Table of Contents
Advertisement
Available languages
Available languages
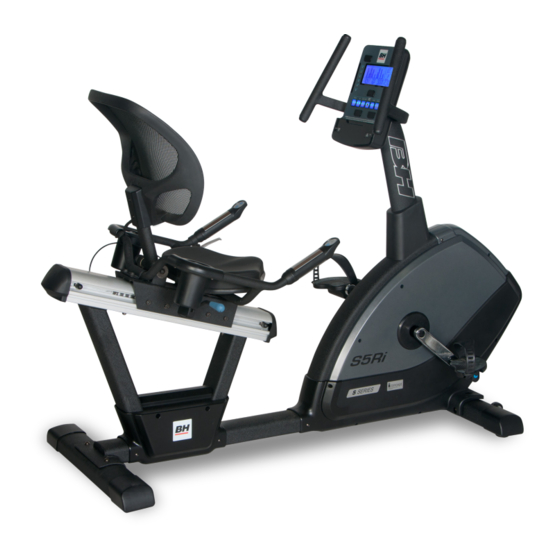
S5Ri
OWNER'S MANUAL
Important: Read all instructions carefully before using this product. Retain this owner's manual for future reference.
FOR SERVICE PLEASE CONTACT BH FITNESS
TOLL FREE: 866-325-2339
BH Fitness | 20155 Ellipse, Foothill Ranch, California 92610 | p.949.206.0330 | f.949.206.0013 | www.BHFitnessusa.com
Advertisement
Chapters
Table of Contents

Subscribe to Our Youtube Channel
Related Manuals for BH FITNESS S5Ri


Summary of Contents for BH FITNESS S5Ri
- Page 1 Important: Read all instructions carefully before using this product. Retain this owner’s manual for future reference. FOR SERVICE PLEASE CONTACT BH FITNESS TOLL FREE: 866-325-2339 BH Fitness | 20155 Ellipse, Foothill Ranch, California 92610 | p.949.206.0330 | f.949.206.0013 | www.BHFitnessusa.com...
-
Page 2: Table Of Contents
TABLE OF CONTENTS Title Page Introduction Safety Information Exercise Instruction Training Guidelines Suggested Stretches Assembly Instructions Exploded View Drawing Parts List Console Operations Maintenance and Cleaning Warranty... -
Page 3: Introduction
Introduction Congratulations on your purchase of BH Fitness equipment. We hope you appreciate the style, quality, and value that exercisers around the world have come to expect from BH Fitness. If you have any questions, concerns or product issues please call our Customer Service Team at 1-866-325-2339 or email us at CustomerSupport@BHNorthAmerica.com. -
Page 4: Safety Information
6. This machine must only be used for the purposes described in this manual. DO NOT use accessories that are not recommended by BH Fitness. Read manual prior to use and follow all warnings and instructions. 7. Do not place sharp objects near the machine. -
Page 5: Exercise Instruction
NOTE: This equipment has been tested and found to comply with the limits for Class B digital device, pursuant to part 15 of the FCC Rules. These limits are designed to provide a reasonable protection against harmful interference in a residential installation. This equipment generates, uses and can radiate radio frequency energy and if not installed and used in accordance with the instructions, may cause harmful interference to radio or television reception. -
Page 6: Training Guidelines
TRAINING GUIDELINES Exercise is one of the most important factors in the overall health of an individual. Listed among its benefits are: • Increased capacity for physical work (strength endurance) • Increased cardiovascular (heart and arteries/veins) and respiratory efficiency • Decreased risk of coronary heart disease •... - Page 7 OXYGEN UPTAKE The effort that you can exert over a prolonged period of time is limited by your ability to deliver oxygen to the working muscles. Regular vigorous exercise produces a training effect that can increase your aerobic capacity by as much as 20 to 30%. An increased VO2 Max indicates an increased ability of the heart to pump blood, of the lungs to ventilate oxygen, and of the muscles to take up oxygen.
- Page 8 HEART RATE As you exercise, your heart beat increases. This is often used as a measure of the required intensity of an exercise. You need to exercise hard enough to condition your circulatory system, and increase your pulse rate, but not enough to strain your heart. Your initial level of fitness is important when developing an exercise program for you.
- Page 9 MUSCLE SORENESS For the first week or so, muscle soreness may be the only indication you have that you are on an exercise program. This, of course, does depend on your overall fitness level. A confirmation that you are on the correct program is a very slight soreness in most major muscle groups. This is quite normal and will disappear in a matter of days.
-
Page 10: Suggested Stretches
SUGGESTED STRETCHES Head Rolls Rotate your head to the right for one count while feeling the stretch up the left side of your neck. Next, rotate your head back for one count, stretching your chin to the ceiling. Rotate your head to the left for one count, and finally, drop your head to your chest for one count. - Page 11 SUGGESTED STRETCHES Inner Thigh Stretch Sit with the soles of your feet together with your knees pointing outward. Pull your feet as close into your groin as possible. Gently push your knees towards the floor. Hold for 15 counts. Toe Touches Slowly bend forward from your waist, letting your back and shoulders relax as you stretch toward your toes.
-
Page 12: Assembly Instructions
ASSEMBLY INSTRUCTIONS AND WARNING LABELS... - Page 13 S5Ri...
- Page 14 S5Ri...
- Page 15 STEP 1 Attach the Front stabilizer (71) (make sure the wheels face away from the main frame) to the Main frame (1) then secure it tightly with Allen screws (64) and Flat washers (5). STEP 2 Follow the same instructions as Step 1 to assemble the Rear Stabilizer (73).
- Page 16 STEP 3 Thread the Left Pedal (53) into the left crank arm counter clockwise. Then screw the Right Pedal (48) into the right crank arm clock wise. STEP 4 Slide the Post Cover (56) onto the Post Tube (55) then connect the cables from the Post and Frame.
- Page 17 STEP 5 Place the Handle Bar (57) on the Post Tube. Secure with Allen Screws (62), Spring washers (63) and Flat washers (5). Φ 8*Φ16 2PCS 62 M8*45 2PCS 63 Φ 8.5 2PCS STEP 6 Connect the cables from the Console (58) into the Post Tube, then mount the Console (58) onto the Post Tube using Allen screws (61).
- Page 18 STEP 7 1) Connect the cables from the aluminum rail into the frame. 2) Insert the head of the screws in the slots of the rail and tighten the nuts. 3) Place the end cap (74). 4) Mount the Aluminum rail (77) to Main Frame with screws (75).
- Page 19 STEP 9 Attach the Seat (96) to the Seat Slider with Allen screws (94). STEP 10 1) Take the Seat Back (92) and align its ends with the holes of the Seat Slider. 2) Then insert the Gas Spring Set (119) through both the Seat Back (92) and the Seat Slider.
- Page 20 STEP 11 Make sure to loosen the hex bolt on the Seat Lever with the hex wrench provided. Adjust the Seat Lever so that it faces straight down to the floor and is parallel with the handlebar. Tighten the hex nut to secure the Seat Lever.
- Page 21 STEP 13 Visually inspect the machine to make sure that the seat is level with the console and front handlebars. If not, you can adjust the seat assembly by: 1. Loosening the 4 nuts (A) on the bottom of the Aluminum rail.
- Page 22 MOVING THE MACHINE To move the machine to a new location, tilt the bike forward and roll the machine on the transport wheels.
-
Page 23: Exploded View Drawing
EXPLODED VIEW DRAWING... -
Page 25: Parts List
To order replacement parts: provide your customer service representative with the product model number and the part number located on the Parts List below, along with the quantity you require. Description Description Description S5Ri-1 Main Frame S5Ri-46 Philip auto screwD4*8 S5Ri-91... -
Page 26: Console Operations
CONSOLE OPERATIONS... - Page 27 SPECIFICATIONS: ENTER To confirm all setting values RESET To reset all parameters to default value START/STOP To start or stop training To make upward setting change DOWN To make downward setting change RECOVERY In stop or start mode, pressing this button will start Heart Rate recovery status measurement.
- Page 28 1. MANUAL MODE User may preset their own resistance level from 1 to 24 by pressing the UP/DOWN buttons. The default resistance level is 1. Press ENTER to confirm. Using the UP/DOWN buttons enter values for TIME, DISTANCE, CALORIES, PULSE, and then press START to begin your workout.
- Page 29 values for TIME, DISTANCE, and CALORIES. You will see a random program profile. Press START/STOP to start the exercise. The duration of the program graph is 16 minutes, divided into sixteen segments. To program time, distance and/or calories, go through the following procedure: Once the program has been selected and before pressing the START STOP button, press the ENTER button to program the time using the UP/DOWN buttons.
- Page 30 CONSOLE PROGRAMS...
- Page 31 DOWNLOADING APPS AND PAIRING YOUR DEVICE WITH YOUR EQUIPMENT DOWNLOADING THE SOFTWARE Connect the Apple device with the App Store (iTunes) or your Android Device with Google Play, search for "Pafers", then read the APP introductions and Download the APPs with bicycle/elliptical machine functions to your device, for example Pedal Monitor or other applicable apps.
- Page 32 2 BH Fitness i.Concept Bluetooth products are compatible with Apple devices with iOS 5.1 or later. It is recommended to update iOS to latest version to obtain the best user experience. iPad, iPhone, iPod, iPod classic, iPod nano, iPod shuffle, and iPod touch, is a registered trademark of Apple, Inc., in the United States and other countries.
-
Page 33: Maintenance And Cleaning
has been designed to connect specifically to iPod, iPhone, or iPad, respectively, and has been certified by the developer to meet Apple performance standards. Apple is not responsible for the operation of this device or its compliance with safety and regulatory standards. Please note that the use of this accessory with iPod, iPhone, or iPad may affect wireless performance. -
Page 34: Warranty
WARRANTY LIMITED RESIDENTIAL WARRANTY BH Fitness will repair or replace, free of charge, at its option, parts that are defective as a result of material or workmanship. Lifetime replacement warranty coverage on frame and motor. Ten (10) years on other parts. Labor warranty coverage is one (1) year. - Page 35 Conservez le présent Guide d’utilisation aux fins de consultation ultérieure. POUR LE SERVICE, VEUILLEZ PRENDRE CONTACT AVEC BH FITNESS SANS FRAIS : 866 325-2339 BH Fitness | 20155 Ellipse, Foothill Ranch, Californie 92610 | tél. : 949 206-0330 | téléc. : 949 206-0013 | www.BHFitnessUSA.com...
- Page 36 TABLE OF CONTENTS Titre Page Introduction Renseignements relatifs à la sécurité Instructions relatives à l’exercice Lignes directrices sur l'entraînement Étirements suggérés Instructions d'assemblage Croquis en vue éclatée Liste des pièces Fonctionnement de la console Maintenance et entretien Garantie...
-
Page 37: Introduction
Introduction Nous vous félicitons d'avoir acheté un appareil de BH Fitness. Nous espérons que vous apprécierez le style, la qualité et la valeur auxquels BH Fitness a habitué les adeptes de l'exercice physique de partout au monde. Si vous avez des questions ou en cas de problème relatif à l'appareil, communiquez avec notre Service à... -
Page 38: Renseignements Relatifs À La Sécurité
6. Cet appareil ne doit être utilisé qu’aux fins auxquelles il est destiné, décrites dans ce guide. N’utilisez PAS d'accessoires non recommandés par BH Fitness. Lisez ce guide avant la première utilisation et respectez toutes les mises en garde et consignes. -
Page 39: Instructions Relatives À L'exercice
Remarque: Cet appareil a été teste et a été trouver conformant aux limites de la Class B appareil numérique, conformément a la partie 15 des règlements de FCC. Ces limites sont conçues pour fournir une protection raisonnable contre les interférences nuisible dans une installation résidentielle. Cet appareil génère, utilise et peut émettre des fréquences d’énergie de radio et, si celui-ci n’est pas installe et utilise conformément aux instructions, peut causer des interférences nuisibles a la réception de radio ou télévision, ce qui peut être détermine en allumant et fermant les appareils. -
Page 40: Lignes Directrices Sur L'entraînement
LIGNES DIRECTRICES SUR L'ENTRAÎNEMENT L'exercice est l'un des principaux facteurs contribuant à la santé globale d'une personne. En voici quelques bienfaits : • Capacité accrue de travail physique (force-endurance); • Capacité cardio-vasculaire (cœur et artères/veines) et respiratoire accrue; • Diminution des risques de maladie coronarienne; •... - Page 41 CONSOMMATION D'OXYGÈNE L'effort que vous pouvez déployer au cours d'une période prolongée est limité par votre capacité d'approvisionner en oxygène les muscles au travail. L'exercice intense régulier a un effet d'entraînement qui augmente votre capacité aérobique jusqu'à 20 à 30 %. Une amélioration des résultats du test VO2 Max indique une capacité...
- Page 42 FRÉQUENCE CARDIAQUE Votre fréquence cardiaque augmente durant l'exercice. Elle sert d'ailleurs souvent de mesure de l'intensité d'un exercice. Vous devez pousser suffisamment l'exercice pour améliorer votre appareil circulatoire et élever la fréquence de votre pouls, mais pas assez pour imposer un effort excessif à votre cœur.
- Page 43 Ne vous poussez pas trop en tentant d'atteindre les chiffres suggérés par ce tableau. Un exercice excessif risquerait de vous causer un malaise important. Laissez la fréquence cardiaque évoluer naturellement à mesure que votre programme avance. N'oubliez pas que la cible est un guide, pas une règle, et qu'il n'y a pas de problème à...
-
Page 44: Étirements Suggérés
ÉTIREMENTS SUGGÉRÉS Rotations de la tête Tournez la tête vers la droite sur un temps et sentez l'étirement du côté gauche de votre cou. Continuez ensuite la rotation vers l'arrière et étirez le menton vers le ciel. Enfin, tournez la tête vers la gauche sur un temps et laissez tomber votre tête sur la poitrine sur un temps. - Page 45 ÉTIREMENTS SUGGÉRÉS Étirement de l'intérieur de la cuisse Assoyez-vous en ramenant les plantes des pieds l'une contre l'autre, les genoux pointés vers l'extérieur. Rapprochez le plus possible les pieds des aines. Poussez délicatement les genoux vers le sol. Comptez 15 temps. Flexions avant Penchez-vous lentement vers l'avant à...
-
Page 46: Instructions D'assemblage
INSTRUCTIONS D'ASSEMBLAGE ÉTIQUETTE D'AVERTISSEMENT... - Page 47 S5Ri...
- Page 48 S5Ri...
- Page 49 ÉTAPE 1 Fixez le stabilisateur avant (71) au châssis principal (1) à l’aide de vis (64) et de rondelles plates (5) en vous assurant que les roues font dos au châssis principal. ÉTAPE 2 Suivez la même procédure que l'étape 1 pour assembler le stabilisateur arrière (73).
- Page 50 ÉTAPE 3 Enfilez la pédale gauche (53) et la pédale droite (48) dans les maniv- elles du côté respectif. Serrez la pédale gauche en direction antiho- raire et la pédale droite en direction horaire. ÉTAPE 4 Enfilez le protecteur de tige (56) à la tige avant (55) et connectez les câbles reliant la tige au châssis.
- Page 51 ÉTAPE 5 Fixez le guidon (57) sur la tige à l’aide des vis (62), des rondelles à ressort (63) et des rondelles plates (5). Φ 8*Φ16 2PCS 62 M8*45 2PCS 63 Φ 8.5 2PCS ÉTAPE 6 Installez la console (58) à la tige avant à...
- Page 52 ÉTAPE 7 1) Connectez le câble du rail en aluminium et celui du châssis. 2) Insérez les vis dans le rail et serrez les écrous. 3) Placez le bouchon (74). 4) Installez le rail en aluminium (77) au châssis principal à l’aide de vis (75).
- Page 53 ÉTAPE 9 Fixez le siège (96) à la glissière de siège avec quatre vis Allen (94). ÉTAPE 10 1) Alignez le dossier (92) avec les trous de la glissière de siège. 2) Insérez le ressort à gaz (119) au travers le siège (92) et la glissière à siège.
- Page 54 ÉTAPE 11 Assurez-vous de desserrer légèrement le boulon à six pans du levier du siège à l’aide de la clé. Ajustez levier du siège afin que celui-ci soit orienté vers le plancher tout en étant parallèle avec le guidon. Serrez l’écrou à...
- Page 55 ÉTAPE 13 Inspectez visuellement la machinepour vous assurez que le siège soit à la bonne hauteur par rapport au console et au guidon du devant. Sinon, ajustez le siège de la manière suivantede la manière suivante: 1.Desserrez les quatre écrous (A) au bas du rail de glissade en aluminium 2.
- Page 56 MOVING THE MACHINE Pour déplacer la machine, inclinez le vélo vers l’avant et le déplacer à l’aide des roues de transport.
-
Page 57: Croquis En Vue Éclatée
VUE ÉCLATÉE... -
Page 59: Liste Des Pièces
N° Description Qté N° Description Qté N° Description Qté S5Ri-1 Châssis principal S5Ri-46 Vis auto-taraudeuse D4*8 S5Ri-91 Flasque de dossier S5Ri-2 Protecteur (sous le siège) S5Ri-47 Manivelle-droit... -
Page 60: Fonctionnement De La Console
FONCTIONNEMENT DE LA CONSOLE... - Page 61 SPÉCIFICATIONS : « ENTER » (entrée) Pour confirmer tous les paramètres « RESET » (réinitialisation) Pour ramener tous les paramètres aux valeurs par défaut « START/STOP » (arrêt/marche) Pour commencer ou arrêter l'entraînement « UP » (plus) Pour augmenter la valeur du paramètre « DOWN » (moins) Pour diminuer la valeur du paramètre « RECOVERY »...
- Page 62 1. MODE MANUEL L'utilisateur peut prérégler son propre degré de résistance de 1 à 24 en appuyant sur les boutons « UP/DOWN » (plus/moins). Le degré de résistance par défaut est de 1. Appuyez sur « ENTER » (entrée) pour confirmer votre choix. Au moyen des touches « UP/DOWN » (plus/moins), entrez les valeurs de temps (« TIME »), de distance, (« DISTANCE »), de calories (« CALORIES ») et de pouls (« PULSE »), puis appuyez sur « START »...
- Page 63 7. MODE ALÉATOIRE Au moyen des touches « UP/DOWN » (plus/moins), sélectionnez la fonction « RANDOM » (aléatoire) et appuyez sur « ENTER » (entrée). Entrez les valeurs de temps (« TIME »), de distance (« DISTANCE ») et de calories (« CALORIES »). Un profil de programme aléatoire s'affichera.
- Page 64 PROGRAMMES DE LA CONSOLE...
- Page 65 TÉLÉCHARGEMENT D'APPLICATIONS ET ASSOCIATION DE VOTRE APPAREIL ET DE L'ÉQUIPEMENT TÉLÉCHARGEMENT DU LOGICIEL Connectez-vous à l'App Store (iTunes) à partir d'un appareil Apple ou à Google Play à partir d'un appareil Android, cherchez « Pafers », lisez les notes des applications et téléchargez l'application destinée à...
- Page 66 • iPad 2 • iPad (3e génération) • iPad Les produits BH Fitness iConcept sont compatibles avec les appareils Apple de version iOS 4.2.3 ou ultérieures. Il est recommandé de télécharger la plus récente version iOS pour garantir la meilleure utilisation possible.
-
Page 67: Maintenance Et Entretien
MAINTENANCE ET ENTRETIEN Votre appareil a été correctement ajusté et lubrifié à l'usine. Nous ne vous recommandons pas de tenter de réparer vous-même des pièces internes. Faites plutôt appel à un centre de réparation autorisé. Vous pouvez toutefois nettoyer la surface extérieure. Utilisez pour ce faire un linge doux, humecté... -
Page 68: Garantie
Enregistrez la garantie de votre produit en ligne à : http://www.bhnorthamerica.com/BHFH/support/warranty/registration.php POUR FAIRE EFFECTUER DES RÉPARATIONS COUVERTES PAR LA GARANTIE, NE RAPPORTEZ PAS L’APPAREIL AU DÉTAILLANT. COMMUNIQUEZ PLUTÔT AVEC BH Fitness. BH Fitness/BH North America Corporation 20155 Ellipse Foothill Ranch, CA 92610, États-Unis Téléphone : 949.206.0330;...
Need help?
Do you have a question about the S5Ri and is the answer not in the manual?
Questions and answers