
Related Manuals for REMEHA W40


Summary of Contents for REMEHA W40
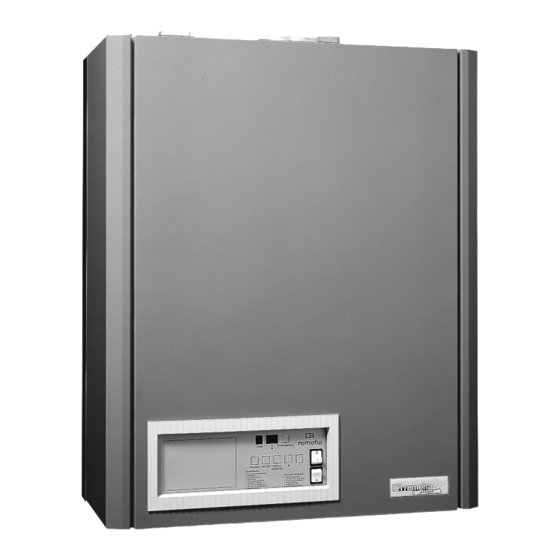
- Page 1 Installation and W40/60-m ECO maintenance instructions High-efficiency condensing boiler for free standing (frame mounted) or wall mounted installation Suitable for room sealed fanned flue or open flue fan assisted operation...
-
Page 2: Table Of Contents
W40/60-m ECO CONTENTS 7. Installation instructions Preface 7.1 General 7.2 Location 1. General description of the boiler 7.3 Dimensions of wall mounting bracket 7.4 Ventilation requirements 2. Construction 7.5 Flue gas discharge and air supply 3. Technical data and dimensions 7.5.1... - Page 3 8. Electrical installation 10. Commissioning 8.1 General 10.1 Initial lighting 8.2 Electrical supply 10.2 Shut-down 8.3 Connection to the control system 10.3 Settings 8.3.1 Modulating control 10.3.1 General 8.3.2 Room thermostat 24V 10.3.2 Setting the required flow 8.3.3 Room thermostat in combination temperature with an outdoor temperature sensor 26 10.3.3...
-
Page 4: Preface
Information "Multiple units". tem operation. The boiler meets the requirements of the EC regulations The remeha W40/60-m ECO is fitted with a top mounted premix gas burner firing downwards into an aluminium of the directives: heat exchanger. The application of the premix burner,... -
Page 5: Technical Data And Dimensions
100 mm dia. * Low loss header for single boiler only Side view Front view Flow/return connections 1 BSP (F) Fig. 01 remeha W40-m ECO remeha W60-m ECO view 1 Flow boiler " male thread 2 Return boiler " male thread 3 Gas "... -
Page 6: Technical Data
W40/60-m ECO 3.2 Technical data Boiler type remeha remeha W40-m ECO W60-m ECO modulating Load control: adjustable modulating high - low high - low on - off on - off Output (80/60˚C) - min. 12,4 18.2 - max. 41.0 60.5... -
Page 7: Efficiency Information
The low noise level emission of 48 dBA measured at 1 open vented central heating system and pumped heat- m from the boiler makes the remeha W40/60-m ECO ing combined with pumped indirect domestic hot water ideal for installation as a single boiler in large domestic supply systems. -
Page 8: Installation Of Multiple Boilers
W40/60-m ECO 5.1.2 Installation of multiple boilers Multiple boilers are idealy suited for use in larger com- mercial buildings and offer a wide variety of application possibilities (see principle drawing). D.H.W. Fig. 05 Principle drawing multiple boilers For further advice or information refer to the Technical Information "Multiple Units". -
Page 9: Boiler Layout
29. Gas connection 30. Pump (only W40-m ECO) 31. Pressure gauge 32. Filling and drain cock 33. Return connection 34. Electrical connection pump and three-way valve 35. Flow connection Fig. 06 Boiler layout remeha W40-m ECO... -
Page 10: Operating Principle
6.3 Control panel The appliance is equipped with a closed air box. Via a The remeha W40/60-m ECO is equipped with an fan, air is drawn in. On the intake side of the fan, an inta- advanced control system comprising: ke unit has been mounted where the gas is injected. -
Page 11: Control System
6.4 Control system 6.4.1 General Press the 'mode'-key Press the 'step'-key 'Code'-display Temperature display Operating mode (see Flow temperature para. 6.4.2) digit Required flow temperature Setting Pump setting mode (see D.H.W. setting para. 6.4.3) Boiler control operation digit and On service level (C 12): Fan speed at full load (hundreds) Fan speed at full load (units) Fan speed at part load (hundreds) -
Page 12: Operating Mode
W40/60-m ECO 6.4.2 Operating mode 5 Waiting mode; the fan runs and the boiler waits until During operation the 'code'-display shows the status this has been proved or waits until the three-way (position in cycle) of the boiler, while the temperature valve has returned to the central heating position. -
Page 13: Setting Mode (With Dot)
6.4.3 Setting mode (with dot) Various settings can be changed as required in the set- ting mode. a. on user level - Select the setting mode by pressing the 'mode'-key until 1. appears in the 'code' read-out display. - Now select the required code, using the 'step'-key. Code Description Setting... -
Page 14: Read-Out Mode (With Blinking Dot)
W40/60-m ECO 6.4.4 Read-out mode (with blinking dot) Various values can be read in the read-out mode. On user level. - Select the read-out mode by pressing the 'mode'-key until 1. (blinking dot) appears in the 'code'-display. - Now select the required code, using the 'step'-key. -
Page 15: Failure Mode (Blinking 'Code' Display)15
6.4.9 Service code 6.4.8 Failure mode (blinking 'code' display) Only for the heating contractor. Only for the heating contractor. Malfunctions of the boiler control occurring during opera- To avoid incorrect settings several operation levels have tion are shown on the read-out displays (see failure protection codes. -
Page 16: User Settings
W40/60-m ECO 6.4.10 User settings 3. D.H.W. setting (basic setting 65˚C). Only with sensor. - Press the 'mode'-key until the digit 1. (with dot) The user can set the following parameters to the required values. appears in the 'code'-display. -
Page 17: Installation Instructions
A = Drill hole ing publications should be complied with: Fig. 09 Template for wall bracket remeha W40-m ECO Domestic: BS 5449, BS 5546, BS 6644, BS 6891, CP 3006 and BG DM2. -
Page 18: Ventilation Requirements
W40/60-m ECO 7.4 Ventilation requirements b. Room sealed installations a. Open flue installations Boilers require no air for combustion but air may be The requirements for high and low level ventilation open- required to ventilate the boiler house and remove any ings which MUST be provided are contained in detail excess heat generated by auxiliary equipment. -
Page 19: Flue Gas Discharge And Air Supply
Purpose designed flue and air systems for all applica- tions are available from: - Rite-Vent Ltd 7.5.1 General Crowther Industrial Estate The remeha W40/60-m ECO is suitable for room sealed Washington NE 38 OAB fanned flue or open flue fan assisted operation. Tel.no.: 0191 - 4161150 Separate flue discharge and combustion air inlet con- Fax.no.: 0191 - 4151263... -
Page 20: Single Boiler, Non Room Sealed Applications
W40/60-m ECO 7.5.2 Single boiler, non room sealed applications Construction of flue gas discharge duct 1 = flue gas discharge duct without bends 2 = flue gas discharge duct with two 45˚ bends 3 = flue gas discharge duct with two 90˚ bends 4 = flue gas discharge duct with T inlet and 90˚... -
Page 21: Single Boiler, Room Sealed Applications
@ @ @ @ @ @ @ @ @ @ f Fig. 13 Examples of flue gas discharge duct, single boiler, room sealed applications. remeha W40-m ECO D (in mm) Min. and max. allowable total lengths of the flue gas discharge and air supply piping 'H' in m together Ø... -
Page 22: Installation Details
7.6.3 Water treatment Water treatment of all systems, but in particular open vented systems used with the remeha W40/60-m ECO , is considered necessary good practice in order to: a. avoid metallic corrosion within the system b. -
Page 23: Safety Valve
7.7.1 D.H.W. control 7.6.5 Circulation pump The remeha W40/60-m ECO is supplied as standard The remeha W40-m ECO is equipped with a circulation with a D.H.W. control suitable for activating a 230 V pump, manufactured by Wilo, model RS 25/70 r. -
Page 24: Schematic Sketch Of Connections
W40/60-m ECO 7.7.2 Schematic sketch of connections Fig. 15 Schematic sketch of an open system Fig. 16 Schematic sketch of a sealed system... - Page 25 SR 5240 C1 (no possibility for post-regula- control and safety equipment, and flame ionisation tion of central heating groups) control. A microprocessor is at the heart of the remeha Installation in the boiler or in a reference room. In W40/60-m ECO.
- Page 26 W40/60-m ECO 8.3.2 Room thermostat 24V 8.3.4 Two-stage external weather compensator The remeha W40/60-m ECO is suitable for a 2- or 4- The remeha W40/60-m ECO can be connected to a two- wire standard room thermostat. stage external weather-compensator. The boiler can run Proceed as follows: on high/low.
- Page 27 8.3.6 Frost protection 8.3.7 Signals Install the boiler in a frost-free room. If the temperature The boiler is supplied with remote alarm and boiler run of the central heating water drops too low, the built-in signalling facility. The alarm signal operates via termi- frost protection is activated.
- Page 28 W40/60-m ECO 8.4 Water temperature control 8.9 Fuse specification The remeha W40/60-m ECO is supplied with an elec- Fuse: F1 3.15 A T tronic temperature control (basic setting 80˚C) with flow 3.15 A T and return temperature sensors. The flow temperature 2 A F (sand-filled) can be adjusted between 20 and 90˚C.
- Page 29 8.10 Electrical wiring diagram Fig. 19 Electrical wiring diagram...
- Page 30 W40/60-m ECO 9. INSTALLATION INSTRUCTIONS FOR THE GAS INSTALLER 9.1 Gas connection 9.3 Gas/air ratio control The boiler is suitable for firing on natural gas and The boiler is equipped with a gas/air ratio control. propane. The purpose of this control is to keep the ratio between...
- Page 31 6. Fill the boiler and the installation with water and check the water pressure (recommended 1.5 bar). 7. Only remeha W40-m ECO: Check the pump; this may be stuck. If necessary, release with a screwdriver. 8. If necessary, vent the heat exchanger; the manual air vent is mounted inside the air box (fig.
- Page 32 21. The boiler is now ready for use. B - Setting screw part load Note: Fig. 21 Setting screws The remeha W40/60-m ECO is supplied with a number of basic settings: 17c.When full-load speed is reached, you should com- - burner control...
- Page 33 10.3 Settings 10.3.6 Setting the burner control Setting mode, step A. 10.3.1 General The basic setting is modulating burner control. In this paragraph a number of further setting options are To alter burner control, you should carry out the follow- explained briefly.
- Page 34 10.3.7 Setting D.H.W. temperature - Press the 'reset' key to return to operating mode. Setting mode, step 3. Setting this value is only important if a remeha D.H.W. sensor is used. ⇑ The basic setting is: D.H.W. operation with a D.H.W. tem- perature of 65°C.
- Page 35 11. FAULT-FINDING 11.1 General This chapter differentiates between appliances with the modulating rematic ® weather-compensated control and appliances controlled in some other way. In those cases where a modulating room control (Honeywell Chronotherm Modulation with relevant interface) is used, follow par. 11.2. 11.2 Faults in appliances in combination with the rematic ®...
- Page 36 W40/60-m ECO Description Cause/checkpoints 0 0. Flame simulation Check ionisation probe (distance 3 - 4 mm). 0 1. Short-circuit 24V Check wiring. 0 2. No flame a. no ignition spark (visible through inspection glass). or no ionisation Check: - connection of ignition cable and spark plug cap.
- Page 37 The remeha W40/60-m ECO is practically maintenance- free. Once a year, the appliance should be checked and if necessary cleaned. 12.2 Inspection The annual inspection of the remeha W40/60-m ECO can be limited to: - inspection of the boilers combustion characteristics - cleaning the siphon...
- Page 38 W40/60-m ECO 12.3 Maintenance If the appliance is checked for technical combustion problems and the result is that either combustion or heat exchanger are no longer at the optimum level, maintenance should be carried out. This maintenance will consist of:...
- Page 39 A Union nut Fig. 26 Servicing points remeha W40/60-m ECO B Fastening strips C Ignition cable - To inspect or clean the fan, it must be disconnected D Connecting plug from the gas injector. E Hose connection - Remove the screws at the rear of the fan.
- Page 40 W40/60-m ECO ISO 9001 since 1988 Broag Ltd. Head Office Remeha house, Molly Millars Lane, Wokingham, Berkshire RG 41 2QP. Tel. 0118 9786977 Fax 0118 9783434 Email address: boilers@broag.ltd.uk. Branch Office © Copyright Unit 3,Kestrel Close, All technical and technological infor-...
Need help?
Do you have a question about the W40 and is the answer not in the manual?
Questions and answers