Table of Contents
Advertisement
Quick Links
201
WALL MOUNTED,
GAS COMBINATION BOILER
INSTALLATION
INSTRUCTIONS
W.R.C. No. 9207075
LEAVE THESE INSTRUCTIONS
ADJACENT TO THE GAS METER
Phone numbers:
FERROLI HELPLINE
FOR SERVICE INFORMATION OR
Installer
HELP TELEPHONE: 0121 313 1030
ALWAYS QUOTE YOUR SERIAL NUMBER
Service Engineer
FOR IMMEDIATE ASSISTANCE
Serial No.
ALL SPECIFICATIONS SUBJECT TO CHANGE
Stockton Close, Minworth Industrial Park, Minworth, Sutton Coldfield, West Midlands B76 8DH
Tel.: 0121/3523500 - Fax 0121/3523510
Advertisement
Table of Contents

Related Manuals for Ferroli optima 201


Summary of Contents for Ferroli optima 201
- Page 1 GAS COMBINATION BOILER INSTALLATION INSTRUCTIONS W.R.C. No. 9207075 LEAVE THESE INSTRUCTIONS ADJACENT TO THE GAS METER Phone numbers: FERROLI HELPLINE FOR SERVICE INFORMATION OR Installer HELP TELEPHONE: 0121 313 1030 ALWAYS QUOTE YOUR SERIAL NUMBER Service Engineer FOR IMMEDIATE ASSISTANCE Serial No.
-
Page 2: Table Of Contents
page INDEX General Description Related Documents Technical Data Appliance Dimensions Boiler Flow Diagram Installation Details 1. Location of Boiler 2. Air Supply 3. Flue System 4. Gas Supply 5. Water System Central Heating Pump Sizing of expansion vessel Installation of Boiler 1. -
Page 3: General Description
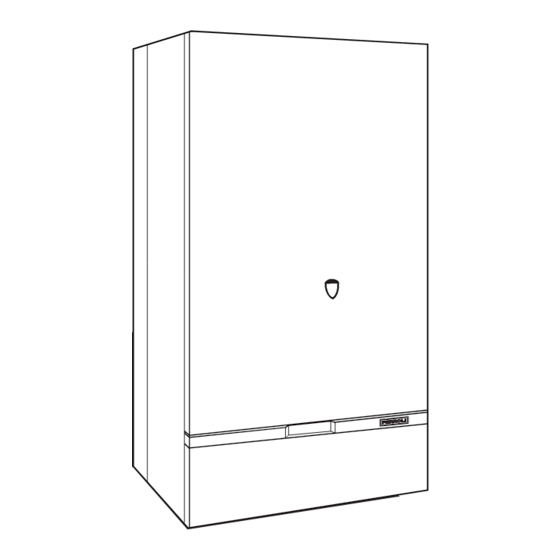
General Description The Ferroli 201 is a wall mounted combination boiler for Central Heating (C.H.) and domestic Hot Water (D.H.W.). The boiler is of light weight construction and the heat exchanger provides Central Heating and Domestic Hot Water from an integrally designed unit. The boiler contains its own expansion vessel for sealed systems. -
Page 4: Technical Data
Technical Data Nominal Heat Input D.H.W. & C.H. (gross) 28.6 kW 28.0 kW Minimum Heat Input D.H.W. & C.H. (gross) 12.8 kW 12.5 kW Nominal Heat Input D.H.W. & C.H. (net) 25.8 kW 25.8 kW Minimum Heat Input D.H.W. & C.H. (net) 11.5 kW 11.5 kW Nominal Heat Output D.H.W. -
Page 5: Appliance Dimensions
Appliance Dimensions Fig. 1 1. Electricity cable entry 2. Gas supply 3. Domestic Hot Water outlet 4. Domestic Cold Water inlet 5. Central Heating Pressure relief valve 6. Central Heating Flow outlet 7. Central Heating Return inlet... -
Page 6: Boiler Flow Diagram
Boiler Flow Diagram Fig. 2... - Page 7 1. Fixing point 42. D.H.W. temperature sensor 6. Control panel 44. Combination gas valve 7. Gas inlet 45. Knob gas valve 8. Domestic hot water outlet 46. Operator gas valve 9. Cold water inlet 47. Modulating regulator (Modureg) gas valve 10.
-
Page 8: Installation Details
Installation Details Location of Boiler The installation of the 201 must be on a suitable non-combustible load bearing wall which will provide an adequate fixing for the boiler mounting bracket assembly. A satisfactory flue with a minimum of 600 mm (2 ft.) rising vertically above the draught diverter must also be provided, terminating in a British Gas Approved cowl. - Page 9 Cupboard or compartment air supply: If the appliance is to be installed in a compartment or cupboard if existing, it should be of sufficient size. This compart-ment or cupboard must have permanent air vents for combustion air, flue dilution and cooling purpose!s, the vents being positioned at high and low level.
-
Page 10: Gas Supply
Cupboard or compartment installation 2. Boiler in a cupboard 3. Boiler in a cupboard 1. Boiler in a room Vented to a room Vented to outside Fig. 4 Effect of an extract fan If there is type of extract fan fitted in the premises, there is the possibility with open flued appliances, that if inadequate fresh air vents are not provided, spillage of products from the flue diverter could take place, when the fan is in operation. - Page 11 Central Heating It must be a sealed system. Detailed recommendations are given in BS6798, BS5449, BS6700 and CP342 Part. 2. Pipework not forming part of the useful heating surface should be insulated to prevent any heat losses or possible freezing (i.e. in roof spaces or ventilated underfloor spaces).
- Page 12 1. Filling point C.H. 2. Temporary connection 3. Cold water supply Fig. 6 Provision must be made for replacing water lost from sealed system. Reference should be made to BS6798, for methods of filling and making up sealed systems. There must be no direct connection between the boiler's central heating system and the mains water supply.
-
Page 13: Installation Of Boiler
Installation of boiler 1 2 3 Speed settings A Boiler pressure drop B Max. available pump head C.H. Fig. 7 SIZING OF ADDITIONAL EXPANSION VESSELS: Deduct from the value given in the table the 7 litre vessel supplied. SAFETY VALVE SETTING (bar) VESSEL CHARGE PRESSURE (bar) - Page 14 1 = Electrical cable entry 2 = Gas supply 3 = Domestic Hot Water outlet 4 = Domestic Cold Water Inlet 5 = Outlet Central Heating safety valve 6 = Central Heating flow outlet 7 = Central Heating return inlet 2 Gas 3 Domestic hot Water outlet 15 mm 22 mm gas supply must be within 3 m of boiler.
-
Page 15: Unpacking
Note - To mount the boiler on the wall, a two person lift will be needed. UNPACKING The appliance is delivered in two cartons. The large carton contains the boiler, and the Installation/Servicing and Users Instruction. One carton contains the mounting jig assembly, complete with isolating valves, the assembly fixing screws and wall plugs (x4), the boiler mounting nuts and washers (x2) and drilling template. - Page 16 CONNECTING THE BOILER Place the boiler on its back. Remove the boiler base plate, four screws (fig. 11). Remove the plugs fitted to the boiler water connections. Remove the bag of sealing washers from the boiler pipework. Remove the front panel by gripping on both sides and pulling away from the main boiler.
-
Page 17: Electrical Installation
Fig. 12 Fig. 11 ELECTRICAL INSTALLATION Electrical installation must be carried out by a competent electrician. The appliance is to be connected to a 240 V ~ 50 Hz supply (see fig. 13). The supply fuse rating is 3A. The terminals are accessible after removing the boiler base plate and single screw securing the terminal cover (see fig. -
Page 18: Time Clock
Time Clock A 24 hour time clock is fitted to the boiler to control the central heating, this will come into operation when the selector switch is turned to the position marked “heating timed and hot water”. A Slide switch: set clock - auto - set programme AUTO AUTO B Display. - Page 19 Over ride By pressing the over ride button (E) the timer programme is over ridden ie, if programme is in OFF time it will come ON and if in ON time will go OFF. The timer will revert back to it set programme on reaching the next ON or OFF time. When the programme is on over ride the sign will be shown in the display window (B).
-
Page 20: Commissioning & Testing
COMMISSIONING AND TESTING Filling the Central Heating System Plastic cap Automatic air vent Burner pressure test point Heat exchanger vent C.H. temperature sensor Pump phial and shim D.H.W. expansion vessel (optional) Pressure gauge Gas inlet pressure C.H. pressure relief valve D.H.W. -
Page 21: To Light The Boiler
Pilot viewing opening Important note - If the burner stops for C.H. C.H. pressure gauge only after a waiting time C.H. boiler of 3 minutes the boiler will thermostat light again! C.H. valve control knob Time clock C.H./D.H.W. selector switch Fig. -
Page 22: To Range Rate The Boiler C.h
To Range Rate the Boiler C.H. (not required on standard installation) The boiler can be range rated for an output up to 23.3 kW. When the boiler is supplied it is factory set at an output 23,3 kW. Procedure a. Release the control panel fixing screws (fig. 23) and lower panel. b. - Page 23 Honeywell VR 4600 N 4002 valve with V7335A4014 Modureg Gas pressure Adjustment With the burner lit: Connect suitable pressure gauge to burner test point "B", and then: Disconnect the wires from coil "C" of the Modureg; Remove protective cover "D"; Remove coil "C"...
-
Page 24: System Operation
2.7 mbar +/- 0.5 mbar. If the burner pressure is not as stated check the inlet working pressure (fig. 17) which should be minimum 20 mbar. If that is correct, consult Ferroli SERVICE DEPARTMENT. No attempt should be made to alter D.H.W. burner pressure. - Page 25 23 Thermocouple 230V 11 10 9 8 7 6 5 4 3 2 1 24 spark electrode 50Hz 32 Central heating pump 34 C.H. flow temperature sensor 42 D.H.W. temperature sensor 46 Operator gas valve 47 Modulating regulator (Modureg) gas valve 49 Overheat cut-off thermostat 50 Heat exchan.
- Page 26 General Notes - For use on the 201 fitted with VMF7 Printed Circuit Board *The central heating pump (32) will run to disperse heat if the temperature at the heat exchanger limit thermostat (50) is too high ° RL not energised LED n colour signification: green Mains on/low voltage on...
-
Page 27: Domestic Hot Water
Domestic Hot Water Performance Fig. 1 - D.H.W. Pressure Drop VS. flow A = Standard with col water Flow Restricter B = Cold Water Flow Restricter Removed Fig. 1 Fig. 2 - D.H.W. temperature VS. flow A = Cold Water 15°C B = Cold Water 5°C Fig. - Page 28 Spare Parts List Item No.G.C. Part No.Makers Part No No. Off DESCRIPTION 386816 800130 C.H. safety valve 372176 815850 Main injector (Natural Gas) 815870 Main injector (L.P.G.) 390210 801170 Thermocouple 386575 801890 Spark electrode 386586 801900 Pilot 386814 800620 Central heating pump 386818 800310 Temperature sensor...
- Page 32 Phone numbers: Installer Service Engineer BECAUSE OF OUR CONSTANT ENDEAVOUR FOR IMPROVEMENT DETAILS MAY VARY SLIGHTLY FROM THOSE QUOTED IN THESE INSTRUCTIONS. ALL SPECIFICATIONS SUBJECT TO CHANGE Stockton Close, Minworth Industrial Park, Minworth, Sutton Coldfield, West Midlands B76 8DH Tel.: 0121/3523500 - Fax 0121/3523510...
Need help?
Do you have a question about the optima 201 and is the answer not in the manual?
Questions and answers