Webasto Telestart T91 Operating Instructions Manual
Hide thumbs
Also See for Telestart T91:
- Operating and servicing manual (100 pages) ,
- Installation instructions manual (19 pages) ,
- Operating instructions manual (14 pages)
Advertisement
Table of Contents
- 1 General Information
- 2 Care and Handling
- 3 Checking Mode
- 4 Setting Mode
- 5 Feedback from Transmitter Upon Turning On/Off
- 6 Switching off Heater or Ventilation
- 7 Switching off Using Pushbutton Switch
- 8 Switching On/Off Using Pushbutton Switch
- 9 Switching off Using a Digital Timer
- 10 Checking and Setting Operating Time
- 11 Checking Operating Time
- 12 Setting Operating Time
- 13 Returning to Factory Setting
- 14 Checking Battery
- Download this manual
Advertisement
Table of Contents

Related Manuals for Webasto Telestart T91


Summary of Contents for Webasto Telestart T91
- Page 1 Telestart T91...
-
Page 3: General Information
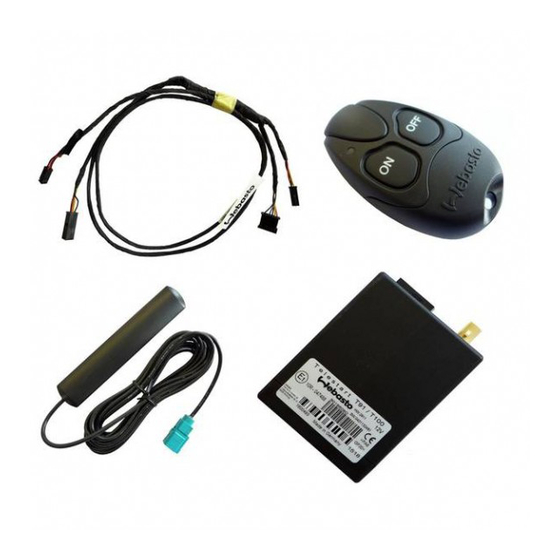
In these operating instructions we would like to once again provide you with an overview of the safe use of this product. The Telestart T91 heater control complies with the homologation approval in accordance with the directive 72/245/EEC (EMC). -
Page 4: Care And Handling
• In enclosed rooms (e.g. garages), not even via the timer or Telestart. Care and Handling Note the following points to avoid damage to the Telestart T91: • Do not expose to heat above 70 °C (e.g. direct sunlight). • Operating temperature between 0 °C and +50 °C. - Page 5 With the Thermo Top Evo heater which is connected to the Telestart T91 via W bus communication, a change in the mode must be carried out on the transmitter to switch on the parking ventilation (ventilation of the vehicle interior) (see the point "Setting Mode").
- Page 6 Optimum signal transmission is achieved out in the open or from a position higher than the vehicle. In this case, the parking heater can be operated at a distance of approx. 1000 m from the vehicle. When operating the transmitter, please hold it vertically pointing upward and do not cover the upper side (see illustration).
- Page 7 Teaching In Telestart Transmitter for Thermo Top E and C 1. Insert the battery in the battery compartment of the transmitter. 2. Remove the 1 A fuse (black) from the heater's fuse holder (voltage interruption of receiver). 3. Wait at least 5 seconds and refit the fuse. 4.
- Page 8 Teaching in Telestart Transmitter for Thermo Top Evo As described above for the Thermo Top E and C, however remove either 1 A fuse (black, vehicle interior) or 30 A fuse (green, engine compartment) (voltage inter- ruption for receiver). min. 5 s.
-
Page 9: Checking Mode
Checking Mode Simultaneously press and hold down the ON- and OFF-but- tons. LED lights up: = Heating mode green = Ventilation mode* LED extinguishes: – when the buttons are released, or – after 3 seconds * Please observe the information under "Use". Setting Mode Depress the ON- and OFF buttons simultaneously twice within one second. -
Page 10: Feedback From Transmitter Upon Turning On/Off
Feedback from Transmitter Upon Turning On/Off The LED on the transmitter The signal has been received and the heater / lights up for 2 seconds: vehicle fan switched on or off. = Heating mode green = Ventilation mode* The LED on the transmitter Error during signal transmission. -
Page 11: Switching Off Heater Or Ventilation
Hold the transmitter with the aerial upright and press the OFF button until the LED lights up (approx. 1 second). The Telestart T91 in the vehicle will send a feedback signal. Switching Off Using Pushbutton Switch If the heater was activated by means of Telestart, the pushbutton switch must be... -
Page 12: Switching On/Off Using Pushbutton Switch
When the pushbutton switch is used for activating the heater, the operating mode (parking heating or parking ventilation) and the operating duration most recently used with Telestart T91 will be selected. Switching On Using a Digital Timer (Immediate Heat Button) Operation is indicated on the digital timer. -
Page 13: Switching Off Using A Digital Timer
If the heater was activated using Telestart, the immediate heat button must be pressed twice to deactivate the heater. When connecting the Telestart T91 and the digital timer to a Thermo Top Evo, only a single press of the button is required due to the connection via W bus commu- nication. -
Page 14: Checking And Setting Operating Time
Checking and Setting Operating Time The operating time of the heater or the vehicle's fan can be preset on the trans- mitter in increments of 10 minutes. The operating time is factory-set at 30 min- utes. NOTE: Make sure that the car battery is recharged sufficiently if you use the system fre- quently and for a long period. -
Page 15: Checking Operating Time
Checking Operating Time Simultaneously briefly press the ON and OFF button three times consecutively. The LED flashes in accordance with the preset operat- ing time. No. of coded flash- ing signals Operating time 10 min. 20 min. 30 min. 40 min. 50 min. -
Page 16: Setting Operating Time
Setting Operating Time Press the OFF button to call up the next operating time. To store the setting: – do not actuate any button for 10 seconds, or – actuate the ON button. Returning to Factory Setting Simultaneously press the ON and OFF button for at least 15 seconds. - Page 17 Procedure after not using for longer time When the hand-held transmitter is not used for longer periods, we recommend removing the battery from the hand-held transmitter to increase battery life. Caution: Do not store in the vehicle, but instead in a dry place at room temperature. Returning to use: 1.
-
Page 18: Checking Battery
Checking Battery Press the ON or OFF button. Battery Action lights up for 2 sec- full Battery OK onds in green or ATTENTION: Heater could be activated or deactivated in the process. flashes for 2 sec- full Battery OK onds in green or ATTENTION: Receiver too far away or trans- mitter not taught. - Page 19 Battery Change/Disposal Information NOTE: Batteries and electronic devices are the object of the European Directive 2006/66/EC or 2002/96/EC in the current versions and must not be disposed of as household waste. Every consumer is therefore legally obligated to dispose of batteries and used/scrap electronic devices in the marked recycling containers at a waste collection point or in the retail trade.
- Page 20 Webseite Ihrer jeweiligen Webasto-Landesvertretung. In multilingual versions the German language is binding. The telephone number of each country can be found in the Webasto service center leaflet or the website of the respective Webasto representative of your country. Dans le cas d'une version rédigée en plusieurs langues, l'allemand est alors la langue qui fait foi.
Need help?
Do you have a question about the Telestart T91 and is the answer not in the manual?
Questions and answers