Fisher & Paykel DH8060P1 Service Manual
Hide thumbs
Also See for DH8060P1:
- Quick start manual (5 pages) ,
- Installation instructions manual (8 pages) ,
- Getting started (2 pages)
Table of Contents
Advertisement
SERVICE MANUAL
TL1501S005V1.1
:
Tumble Dryer
DH8060P1
Model No.
WARNING
This service information is designed for experienced repair technicians only and is not designed for use by the general public.
It does not contain warnings or cautions to advise non-technical individuals of potential dangers in attempting to service a product.
Products powered by electricity should be serviced or repaired only by experienced professional technicians.Any attempt to service
or repair the product or products dealt with in this service information by anyone else could result in serious injury or death.
Advertisement
Table of Contents

Related Manuals for Fisher & Paykel DH8060P1


Summary of Contents for Fisher & Paykel DH8060P1
-
Page 1: Document Control
SERVICE MANUAL TL1501S005V1.1 Tumble Dryer DH8060P1 Model No. WARNING This service information is designed for experienced repair technicians only and is not designed for use by the general public. It does not contain warnings or cautions to advise non-technical individuals of potential dangers in attempting to service a product. -
Page 2: Table Of Contents
Issue Service Manual Rev. Model No: DH8060P1 Table of Contents Document control ......................1 Chapter 1. General Information ................... 2 1-2 General Guidelines 1-3 Caution and Warning symbols 1-4 Function indication symbols Chapter 2. Product Feature ..................4 2-1 Features 2-2 Specification Chapter 3. -
Page 3: General Guidelines
Service Manual Issue Rev. Model No: DH8060P1 1-2. General Guidelines When servicing,observe the original lead dress.If a short circuit is found, replace all parts which are overheated or damaged by the short circuit.After servicing ,see to it that all the protective devices such as insulation barriers ,insulation papers shields are properly installed. -
Page 4: Chapter 2. Product Feature
Issue Service Manual Rev. Model No: DH8060P1 Chapter 2. Product Feature 2-1. Features Features Heat pump dryer Energy class 6.0 stars LED Display Delay time adjustive - 4 -... -
Page 5: Specification
Service Manual Issue Rev. Model No: DH8060P1 2-2. Specification Front loaders dryer Unit DH8060P1 Product identification Description of appliance Dryer Type of appliance (FS = standing, BI = built-in) Supplier own brand Fisher&Paykel Supplier bar code (TBC) Commercial Brand / Model Fisher&Paykel... - Page 6 Service Manual Issue Rev. Model No: DH8060P1 Basics data Unit dimensions (H x W x D) 84.5x 59.5 x65.0 Net weight Voltage/frequency V/Hz 220~240V/50Hz Input power(Max) 900W Control M = electromechanical, E = electronic, F = fuzzy Drum S = stainless steel / Z = zinc coated...
-
Page 7: Chapter 3. Important Safety Instructions
Issue Service Manual Rev. Model No: DH8060P1 Chapter 3. Important Safety Instructions 3-1 Before switching the device on for the first time 1.Ensure that the device is installed and electrically grounded by a qualified service person in accordance to local codes to prevent shock hazard and assure tability during operation. -
Page 8: Chapter 4. Operation Instructions
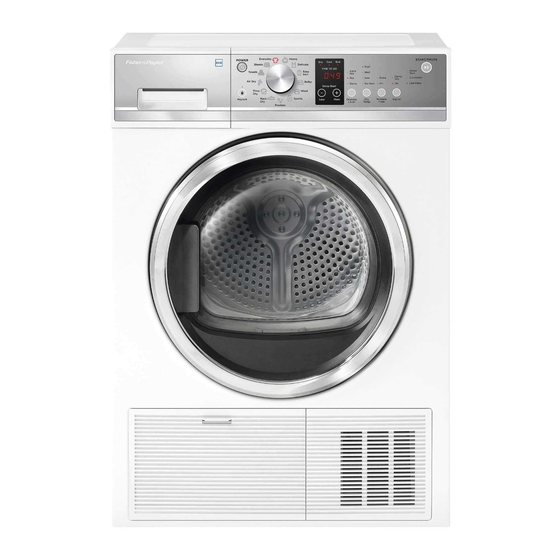
Issue Service Manual Rev. Model No: DH8060P1 Chapter 4. Operation instructions 4-1 Control panel Model No: DH8060P1 4 .1.1 Power button Press this button to turn the tumble dryer on and off. 4 .1.2 Start/Pause button Press this button to start the tumble dryer. Press this button again during the operation of the tumble dryer.The indicator light and display screen will... - Page 9 Issue Service Manual Rev. Model No: DH8060P1 4.1.4 Programme The cycles in the following table will each have an icon and can be selected by the user turning the knob on the control panel. The option shown in bold is the default at power on.
- Page 10 Issue Service Manual Rev. Model No: DH8060P1 4.1.5 Display sceen User warning sounds and “Water Tank” LED will flash when the dryer detects that the water tank is full. After every 5 drying cycles the “ condenser” LED flashes at the start of the cycle.
-
Page 11: Using The Tumble Dryer
Issue Service Manual Rev. Model No: DH8060P1 4-2 Using the tumble dryer 4.2.1 Connect the tumble dryer to the power supply (220V to 240V~/50Hz). 4.2.2 Loading the tumble dyer 4.2.3 Switch on the power supply 4.2.4 Selecting program,selecting functional NOTE... -
Page 12: Chapter 5. Part Identification
Issue Service Manual Rev. Model No: DH8060P1 Chapter 5. Part Identification drawer hold the drawer,the tank can be pulled control panel outwards outer frame of sight window handle pull the handle , screen of sight window the door can be you can see the loading through the window opened. - Page 13 Issue Service Manual Rev. Model No: DH8060P1 fortified panel drum belt compressor capacitor inverter motor foot compressor refrigerant filter pump box of container wheel support the drum base part condenser evaporator -13 -...
- Page 14 Issue Service Manual Rev. Model No: DH8060P1 cover of air channel motor fan belt pulley belt pulley belt lamp cover unscrew 2 screws from the cover, it can be opened,the light can be replaced. hook of basket filter humidity sensor...
-
Page 15: Chapter 6. Disassembly Guide
Issue Service Manual Rev. Model No: DH8060P1 Chapter 6. Disassembly Guide 6-1 Control panel 1) Unscrew 2 screws on the back pull of the top cover. 2) Pull the top cover backward and then upward as shown. Pull out the tank . -
Page 16: Bearing And Process Fan
Issue Service Manual Rev. Model No: DH8060P1 6-2 Bearing and process fan 1) Unscrew all the screws around the belt cover and the back cover. 1) Remove the blet; 2) Unscrew the 2 screw near the bearing; 3) Unscrew the screw near the pulley. -
Page 17: Motor
Issue Service Manual Rev. Model No: DH8060P1 Unscrew 4 screws on the holder for bearing. The bearing can be disassembled. bearing 6-3 Motor 1) Disassemble the top cover; 2) Disassemble the control panel; 3) Unscrew 5 screw fastening the front girder and disassemble it. - Page 18 Issue Service Manual Rev. Model No: DH8060P1 1)Disconnect the wire of motor ; 2)Disassemble the spring drum belt. 3)Unscrew 2 screws fastening the motor. 1)Unscrew the nut fastening the motor belt pulley and remove the pulley. 2)Disassemble the wire of capacitor;...
-
Page 19: Pump
Issue Service Manual Rev. Model No: DH8060P1 6-4 Pump 1) Unscrew 2 screws on the support of pump. 2) Seperate the pipe and pump; 3) Disconnect the wire of pump. The pump assembly can be taken out. -19 -... -
Page 20: Front Air Channel
Issue Service Manual Rev. Model No: DH8060P1 6-5 Front air channel 1) Disassemble the top panel; 2) Disassemble the control panel. 3) Disassemble the front girder. Disassemble the two side panel. Unscrew 7 screws on the top of front panel. - Page 21 Issue Service Manual Rev. Model No: DH8060P1 1) Unscrew 3 screws on the middle of front panel. 2) Disassemble the sealing bar of door. 3) Disconnect the wire of door lock . Turn the four spanners anticlockwise and you can take the filter assembly out.
-
Page 22: Belt
Issue Service Manual Rev. Model No: DH8060P1 Unscrew 3 screws on the front air channel. The front air channel can be disassembled. 6-6 Belt The belt can be disassembled. -22 -... -
Page 23: Base Assembly
Issue Service Manual Rev. Model No: DH8060P1 6-7 Base assembly Instruction: 1) All the tubes can be welded together to be a heat pump system; 2) Every part in the base assembly can be applied as spare parts; 3) The refrigerant charged is R134A. - Page 24 Issue Service Manual Rev. Model No: DH8060P1 seal bar -24 -...
-
Page 25: Chapter 7. Schematic Diagram
Issue Service Manual Rev. Model No: DH8060P1 Chapter 7. Schematic Diagram NTC2 NTC3 PCB1 PCB2 HP Heat pump Door switch DP Drainage pump Water level switch Humidity sensor Lamp NTC2 Temperature sensor near condenser Fan motor NTC3 Temperature sensor near compressor... -
Page 26: Chapter 8. Circuit Interface Diagram
Issue Service Manual Rev. Model No: DH8060P1 Chapter 8. Circuit Interface Diagram Pump Zero line relay Motor Lamp Power compressor Power Power L’ Power PCB1 communication Power Door switch Water level switch Motor communication Door switch PCB2 Humidity sensor Keystroke board... -
Page 27: Chapter 9. Fault Detection
Issue Service Manual Rev. Model No: DH8060P1 Chapter 9. Fault Detection The dryer does not start Insert the power plug into an The power supply plug peels off; appropriate receptacle and turn on the power Put on the local circuit The local circuit is out of power;... -
Page 28: The Drying Result Is Not Good And The Drying Time Is Too Long
Issue Service Manual Rev. Model No: DH8060P1 The drying result is not good and the drying time is too long. The drying program setting is not Set the drying program correct; correctly The filter screen near the window Clean the filter screen near... -
Page 29: The Dryer Runs With Noise
Issue Service Manual Rev. Model No: DH8060P1 The dryer runs with noise Check if the floor Place the dryer in Try to find out where the is horizontal horizontal floor Exterior sound comes from Adjust these four Check if all four feet... -
Page 30: Code:e2
Issue Service Manual Rev. Model No: DH8060P1 Code:E2 Error message:The drain pump is failed. Empty the tank and Check if the tank is full with restart the dryer. water Check if there are some lints Clear the lints; aroud the floater ;... -
Page 31: Code:e33
Issue Service Manual Rev. Model No: DH8060P1 Code:E33 Error message:The NTC3(near the outlet of compressor) is short or cut out; Insert the connector Check if the connector are properly. inserted properly Check if NTC is failed ; Replace a new NTC;... -
Page 32: User Warnings
Issue Service Manual Rev. Model No: DH8060P1 9-13 User Warnings The product enters this mode automatically if a user warning state is detected and the specified number of auto start attempts is exceeded. User Warnings are displayed in plain text. Where multiple words are displayed one at a time with a 1s pause between changing from one word to the other. -
Page 33: Chapter 10. Test Programme
Issue Service Manual Rev. Model No: DH8060P1 Chapter 10. Test Programme To enter diagnostic mode, press and hold Keylock & Dryness Level for 3 sec. Diagnostic mode can be entered while the product is running or from pause/idle state. While in diagnostic mode the keys and LEDs operate according to the table below. -
Page 34: Chapter 11. Electric Appliances Parameter
Issue Service Manual Rev. Model No: DH8060P1 Chapter 11. Electric Appliances Parameter Reference number Part name Parameter Remark in SBOM Motor 220-240V,50Hz 0184000013 Compressor AC 450V Capacitor 50/60Hz 0030803598 motor protector Compressor 220-240V / 50Hz Compr 0184000016 motor Main AUX.
Need help?
Do you have a question about the DH8060P1 and is the answer not in the manual?
Questions and answers