Table of Contents
Advertisement
Quick Links
Advertisement
Table of Contents

Subscribe to Our Youtube Channel
Related Manuals for Air Live FE-501OD


Summary of Contents for Air Live FE-501OD
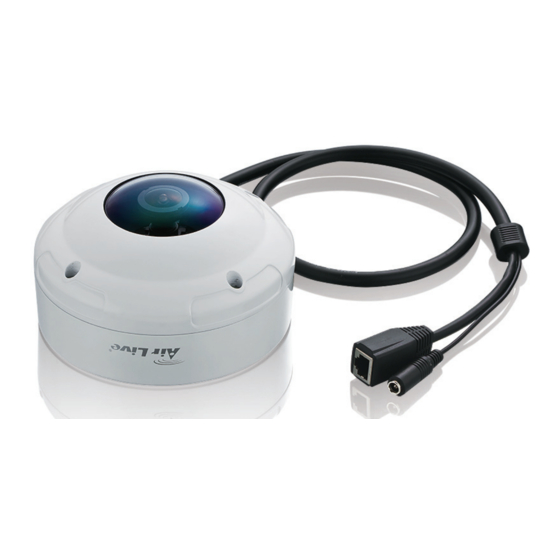
- Page 1 FE-501OD 5MP Fisheye Outdoor IP67 PoE Camera User’s Manual...
- Page 2 This product contains some codes from GPL. In compliance with GPL agreement, AirLive will publish the GPL codes on our website. Please go to www.airlive.com and go to the "Support->GPL" menu to download source code. All Trademarks are properties of their respective holders. AirLive FE-501OD User’s Manual...
- Page 3 The lists of entities entitled to receive used equipment can be found on the websites of municipalities. Some components of devices such as external wiring, circuit boards and liquid crystal displays have a negative impact on the environment. AirLive FE-501OD User’s Manual...
-
Page 4: Table Of Contents
4.1 Live View....................15 4.2 Configuration ..................19 5. Configuration ...................20 5.1 Network....................21 5.2 Video....................26 5.3 Audio....................35 5.4 Event....................36 5.5 Storage ....................45 5.6 System....................47 6. Operating IP Camera via iOS/Android Device ........54 6.1 Using IP Camera via iOS/Android Device..........54 AirLive FE-501OD User’s Manual... -
Page 5: Overview
Pixel resolution respectively and superior H.264-AVC performance and rich functions. FE-501OD includes a fish-eye lens for 360° panoramic wide angle view without blind spot. It is very suitable to view a wide area with single camera such as hallway, store, and office without the need to install multiple cameras. -
Page 6: Features
1/2.5” Progressive CMOS Sensor Maximum Resolution 1920x1920 Lens Type Fisheye Fix Lens Focal Length f=1.05mm Aperture F=2.8 Field of View 180°(Horizontal/Vertical/Diagonal) WDR Technology WDR Enhanced Day/Night Removable IR-cut filter for day & night function Minimum Illumination 1.9Lux @F2.8(Color);0.1Lux@F2.8(B/W) AirLive FE-501OD User’s Manual... - Page 7 Users HTTP, HTTPS, TCP/IP, IPv4, UDP, SMTP, FTP, DHCP, DDNS, NTP, DNS, ARP, RTSP, RTP, UPnP, OnVIF(Profile Protocols S), Multicast Interface 10 Base-T/100 Base TX Ethernet(RJ-45) Ver.2.2 OnVIF Intelligent Video Motion Detection Ten-window video motion detection AirLive FE-501OD User’s Manual...
- Page 8 Temperature Operating Humidity 10%~80% System Requirements Operating System Windows® 2000, XP, Vista, 7 Web Browser Mozilla Firefox 7~10, Internet Explorer 7.x or 8.x, Chrome/Safari 4.0 or above Video Player VLC, Quick Time, Real Player, Core Player AirLive FE-501OD User’s Manual...
-
Page 9: System Requirement
Internet Explorer 9 or later; Apple Safari; Firefox; Google Chrome Recorded File Microsoft Media Player 11.0 or later Playback Note: Please keep updating the latest Windows software and service package. (Ex: Net Framework, Windows Media Player, Enhance ActiveX Security) AirLive FE-501OD User’s Manual... -
Page 10: Package Contents And Installation
2.1 Package Content User can find the following items in the package as below: 1. FE-501OD is the main element of the product. 2. Power Adapter dedicates 12V DC electric power output to Network Camera. 3. Bundle CD provides installation software, application program, important information and instructions for operating the Network Camera. - Page 11 2. Package Contents and Installation AirLive FE-501OD User’s Manual...
- Page 12 User can make the connectors to support 1) Video Out, 2) Audio In, 3) Audio Out, 4) Terminal Block for GPIO. Please refer to following figure of extensive compound cables that user can DIY easily: *NOTE: This Compound Wire is optional, please contact with us if you need it. AirLive FE-501OD User’s Manual...
- Page 13 Digital Input: Only one set is designed in this Camera Model. The internal device is also photo-coupled electrical relay; and the external device can be simply an On/Off switch. Each set of On/Off switch can be connected as one trigger source. AirLive FE-501OD User’s Manual...
-
Page 14: Install The Camera In Lan
4. Ensure the power adaptor specification matches the power system (110V or 220V) and plug the adaptor into the outlet(This step is optional if used PoE switch for PoE model) 5. Use AirLive IP Wizard software utility in CD and launch browser to start connecting with AirLive FE-501OD User’s Manual... -
Page 15: Connect To Ip Camera
2. Package Contents and Installation 2.4 Connect to IP Camera 1. Insert the bundled CD into your PC/Laptop. Auto Run screen pops up, click “Install Software AirLive IP Wizard II” to install the configuration tool. AirLive FE-501OD User’s Manual... - Page 16 2. Package Contents and Installation 3. After completing installation, run the “Air Live IP Wizard II” to start to search the IP camera. 4. The entire detected IP camera will be listed out. AirLive FE-501OD User’s Manual...
- Page 17 5. If the Camera’s IP address is in the same IP segment as your LAN, select the founded IP Camera and double click on the item. Then, the default browser will show up and connect to the IP camera’s Web automatically. AirLive FE-501OD User’s Manual...
-
Page 18: Using Ip Camera Via Web Browser
You can change them in the Security Menu. (Please check “Configuration → Security”) 3. The monitor image will be displayed in your browser. In the left side of main window, you can configure the settings you want. For more details, please refer to the following chapters. AirLive FE-501OD User’s Manual... -
Page 19: Operating The Network Camera
You can operate live view function on the main page, please refer to the description below: 4.1 Live View 1. Original size / Preview Size Switches live image view between original size (Depends on main stream setting) and preview size. AirLive FE-501OD User’s Manual... - Page 20 “Enable ROI (Stream)” function will appear. For the first time use, you may Left-click the mouse button under lower-left, upper-right or lower-right Live View Window. Then you could see a x1 frame displaying in the Source View Window. AirLive FE-501OD User’s Manual...
- Page 21 Such as Quad with Source View will have five stream output maximum at the same time. rtsp://camera ip address/live1.sdp means whole display window could be seen. rtsp://camera ip address/live2.sdp means upper-left Source View Window could be seen. AirLive FE-501OD User’s Manual...
- Page 22 To reset the scene back to its original status, click the Home button. You can also directly click the mouse button on the video to drag for pan and tilt, roll the mouse wheel for zoom a selected area. AirLive FE-501OD User’s Manual...
-
Page 23: Configuration
User can select proper streaming protocol according to network environment. 10. View Options It is a pull-down list for video streaming. 11. Language FE-501OD support multi-language. 4.2 Configuration Click “Configuration” for the camera’s detail settings. For more information, please refer to Chapter 5. AirLive FE-501OD User’s Manual... -
Page 24: Configuration
5. Configuration Configuration Click the “Configuration” to display sub-menus included: Network / Video / Audio / Event / Storage / System AirLive FE-501OD User’s Manual... -
Page 25: Network
DHCP server each time the Camera is connected to the network. • Fixed IP Address: This option manually assigns a static IP address to the Network Camera. The default setting is 192.168.1.100. • PPPoE: Select this option to set PPPoE account & password. AirLive FE-501OD User’s Manual... - Page 26 • HTTP Port: Re-define the existing HTTP Port number in the text box. • RTSP Port: Re-define the existing RTSP Port number in the text box. : After setups are completed, click “Save” button to apply the settings. AirLive FE-501OD User’s Manual...
- Page 27 Service Provider. Update Time: Define a time interval for the device to periodically update and check its access status with website of DNS Service Provider. : After setups are completed, click “Save” button to apply the settings. AirLive FE-501OD User’s Manual...
- Page 28 In other words, the camera can send just one streaming and each client can receive the streaming with Multicast Protocol. AirLive FE-501OD User’s Manual...
- Page 29 : Filling the IP range, then click “Save” button to implement the settings. : If you would like to re-open the access right of those listed device, select it from the list and then click “Remove” button to apply the settings. AirLive FE-501OD User’s Manual...
-
Page 30: Video
5. Configuration 5.2 Video 1. Stream AirLive FE-501OD User’s Manual... - Page 31 8M bps, 10M bps and 12M bps. • Intra frame period: Available choices are; 5, 8, 10, 15, 20, 25, 30, 40, 50 & 60 frames per period. This function will let you choose how long distance between two I-Frames. AirLive FE-501OD User’s Manual...
- Page 32 For example: the default RTSP Port Access Name is live1.sdp;it means your playback stream name would be “RTSP://camera’s IP address/live1.sdp” : After setups are completed, click “Save” button to apply the settings. 2. Video: AirLive FE-501OD User’s Manual...
- Page 33 5. Configuration AirLive FE-501OD User’s Manual...
- Page 34 Adjust the Saturation value to 255. • Contrast: The brightness ratio of the lightest to the darkest part of the video image. Try to assign the fit value according to the environment. AirLive FE-501OD User’s Manual...
- Page 35 Camera into “day” or “night” mode relative to luminance of the area under surveillance. When the environment luminance becomes higher than the set lux value, the Camera will auto switch to “day” or “color” mode. Otherwise, it will remain at “night” or “mono” mode. AirLive FE-501OD User’s Manual...
- Page 36 Set WDR function to Set WDR function to Disable. Enable. • White Balance: Because camera doesn’t have ability to automatically adjust different color (temperature) to the environment, six templates are provided to let you choose for different light. AirLive FE-501OD User’s Manual...
- Page 37 5. Configuration • Camera Mount: Three camera mounting types could be chose and will also bring different kinds of Display Mode. Ceiling: Wall: Hi-FPS: ,raise to 30 frames per second and the max resolution value is 1600x1200@30fps. AirLive FE-501OD User’s Manual...
- Page 38 3. Privacy Mask: This is an “Ellipse” type. This is a “Rectangle” type. This is a “Line” type. The “Privacy Mask” tabbed pane allows you to mask or block private areas from surveillance for privacy reason. AirLive FE-501OD User’s Manual...
-
Page 39: Audio
• Type: Select which kind of codec you would like to set as Audio-In signal output format. • Mute: Enable or disable mute function of the Camera’s Audio-In signal. : After setups are completed, click “Save” button to apply the settings. AirLive FE-501OD User’s Manual... -
Page 40: Event
5. Configuration 5.4 Event 1. Motion Detection 1. To enable “Motion Detection” function. 2. To draw a region to define the detection range. AirLive FE-501OD User’s Manual... - Page 41 Time Lapse (in seconds) whenever motion is detected. The video record may be provided to host by E-mail/FTP, stored in the SD card, Remote Disk as selected or through all of them. AirLive FE-501OD User’s Manual...
- Page 42 Motion is ignored with this method. Each recording time-span is in accordance with the setting value of Post event recording (in seconds) and the video record is stored in the SD card, Remote Disk as selected or through both of them. AirLive FE-501OD User’s Manual...
- Page 43 Each recording time-span is in accordance with the total value of Pre-event recording and Post event recording (in seconds). And the video record may be provided to host by E-mail/FTP, stored in the SD card, Remote Disk, activated GPIO Output Port or through all of them. AirLive FE-501OD User’s Manual...
- Page 44 Camera buffer and 3 snapshot frames are captured live. The stream of accumulated snapshots may be sent to host by E-mail, FTP, stored in the SD card, Remote Disk as preferred or through all of them. AirLive FE-501OD User’s Manual...
- Page 45 Camera buffer and 3 snapshot frames are captured live. The stream of accumulated snapshots may be sent to host by E-mail, FTP, stored in the SD card, Remote Disk as preferred or through all of them. AirLive FE-501OD User’s Manual...
- Page 46 • GPIO: On the defined days of the week and at certain time of the set days, the Camera will trigger its GPIO Input Signal according to the set time interval (in seconds) when its state changes. Single or 6 snapshots may be captured at a time as defined. AirLive FE-501OD User’s Manual...
- Page 47 The stream of accumulated snapshots may be sent to host through E-mail, FTP, stored in the SD card, Remote Disk, activated GPIO Output Port; per selection or through all of them. When selected, the setup dialog for these methods will display is illustrated in the following figure. AirLive FE-501OD User’s Manual...
- Page 48 ※ As for the settings of FTP Service, kindly please contact with your FTP service provider。While all parameters filled in Windows FTP Transferring Utility are correct and working properly under your Laptop or other PC, you may enter them into the text area manually. AirLive FE-501OD User’s Manual...
-
Page 49: Storage
“Storage” button, a warning message will occur. SD card management: • : Click this button to save changes to the SD card control setting. • : Click this button to format the SD memory card AirLive FE-501OD User’s Manual... - Page 50 4) Select the file to playback and enable the corresponding check box. The dialog strip below will then pops up. 5) Clicking Open button will playback the file. Save button will save file to a designated folder. AirLive FE-501OD User’s Manual...
-
Page 51: System
5. Configuration 5.6 System 1. Information The “Information” tabbed pane provides the existing system status of the Camera which includes Model Name, System Time, Firmware Version, MAC Address, ActiveX Control Version, Wired Network and DDNS Server Status. AirLive FE-501OD User’s Manual... - Page 52 Camera clock with your manually entered Network Time Protocol (NTP) Server. • Keep current date and time setting: Select this option in lieu of automatic synchronization if the Camera is not connected to NTP Server and uses its own embedded clock. AirLive FE-501OD User’s Manual...
- Page 53 The “Account” tabbed pane allows you to add new Camera User Name and change Password and the surveillance status or User Group. Click the “Add” button to access the security setup dialog (shown below). AirLive FE-501OD User’s Manual...
- Page 54 Camera live stream, other adjustments of Camera parameter are prohibited. Viewer: User is only allowed to login “Live View” Webpage and perform all functions within this page. Changing Camera settings is prohibited. : After setups are completed, click “Save” button to apply the settings. AirLive FE-501OD User’s Manual...
- Page 55 “Network setting” parameters. Besides, all configured data in the “System Time”, “Account” and “Maintenance” tab will be remained current. AirLive FE-501OD User’s Manual...
- Page 56 1) Click the “Browse” button to access and select saved “config_backup.tar.gz” file from the PC. 2) Click the “Restore” button to process Camera configuration restore. 5. System Log Click it; There will be another browser page opening and then displaying Camera’s basic log. AirLive FE-501OD User’s Manual...
- Page 57 Remote Log Server. • Remote Log Setting: Check “Enable remote log” selection first; and then manual entering IP address & port setting of Remote Log Server. : After setups are completed, click “Save” button to apply the settings. AirLive FE-501OD User’s Manual...
-
Page 58: Operating Ip Camera Via Ios/Android Device
You can access into your IP camera via the iOS/Android device. Please follow the setup steps below. 2. Execute the AirLive CamPro 1. Download AirLive CamPro Mobile program Mobile from APP store/Google play 3. Click Setup button. 4. Setup page appears AirLive FE-501OD User’s Manual... - Page 59 6. Operating IP Camera via iOS/Android Device 5. Click Add and Auto Search button. Select the camera. 7. Edit the information and User Name/Password, click “Save”. AirLive FE-501OD User’s Manual...
- Page 60 6. Operating IP Camera via iOS/Android Device 9. Select the camera. 8. Click “Back”. 10. Select the channel to 11. Camera live view. enlarge the video. Note: The image is continuous snapshots, not video. Thus, live image can’t be recorded here. AirLive FE-501OD User’s Manual...
Need help?
Do you have a question about the FE-501OD and is the answer not in the manual?
Questions and answers