Hitachi DS 13DV2 Instruction Manual And Safety Instructions
Hide thumbs
Also See for DS 13DV2:
- Handling instructions manual (39 pages) ,
- Handling instructions manual (67 pages)
Table of Contents
Advertisement
Quick Links
INSTRUCTION MANUAL
AND
SAFETY INSTRUCTIONS
FOR
CORDLESS DRIVER DRILL
Variable speed
MODEL DS 13DV2
WARNING:
Improper and unsafe use of this power tool can result in
death or serious bodily injury!
This manual contains important information about product
safety. Please read and understand this manual before
operating the power tool. Please keep this manual available
for others before they use the power tool.
Advertisement
Table of Contents

Subscribe to Our Youtube Channel
Related Manuals for Hitachi DS 13DV2


Summary of Contents for Hitachi DS 13DV2
-
Page 1: Safety Instructions
INSTRUCTION MANUAL SAFETY INSTRUCTIONS CORDLESS DRIVER DRILL Variable speed MODEL DS 13DV2 WARNING: Improper and unsafe use of this power tool can result in death or serious bodily injury! This manual contains important information about product safety. Please read and understand this manual before operating the power tool. -
Page 2: Table Of Contents
— CONTENTS — Page IMPORTANT INFORMATION ..................3 MEANINGS OF SIGNAL WORDS ................3 SAFETY IMPORTANT SAFETY INSTRUCTIONS FOR USING ALL POWER TOOLS ..............4 IMPORTANT SAFETY INSTRUCTIONS FOR USE OF THE CORDLESS DRIVER DRILL ..........7 IMPORTANT SAFETY INSTRUCTIONS FOR BATTERY CHARGER ................ -
Page 3: Important Information
WARNINGS on the power tool and in this Instruction Manual. Never use this power tool in a manner that has not been specifically recommended by HITACHI, unless you first confirm that the planned use will be safe for you and others. -
Page 4: Safety
SAFETY IMPORTANT SAFETY INSTRUCTIONS FOR USING ALL POWER TOOLS WARNING: Death or serious bodily injury could result from improper or unsafe use of power tools. To avoid these risks, follow these basic safety instructions: READ ALL INSTRUCTIONS NEVER TOUCH MOVING PARTS. Never place your hands, fingers or other body parts near the tool’s moving parts. - Page 5 KEEP CHILDREN AWAY. Do not let visitors contact tool. All visitors should be kept safely away from work area. DON’T FORCE TOOL. It will do the job better and safer at the rate for which it was intended. USE RIGHT TOOL. Don’t force small tool or attachment to do the job of a heavy-duty tool.
- Page 6 Wipe plastic parts with a soft cloth lightly dampened with soapy water. USE ONLY AUTHENTIC HITACHI REPLACEMENT PARTS. Replacement parts not manufactured by Hitachi may void your warranty and can lead to malfunction and resulting injuries. Authentic Hitachi parts are...
-
Page 7: Important Safety Instructions For Use Of The Cordless Driver Drill
2. Before using battery charger, read all instructions and cautionary markings on (1) battery charger, (2) battery, and (3) product using battery. 3. To reduce risk of injury, charge HITACHI rechargeable battery type EB7, EB9, EB9B, EB12, EB12B. Other type of batteries may burst causing personal injury and damage. -
Page 8: Important Safety Instructions For Use Of The Battery And Battery Charger
UC 12YD battery charger, be sure to read all instructions and cautionary statements on it, the battery and in this manual. REMEMBER: USE ONLY HITACHI BATTERY TYPES EB7 SERIES, EB9 SERIES, EB12 SERIES. OTHER TYPES OF BATTERIES MAY BURST AND CAUSE INJURY! -
Page 9: Disposal Of The Exhausted Battery
1. NEVER disassemble the battery. 2. NEVER incinerate the battery, even if it is damaged or is completely worn out. The battery can explode in a fire. 3. NEVER short-circuit the battery. 4. NEVER insert any objects into the battery charger’s air vents. Electric shock or damage to the battery charger may result. -
Page 10: Operation And Maintenance
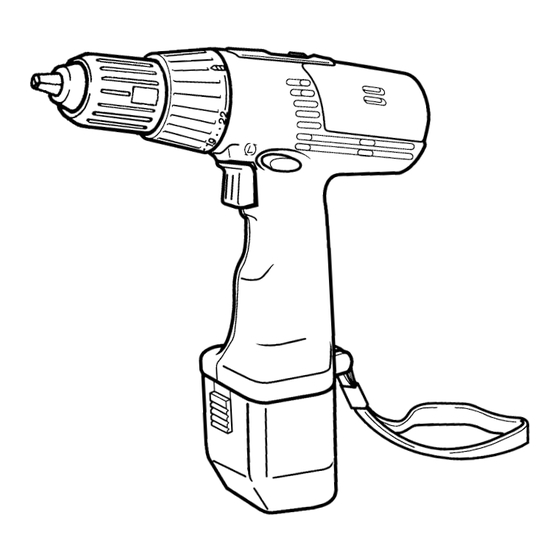
Some illustrations in this Instruction Manual may show details or attach- ments that differ from those on your own power tool. MODEL DS 13DV2 (BDK): with charger (UC 12YD) and case NAME OF PARTS 1. Cordless Driver Drill (DS 10DV2) -
Page 11: Specifications
2. Battery Charger (UC 12YD) Battery Installation Hole Cord Nameplate Pilot Lamp Fig. 2 SPECIFICATIONS 1. Cordless Driver Drill (DS 13DV2) Model DS 13DV2 Motor DC motor 0–350 rpm No-load speed High 0–1200 rpm Capacity Drilling Wood ......15/16″ (24mm) (Soft Wood) (Thickness 11/16″... -
Page 12: Accessories
The use of any other attachment or accessory can be danger- ous and could cause injury or mechanical damage. STANDARD ACCESSORIES Fig. 3 DS 13DV2 (BDK) q Phillips bit (No. 2) ........1 (Code No. 983006) w Battery (EB12B) ........... 2 e Battery Charger (UC 12YD) ...... -
Page 13: Applications
5/32″ (4mm) 3/16″ (5mm) Fig. 7 NOTE: Accessories are subject to change without any obligation on the part of the HITACHI. APPLICATIONS Use as a drill Drilling of soft steel, wood, plastic and aluminum materials. Use as a screwdriver Tightening and loosening of machine screws, wood screws and tapping screws. -
Page 14: Charging Method
CHARGING METHOD NOTE: Before plugging into the receptacle, make sure the following points. The power source voltage is stated on the nameplate. The cord is not damaged. WARNING: Do not charge at voltage higher than indicated on the nameplate. If charged at voltage higher than indicated on the nameplate, the charger will burn up. - Page 15 (1) Pilot lamp indication The indications of the pilot lamp will be as shown in Table 2, according to the condition of the charger or the rechargeable battery. Table 2 Indications of the pilot lamp Blinks Lights for 0.5 seconds. Does not light for Before (RED) 0.5 seconds.
-
Page 16: Before Use
5. Remove the battery from the battery charger. Supporting the battery charger with hand, pull out the battery from the battery charger. CAUTION: If the battery is charged while it is heated because it has been left for a long time in a location subject to direct sunlight or because the battery has just been used, the pilot lamp of the charger light up yellow. -
Page 17: Operation
OPERATION 1. Mounting and dismounting of the bit (1) Mounting the bit Slide the sleeve to the FREE (release) side. Loosen Rotate the sleeve to the left (counterclockwise as Sleeve seen from the front) to open the clip on the keyless chuck. - Page 18 3. Check the rotational direction The bit rotates clockwise (viewed from the rear side) by pushing the R-side of the selector button. Triger The L-side of the selector button is pushed to turn switch the bit counterclockwise. (See Fig. 12). (The marks marks are provided on the body.) When the trigger switch is depressed, the tool...
- Page 19 5. Confirm the cap position (see Fig. 15) The tightening torque of this unit can be adjusted according to the cap position, at which the cap is Triangle mark set. (1) When using this unit as a screwdriver, line up the one of the numbers “1, 3, 5 ...
-
Page 20: The Scope And Suggestions For Uses
If the motor is locked, immediately turn the power off. If the motor is locked for a while, the motor or battery may be burnt. Too long hammering may cause the screw broken due to excessive tightening. A buzzing noise is produced when the motor is about to rotate; This is only a noise, not a machine failure. -
Page 21: How To Select Tightening Torque
HOW TO SELECT TIGHTENING TORQUE Table 5 Tightening torque Operation example position Approximately 4 in-lbs. (5 kg-cm) Machine screw tightening Approximately 9 in-lbs. (10 kg-cm) Screw tightening for soft Approximately 17 in-lbs. (20 kg-cm) wood material Approximately 26 in-lbs. (30 kg-cm) Approximately 35 in-lbs. -
Page 22: Storage
All quality power tools will eventually require servicing or replacement of parts because of wear from normal use. To assure that only authorized replacement parts will be used, all service and repairs must be performed by a HITACHI AUTHORIZED SERVICE CENTER, ONLY. - Page 25 Planet Gear (C) Set 503A Case Washer (A) Parts are subject to change without any obligation on the part of the Rear Case HITACHI due to improvements. Screw Set D3×12 19A Slide Ring Gear Pinion (C) Planet Gear (A) Set...
- Page 28 Please contact HITACHI KOKI U.S.A. LTD. at 1-800-59-TOOLS (toll free), or HITACHI AUTHORIZED POWER TOOL NICKEL-CADMIUM BATTERY MUST BE RE- SERVICE CENTER regarding COLLEC- CYCLED OR TION. DISPOSED OF PROPERLY. Shinagawa Intercity Tower A, 15-1, konan 2-chome Minato-Ku, Tokyo 108-6020, Japan Code No.
Need help?
Do you have a question about the DS 13DV2 and is the answer not in the manual?
Questions and answers