
Related Manuals for Astralpool RPX 11714


Summary of Contents for Astralpool RPX 11714
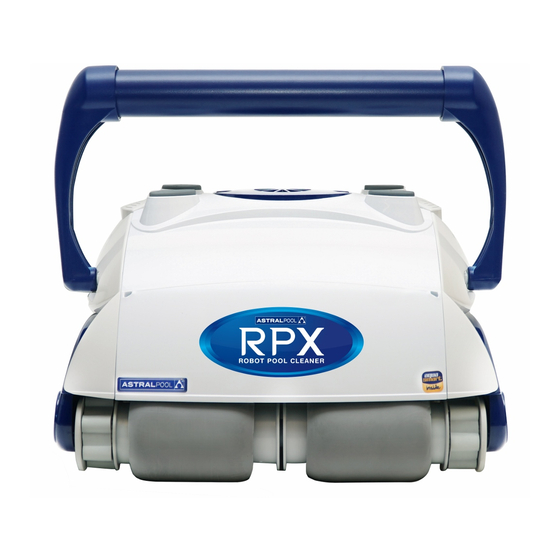
- Page 1 RPX Robotic Pool Cleaner Installation and Operating Instructions Product 11714 Product Inst 323...
-
Page 2: Important Safety Instructions
Dear Customer, IMPORTANT SAFETY INSTRUCTIONS Thank you for choosing our product to clean your pool. We hope that you will enjoy using your new robot to maintain your swimming pool for years to come. READ AND FOLLOW ALL THE INSTRUCTIONS Before you begin to use your robot, please take a few minutes to carefully read these CAUTION: Do not plug the power supply into a grounded outlet or do not switch the operating instructions. - Page 3 Operating the pool cleaner 1. Place the power supply (transformer) at least 3.6 meters / 11.8 feet from the pool and at 4. Place the unit in the water. Turn the unit least 12 cm / 4 Inch above the surface (fig.1). The transformer will supply low voltage to side to side in the water to allow air to the cleaner.
- Page 5 Operating the pool cleaner and power supply a. Power LED The blue LED flashes when the power supply is in standby mode and lights continuously when the pool cleaner is operating.The power button switches between ON and STANDBY b. "POWER" button The button switches between "ON"...
- Page 6 Model 400 - Aquacontrol Super Remote PROGRAM Pool shape Auto detect HIGH PROGRAM Cleaning Swivel Program PROGRAM NORMAL Internal timer Check filter External timer 1. Auto detect: this feature prevents the robot from getting stuck on obstacles in the pool such as main drains, steps, ladders etc. Press this button to choose one of the following options: Auto-Detect - OFF.
-
Page 7: Maintenance And Adjustment
Aquacontrol Power Supply Specifications Physical Dimensions (W * D * H) 273mm * 242mm * 90mm Weight 1.9 Kg Electrical Input rating 100-240V~, 50/60Hz, 210W Output rating 29V ,6.3A. Storage temperature -10° C - 60° C Operating temperature 0° C - 45 ° C Ingress protection IP54 Maintenance and adjustment... - Page 8 Maintenance and adjustment CLEAN THE FILTER BAG AFTER EVERY CLEANING CYCLE a. Unplug the power supply. (Please keep the plug away from contact with water) b. If the unit is in the pool, gently pull the cleaner toward you using the cable until the handle is within reach. Use the handle (not the cable) to pull the cleaner out of the pool smooth smooth...
- Page 9 Maintenance and adjustment Screws 30°C / 85°F Filter bag outlet top propeller label (continued from the previous page) d. Remove the filter bag from the support bars, turn it inside out and wash off all the dirt Cleaning the pump propeller: with a garden hose or in a sink.
- Page 10 Operating the Wireless Remote Control Wireless Remote Control - R/C Model NOTE: This equipment has been tested and found to comply with the limits for a Class B digital device, pursuant to part 15 of the FCC Rules. These limits are designed to provide reasonable protection against harmful interference in a residential installation.
-
Page 11: Using The Remote Control
Operating the Wireless Remote Control USING THE REMOTE CONTROL The Remote Control Model is provided with a The original remote control provided with radio control transmitter. This feature will your robot is already matched to the power enable you to directly guide the robot to any supply. -
Page 12: Replacing The Battery
Operating the Wireless Remote Control To replace the battery: REPLACING THE BATTERY 1. Unscrew the 6 screws securing the back cover of the unit using a Philips screwdriver. The battery installed in the remote control can 2. Remove the battery and dispose of safely. last several years. -
Page 13: Installation Instructions
Caddy Installation Parts 1. Caddy handle 2. Handle screws 3. Body screws 4. Caddy body Installation Instructions 1. INSTALL THE ENTIRE CADDY HANDLE using the two handle screws (2) as is shown in the picture. 2. INSERT THE CADDY HANDLE into the caddy body special place and fix it with three body screws (3) as is shown in the picture. -
Page 14: Troubleshooting Guide
Troubleshooting Guide PLEASE CHECK THE FOLLOWING BEFORE CALLING YOUR SERVICE CENTER Before troubleshooting, the pool cleaner must be disconnected from the power supply and the power supply must be unplugged from the electrical outlet to prevent damage to the unit and possible personal injury. For reference numbers, consult the parts list diagram located on the last page of the instructions. -
Page 16: Warranty Terms And Conditions
Your Astralpool Robotic Pool Cleaner is covered by a limited 3 year warranty against defect in material and assembly. Parts... -
Page 17: Warranty Claims
Product is installed for inspection and testing. 4. If such inspection and testing finds no defect in the Product, the customer must pay AstralPool's usual costs of service work and testing. If such inspection and testing finds a defect that is not covered by this warranty, the customer must pay AstralPool's usual costs of service work plus any parts and labour required to repair the Product, unless recoverable from AstralPool on the failure of any statutory guarantee under the ACL. -
Page 18: Exclusions And Limitations
Examples of exclusions include but are not limited to: LIMITATIONS The repair or replacement of the Product or part of the Product is the absolute limit of AstralPool's liability under this express warranty. - Page 19 1/27 Millenium Place 97 Sheffield Road 1/28 Export Drive Mile End South SA 5031 Tingalpa QLD 4173 Welshpool WA 6106 Molendinar QLD 4214 P: 08 8152 7600 P: 07 3308 5400 P: 08 9350 2600 P: 07 5552 2600 sales@astralpool.com.au www.astralpool.com.au...
Need help?
Do you have a question about the RPX 11714 and is the answer not in the manual?
Questions and answers