Advertisement

Feel free to enjoy life!
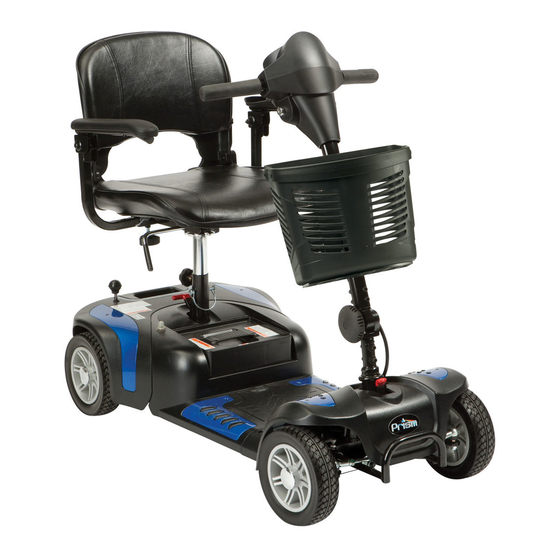
Vitesse
8
OWNER'S MANUAL
SCOOTER
RANGE
Drive Medical Ltd
Ainleys Industrial Estate, Elland, West Yorkshire,HX5 9JP
Tel: +44 (0) 1422 314488 / Fax +44 (0) 1422 314489
Email: enquiries@drivemedical.co.uk
Web: www.drivemedical.co.uk
Part No. Z40949 (Rev A)
The team at Drive Medical develops its products to give our customers the freedom to live
independently. This encompasses their daily home life and provides them with the
opportunity to enjoy an outing with family and friends. Our goal is to develop a range that
will provide individuals with a chance to enjoy every day life..

Advertisement

Table of Contents
loading

Summary of Contents for Drive Medical Prism 3-wheel

  • Page 1 Web: www.drivemedical.co.uk Part No. Z40949 (Rev A) The team at Drive Medical develops its products to give our customers the freedom to live independently. This encompasses their daily home life and provides them with the opportunity to enjoy an outing with family and friends. Our goal is to develop a range that...
  • Page 2: Table Of Contents

    QUICK REFERENCE GUIDE CONTENTS Problem: Scooter will not switch on 1. PREFACE Symptoms: Remedy: Batteries not connected Check batteries connected 2. SAFETY NOTICE Circuit breaker has tripped Push circuit breaker to reset Rear and front sections not Check connection on front- 2.1 Before Driving connected to-rear loom...
  • Page 3: Preface

    PREFACE AND INTRODUCTION Only use road to cross to other side of the pavement. • Please carefully read this owner’s handbook before • Be aware of traffic when crossing or using roads. using the scooter to ensure that you operate the •...
  • Page 4: Labelling

    OPERATION OF THE FREEWHEEL LEVER effect the EMI susceptibility of the scooter. Do not Always pull UP FIRMLY for freewheel mode fit accessories other than Drive Medical authorised Always push DOWN FIRMLY for drive mode accessories. Above: Located by freewheel lever on rear...
  • Page 5: Parts Introduction

    For more information about the body shrouds please 3. PARTS INTRODUCTION refer to the installation instructions supplied with the body shroud packs. CONTROL PANEL REST A copy of these instructions is also contained at the back of this manual. CHARGER SEAT SOCKET 4.
  • Page 6 • Moving and Braking. Push the right hand side of the • Adjusting the Seat Height. wigwag paddle forward with your right thumb and Remove the seat from your the scooter will move forward. Push the left hand scooter then remove the locking side of the wigwag paddle forward with your left pin (arrowed).
  • Page 7 • Circuit Breaker. The circuit breaker may trip when • Tiller Adjustment the scooter is under excessive loads or when The tiller can be adjusted in to many different positions travelling on steep inclines. It will be more prone to to suit each user.
  • Page 8: Driving On The Road

    5. DRIVING ON THE ROAD • Starting and Driving 1. Make sure the seat is installed properly. 2. Make sure the tiller has been secured properly. 3. Fold down the armrests so you can rest your arms on them. 4. Switch the key ignition on. 5.
  • Page 9 Ensure that the charger is removed from Warning the mains and the scooter or battery pack If battery pack loses contact with the after charging. Failure to do this may scooter during operation switch the key flatten the battery. ignition off, re-insert the battery pack and Do not remove the battery pack whilst the switch the ignition back on.
  • Page 10: Inspection And Maintenance

    7.1 Weekly Checking Check the following items weekly or before driving. If Warning you find anything abnormal contact your Drive Medical • Do not use a hose pipe or splash water Dealer for further inspection or advice. • Tiller. Ensure it is not loose and can turn smoothly directly on to the scooter.
  • Page 11: Assembling The Scooter

    1. Push the Seat 5. Pull up the Rotate Lever scooter using whilst pulling up the seat post, on the seat to whilst pulling remove. the red handle behind the seat post. 2. Lift out the 6. Lift the front battery pack section up until from the main...
  • Page 12: Troubleshooting

    3. Unlock the front 8. TROUBLESHOOTING wheel and tiller by • The troubleshooting guide is also featured on page pulling the wheel 1 for the Owner’s Handbook. lock catch up. Problem: Scooter will not switch on Symptoms: Remedy: Batteries not connected Check batteries connected Circuit breaker has tripped Push circuit breaker to reset...
  • Page 13: Specification

    9. SPECIFICATION Model Reference Prism 4-wheel Sport Dimension 104 x 55 x 90cm / Model Reference Prism 3-wheel (L x W x H) 41” x 21.5” x 35.5” Dimension 950 x 470 x 870mm Total Weight 51.5kg / 113lb (L x W x H) 37½...
  • Page 14: Warranty

    Any work or replacement part installation must be data shown in this manual. All figures, measurements carried out by an authorized Drive Medical dealer and capacities shown in this manual are approximate / service agent.
  • Page 15 Appendix A: Service Record YEAR YEAR Service Dates Service Dates Controller Upholstery On/off switch Seat Control Lever Back Braking Armrests Recharge point Electrics Batteries Connections condition Levels Lights Connections Test run Discharge test Forwards Wheels and Reverse Tyres Wear Emergency stop Pressure Left turn Bearings...
  • Page 16 Appendix B: Body Shroud (Body Panel) Installation Prism Electric Scooter s ’ r...

This manual is also suitable for:

Prism 4-wheel sportPrism 4-wheel

Table of Contents