Table of Contents
Advertisement
Advertisement
Table of Contents

Related Manuals for Drive Medical PHOENIXHD3


Summary of Contents for Drive Medical PHOENIXHD3
- Page 1 PHOENIX HD SCOOTER PHOENIXHD3 PHOENIXHD4 OWNER’S MANUAL...
-
Page 2: Table Of Contents
TABLE OF CONTENTS PREFACE AND INTRODUCTION ……..………………………………… SAFETY NOTICE…………………………………………………………...…. 2.1 Before driving 2.2 While driving 2.3 Labeling 2.4 EMI PARTS INTRODUCTION……………..……………….. ……………………. OPERATION…………………………………………………………………..1 Control panel 4.2 How to operate your scooter 4.3 How to set to freewheel mode DRIVING ON THE ROAD…………………………………………………….. 15 BATTERY CHARGING AND CARE…………………………………….. -
Page 3: Preface And Introduction
P R E F A C E A N D I N T R O D U C T I O N lease carefully read this owner’s manual before using the vehicle. Improper use of the vehicle could result in harm, injury or traffic accidents. To ensure that you get the most your scooter, please read this owner’s manual before using. -
Page 4: Safety Notice
S A F E T Y N O T I C E 2.1 BEFORE DRIVING The user needs to be familiar with the usage and operation of this vehicle before driving. Therefore, please follow the commendations in this safety notice. The same traffic rules apply to the use of this vehicle as apply to pedestrians ♦... -
Page 5: While Driving
S A F E T Y N O T I C E 2.2 WHILE DRIVING Do not use your vehicle under the circumstances below. ♦ On surfaces that are muddy, gravelly, bumpy, narrow, snowed over, icy, or canal towpaths not guarded by any fence or hedge. Keep away from places where you might get the wheels stuck. -
Page 6: Labeling
S A F E T Y N O T I C E 2.3 Labeling Please carefully read all the labeling on the scooter before drive it. For your future reminding, do not remove them. -
Page 7: Emi
2 . S A F E T Y N O T I C E 2.4 EMI This portion of the content will provide the user with basic information that describes the problems with EMI, known sources of EMI, protective measures either to lessen the possibility or exposure or to minimize the degree of exposure, and suggested action should unexpected or erratic movement occur. - Page 8 2 . S A F E T Y N O T I C E 3. Long-range transmitters and transceivers, such as commercial broadcast transmitter (radio and TV broadcast antenna towers) and amateur (HAM) radios. Note: Other types of hand-held devices, such as cordless phones, laptop computers, AM/FM radios, TV sets, CD player, and cassette players, and small appliances, such as electric shavers and hair dryers, so far as we know, are not likely to cause EMI problems to your powered scooter.
-
Page 9: Parts Introduction
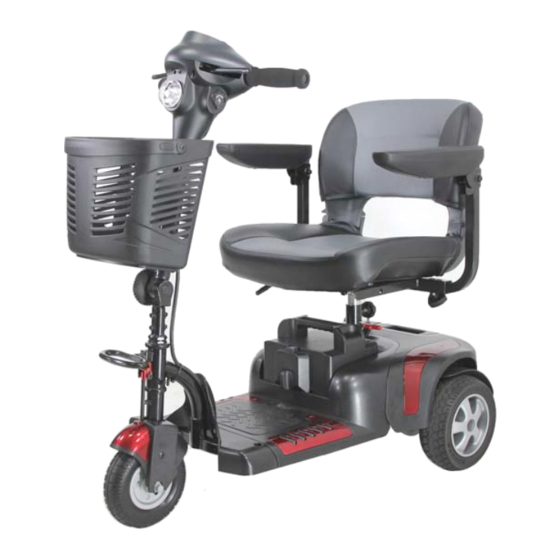
P A R T S I N T R O D U C T I O N PARTS DESCRIPTION Control panel Seat Anti-tip wheels Basket Seat Rotation Lever Seat Post Knob Charger Socket Battery Pack Seat Height Adjustment Tiller Adjustment Knob Freewheel Lever... -
Page 10: Operation
O P E R A T I O N 4.1 CONTROL PANEL 1. Speed Dial 2. Horn Button 3. Battery Indicator 4. Power Switch 5. Power Eye 4.2 HOW TO OPERATE YOUR SCOOTER Power switch ♦ To switch the power on , turn the key clockwise in the ignition. - Page 11 4 . O P E R A T I O N N Warning When on a gradient NEVER set the vehicle to the freewheel mode. The electromagnetic brakes will not be applied. This may result in injury or damage. S eat ♦...
- Page 12 O P E R A T I O N & Suggestion 1. You should recharge the batteries after each time the vehicle is used to ensure maximum range. The batteries should be charged up at least once a week even if the scooter is not used.
-
Page 13: How To Set To Freewheel Mode
O P E R A T I O N 4.3 How to set to freewheel mode Lever Lever Fig 4.1 Fig 4.2 Engaged mode (Fig. 4.1): Push the lever completely and the scooter can be driven by motor power. Freewheel Mode (Fig 4.2) Pull the lever up and the scooter can be moved manually. N... - Page 14 O P E R A T I O N Tiller Adjustment The tiller can be adjusted in to many different positions to suit each driver. 1. Loosen the knob to adjust the tiller to positions you want. (Fig. 4.3) 2. Once decide the position, tighten the knob to secure the tiller.( Fig.4.4) Adjustment knob Fig.
-
Page 15: Driving On The Road
5 . D R I V I N G O N T H E R O A D S tarting and Driving Make sure the seat is installed properly. Make sure the tiller has been secured properly. Fold down the armrests so you can rest your arms on them. Turn the power switch to “ON”. -
Page 16: Battery Charging And Care
6 . B A T T E R Y C H A R G I N G A N D C A R E 6.1 CHARGING THE BATTERY M ethod 1: On board Charging (see photograph overleaf) Follow the procedure below step by step: 1. -
Page 17: Battery
6 . B A T T E R Y C H A R G I N G A N D C A R E C harging Hours The charging duration is about 6 hours. To ensure optimum performance a 10-hour charge is recommended. -
Page 18: Replacing Batteries
6 . B A T T E R Y C H A R G I N G A N D C A R E ♦ The batteries carry a eight-month of manufacturer's warranty. This warranty only covers issues relating to manufacturing faults, and not faults relating to failure to recharge the batteries as instructed above. - Page 19 6 . B A T T E R Y C H A R G I N G A N D C A R E N Warning 1. The wiring system and charger are well situated in the battery pack while being assembled in plant.
-
Page 20: Inspection And Maintenance
7 . I N S P E C T I O N A N D M A I N T E N A N C E 7.1 INSPECTION • Clean the scooter with a damp cloth and dust down approximately once a week to preserve the appearance of the scooter. -
Page 21: Battery And Tire
7 . I N S P E C T I O N A N D M A I N T E N A N C E 7.3 BATTERY, FUSE AND TIRE B attery Refer to the section entitled “6. BATTERY CHARGING AND CARE”. F use If the battery charger is turned on and no LED’s are lit, check the fuse. -
Page 22: Moving About
7 . I N S P E C T I O N A N D M A I N T E N A N C E 7.5 MOVING ABOUT ♦ Switch off the power with power key before moving. Always dismount from the scooter before moving. ♦... - Page 23 7 . I N S P E C T I O N A N D M A I N T E N A N C E Knob lock N Warning Always unplug the rear section electrical connector before separating the two sections.
-
Page 24: Assembly
7 . I N S P E C T I O N A N D M A I N T E N A N C E 7.7 ASSEMBLING THE SCOOTER & Suggestion The assembly process is essentially the disassembly process in reverse. First study the text and photographs in the disassembly procedure before re-assembling the scooter. -
Page 25: Troubleshooting
8 . T R O U B L E S H O O T I N G T ROUBLE SHOOTING If you have trouble with your scooter, you can inspect the following before taking you scooter to the dealer. If you cannot solve the problem, contact your dealer for assistance. Problem Symptom Remedy... -
Page 26: Specification
9 . S P E C I F I C A T I O N S P E C I F I C A T I O N S Model PHOENIX HD 3 PHOENIX HD 4 Dimension (L x W x H mm) 980×550×1010mm 1055×550×965mm (L x W x H inch) -
Page 27: Warranty
1 0 . W A R R A N T Y 9.1 WARRANTY There is a limited lifetime warranty on your new Bobcat Scooter. The warranty covers the scooter for parts only during this period. For more detail, please see the Warranty Conditions below. Warranty Conditions: Any work or replacement part installation must be carried out by an authorized Drive dealer / service agent. - Page 28 To ensure the correct after sales service and warranty service support, please write down the vehicle identification number that is stuck on the back right-hand side of the frame. Model PHOENIXHD3/PHOENIXHD4 Motor serial # Key # ……………………………………………………………………………………………………………………………… Warranty Application Form...
- Page 29 Drive Medical Design & Manufacturing 99 Seaview Boulevard Port Washington, NY Tel: (516) 998-4600 Fax: (516) 566-2043 www.drivemedical.com...
Need help?
Do you have a question about the PHOENIXHD3 and is the answer not in the manual?
Questions and answers
Can we put it on one speed permanently - for safety?
No, the Drive Medical PHOENIXHD3 cannot be set to one permanent speed. The speed can be adjusted using the Speed Dial, and the actual speed is controlled by how far the speed control lever is pushed.
This answer is automatically generated