
Related Manuals for FujiFilm Xerox Phaser 6270


Summary of Contents for FujiFilm Xerox Phaser 6270
-
Page 1: User Guide
Xerox Phaser 6270 Photobook Printer User Guide Xerox Phaser 6270 Photobook Printer is distributed and supported by FUJIFILM and FUJIFILM Corporation. - Page 2 Xerox is a registered trademark of Fuji Xerox Co., Ltd. or Xerox Corporation. Phaser is a registered trademark of Xerox Corporation. All Xerox, FUJIFILM and Fuji Xerox product names are either registered trademarks or trademarks of Xerox Corporation, FUJIFILM Corporation and Fuji Xerox Co., Ltd.
-
Page 3: Preface
Preface Thank you for purchasing the Xerox Phaser 6270 Photobook Printer. This guide explains how to operate this printer and the precautions that must be followed during operation. To get the most out of this printer and to use it effectively, be sure to read this guide before use. -
Page 4: Xerox Phaser 6270 Photobook Printer Features
Controls access to the printer by the Authentication feature. Borderless Prints Available • Borderless prints without any post production trimming. (To make Borderless Prints, Fuser Unit and Belt Unit must be used Borderless spec one) Xerox Phaser 6270 Photobook Printer Features... -
Page 5: Table Of Contents
Contents Preface......................3 Xerox Phaser 6270 Photobook Printer Features ..........4 Contents......................5 Types of Manuals....................8 Using This Guide ....................9 Safety Notes ....................11 Illegal Copies and Printouts ................19 Printer Environment Settings..............20 Supported Operating Environments ..............20 Setting the Network Environment ................ - Page 6 Setting the Paper Type and Size on the Control Panel ......... 58 Notes on Loading Envelopes ................. 61 Extending the Output Tray Extension ..............61 Control Panel Menus................62 Overview of the Menus..................62 Menu Configuration ....................62 Changing the Settings ...................63 Description of Menu Items..................
- Page 7 Adjusting the Color Registration ................139 Printing the Color Registration Chart ..............139 Determining the Adjustment Values ..............140 Entering the Adjustment Values ................140 Adjusting the Image Transfer Voltage ..............142 Adjusting the Fuser Temperature ................ 144 7.10 Adjusting the Altitude................... 146 7.11 Cleaning the Printer.....................
-
Page 8: Types Of Manuals
Types of Manuals The following manuals are included with the Xerox Phaser 6270 Photobook Printer. Setup Guide Provides step-by-step instructions on how to set up your printer. User Guide (PDF) (This guide) Describes how to get ready to print and set various print features. It also covers the control panel menus, troubleshooting tips, and maintenance information. -
Page 9: Using This Guide
Using This Guide Organization This guide is organized into the following chapters. The summary of each chapter is as follows: Note • Software for Xerox Phaser 6280 Photobook is used for this machine, instead of software for Xerox Phaser 6270 Photobook. Thus this printer is displayed as Xerox Phaser 6280 Photobook Printer or Phaser 6280 Photobook Printer on the software screen. - Page 10 Conventions In this guide, personal computers and workstations are collectively called "computers". The following terms are used throughout this guide: Important : Important information that must be read and followed. Note : Additional information that merits emphasis. Refer to " "...
-
Page 11: Safety Notes
Safety Notes Before using this product, read "Safety Notes" carefully for safety use. This product and recommended supplies have been tested and found to comply with strict safety requirements including safety agency approvals and compliance with environmental standards. Follow the following instructions for safety use. - Page 12 earthed adapter plug to connect the product to the electrical outlet that has no earth connection terminal. When cleaning this product, always switch off and unplug it. Access to a live machine Improper connection of a grounding interior may cause electric shock. conductor may cause electric shock.
-
Page 13: Machine Installation
Machine Installation Keep the minimum clearance as follows for ventilation and an access to the power plug. Unplug the product if an abnormal condition is noted. Do not locate this product where people might step on or trip over the power cord. Friction or excessive pressure may generate heat and eventually cause electric shock or a fire accident. -
Page 14: Operational Safety
When the product is left in a chilly room and Do not use conductive paper such as the room is rapidly warmed up by heater, origami paper, carbonic paper or dew condensation may form inside the conductively-coated paper. When paper product and cause a partial deletion on jam occurs, it may cause short-circuit and printing. - Page 15 Consumable A ground fault interrupter is embedded in this product. If current leakage occurs, the ground fault interrupter automatically cuts off power circuit to prevent electric shock Store all consumables in accordance with and a fire accident. The ground fault the instructions given on its package or interrupter is normally in the Reset position container.
-
Page 16: Warning And Caution Labels
Warning and Caution Labels Be sure to follow the warning and caution labels placed on the machine. Do not touch areas with labels indicating high voltage or temperature. This can cause an electric shock or burn. Always follow all warning instructions marked on or supplied with this product. To avoid the risk of burn injuries and electric shock, never touch the area with the "High Temperature"... - Page 17 According to the test procedures defined by Blue Angel RAL UZ-122: 2006 Appendix 2, the test was performed under the condition of monochrome copying, using the toner type Xerox Phaser 6270 Photobook Printer Toner cartridge (Black) that is recommended for this product.
- Page 18 This device is in conformity with the provisions of the EMC Directive (2004/ 108/ EC) and Low Voltage Directive (2006/ 95/EC). Information for traceability in Europe Manufacturer: FUJIFILM Corporation Address, City: 7-3, Akasaka 9-Chome, Minato-ku, Tokyo Country: JAPAN Authorised representative in Europe: FUJIFILM EUROPE GMBH Address, City: Dusseldorf Heesenstrasse 31, 40549 Country: Germany Safety Notes...
-
Page 19: Illegal Copies And Printouts
Illegal Copies and Printouts Copying or printing certain documents may be illegal in your country. Penalties of fines or imprisonment may be imposed on those found guilty. The following are examples of items that may be illegal to copy or print in your country. •... -
Page 20: Printer Environment Settings
Supported Operating Environments The Xerox Phaser 6270 Photobook Printer can be used as both a local and a network printer. When used as a local printer, the printer is connected directly to a computer. When used as a network printer, the printer is connected to a computer over a network. - Page 21 Supported Operating Systems and Operating Environments Note • The supported operating systems are subject to change without prior notice. Visit our web site for the latest information. Connection Local Network Method Port Port Name NetWare 9100 TCP/ TCP/ TCP/ TCP/ TCP/ TCP/...
-
Page 22: Setting The Network Environment
Setting the Network Environment This section explains how to install your printer in a TCP/IP environment. When installing the printer in a different environment, refer to the ‘CD-ROM Documentation (HTML)’ on the CD-ROM of the Driver CD Kit. Setting the IP Address To use TCP/IP protocol, you must configure an IP address for the printer. - Page 23 Example of the [Printer Settings] list If an IP address is listed, skip the following procedure. If an IP address is not listed, or if you want to change the current IP address, configure the setting using the following procedure. ...
- Page 24 Press the < > or <Eject/Set> button to IPv4 accept the selection. Get IP Address [Get IP Address] is displayed. Press the < > or <Eject/Set> button to Get IP Address accept the selection. DHCP / Autonet * The current setting is displayed. Press the <...
- Page 25 To Set the Subnet Mask/Gateway Address 17. Press the < > button until [Subnet Mask] IPv4 is displayed. Subnet Mask 18. Press the < > or <Eject/Set> button to Subnet Mask accept the selection. 000.000.000.000* The current subnet mask is displayed. 19.
- Page 26 Setting the IP Address in IPv6 Mode The printer supports IPv6 addresses. You can use IPv6 addresses with this printer under an IPv6 network environment. By default, [IP Mode] of this printer is set to [Dual Stack] (in Dual Stack mode, IPv4 and/or IPv6 is automatically detected).
- Page 27 From the menu on the left, select [TCP/IP] under [Protocol Settings]. By default, [IP Mode] is set to [Dual Stack]. If [IPv4] is selected for [IP Mode], change it to [Dual Stack] or [IPv6] depending on your network environment. Under [IPv6], select the [Enabled] check box for [Enable Manual Address]. Then enter the IP address in the [IP Address] box.
- Page 28 Press the <Menu> button on the control Menu panel to display the menu screen. Report / List Press the < > button until [Admin Menu] is Menu displayed. Admin Menu Note • If you went past the desired item, return to the item by pressing the <...
-
Page 29: Configuring The Printer Using Centreware Internet Services
Configuring the Printer Using CentreWare Internet Services CentreWare Internet Services is a service that allows you to monitor or remotely configure the printer using a web browser when the printer is on a TCP/IP network. Some of the control panel settings can be set also on the service's [Properties] tab. Note •... -
Page 30: Setting Up The Printer
Setting Up a Web Browser When accessing CentreWare Internet Services, we recommend you to set your web browser: • not to use a proxy server when specifying the printer's IP address. • to enable JavaScript. Note • If you access CentreWare Internet Services using a proxy server, the response from the service may be slow or the window of the service may not be displayed. - Page 31 CentreWare Internet Services Setting Items The followings are the main features on each tab of CentreWare Internet Services. Tab Name Feature Status • General Displays the printer's product name, IP address, and status. • Printer Status Displays the sizes and remaining volumes of the paper loaded in the paper trays, the status of the output tray and front cover, and the remaining life of consumables.
-
Page 32: Using Centreware Internet Services
Using CentreWare Internet Services Follow these steps when accessing CentreWare Internet Services. Start your computer and launch a web browser. In the URL field, enter the IP address or URL of the printer, and press the <Enter> key. The top page of CentreWare Internet Services is displayed. •... -
Page 33: Installing A Print Driver
Installing a Print Driver To print from your computer, install a PCL print driver using the CD-ROM of the Driver CD Kit. The installation procedure varies depending on how your computer is connected to the printer. For installation instructions, refer to the ‘CD-ROM Documentation (HTML)’ on the CD-ROM. Uninstalling a Print Driver and Other Software ... -
Page 34: Basic Operation
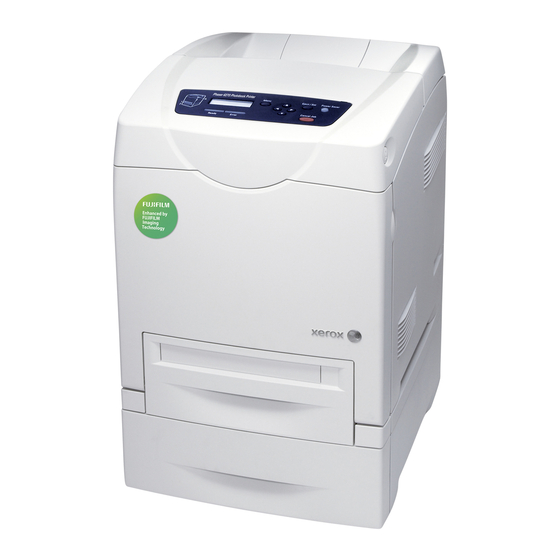
Basic Operation Main Components and Functions Main Unit Front View Name Description Front cover Open this when replacing print cartridges and removing jammed paper. Press the side button to open this cover. Output tray Print jobs are output with the printed side facing down. Control panel Consists of operation buttons, indicators, and the display. -
Page 35: Rear View
Rear View Name Description Ground fault interrupter Cuts off the power circuit automatically in the event of current leakage. Power cord connector Connect the power cord here. USB port Connect the USB cable here. Network connector Connect the network cable here when connecting the printer to a network. Ventilation hole Air intake to prevent the interior of the printer from heating up. -
Page 36: Control Panel
Name Description Duplex unit Enables 2-sided printing. Control Panel Name Description LCD display Displays the setting items, machine status, and messages. Refer to • "Control Panel Display" (P. 37) <Menu> button Press to move to the menu operation. <Eject/Set> button Press to set the menu values. -
Page 37: Control Panel Display
Control Panel Display There are two types of screens: Print screen (for displaying printer status) and Menu screen (for configuring settings). Note • The message displayed differs according to the setting status. Print Screen The Print screen appears when the printer is printing or waiting for data. The following contents are shown on the screen. -
Page 38: Switching On/Off The Power
Switching On/Off the Power Switching On the Power Press the power switch of the printer to the <I> position. When the power is on, [Please wait...] is displayed on the control panel. Check that this display changes to [Ready to Print]. Important •... -
Page 39: About The Ground Fault Interrupter
About the Ground Fault Interrupter The printer has a ground fault interrupter on its rear left side. In the event of current leakage, the ground fault interrupter will automatically cut off the power circuit to prevent any current leakages or fire from occurring. If the interrupter trips (if the <RESET>... -
Page 40: Setting/Exiting The Power Saver Modes
Setting/Exiting the Power Saver Modes The printer is equipped with a low power mode and a sleep mode to reduce power consumption when it is left idle. When no print data is received for 3 minutes, the printer will enter the low power mode. When no data is received for a further 2 minutes (a total of 5 minutes lapse (default) since the last receiving data), it will enter the sleep mode by default. -
Page 41: Cancelling/Checking A Print Job
Cancelling/Checking a Print Job Cancelling a Print Job Print jobs can be cancelled either from your computer or on the control panel. Cancelling a Print Job being Processed on a Computer Double-click the printer icon on the task bar at the lower right corner of your monitor. -
Page 42: Print
Print This chapter describes various printing methods using a PCL print driver. Printing from a Computer This section outlines the basic procedure for sending print jobs from Windows applications. The following procedure uses Windows XP WordPad as an example. (The procedure may vary depending on the application being used.) On the [File] menu of your application, click [Print]. - Page 43 Print Features in the Properties Dialog Box The following introduces some of the print features available on each tab of the print driver. For details on each feature, refer to the online help provided for the print driver. Feature Paper / Output •...
-
Page 44: Printing On Envelopes
Printing on Envelopes This section explains how to print on envelopes and transparencies. Loading Envelopes/Transparencies Envelopes and transparencies can be loaded in the bypass tray. Note • For details on the procedure to load paper in bypass tray, refer to "Loading Paper in the Bypass Tray" (P. -
Page 45: Printing On Envelopes/Transparencies
Loading Transparencies Important • Transparencies with a white frame and full-color transparencies cannot be used. After carefully fanning a small stack of transparencies, load them into the bypass tray with the side to be printed facing down. Load transparencies a few at a time. Slide the paper guides to the size of the transparencies. - Page 46 From [Paper Size], select the size of the original paper to be printed. Click the [Layout] tab, and from [Fit to New Paper Size], select the appropriate paper size. As necessary, click [Booklet / Poster / Mixed Document / Rotation], and in the displayed dialog box, set [Image Rotation 180 Degrees].
-
Page 47: Printing On Non-Standard Size Paper (Including Borderless Print)
Printing on Non-standard Size Paper (Including Borderless Print) This section explains how to print on custom size paper such as long paper using the PCL print driver. Custom size paper can be loaded in each tray. The paper sizes that can be selected on this printer are as follows: ... - Page 48 Note • On Windows XP, Windows Server 2003, Windows Vista, Windows Server 2008, Windows Server 2008 R2 or Windows 7, only users with administrator level access can change the settings. Users without administrator level access can only view the settings. •...
-
Page 49: Printing On Non-Standard Size Paper
Click [OK] to close the [Custom Paper Size] dialog box. Click [OK] to close the Properties dialog box. Printing on Non-standard Size Paper The following procedure uses Windows XP WordPad as an example. Important • Make sure to set paper sizes correctly. Setting wrong paper sizes can cause printer failure. Note •... -
Page 50: How To Make Borderless Print
Click [OK] to close the [Printing Preferences] dialog box. Click [Print] in the [Print] dialog box to start printing. How to make Borderless print Set Custom paper size for borderless print, select "Extended" at printer driver, select the special print size at printer driver. As written above (Registering Non-standard Size Paper), set special print size for Borderless prints. -
Page 51: Paper
Paper About Paper Using apper that is not appropriate for the printer can cause paper jams, image quality problems, or printer failure. To use the printer at its best performance, use the suggested paper that is recommended here. For detail information about paper and media, contact your local dealer. -
Page 52: Unsupported Paper
Important • Be sure to set the correct paper sizes, paper types, and paper trays on the print driver or control panel when printing. Loading paper that is not supported or defining wrong settings can cause paper jams. • Moisture, such as water, rain, and humidity can cause print images to come off from paper. For more information, contact your local dealer. - Page 53 • Label paper with some labels already peeled off • Tack film • Water transfer paper • Textile transfer paper 4.1 About Paper...
-
Page 54: Storing And Handling Paper
Storing and Handling Paper Paper stored in poor conditions can get deteriorated, resulting in paper jams, curled paper, image quality problems, or printer failure. Use the following guidelines when storing paper. Paper Storage Environment • Temperature: 10 - 30°C • Relative humidity: 30 - 65% Paper Storage Guidelines •... -
Page 55: Loading Paper
Loading Paper Loading Paper in the Paper Tray This section describes how to load paper in the tray and the 550 sheet feeder. All trays are loaded the same way. Important • Do not remove the tray during printing. It may cause a paper jam. Pull the tray out of the printer until it stops. -
Page 56: Loading Paper In The Bypass Tray
Important • Do not exceed the maximum fill line in the tray. Overfilling the tray may cause paper jams. Slide the width guides until they rest lightly against the edge of the print media stack. Insert the tray into the printer, and push until it stops. - Page 57 Gently pull open the bypass tray cover. Slide the width guides to the edge of the tray. The width guides should be fully extended. Insert all media face down and top edge first into the bypass tray. Important • Do not force the paper. Slide the width guides until they rest lightly against the edge of the paper stack.
-
Page 58: Setting The Paper Type And Size On The Control Panel
Setting the Paper Type and Size on the Control Panel When loading paper in the paper tray or the 550 sheet feeder, it is necessary to set the paper type on the control panel. When loading paper in the bypass tray, set the paper size and type on the print driver when printing. -
Page 59: Setting The Paper Size
Press the < > button until the correct Paper Type paper type is displayed for the loaded Heavyweight 1 paper. (Example: Heavyweight 1) Press the <Eject/Set> button to confirm Paper Type your selection. Heavyweight 1 * Press the <Menu> button to return to the print screen. - Page 60 Press the <Menu> button to return to the print screen. 4 Paper...
-
Page 61: Notes On Loading Envelopes
Notes on Loading Envelopes To load envelopes in the bypass tray, insert the envelopes with the flaps closed. The print side must be facing down. You can load envelopes up to the maximum fill line in the tray at one time. Sometimes the wrinkle might be generated on envelopes. -
Page 62: Control Panel Menus
Control Panel Menus Overview of the Menus Menu Configuration The menus that can be accessed from the control panel are as follows: Menu Content Report / List Use the [Report / List] menu to print various types of reports and lists. Meter Readings Use the [Meter Readings] menu to display the number of printed pages to date on the control panel. -
Page 63: Changing The Settings
Changing the Settings Basic Procedure To display a menu screen or to move up and down the menus, use the following buttons on the control panel. Press to display the menu screen (print screen) (menu screen) <Menu> Ready to Print Menu Report / List Press to display the menu items in the same hierarchy... -
Page 64: Setting Example
Setting Example: Changing the Power Saver Mode Setting Use the following procedure to set a value on the control panel. In this example, we will set [Low Power Timer] (an interval at which the printer switches to the Low Power mode) to [60 Minutes]. Press the <Menu>... -
Page 65: Description Of Menu Items
Description of Menu Items This section describes the items that can be configured on each menu. Note • The menus and items to be displayed may vary depending on your printer model and its configuration. Report / List Prints various types of reports and lists. Note •... -
Page 66: Meter Readings
Meter Readings Displays the number of printed pages on the control panel. The meter is divided according to the color modes. Note • For information on how to check the number of printed pages, refer to "7.3 Checking Printed Pages" (P. 119). - Page 67 Item Description TCP/IP Specifies the settings to use the TCP/IP protocol. IP Mode Sets the IP (Internet Protocol) version to be used for the communication between the printer and clients. • [Dual Stack] (default) Enables both IPv4 and IPv6 communications. •...
- Page 68 Item Description Protocol Select [Enable] when using the protocol. When [Disable] is selected, the protocol cannot be activated. • [LPD] (default: [Enable]) • [Port9100] (default: [Enable]) • [IPP] (default: [Enable]) • [SMB (TCP/IP)] (default: [Enable]) • [SMB (NetBEUI)] (default: [Enable]) •...
-
Page 69: Usb Settings
Item Description Adobe Protocol Sets the PostScript communication protocol. • [Auto] (default) Automatically detects the PostScript communication protocol. • [Standard] Select this when the communication protocol is in ASCII format. • [BCP] Select this when the communication protocol is in binary format. •... -
Page 70: System Settings
System Settings [System Settings] menu is used to make the printer operation settings such as for alarm and Power Saver mode. Item Description Low Power Timer Sets the amount of time before the printer enters the Low Power mode. Specify the value in 1 minute increments. - Page 71 Item Description Job Time-out Sets the amount of time the printer waits for a print job. If a time-out occurs during data reception, the printer stops the reception and prints the data that has been received. • [5 Seconds] to [300 Seconds] (default: [30 Seconds]) Specify the time-out value in 1 second increments.
- Page 72 Item Description Substitute Tray Sets whether to print on paper loaded in another tray when there is no paper left in the tray selected by the auto tray selection feature. • [Off] (default) Select this not to replace paper but display a message prompting you to load paper. •...
- Page 73 Item Description Odd Page 2Sided For duplex printing, specifies how to print the last page when the total number of pages is an odd number. • [1 Sided] (default) The simplex paper feed mechanism works for the last page. Thus, the paper orientation of the last page is not the same as others.
-
Page 74: Maintenance Mode
Maintenance Mode Use this menu to initialize the NVM, or to adjust the configurations for each type of paper. Item Description F/W Version Displays the current firmware version. Note • You can not specify the firmware version using this feature. Adjust PaperType Sets the paper types of plain paper and labels. - Page 75 Item Description Initialize NVM Initializes the settings stored in the NVM except for the network settings. The NV memory is nonvolatile memory that retains the settings of the printer even when its power is switched off. After executing this function and restarting the printer, all the menu options are reset to their default values.
- Page 76 Item Description Image Enhance Sets whether to perform image enhancement. Image enhancement is a feature that makes the boundary line between black and white smoother to decrease jags and enhance the visual appearance. • [On] (default) • [Off] HexDump Sets whether to print the data sent from a computer in ASCII codes corresponding to the hexadecimal notation format in order to check the data contents.
- Page 77 PostScript Specifies the settings related to PostScript. Note • You need to restart the printer to activate the new settings. After making the settings, switch the printer off and then on again. Item Description PS Error Report Sets whether to print an error report in case of a PostScript error. •...
-
Page 78: Panel Settings
Panel Settings Specifies whether to limit menu operations with a password to avoid changing the printer settings by accident. Item Description Panel Lock Sets whether to limit the menu operations with a password. Selecting [On] requires the operator to enter the password. If [On] is set, then you must enter the password to use the [Admin Menu]. -
Page 79: Tray Settings
Tray Settings You can set the paper size and paper type for the bypass tray and paper tray. Bypass Tray Specifies the settings for the paper loaded in the bypass tray. Note The paper type and size settings for [Bypass Tray] are available only when the [Bypass Mode] is set to [Panel Specified]. - Page 80 Tray 1 / Tray 2 Specifies the settings for the paper loaded in the paper tray. Note [Tray 2] appears only when 550 sheet feeder is installed. Item Description Paper Type Sets the type of the paper loaded in the paper tray. •...
-
Page 81: Troubleshooting
Troubleshooting If you encounter a problem while using this printer and have trouble solving the problem, see if any of the symptoms in the following pages matches your problem. If your problem is described in the following pages, apply the suggested solution provided for the problem. -
Page 82: Paper Jams In The Bypass Tray
Note • The labels with the following symbol provide jam clearance procedure. Use the labels also as guides when clearing paper jams. Paper clearance instruction symbol Paper Jams in the Bypass Tray Follow the procedure below to remove paper jammed in the bypass tray. Pull the jammed paper out of the bypass tray, and remove any remaining paper from the bypass tray. -
Page 83: Paper Jams In The Paper Tray
Carefully remove any jammed paper in the printer. Confirm that there are no scraps of paper left inside. Close the front cover. Insert the tray into the printer and push until it stops. Important • Do not use excessive force on the tray. Doing so could damage the tray or the inside the printer. Paper Jams in the Paper Tray Follow the procedure below to remove paper jammed in the paper tray. -
Page 84: Paper Jams At The Fuser Unit
If there is jammed paper remaining inside the printer, pull it out carefully to avoid tearing it. Press the side button and open the front cover. Confirm that there are no scraps of paper remaining inside the printer. Close the front cover. Insert the tray into the printer, and push until it stops. -
Page 85: Paper Jams At The Duplex Unit
Lift the levers at both ends of the fuser unit, and remove the jammed paper. If the paper is torn, remove any scraps of paper remaining inside the printer. Important • The fuser is hot. Do not touch, doing so may cause burns. - Page 86 Carefully pull out the jammed paper from the duplex unit. If jammed paper cannot be found, go to the next step. Hold the knobs of the transfer belt unit as shown in the following illustration and open the unit fully. Remove the jammed paper.
- Page 87 Remove all jammed and/or creased paper from the tray. Pull the jammed paper out carefully to avoid tearing it. If the paper is torn, confirm that there are no scraps of paper remaining inside the printer. Press the side button and open the front cover.
-
Page 88: Hardware Problems
Hardware Problems (Power Failure, Abnormal Noise, etc.) Symptom Cause/Remedy The printer will not switch on. Is the power switched on? Switch the power on by pressing the power switch to the <|> position. Is the power cord firmly plugged into the power outlet? Switch the power off, plug the power cord firmly into the power connector or power outlet, and switch the power back on. -
Page 89: Printing Problems
Printing Problems Symptom Cause/Remedy The <Error> indicator is An error that cannot be resolved by users occurred. Copy down the error message or blinking. error code displayed on the control panel, switch the power off, unplug the power cord from the power outlet, and contact your local dealer. The <Error>... -
Page 90: Print Quality Problems
Print Quality Problems Symptom Cause/Remedy Output is too light. The paper is damp. Load fresh paper. (faded or unclear) The paper is not appropriate for the printer. Load appropriate paper. Refer to • "Supported Paper" (P. 51) The feed roller is damaged or deteriorated. The feed roller unit may need replacement depending on its condition. - Page 91 Symptom Cause/Remedy Streaks appear inside or The paper that had been stored unwrapped for an extended period of time (especially in outside of halftone images. low humidity condition) may be used. Load fresh paper. Shadow is printed around The paper is not appropriate for the printer. Load appropriate paper. solid-filled images.
- Page 92 Symptom Cause/Remedy Output is partially blanked-out. The paper is not appropriate for the printer. Load appropriate paper. Vertical white streaks appear on output. Refer to • "Supported Paper" (P. 51) The paper is damp. Load fresh paper. Print cartridges are not installed correctly. Correctly install them.
- Page 93 Symptom Cause/Remedy Printed image or texts wear off The fuser temperature may not be set properly. Adjust the fuser temperature on the quickly. control panel. Double printing with appropriate margins Refer to • "7.9 Adjusting the Fuser Temperature" (P. 144) Ghost The paper type is not set correctly.
- Page 94 Symptom Cause/Remedy Color image files are printed in Isn't the [Paper / Output] tab > [Output Color] set to [Black & White]? monochrome. Change the [Output Color] setting to [Color]. Refer to • Online help for the print driver Photos are blurred. Isn't the original image blurred? Adjust the sharpness of the original image and try printing it again.
-
Page 95: Paper Feeding Problems
Paper Feeding Problems Symptom Cause/Remedy Paper does not feed properly. Is the paper loaded correctly? Reload the paper correctly. Before loading labels or envelopes, fan them to make sure Paper jams occur. that they are separated. If using coated paper, load one sheet at a time. Multiple sheets are fed at once. -
Page 96: Error Messages (In Alphabetical Order)
Error Messages (in Alphabetical Order) This section describes the messages displayed on the control panel. Messages About Consumables Message Condition/Reason/Action 010-317 The fuser unit is not installed. Install the fuser unit. Install Fuser Refer to • "Replacing the Fuser" (P. 109) 093-NNN Sealing tape is still attached to the XXX print cartridge. -
Page 97: Messages About The Printer And Other Items (In Alphabetical Order)
Message Condition/Reason/Action Ready to print It is nearly time to replace the fuser unit. Purchase a new fuser unit. Fuser Unit Refer to • "Replacing the Fuser" (P. 109) Ready to print Keep Printing Ready to print It is nearly time to replace the belt unit. Purchase a new belt unit. Belt Unit Refer to Ready to print... - Page 98 Message Condition/Reason/Action Invalid Job When the configuration of the printer on the print driver does not conform to the Press SET printer you are using, this message appears. • Press the <Eject/Set> button to clear the message, cancel the current print job,and conduct the next print job, if any.
- Page 99 Message Condition/Reason/Action PDL Error An error relating to PDL emulation has occurred. Press SET • Press the <Eject/Set> button to clear the message, cancel the current print job,and conduct the next print job, if any. • Press the <Cancel Job> button to cancel the print job. Disk Full The printer memory is full and cannot continue processing the current print job.
- Page 100 Message Condition/Reason/Action Wrong Password The password of the PDF file and that set on the printer do not match. Press SET Press the <Eject/Set> button to cancel the print job. Set the correct password on the control panel, and try printing again. Refer to •...
-
Page 101: Network-Related Problems
Network-related Problems For information on how to resolve network-related printing problems, refer to the ‘CD-ROM Documentation (HTML)’ on the CD-ROM of the Driver CD Kit. The following are the problems you may encounter when using CentreWare Internet Services, StatusMessenger. When an error message or error code is displayed, refer to "6.6 Error Messages (in Alphabetical Order)"... - Page 102 Symptom Cause/Remedy The [Refresh] button does not Is your operating system or web browser supported by CentreWare Internet work. Services? The contents in the right frame Refer to "Configuring the Printer Using CentreWare Internet Services" (P. 29) to see does not change even when a if your operating system or web browser is supported by the service.
-
Page 103: Statusmessenger Problems
StatusMessenger Problems Symptom Cause/Remedy Cannot check the printer's status Check to see if [Properties] > [Port Status] > [StatusMessenger] on CentreWare via e-mail. Internet Services is set to [Enabled]. (StausMessenger) Check the following settings under [Properties] > [E-mail] on CentreWare Internet Services. -
Page 104: Ipv6 Environment Printing Problems
IPv6 Environment Printing Problems Symptom Cause/Remedy A Windows shared printer cannot be Register the computer name of this printer in the Windows used from Windows Vista in an IPv6 Vista hosts file. network environment that does not Example Path: have a DNS server. Register in this file: C:\Windows\system32\driver\etc\hosts Cannot perform IPv6 communication Run under IPv4. -
Page 105: Non-Genuine Mode
Non-genuine Mode When toner within a print cartridge is empty, the [Replace XXX Print Cartridge](XXX: Yellow, Magenta, Cyan, or Black) message appears. When you want to use the printer in Non-genuine mode, use the following procedure to program the mode and replace the print cartridge. Important •... -
Page 106: Maintenance
Maintenance Replacing Consumables If a message to prompt you to replace xxx print cartridge is displayed on the control panel, replace the indicated cartridge. Note • About the possible number of pages that can be printed with a print cartridge, refer to "A.3 Life of Consumables"... - Page 107 • Do not reuse print cartridges that have been removed from the printer. Doing so may cause degradation of print quality, or the toner may spill onto print jobs. • Do not shake or pat the removed print cartridges after you remove it. The remaining toner may spill out.
- Page 108 Hold both knobs of the print cartridge with the label facing up and slide the cartridge into the printer as far as it can go. Repeat steps 4, 5, and 6 to install the other print cartridges. Remove the cap of the installed print cartridge.
-
Page 109: Replacing The Fuser
Replacing the Fuser This section describes procedures for replacing the fuser. Caution on Handling the Fuser When handling the fuser, take note of the following points: CAUTION • Fuser Safety When removing the fuser unit, always switch off first and wait for 30 minutes until it cools off. - Page 110 Release the levers at both ends of the fuser. Hold both sides of the installed fuser, and pull it inward slightly and then upward to remove. Unpack a new fuser and remove the tag from the new fuser. With the connector of the fuser toward the slot, lower the fuser and then push the connector into the slot firmly.
-
Page 111: Replacing The Feed Roller
10. Close the chute gate. 11. Close the front cover. Replacing the Feed Roller This section describes procedures for replacing the feed roller. Caution on Handling the Feed Roller When handling the feed roller, take note of the following points: Important •... - Page 112 Hold the knobs of the feed roller cover and open the cover. Turn the feed roller until the roller hook can be seen. Pull the feed roller hook out of the notch in the axle, and then slide the feed roller to the right.
- Page 113 Close the feed roller cover until it clicks. Replace the tray into the printer. Replacing the Feed Roller in the Printer Pull the tray out of the printer until it stops. Hold the tray with both hands, lift the front slightly, and remove it from the printer.
- Page 114 Repeat steps 3-4 and remove the other feed roller from inside of the printer. Align the hole of the new feed roller with the axle. Slide the feed roller along the axle so that the protrusions fit completely into the slots on the axle.
-
Page 115: Replacing The Belt Unit
Replacing the Belt Unit This section describes procedures for replacing the Belt Unit. Caution on Handling the Belt Unit When handling the Belt Unit, take note of the following points: • Avoid bright light and try to finish the replacement within 5 minutes. •... - Page 116 Insert the left knob of the Belt Unit into the hole, and then align the other knob with the groove and push down on the right side of the Belt Unit. Close the Belt Unit by pulling it down until it clicks.
-
Page 117: Printing The Reports/Lists
Printing the Reports/Lists This section describes various reports/lists that can be printed from the printer. Types of the Reports/Lists The printer can print the following reports/lists in addition to print jobs from its clients. Report/List Name Description (Name on the Control Panel) Printer Settings Lists the total number of prints, the printer's hardware configuration, network (Printer Settings) - Page 118 Note • The reports/lists are printed on A4 size paper. Press the <Menu> button to display the Menu menu screen Report / List Press the < > or <Eject/Set> button to Report / List accept the selection. Printer Settings [Printer Settings] is displayed. Press the <...
-
Page 119: Checking Printed
Checking Printed Pages The printer can count the number of printed pages/sheets by different categories such as output color and computer. Checking the Meter Reading (Meter) The total number of prints can be viewed on the control panel. Meter 1 Displays the total number of color prints. -
Page 120: Checking The Meter Reading By Computer (Meter Report)
Checking the Meter Reading by Computer (Meter Report) The [Meter Report] shows the number of printed page/sheets for each computer (job owner). The [Meter Report] can be printed from the control panel. Note • When the Authentication and Auditron Administration features are enabled, you can print the [Auditron Report] instead of the [Meter Report]. -
Page 121: Monitoring/Managing The Printer On A Web Browser
Monitoring/Managing the Printer on a Web Browser When your printer is installed in a TCP/IP environment, you can monitor or remotely configure the printer using a web browser on a networked computer. This feature is called CentreWare Internet Services. CentreWare Internet Services can be used also to check the status of consumables and the paper level of the paper tray. -
Page 122: Security Features
Security Features This section explains various security features of the printer and how to configure them. The information in this section is intended for the system administrator of the printer. Overview of the Security Features The following table lists the security features of the printer. For details on each feature, refer to the reference pages in the table. -
Page 123: Ssl Data Encryption For Http Communication
SSL Data Encryption for HTTP Communication This feature is not supported on the model available in China. Enabling SSL/TLS server communication allows you to encrypt HTTP communication between the printer and clients over a network. There are two ports that support HTTP communication: internet service port and IPP port. This feature allows you to encrypt information exchanged between the printer and CentreWare Internet Services and print data sent to the printer using an IPP port. - Page 124 On the displayed page, set [Public Key Size] and click the [Generate Certificate] button. When a message is displayed to inform your request is successfully proceeded, click the [Back] button. Select the [Enabled] check box for [SSL/TLS Server Communication]. Set [SSL/TLS Server Communication Port Number]. Note •...
- Page 125 Accessing CentreWare Internet Services when Data Encryption is Enabled When data encryption is enabled, enter "https" instead of "http" before the address when accessing CentreWare Internet Services. • Example of IP address https://192.168.1.100/ • Example of internet address https://xxx.yyyy.zz.vvv/ Note •...
- Page 126 Enabling Data Encryption To encrypt print data sent to the printer, you must use an IPP port on the printer. When the printer's IPP port is disabled (the default is [Enable]), enable the port. Then, install a print driver on your computer and set the output port to IPP. The following describes how to install a print driver on your computer.
-
Page 127: Controlling Data Reception By Ip Address
Controlling Data Reception by IP Address When the printer uses an LPD port or Port9100 port, the printer can deny or accept data from certain IP addresses. The following explains how to set this feature using CentreWare Internet Services. Before configuring the setting, disable the print ports other than an LPD port or Port9100 port. - Page 128 To reject printing from a specific user: Example: Reject printing from "192.168.100.50" To permit printing from a specific network address, reject printing from a particular address within the network, but permit printing from a particular user within the rejected address: Example: (1) Permit printing from "192.168.200.10"...
-
Page 129: Ipsec Data Encryption
IPsec Data Encryption IPsec (Security Architecture for Internet Protocol) is a suite of protocols that provide authentication using IKE, and encryption of each IP packet in order to ensure tamper-proof and confidential communications. This feature is not supported on the model available in China. Enabling IPsec allows you to encrypt IP communications. - Page 130 For [PFS], select whether or not to enable PFS (Perfect Forward Security). 10. For [Specify Destination IPv4 Address] or [Specify Destination IPv6 Address], enter an IPv4 address or IPv6 address of the client that perfoms IPsec communications. 11. For [Communicate with Non-IPsec Device], select [Bypass] to enable IP communications, or [Discard] to disable IP communications for clients other than the address you have specified in Step 10.
-
Page 131: Ieee 802.1X Authentication
IEEE 802.1x Authentication This feature is not supported on the model available in China. Enabling IEEE 802.1x authentication allows you to connect your printer to a network secured by IEEE 802.1x authentication. IEEE 802.1x authentication is a suite of protocols that provide authentication using EAP(Extended authentication protocol) and access control. - Page 132 Important • The settings you have configured in Steps 5 to 7 must be the same as those configured on the Authentication Server that performs IEEE 802.1x authentication. When you are finished with the setting, click the [Apply] button. A window that prompts you to enter a user ID and password appears. Enter the administrator's user ID and password and click [OK].
-
Page 133: Authentication And Auditron Administration Features
Authentication and Auditron Administration Features The printer provides the Authentication and Auditron Administration features. The Authentication feature controls access to the printer's features. Whereas the Auditron Administration feature manages the use of each printer's feature. This section briefly explains the overview of the Authentication and Auditron Administration features and the settings required for both features. -
Page 134: Configuring The Authentication And Auditron Administration Features
Auditron Administration Feature When the Authentication and Auditron Administration features are enabled, you can print the [Auditron Report] instead of the [Meter Report]. The [Auditron Report] lists the number of monochrome and color pages/sheets printed to date by each user. Note •... -
Page 135: Registering Login Information On The Printer
Registering Login Information on the Printer The following briefly explains how to enable the Authentication feature on CentreWare Internet Services and register users who are permitted to use the printer. For details about each setting item, refer to the online help for CentreWare Internet Services. Launch your web browser and access CentreWare Internet Services. - Page 136 Verify that [User Account] is displayed on the [Print Auditron] page. Click [Edit User Account]. 10. On the [Edit User Account] page, enter [User Account Number] and click the [Edit] button. 7 Maintenance...
- Page 137 11. On the displayed page, enter each field and click the [Save] button. Note • The user ID and password set on this page will be used also on your print driver. 12. If registering more than one user, click the [Back] button and repeat Steps 10 and 11. 7.6 Authentication and Auditron Administration Features...
- Page 138 Registering the Login Information on the Print Driver (Computer) Configure the following settings under the properties dialog box on your print driver. The printer will not print unless the user ID and password entered on your print driver match those registered on the printer. The following procedure explains how to set the login information on your print driver.
-
Page 139: Adjusting The Color Registration
Adjusting the Color Registration When you first install the printer, or if you move it to another location, adjust the color registration. Also, if colors are not aligned correctly when printed, print the Color Registration Chart and adjust the color registration. Printing the Color Registration Chart Use the following procedure to print the Color Registration Chart. -
Page 140: Determining The Adjustment Values
Determining the Adjustment Values The Color Registration Chart is used to adjust the color registration. The following explains how to determine the adjustment values. On the Color Registration Chart, find the straightest line where the two black lines and the colored line are most closely aligned for each color (Y, M, and C). - Page 141 Press the < > or <Eject/Set> button to Maintenance Mode accept the selection. F/W Version [F/W Version] is displayed. Press the < > button until [Adjust Maintenance Mode ColorRegi] is displayed. Adjust ColorRegi Press the < > or <Eject/Set> button to Adjust ColorRegi accept the selection.
-
Page 142: Adjusting The Image Transfer Voltage
Adjusting the Image Transfer Voltage When you have unsatisfactory printing results, such as having white spots on the printed image, having extra toner spilt on the printout, or a bluish printout, adjust the image transfer voltage to solve these printing problems. The image transfer voltage can be adjusted for each paper type within the range of -3 to 3 in increments of 1. - Page 143 10. Press the < > or < > button to set the Recycled Paper value, then press the <Eject/Set> button. (Example: 1) 11. Press the <Menu> button to return to the print screen. 7.8 Adjusting the Image Transfer Voltage...
-
Page 144: Adjusting The Fuser Temperature
Adjusting the Fuser Temperature When you have unsatisfactory printing results, such as printed images or texts coming off or double printing with appropriate margins, adjust the fuser temperature to solve these printing problems. The fuser temperature can be adjusted for each paper type within the range of -2 to 2 in increments of 1. - Page 145 10. Press the < > or < > button to set the Recycled Paper value, then press the <Eject/Set> button. (Example: 1) 11. Press the <Menu> button to return to the print screen. 7.9 Adjusting the Fuser Temperature...
-
Page 146: Adjusting The Altitude
7.10 Adjusting the Altitude When installing the printer in a high-altitude location or a location with low air pressure, adjust the altitude setting. The altitude can be set to 0 m, 1000 m, 2000 m, or 3000 m. Select the value that is closest to the altitude of the printer. The default is 0 m. Use the following procedure to adjust the altitude. -
Page 147: Cleaning The Printer
7.11 Cleaning the Printer This section explains how to clean the printer to keep it in good condition and to ensure optimum print quality. WARNING • When cleaning this product, use the designated cleaning materials exclusive to it. Other cleaning materials may result in poor performance of the product. Never use aerosol cleaners, or it may catch fire and cause explosion. -
Page 148: Cleaning The Interior
Cleaning the Interior After clearing paper jams or replacing print cartridges, inspect the inside of the printer before closing the printer covers. Important • Never touch a labeled area found on or near the heat roller. You can get burnt. If a sheet of paper is wrapped around the heat roller, do not try to remove it by yourself to avoid injuries or burns. -
Page 149: Moving The Printer
7.12 Moving the Printer Carry out the following procedure when moving the printer. Important • This product weighs 27.4 Kg. When moving it, always carry it by a team of two or more persons to avoid mishandling or injury. • When lifting this product, firmly grip the recessed areas provided on both sides of the machine. Never lift it by gripping any other areas. - Page 150 Remove any paper in the bypass tray. Keep the paper wrapped and away from humidity and dirt. Pull out the paper tray from the printer and remove any paper in the tray. Keep the paper wrapped and away from humidity and dirt.
-
Page 151: A Appendix
Appendix Main Specifications Product Specifications Item Description Machine type Desktop Printing system Laser xerography Important * Semiconductor laser + Dry-type electrophotographic method Fusion method Quick thermal fusing system Warm-up time 30 seconds or less (when power is switched on, temperature: 22 °C) Continuous print speed 1 sided print: 15.0 sheets/min , 2 sided print: 6.0 pages/min... - Page 152 Item Description Paper type Bypass tray: Plain paper (60 - 80 g/m ), bond paper (81 - 105 g/m heavyweight paper 1 (106 - 163 g/m ), heavyweight paper 2 (164 - 216 g/m ), coated paper 1 (95 -105 g/m ), coated paper 2 (106 - 163 g/m ), coated paper 3 (164 -216 g/m...
- Page 153 Item Description Interface Standard: USB2.0 (Hi-Speed) Ethernet 100Base-TX/10Base-T Supported protocol LPD, Port9100, IPP, SNMP, HTTP, HTTPS, DHCP, BOOTP, RARP, AutoIP, WINS, FTP, SMB, DDNS, SMTP, NetWare, Bonjour (mDNS), IPSec [IPsec] is not supported by the model available in China. Power source AC 110 - 127 V±10%, 8 A, 50/60±3 Hz or AC 220 - 240 V±10%, 4 A, 50/60±3 Hz Important...
-
Page 154: Printable Area
Printable Area Top edge 4.1 mm Unprintable area Printable area Left 4.1 mm Right 4.1 mm Bottom edge 4.1 mm A Appendix... -
Page 155: Consumables
Consumables This section explains how to handle the types of consumables. For details on the replacement procedure of the consumables, refer to the procedure listed in the packaging box of the consumables and "7.1 Replacing Consumables" (P. 106). Important • If you are not using the consumables recommended by our company, the performance of the machine may not be at its optimum level. -
Page 156: Life Of Consumables
Life of Consumables Consumables Product name Lifespan Toner-K,Toner-C, Toner-M, Toner-Y About 9,000 pages Bordered Type About 100,000 pages Fuser Unit Borderless Type About 20,000 pages Bordered Type About 100,000 pages Belt Unit Borderless Type 20,000 pages Important • The possible number of pages that can be printed with each print cartridge is the number of pages "... -
Page 157: Notes And Restrictions
Notes and Restrictions Notes and Restrictions on Using the Printer This section lists the notes and restrictions that apply to the printer. Meter Counts for 2-Sided Print Pages If you print a job 2-sided, depending on the application being used and the print quantity setting, the application may automatically insert a blank page into the job. -
Page 158: Glossary
Glossary 10BASE-T: A 10 Mbps Ethernet network that uses a baseband signal and twisted-pair cable. It is one of the IEEE802.3 standards. 100BASE-TX: An extended version of 10BASE-T known as FastEthernet. Its communication speed is 100 Mbps, which is much faster than 10 Mbps of 10BASE-T. Address: Information (identifier) that is assigned to identify each node (computer or terminal) on a network. -
Page 159: Full Color
DNS: An acronym for Domain Name System. It is a name resolution service which converts host names to IP addresses. dpi: An acronym for dots per inch. It refers to the number of dots that can be printed in an inch (approximately 25.4 mm) and is a unit of measurement to indicate resolution. -
Page 160: Interface Cable
Interface cable: A cable that is used to connect multiple devices together. Interface cables include, USB cable, which connects a printer with a computer, and Ethernet cable, which connects a printer with a network. IP address: An address used by TCP/IP protocols to identify computers on a network. IPP: A protocol used when printing using HTTP. -
Page 161: Print Driver
Port9100: A network communication method that enables data transmission. This can be used on the standard TCP/IP port monitor. ppm: A measurement that shows how many pages the printer is capable of printing in one minute. Printable area: The area on paper which can be printed. Print driver: Software that translates data created on an application into a format that the printer can read and print. -
Page 162: Web Browser
Web browser: Software that is designed to view information from the Internet on computers. Mozilla Firefox and Internet Explorer are the two most popular web browsers. WINS: An acronym for Windows Internet Name Services. It is a name resolution service that converts a computer name to an IP address in a TCP/IP environment. - Page 163 A.5 Glossary...
-
Page 164: Index
Index < > < > < > < > buttons ....36 Display Screen ......80 dual stack . - Page 165 Paper Type ......80 PCL....... . . 75 lamp PCL Font List .
- Page 166 Sleep Mode ......70 Sleep Mode Timer ..... 70 SMB .
-
Page 167: Control Panel Menu Tree
Control Panel Menu Tree Control Panel Menu Tree Basic Control Panel Functions To move up and down the menus: < > or < > button To select a menu or move to the right: < > or <Eject/Set> button To cancel a selection or return to the left: <... - Page 168 Conventions for the Administrator Menus : Main menus * : Default Administrator Menus Ready to Print Password If the control panel is locked with a password, <Menu> [0000] enter the password here. button Report / List Printer Settings, Panel Settings, PCL Font List, PCL Macro List, PS Font List, PDF Font List, Job History, Error History, Print Meter, Demo Print, Stored Documents Meter 1, Meter 2, Meter Readings...
- Page 169 A Wired Network Ethernet Auto * , 10BASE-T Half, 10BASE-T Full, 100BASE-TX Half, 100BASE-TX Full TCP/IP IP Mode Dual Stack * , IPv4, IPv6 DHCP / Autonet * , IPv4 Get IP Address BOOTP, RARP, DHCP, Panel IP Address, Subnet Mask, 000.000.000.000 * Gateway Address IPsec...
- Page 170 System Settings Low Power Timer 3 Minutes * 3 - 60 Minutes (increment: 1 min.) Sleep Mode Enable * , Disable Sleep Mode Timer 2 Minutes * 2 - 120 Minutes (increment: 1 min.) Audio Tones Control Panel, Invalid Key, Machine Ready, On *, Job Completed, Fault Tone, Alert Tone, Out of Paper, Low Toner Alert, Base Tone...
- Page 171 Maintenance Mode F/W Version xxxxxxxxxxxx Adjust Paper Type Adjust PaperType Plain Paper Plain Paper Heavyweight * , Lightweight Labels Adjust BTR Plain Paper, Recycled Paper, Bond Paper, Transparency, Heavyweight 1, Heavyweight 2, Labels, Coated 1, -3 - 3 (unit: 1) Coated 2, Coated 3, Envelope Adjust Fuser Plain Paper, Recycled Paper, Bond Paper,...
- Page 172 F Auto * , Tray 1, Paper Tray Bypass Tray Adjust Paper Type Output Size A4 * , A5, B5, 8.5 x 11", 8.5 x 13", 8.5 x 14", 7.25 x 10.5", Env 3.9 x 7.5", Env 110 x 220mm, Env 162 x 229mm, Env 4.1 x 9.5" xxxmm * Custom Size Length Y...
- Page 173 On * , Standard Mode * , Adjust Paper Type Print Ticketetport Print Ticket Plain Paper CompatibleMode, Off * This printer does not support this menu. Panel Settings On * , Off * , Adjust Paper Type PS Error Report Panel Lock Plain Paper Change Password...
- Page 174 Xerox Phaser 6270 Photobook Printer User Guide ME5122E9-3 (Edition 3) October 2012 Fuji Xerox Co., Ltd. and Xerox Co., Ltd. Copyright © 2012 by Fuji Xerox Co., Ltd. and Xerox Co., Ltd.
Need help?
Do you have a question about the Xerox Phaser 6270 and is the answer not in the manual?
Questions and answers