Table of Contents
Advertisement
Advertisement
Table of Contents

Related Manuals for FujiFilm ASK-400


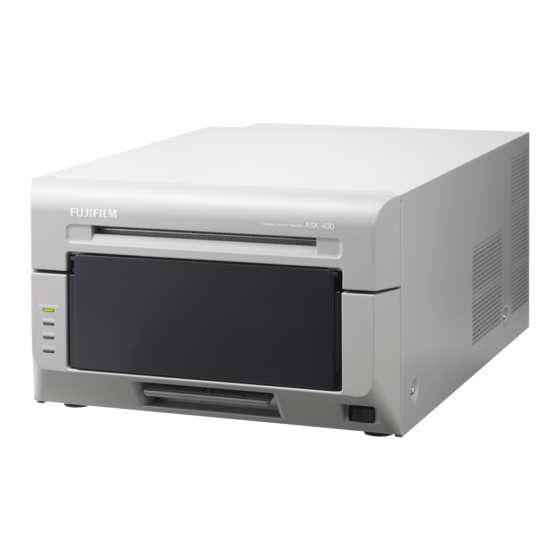
Summary of Contents for FujiFilm ASK-400
- Page 1 FUJIFILM THERMAL PHOTO PRINTER ASK-400 January 20, 2021 Ver.1.0.0.1 FUJIFILM Corporation...
- Page 2 Be aware that the content complies with the standards at the time the User’s manual section related to safety, including usage and safety precautions, was created. ● Modifications To ensure product safety, modification of the ASK-400 printer and ASK-400 printer driver is prohibited. ● Copyright...
-
Page 3: Table Of Contents
Table of contents n _______________________________ 1 s ______________________________ 14 2.2.1 Layout __________________________________________________________________________ 16 2.2.2 Advanced options _________________________________________________________________ 17 2.2.3 Paper/Quality _____________________________________________________________________ 23 2.2.4 Option __________________________________________________________________________ 23 2.2.5 Color Adjustment __________________________________________________________________ 25 2.2.6 Printer information _________________________________________________________________ 26 r ________________________ 32 r _________________________ 35... - Page 4 [ASK-400 Printer Driver] Instruction Manual (For Windows 7, 10) Installation procedure The installation procedure is made up of three steps. The details of each step are explained below. Step 1 Prepare the printer and computer → “1.1 Prepare the printer and computer”...
-
Page 5: P R E P A R E T H E P R I N T E R A N D C O M P U T E R
[ASK-400 Printer Driver] Instruction Manual (For Windows 7, 10) Make sure that the printer power is off. Prepare a USB cable. However, do not use the USB cable to connect the printer and computer at this time. Log in to Windows as an administrator. The following explanation presumes that the operations are carried out with administrator privileges. - Page 6 [ASK-400 Printer Driver] Instruction Manual (For Windows 7, 10) In the selected folder, double click the following file: DriverInstall.CMD. (Depending on your usage environment, the .CMD extension may not be displayed.) The driver package installer appropriate for your operating system (32-bit or 64-bit) is selected automatically.
- Page 7 [ASK-400 Printer Driver] Instruction Manual (For Windows 7, 10) Click “Install” when the installation is ready. Figure 1.2.5 Installation start confirmation screen When the installation starts, a screen appears that shows the installation status. Figure 1.2.6 Installation status screen FUJIFILM Corporation...
- Page 8 [ASK-400 Printer Driver] Instruction Manual (For Windows 7, 10) When a User Account Control dialog box appears, click “Yes”. Figure 1.2.7 User Account Control Click “Install” when the Windows Security confirmation display appears. Figure 1.2.8 Windows Security confirmation Installation of the driver package starts. Wait until installation finishes.
- Page 9 [ASK-400 Printer Driver] Instruction Manual (For Windows 7, 10) Use the USB cable to connect the printer and computer, and then switch on the power of the FUJIFILM ASK-400 printer. After the printer is recognized, installation of the driver starts.
- Page 10 [ASK-400 Printer Driver] Instruction Manual (For Windows 7, 10) A confirmation dialog box appears. Click “Yes”. Figure 1.3.4 Confirmation to skip getting driver software from Windows Update Soon after installation starts, a message appears in the taskbar stating “Your device is ready to use”, and then printer driver installation finishes.
- Page 11 Figure 1.3.7 Control Panel In Devices and Printers, make sure that “FUJIFILM ASK-400” is present. Note: In Windows 10, when the printer is offline (the printer is not on and connected), the FUJIFILM ASK-400 icon is not displayed. This completes installation of the printer driver.
- Page 12 [ASK-400 Printer Driver] Instruction Manual (For Windows 7, 10) In Windows 7, when the FUJIFILM ASK-400 printer driver could not be installed correctly, the following message appears in the taskbar: “Device driver software was not successfully installed”. Figure 1.3.9 Message indicating that the driver was not installed If you click on this message, the Install driver software screen appears and displays the message “Device driver software was not successfully installed”.
-
Page 13: I N S T A L D R I V E R S F O R U N S P E C I F I E D D E V I C E S
[ASK-400 Printer Driver] Instruction Manual (For Windows 7, 10) If you connect a printer that is on to the computer before installing the driver package, a device is created under “Unspecified” in Devices and Printers. Figure 1.4.1 Photo Printer under Unspecified In such a case, use the following method to install the printer driver. - Page 14 4. After starting up the computer, connect the USB cable again and turn on the printer. In Devices and Printers, make sure that “FUJIFILM ASK-400” is present. Note: When the printer is offline (the printer is not on and connected), the FUJIFILM ASK-400 icon is not displayed.
- Page 15 [ASK-400 Printer Driver] Instruction Manual (For Windows 7, 10) In Windows 7: In Devices and Printers, under Unspecified, right click on “Photo Printer”. From the menu, click “Troubleshoot”. Figure 1.4.4 Photo Printer under Unspecified The Install a driver for this device screen appears. Click “Apply this fix”.
- Page 16 If the driver is installed, the message “Troubleshooting has completed” appears. Click “Close the troubleshooter” to close the troubleshooting window. Figure 1.4.6 Completing troubleshooting In Devices and Printers, make sure that “FUJIFILM ASK-400” is present. This completes installation of the printer driver. Figure 1.4.7 Devices and Printers screen After the installation of the printer driver is complete, always restart the computer.
-
Page 17: Chapter 2 P R O P E R T I E S
[ASK-400 Printer Driver] Instruction Manual (For Windows 7, 10) You can configure various printer settings from the Properties of the driver. Make sure you understand the contents well before changing settings. To use the properties, log in as an administrator. - Page 18 [ASK-400 Printer Driver] Instruction Manual (For Windows 7, 10) 3. Right click “FUJIFILM ASK-400” icon. From the menu, click “Printer Properties” to open the Properties dialog box. Note: In Windows 10, when the printer is offline (the printer is not on and connected), the FUJIFILM ASK-400 icon is not displayed.
-
Page 19: P R I N T S E T I N G S F U N C T I O N S
[ASK-400 Printer Driver] Instruction Manual (For Windows 7, 10) If you select the basic settings from the Properties screen, you can change various print settings. 2.2.1 Layout Figure 2.2.1 Layout tab Orientation Set the print orientation to “Portrait” or “Landscape”. -
Page 20: Advanced Options
[ASK-400 Printer Driver] Instruction Manual (For Windows 7, 10) 2.2.2 Advanced options If you select “Advanced...” on the Layout tab, you can configure various advanced options. Figure 2.2.2.1 Advanced settings Figure 2.2.2.2 Advanced options tab Paper/Output Paper Size Specify the paper size. Match the paper size with the size of the media set in the printer. - Page 21 [ASK-400 Printer Driver] Instruction Manual (For Windows 7, 10) Graphic Print Quality Specify the resolution. Print quality Function High-speed Print using high speed mode High-quality Print using high quality mode ICM Method ICM Method Function Synchronized with “Color Adjustment Disabled” in the 2.2.4 ICM Disabled Option.
- Page 22 [ASK-400 Printer Driver] Instruction Manual (For Windows 7, 10) Print Re-try Specify whether to print data in the printer buffer after a printer error has been cleared. Print Re-try Function Disable Clear the print data in the printer buffer when a printer error occurs.
- Page 23 [ASK-400 Printer Driver] Instruction Manual (For Windows 7, 10) <Multiple layout> When 5x7, 6x8 or 6x9 media is used, you can use a two-picture layout. You can enable multiple layout settings by setting the paper size of the printer driver.
- Page 24 [ASK-400 Printer Driver] Instruction Manual (For Windows 7, 10) <Rewind Print function> If you set the paper size setting to (6x4) when printing 6x4 size to 6x8 size media, printing is optimized to reduce consumption of the ribbon. Furthermore, if you set the paper size setting to (5x3.5) or (6x4.5) when printing 5x3.5 size to 5x7 size media or when printing 6x4.5 size to 6x9 size media, printing is similarly optimized to reduce...
- Page 25 [ASK-400 Printer Driver] Instruction Manual (For Windows 7, 10) Step 4. Set the Orientation to Portrait, < Application usage example > and click "Advanced...". This usage example uses Windows Explorer. Step 1. In Windows Explorer, select two or more pictures.
-
Page 26: Paper/Quality
[ASK-400 Printer Driver] Instruction Manual (For Windows 7, 10) 2.2.3 Paper/Quality Figure 2.2.3 Paper/Quality tab Color Set Color. Do not use black and white. 2.2.4 Option Figure 2.2.4.1 Option tab Figure 2.2.4.2 Sharpness setting Border Specify a border for printing. (Select the check box for a border.) Synchronized with Border Enable/Disable in the Advanced settings. -
Page 27: Color Adjustment
[ASK-400 Printer Driver] Instruction Manual (For Windows 7, 10) Color Adjustment None Synchronized with the ICM Method in the Advanced settings. If this check box is selected, ICM is disabled, the Color adjustment tab is also disabled, and the printer driver does not carry out color adjustment. - Page 28 [ASK-400 Printer Driver] Instruction Manual (For Windows 7, 10) 2.2.5 Color Adjustment If the Handled by Driver check box is selected in the 2.2.4 Option, the adjustment values of the Color Adjustment tab are applied to the image. Figure 2.2.5 Color Adjustment tab The following section shows the setting ranges on the Color Adjustment tab.
-
Page 29: Printer Information
[ASK-400 Printer Driver] Instruction Manual (For Windows 7, 10) 2.2.6 Printer information View the printer information. Figure 2.2.6.1 Printer Information tab Figure 2.2.6.2 Display when incorrect media is loaded The following section shows the information displayed in the Printer Info tab. - Page 30 [ASK-400 Printer Driver] Instruction Manual (For Windows 7, 10) Display item Display details Printer Status Display icon Display Status/Response (Color) characters Offline The printer cannot be recognized. Connect the printer and computer, and then turn on the power. (Gray) Cooling head The head is being cooled.
-
Page 31: D E F A U L T V A L U E S F O R S E T I N G S
[ASK-400 Printer Driver] Instruction Manual (For Windows 7, 10) The following section shows the default values of the settings (at installation). If the settings have been changed, and the printer driver no longer operates normally, return to the default values shown below. -
Page 32: C O L O R M A N A G E M E N T
[ASK-400 Printer Driver] Instruction Manual (For Windows 7, 10) Use Color management to specify the color profile. The installer associates “ASK400_xxxx.icc” by default. Step 1. From the Printer Properties, select the Color Management tab, and then click “Color Management...”. Figure 2.4.1 Color Management Tab Step 2. -
Page 33: P R I N T A R E A
[ASK-400 Printer Driver] Instruction Manual (For Windows 7, 10) The following section shows the image sizes and numbers of dots generated by the paper size setting of the driver. Image size Number of image dots (width x height) (width x height) - Page 34 [ASK-400 Printer Driver] Instruction Manual (For Windows 7, 10) The following chart shows the relationship of images generated by an application and printed items (output direction) according to the orientation setting. Hint: The PR print size (center column) is prepared for applications that are not able to change from landscape to portrait and back using the orientation setting on the layout tab.
-
Page 35: Chapter 3 U P D A T E T H E D R I V E R
Note: In Windows 10, when the printer is offline (the printer is not on and connected), the FUJIFILM ASK-400 icon is not displayed. Always connect the printer with the power turned on and check that there are no documents in the queue. - Page 36 In Windows 7, click “Start”, and then click “Control Panel”. In the Control Panel, click “Uninstall a program”. Figure 3.2 Control Panel 2) The Uninstall or change a program screen appears. In the list, double click “FUJIFILM ASK-400”. Figure 3.3 Uninstall a program FUJIFILM Corporation...
- Page 37 [ASK-400 Printer Driver] Instruction Manual (For Windows 7, 10) 3) Click “Yes” when the FUJIFILM ASK-400 uninstall confirmation windows appears. Uninstalling the driver is complete. After uninstalling the printer package, restart the computer. Figure 3.4 Uninstallation confirmation When a User Account Control dialog box appears, click “Yes”.
-
Page 38: Chapter 4 D E L E T E T H E D R I V E R
[ASK-400 Printer Driver] Instruction Manual (For Windows 7, 10) The printer driver is automatically deleted when uninstalling the driver package. For the steps to uninstall the driver package, see “2. Uninstall the driver package” in Chapter 3. Note that uninstalling the driver package when the printer driver is in use will display the following message, and the printer driver will not be deleted. -
Page 39: M A N U A L D E L E T I O N O F P R I N T E R D R I V E R S
In Windows 7, Click “Start”, and then click “Control Panel”. In the Control Panel, click “View devices and printers”. From the Devices and Printers screen, right click the FUJIFILM ASK-400 printer. From the menu, click “Remove device”. Figure 4.2.1 Right clicking FUJIFILM ASK-400 in the Devices and Printers screen... - Page 40 [ASK-400 Printer Driver] Instruction Manual (For Windows 7, 10) In Windows 10, when the printer is offline (the printer is not on and connected), the FUJIFILM ASK-400 icon is not displayed. In such cases, use the following procedure to delete the device.
- Page 41 2) The printer deletion confirmation dialog box appears. Click “Yes”. Figure 4.2.3 Printer deletion confirmation dialog box 3) After deleting the FUJIFILM ASK-400 printer, select another printer (for example, Fax), and then click “Print Server Properties” in the menu bar.
- Page 42 [ASK-400 Printer Driver] Instruction Manual (For Windows 7, 10) 4) The Print Server Properties dialog box appears. Click the “Drivers” tab. From the installed printer driver list, select FUJIFILM ASK-400, and then click “Remove...”. Figure 4.2.5 Printer Server Properties dialog box 5) The Remove Driver and Package dialog box appears.
- Page 43 Disconnect the USB cable and then restart your computer and try deleting the printer driver again. Fig 4.2.7.i Driver in use 7) In the Print Server Properties dialog box, confirm that FUJIFILM ASK-400 was deleted, and then click “Close”. Figure 4.2.8 Print Server Properties...
- Page 44 FUJIFILM Corporation...
Need help?
Do you have a question about the ASK-400 and is the answer not in the manual?
Questions and answers