Advertisement
ASSEMBLY, CARE & USE MANUAL
WARNING & SAFETY INFORMATION
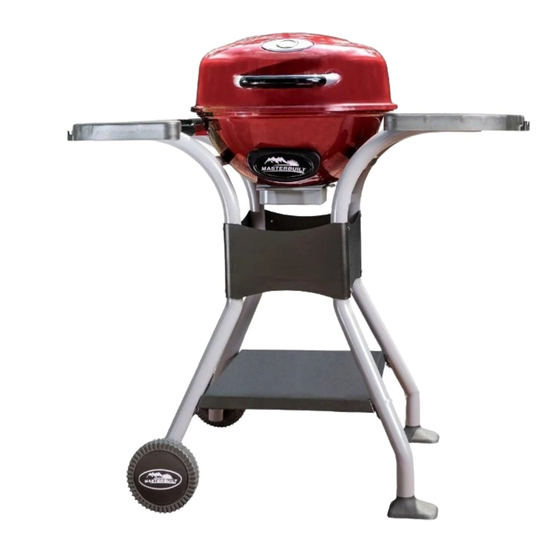
ELECTRIC PATIO GRILL
Masterbuilt Manufacturing, Inc.
MODELS 20150112, 20150213, 20150513, 20150613, 20150713
1 Masterbuilt Ct.
THIS PRODUCT IS FOR OUTDOOR USE ONLY
Columbus, GA 31907
Customer Service 1-800-489-1581
www.masterbuilt.com
Approximate assembly time : 30 minutes
Tool needed for assembly: Phillips Head Screwdriver
WARNING
WARNING
This manual contains important
Use only outdoors where it is
information necessary for the proper
well ventilated.
and safe use of this unit.
Read and follow all warnings
and instructions before using
Fuel, such as charcoal briquettes, wood or heat
grill and during use.
pellets, are not to be used in the unit.
Keep this manual for future reference.
Failure to follow these warnings and instructions properly could result in personal injury or death.
Advertisement
Table of Contents

Subscribe to Our Youtube Channel
Related Manuals for Masterbuilt 20150112


Summary of Contents for Masterbuilt 20150112
- Page 1 ASSEMBLY, CARE & USE MANUAL WARNING & SAFETY INFORMATION ELECTRIC PATIO GRILL Masterbuilt Manufacturing, Inc. MODELS 20150112, 20150213, 20150513, 20150613, 20150713 1 Masterbuilt Ct. THIS PRODUCT IS FOR OUTDOOR USE ONLY Columbus, GA 31907 Customer Service 1-800-489-1581 www.masterbuilt.com Approximate assembly time : 30 minutes...
-
Page 2: Limited Warranty
• Do not plug in electric grill until fully assembled and ready for use. This expressed warranty is the sole warranty given by Masterbuilt and is in lieu of all other warranties, • Use only approved grounded electrical outlet. -
Page 3: General Warnings And Safety Information
Place chicken bone side down. Cover and grill for 50-60 minutes or until chicken is no longer pink. (170° F degrees for breast and • Accessory attachments not supplied by Masterbuilt Manufacturing, Inc. are not recommended 180° F degrees for dark meat). Brush the pieces with sauce occasionally during the last 10 minutes of grilling. - Page 4 RECIPES GENERAL WARNINGS AND SAFETY INFORMATION • Fatty foods (hamburgers,etc.) can have excess grease and cause fl are ups. When cooking fatty BBQ BURGERS foods use a low setting with lid open. • Clean internal base pan before each use. This will cut down on build-up and fl are-ups. ¼...
-
Page 5: Parts List
SAFE STORAGE AND MAINTENANCE DO NOT RETURN TO RETAILER For Assembly Assistance, Missing or Damaged Parts Call: MASTERBUILT Customer Service at 1-800-489-1581. STOP! Please have Model Number and Serial Number available when calling. • Inspect hardware and assembled parts on a regular basis to insure grill is in safe working condition. -
Page 6: Hardware List
DO NOT RETURN TO RETAILER For Assembly Assistance, Missing or Damaged Parts STOP! Call: MASTERBUILT Customer Service at 1-800-489-1581. Please have Model Number and Serial Number available when calling. These numbers are located on silver label on back of unit. - Page 7 ASSEMBLY ASSEMBLY STEP 15 • BEFORE ASSEMBLY READ ALL INSTRUCTIONS CAREFULLY. Place refl ector plate (9) into • ASSEMBLE UNIT ON A CLEAN, FLAT SURFACE. bottom of grill base (5). • TOOL NEEDED: PHILLIPS HEAD SCREWDRIVER STEP 1a Attach wheel (16) to wheel leg (19) using washer (K) and screw (E) as shown.
- Page 8 ASSEMBLY ASSEMBLY STEP 13 STEP 3 Place bakelite spacer (F) on grill Note: Side panels are longer lid (1). Attach handle (24) than front/back panels. Back using washers (J) and screws (D) panel has serial plate. as shown. Insert front right leg (11a) onto leg* (18).
- Page 9 ASSEMBLY ASSEMBLY STEP 11 STEP 5 Position grill lid (1) on top of grill Insert back left leg (11a) onto base (5) as shown. Secure hinges wheel leg (19). Place front/back using screw (B). panel (14) over side panel (13). Secure using screws (G).
- Page 10 ASSEMBLY ASSEMBLY STEP 7 STEP 9 Attach drip tray bracket (8) to grill Place logo base (26) onto grill base (5) using washers (I) and base (5). Secure using washers screws (L). (J) and screws (H). STEP 10 STEP 8 Note: Hinge for grill base is Position grill base (5) onto seat larger than hinge for grill lid.
Need help?
Do you have a question about the 20150112 and is the answer not in the manual?
Questions and answers