Masterbuilt 20070311 Assembly, Care & Use Manual
Hide thumbs
Also See for 20070311:
- Assembly, care & use manual (21 pages) ,
- Care & use manual (21 pages) ,
- Quick start manual (2 pages)
Table of Contents
Advertisement
ASSEMBLY, CARE & USE MANUAL
WARNING & SAFETY INFORMATION
ELECTRIC SMOKER MODELS 20070311
THIS PRODUCT IS FOR OUTDOOR USE ONLY
Masterbuilt Manufacturing, Inc.
1 Masterbuilt Ct.
Columbus, GA 31907
Servicio de atención al cliente: 1-800-489-1581
www.masterbuilt.com
Approximate assembly time : 15 minutes
Tool needed for assembly: Phillips Head Screwdriver (not included)
CARBON MONOXIDE HAZARD
WARNING
Burning wood chips gives off carbon
This manual contains important information
monoxide, which has no odor
necessary for the proper and safe use of this unit.
and can cause death.
Read and follow all warnings and instructions
DO NOT burn wood chips inside homes,
before using smoker and during use.
vehicles, tents, garages or any enclosed areas.
Keep this manual for future reference.
Use only outdoors where it is
well ventilated.
Some parts may have sharp edges
handle with care.
Failure to follow these warnings and instructions properly could result in personal injury or death.
Advertisement
Table of Contents

Related Manuals for Masterbuilt 20070311


Summary of Contents for Masterbuilt 20070311
- Page 1 ASSEMBLY, CARE & USE MANUAL WARNING & SAFETY INFORMATION ELECTRIC SMOKER MODELS 20070311 THIS PRODUCT IS FOR OUTDOOR USE ONLY Masterbuilt Manufacturing, Inc. 1 Masterbuilt Ct. Columbus, GA 31907 Servicio de atención al cliente: 1-800-489-1581 www.masterbuilt.com Approximate assembly time : 15 minutes...
-
Page 2: General Warnings And Safety Information
When using electrical appliances, basic safety precautions should always be followed including La garantía de Masterbuilt no ampara la pintura de acabado, pues ésta se puede deteriorar por el calor con el uso normal. La garantía de Masterbuilt no ampara la oxidación de la unidad. - Page 3 FCC. Estos límites han sido establecidos para proteger de manera razonable las instalaciones • Accessory attachments not supplied by Masterbuilt Manufacturing, Inc. are not recommended residenciales contra la interferencia nociva. Este equipo genera, emplea y es capaz de irradiar and may cause injury.
-
Page 4: Let's Get Started
RECETAS PARA AHUMAR EN EL MASTERBUILT RECETAS PARA AHUMAR EN EL MASTERBUILT RECETAS PARA AHUMAR EN EL MASTERBUILT RECETAS PARA AHUMAR EN EL MASTERBUILT LET’S GET STARTED! • This is a slow smoker…allow suffi cient time for cooking. Smoker is for OUTDOOR USE ONLY. -
Page 5: Parts List
DO NOT RETURN TO RETAILER For Assembly Assistance, Missing or Damaged Parts DATOS IMPORTANTES SOBRE EL USO DEL AHUMADOR Call: MASTERBUILT Customer Service at 1-800-489-1581. STOP! • El límite máximo de temperatura es 275° F (135° C). Please have Model Number and Serial Number available when calling. -
Page 6: Hardware List
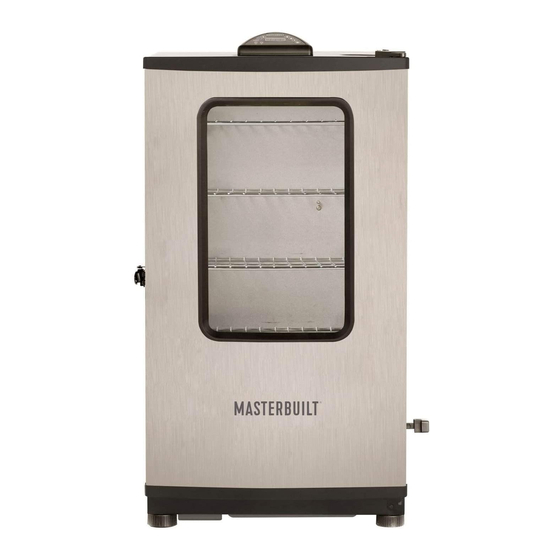
Ponga el interruptor en la posición de DO NOT RETURN TO RETAILER For Assembly Assistance, Missing or Damaged Parts apagado encendido Call: MASTERBUILT Customer Service at 1-800-489-1581. STOP! Please have Model Number and Serial Number available when calling. La temperatura de la carne Funcionamiento incorrecto del Comuníquese con Masterbuilt llamando al... - Page 7 CÓMO UTILIZAR EL PANEL DE CONTROL Y EL CONTROL REMOTO ASSEMBLY • BEFORE ASSEMBLY READ ALL INSTRUCTIONS CAREFULLY. • ASSEMBLE UNIT ON A CLEAN, FLAT SURFACE. • TOOL NEEDED: PHILLIPS HEAD SCREWDRIVER STEP 1 Position wheel (5) on bottom of smoker body (1) as shown.
- Page 8 CÓMO UTILIZAR EL PANEL DE CONTROL Y EL CONTROL REMOTO ASSEMBLY STEP 3 Secure control panel (6) to smoker body (1) with phillips screws (A). Note: Do not over tighten. APAGADO AJUSTAR AJUSTAR TEMP. TIEMPO TERMÓMETRO PARA LA CARNE Note: La luz solar directa interfi ere en la capacidad de leer la pantalla de diodos LED; si es necesario, bloquee la luz del sol.
- Page 9 INSTRUCCIONES PARA CURAR EL EQUIPO ASSEMBLY STEP 5 PRETEMPORADA DE FUMAR ANTES DEL PRIMER USO. Quizás salga un poco de humo en esta ocasión, pero eso es normal. Slide smoking racks (13) into guides of smoking rack support 1. Asegúrese de que la bandeja para el agua esté instalada SIN AGUA. (21).
- Page 10 ASSEMBLY ARMADO STEP 7 PASO 9 Deslice los soportes de la parte Place wood chip tray (10) in trasera de la bandeja para grasa smoker as shown. (15) sobre las lengüetas ubicadas en la parte posterior del ahumador, Note: Wood chip tray and wood (1) hasta que no se deslicen más.
- Page 11 ARMADO ASSEMBLY STEP 9 PASO 7 Coloque el recipiente para trocitos Slide brackets on back of grease de madera (10) en el ahumador, tray (15) onto tabs on back of como se ilustra. smoker body (1) until grease tray stops. Nota: Al utilizar el ahumador, el cargador y el recipiente de trocitos Note: Wheels will not operate...
- Page 12 PRE-SEASON INSTRUCTIONS ARMADO PASO 5 PRE-SEASON SMOKER PRIOR TO FIRST USE. Deslice bastidores fumadores (13) Some smoke may appear during this time, this is normal. en las guías de ayuda que fuma 1. Make sure water pan is in place with NO WATER. bastidor (21).
- Page 13 HOW TO USE CONTROL PANEL & REMOTE CONTROL ARMADO PASO 3 Con tornillos Phillips (A), fi je el panel de control (6) al cuerpo del ahumador (1). Nota: No los apriete demasiado. Note: Direct sunlight may interfere with ability to read LED display, block light if needed. To set temperature: •...
- Page 14 HOW TO USE CONTROL PANEL & REMOTE CONTROL ARMADO • ANTES DE ARMARLA, LEA DETENIDAMENTE TODAS LAS INSTRUCCIONES. • ARME LA UNIDAD EN UNA SUPERFICIE LIMPIA Y PLANA. • HERRAMIENTAS NECESARIAS: DESTORNILLADOR PHILLIPS PASO 1 Ubique la rueda (5) en la parte inferior del ahumador (1), como muestra la ilustración.
-
Page 15: Lista De Piezas
¡ALTO! Contact Masterbuilt at 1.800.489.1581 de atención al cliente de MASTERBUILT, al 1-800-489-1581. Remote malfunctioning Cuando llame, tenga a mano el número de modelo y el número de serie. Estos números fi guran en una etiqueta plateada ubicada en la parte trasera de la unidad. - Page 16 Servicio ¡ALTO! de atención al cliente de MASTERBUILT, al 1-800-489-1581. • Maximum temperature setting is 275°F (135°C). Cuando llame, tenga a mano el número de modelo y el número de serie.
- Page 17 Delicate, wood smoke flavor Pecan Bold and hearty flavor Maple Sweet, subtle flavor Apple Sweet, delicate flavor Cherry Sweet, delicate flavor BE A PART OF OUR “DADGUM GOOD” COMMUNITY ONLINE: www.masterbuilt.com | www.dadgumthatsgood.com | www.facebook.com/masterbuilt Twitter @Masterbuilt @JohnMcLemore @DadgumTh atsGood...
- Page 18 • Se recomienda no usar accesorios que no sean los suministrados por Masterbuilt Manufacturing, Inc., instructions, may cause harmful interference to radio communications.
-
Page 19: Lea Todas Las Instrucciones
• Use únicamente tomacorrientes autorizados con conexión a tierra. • No use el ahumador durante tormentas eléctricas. This expressed warranty is the sole warranty given by Masterbuilt and is in lieu of all other warranties, • Nunca exponga el ahumador eléctrico a la lluvia ni al agua. - Page 20 MANUAL DE ARMADO, USO Y MANTENIMIENTO ADVERTENCIAS E INFORMACIÓN DE SEGURIDAD AHUMADOR ELÉCTRICO MODELOS 20070311 ESTE PRODUCTO ESTÁ DISEÑADO PARA USARSE ÚNICAMENTE AL AIRE LIBRE Masterbuilt Manufacturing, Inc. 1 Masterbuilt Ct. Columbus, GA 31907 Customer Service 1-800-489-1581 www.masterbuilt.com Tiempo aproximado de armado: 15 minutos Herramientas necesarias para el armado: Destornillador Philips (no incluye) PELIGRO DE EMISIÓN DE...
- Page 21 MANUEL DE L’UTILISATEUR, D’ASSEMBLAGE ET D’ENTRETIEN AVERTISSEMENT ET CONSIGNES DE SÉCURITÉ FUMOIR ÉLECTRIQUE MODÈLE 20070311 CET APPAREIL EST CONÇU POUR UN USAGE À L’EXTÉRIEUR SEULEMENT Masterbuilt Manufacturing, Inc. 1 Masterbuilt Ct. Columbus, GA 31907 Service à la clientèle 1-800-489-1581 www.masterbuilt.com Durée d’assemblage approximatif : 15 minutes...
- Page 22 • Brancher l’appareil comme il faut dans une prise de courant mise à la terre uniquement. Dans le cas où Masterbuilt demande de renvoyer la pièce en question à des fi ns d’inspection, Masterbuilt assume les frais d’expédition pour renvoyer l’article demandé.
- Page 23 Cet équipement génère, utilise et diffuse des ondes • Les accessoires qui ne sont pas fournis par Masterbuilt Manufacturing, Inc.sont déconseillés radio et, s’il n’est pas installé ni utilisé en conformité avec les instructions dont il fait l’objet, peut et peuvent causer des blessures.
- Page 24 • NETTOYER L’APPAREIL APRÈS CHAQUE UTILISATION. Cela prolongera la vie de votre fumoir et évitera l’apparition de moisissures. Pomme Arôme sucré et délicat SAVOUREZ! Cerise Arôme sucré et délicat REJOIGNEZ NOTRE COMMUNAUTÉ EN LIGNE « SACREBLEU, C’EST BON ! » : www.masterbuilt.com | www.dadgumthatsgood.com | www.facebook.com/masterbuilt Twitter @Masterbuilt @JohnMcLemore @DadgumTh atsGood...
- Page 25 STOP! MASTERBUILT au 1-800-489-1581 ou envoyer un courriel à Customerservice@masterbuilt.com. • La température maximale se situe à 275°F (135°C). Veuillez avoir à disposition le numéro de modèle et le numéro de série lors de l’appel.
-
Page 26: Liste Des Pièces
Contacter Masterbuilt au 1-800-489-1581 STOP! MASTERBUILT au 1-800-489-1581 ou envoyer un courriel à Customerservice@masterbuilt.com. Dérèglement de la télécommande Veuillez avoir à disposition le numéro de modèle et le numéro de série lors de l’appel. Ces numéros... - Page 27 COMMENT UTILISER LE PANNEAU DE COMMANDE ET LA TÉLÉCOMMANDE ASSEMBLAGE • AVANT DE PROCÉDER À L’ASSEMBLAGE, VEUILLEZ LIRE ATTENTIVEMENT TOUTES LES CONSIGNES. • ASSEMBLER L’APPAREIL SUR UNE SURFACE PROPRE ET PLANE. • OUTIL REQUIS POUR L’ASSEMBLAGE : TOURNEVIS À POINTE CRUCIFORME ÉTAPE 1 Poser la roue (5) dans la partie inférieure du fumoir (1) comme...
- Page 28 ASSEMBLAGE COMMENT UTILISER LE PANNEAU DE COMMANDE ET LA TÉLÉCOMMANDE ÉTAPE 3 Fixer solidement le panneau de commande (6) au fumoir (1) à l’aide des vis cruciformes (A). Note : Veillez à ne pas trop serrer. Note : Les rayons directs du soleil peuvent gêner la lecture de l’affi chage DEL, le protéger de la lumière le cas échéant.
- Page 29 CONSIGNES RELATIVEMENT À L’ASSAISONNEMENT PRÉALABLE ASSEMBLAGE ÉTAPE 5 ASSAISONNER LE FUMOIR AU PRÉALABLE AVANT LA PREMIÈRE UTILISATION. Un peu de fumée peut se dégager à ce moment-là, mais ceci est normal. Glisser les grilles de fumage (13) 1. S’assurer que le réservoir d’eau est en place et NE CONTIENT PAS D’EAU. dans les guides de la fi...
- Page 30 ASSEMBLAGE ASSEMBLAGE ÉTAPE 7 ÉTAPE 9 Placer le bac à copeaux de Glisser les supports se trouvant au bois (10) dans le fumoir comme dos du collecteur de graisse (15) indiqué sur le schéma. sur les languettes situées à l’arrière du fumoir (1) jusqu’à...
Need help?
Do you have a question about the 20070311 and is the answer not in the manual?
Questions and answers