Table of Contents
Advertisement
Quick Links
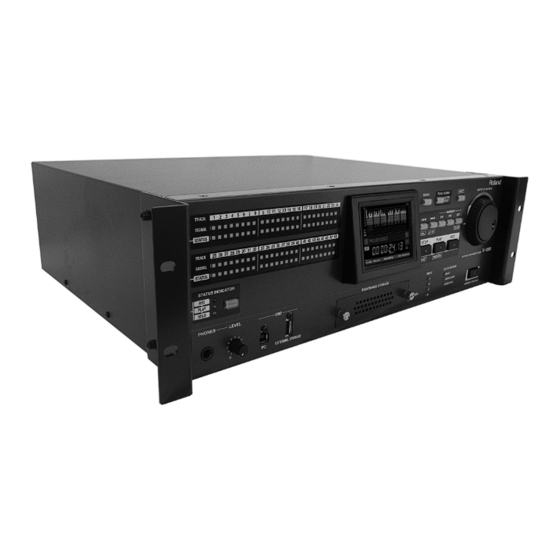
R-1000
48-TRACK RECORDER / PLAYER
Owner's Manual
Before using this unit, carefully read the sections entitled: "IMPORTANT SAFETY INSTRUCTIONS" (p. 2),
"USING THE UNIT SAFELY" (p. 3), and "IMPORTANT NOTES" (p. 5). These sections provide important
information concerning the proper operation of the unit. Additionally, in order to feel assured that you
have gained a good grasp of every feature provided by your new unit, owner's manual should be read in
its entirety. The manual should be saved and kept on hand as a convenient reference.
Copyright © 2011 ROLAND CORPORATION
All rights reserved. No part of this publication may be reproduced in any form without the written
permission of ROLAND CORPORATION.
* Roland and REAC are either registered trademarks or trademarks of Roland Corporation in the United States and/or
other countries.
* All product names mentioned in this document are trademarks or registered trademarks of their respective owners.
Advertisement
Table of Contents

Related Manuals for Roland R-1000


Summary of Contents for Roland R-1000
- Page 1 All rights reserved. No part of this publication may be reproduced in any form without the written permission of ROLAND CORPORATION. * Roland and REAC are either registered trademarks or trademarks of Roland Corporation in the United States and/or other countries.
-
Page 2: Important Safety Instructions
WARNING: To reduce the risk of fire or electric shock, do not expose this apparatus to rain or moisture. The lightning flash with arrowhead symbol, within an CAUTION equilateral triangle, is intended to alert the user to the RISK OF ELECTRIC SHOCK presence of uninsulated dangerous voltage within the DO NOT OPEN product s enclosure that may be of sufficient magnitude to... -
Page 3: Using The Unit Safely
Refer all servicing to your retailer, ..........................the nearest Roland Service Center, or an authorized Roland distributor, as listed on the “Information” sheet. • Do not place containers containing liquid (e.g., flower vases) .......................... - Page 4 Before using the unit in a foreign country, consult with your area, pull the plug on the power cord out of the outlet. retailer, the nearest Roland Service Center, or an authorized ..........................Roland distributor, as listed on the “Information” sheet.
-
Page 5: Important Notes
POWER switch, then unplug the it may not be possible to restore the data, and Roland assumes no power cord from the power outlet. For this reason, the outlet into liability concerning such loss of data. - Page 6 In such instances, consult your dealer or the nearest • Do not touch or allow metal to come into contact with the contact Roland Service Center. Note, however, that it may not be possible portion of the storages. to recover any data from the hard disk once it has been lost.
- Page 7 In such instances, take steps such as using cables with ferrite cores near their connectors. For information on specific preventive methods, contact your dealer, the nearest Roland Service Center, or an authorized Roland distributor, as listed on the "Information" sheet. Class A •...
-
Page 8: Check The Included Items
REAC devices are connected using at least Cat 5e (Enhanced Category 5) Ethernet cable. MMP (Moore Microprocessor Portfolio) refers to a patent portfolio concerned with microprocessor architecture that was developed by Technology Properties Limited (TPL). Roland has licensed this technology from the TPL Group. -
Page 9: Table Of Contents
Example 2: Recording Output from Digital Snake Devices ................28 Example 3: Performing Multi-track Playback on the R-1000................29 Example 4: Mixing Live Audio with Playback on the R-1000 ................30 Example 5: Recording Analog Signals Split from the Sources .................31 Example 6: Connecting a MADI Device via the S-MADI..................32 Connecting Other Peripheral Devices.........................34... - Page 10 Performing Multi-track Recording ............. 42 Selecting a Recording Track............................42 Selecting a Recording Track Automatically......................42 Selecting a Recording Track Manually ........................44 Initiating Recording..............................49 Operations Possible During Recording.......................50 Performing Multi-track Playback ............... 51 Playing Back Recorded Data to an Output Channel..................51 Starting Playback.................................53 Useful Features During Playback...........................54 Indexing Using the SHUTTLE and JOG/VALUE Dials....................54 Returning to the Start Location of Playback (CALL).....................54...
-
Page 11: Important Notes On Installation And Connections
Important Notes on Installation and Connections Important Notes on Installation About the Exhaust Port of the Cooling Fan The R-1000 performs forced cooling by means of a cooling fan, and is provided with an exhaust port at the location shown below. fig.exhaust.eps Exhaust Never obstruct the exhaust port. -
Page 12: About Rack Mounting
• Never use any screws except the removed ones to occupy the screw holes. Using other screws may cause malfunction. • When re-installing the rack-mount brackets, turn off the power to the R-1000 and detach the power cord and all connection cables. Also, be... -
Page 13: Important Notes On Connections
About Ferrite Cores Four ferrite cores are included with the R-1000. Attach ferrite cores to all REAC cables being connected to the R-1000. Clamp each ferrite core onto the cable at a location near the plug at the end of the cable, pressing down on the ferrite core until it clicks closed. -
Page 14: Power Supply
Power Supply Connect the included power cord to the AC INPUT connector on rear panel. Be sure to use the included power cord for connecting the power supply. fig.AC-connection.eps AC cord Be sure to connect the power plug only to a power outlet that meets the specifications given on the rating plate. The rating plate is located on the rear panel. -
Page 15: About The Internal Lithium Battery
Turn the power on. Set the POWER switch on the rear panel to ON. When the R-1000 starts, the STANDBY button on the front panel lights up green. *When you start the unit for the first time, the calendar/clock setting screen is displayed on the R-1000’s touch-panel display. -
Page 16: Turning The Power Off
When turning off the power, pay attention to the following points. • Before turning off the power, be sure to operate the STANDBY button on the front panel to put the R-1000 in standby mode. When the unit is put into standby mode, the color of the STANDBY button changes to red. Turning off the power before going into standby mode can cause corruption of recorded data or malfunction. -
Page 17: About Removable Storage For Recording
* When multiple projects and songs are recorded, total recording time is less than the figures shown here. The R-1000 saves recorded data in Broadcast Wave Format (BWF). To embed user information in a file, go to the [SYSTEM] menu and select [USER NAME], then type in the user information. -
Page 18: Inserting Removable Storage
Insert the removable storage device. Carefully Insert the removable storage device all the way in until it is firmly in place. When the R-1000 detects the new removable storage device, the message on following page appears on the screen. For information on how to perform formatting, refer to the following page. -
Page 19: Formatting Removable Storage
Re-formatting a Removable Storage that has been formatted on a device other than the R-1000 When a removable storage device that has been formatted on a device other than the R-1000 (like Edirol F-1) is inserted into the REMOVABLE STORAGE bay, the confirmation screens shown below will appear. Touch [Format] at the confirmation screen to start formatting. - Page 20 About Removable Storage for Recording Select the removable storage device. Touch [REMOVABLE] to select the removable storage device. * To format an external storage device connected to the USB port on the front panel, touch [EXTERNAL]. fig.select-HDD.eps Perform formatting. Touch [Format]. The confirmation screens shown below appear, Touch [Format] to start formatting. * Touching [Cancel] returns operation to the previous screen.
-
Page 21: Part Names And Functions
Pressing this makes the button light up and displays the the respective tracks. menu for the R-1000 on the touch-panel display. For information on menu items, refer to “Menu Operations and The STATUS indicators show whether the tracks are for Menu List”... - Page 22 15. STANDBY Button (p. 16) the same as the audio that is output to the two MONITOR This puts the R-1000 in standby mode. To put the unit in OUT connectors on the rear panel. standby mode, press and hold the button for 2 seconds or longer.
-
Page 23: Rear Panel
6. VIDEO SYNC Connectors • Water pipes (may result in shock or electrocution) When you are synchronizing the R-1000 with a video source, • Gas pipes (may result in fire or explosion) connect a black-burst generator or other source here. -
Page 24: Connecting External Equipment
About the Sampling Rate The R-1000 cannot convert the sampling rate. Make the sampling rates of all connected REAC devices identical with the sampling rate of the REAC master device. Mis-matched sampling rates will result in a failure of audio transmission. - Page 25 Connecting External Equipment About Internal REAC Connections Inside of the R-1000, REAC C/A and REAC D/B are connected as figures below. This enables the input/output between : • devices connected to C and A • devices connected to D and B During recording, the internal REAC signal flow of the R-1000 is as below.
- Page 26 Connecting External Equipment About the Clock Source The connection examples (1 through 6) in this chapter all use [REAC] as the clock source. When the default settings are in effect, [REAC] is set to be the clock source. If this has been changed to a different source, follow the procedure described below to return it to [REAC].
-
Page 27: Example 1: Recording V-Mixer's Split Output
* Connect REAC A/B on the V-Mixer to the digital snake device at the stage. * Connect REAC SPLIT on the V-Mixer to the [TO MASTER] REAC port on the R-1000. If you are using the unit with the factory-default settings unchanged, make the connection to the [A] port. -
Page 28: Example 2: Recording Output From Digital Snake Devices
* Connect the R-1000’s [TO SLAVE/SPLIT] REAC port (C/D) to the digital snake devices at the stage. * Connect REAC A/B on the V-Mixer to the [TO MASTER] REAC port on the R-1000. Be careful not to mix up the A and B connections. -
Page 29: Example 3: Performing Multi-Track Playback On The R-1000
* Connect the R-1000’s [TO SLAVE/SPLIT] REAC port (C/D) to the digital snake devices at the stage. * Connect REAC A/B on the V-Mixer to the [TO MASTER] REAC port on the R-1000. Be careful not to mix up the A and B connections. -
Page 30: Example 4: Mixing Live Audio With Playback On The R-1000
* Connect REAC A/B on the V-Mixer to the [TO MASTER] REAC port on the R-1000. Be careful not to mix up the A and B connections. * For the channel on which the live audio is output, use the settings at the track status screen to turn off output from the R-1000. Refer to “Select the playback track”... -
Page 31: Example 5: Recording Analog Signals Split From The Sources
To record signals sent from source devices on the stage via a splitting device, make the connections as shown below. For this connection setup, set the REAC setting on the R-1000 to [EXT. CLOCK with D.SNAKE]. Refer to “About REAC Settings” (p. 36). -
Page 32: Example 6: Connecting A Madi Device Via The S-Madi
For this connection, set the REAC setting on the R-1000 to “SOUND CHECK.” Refer to “About REAC Settings” (p. 36). * Connect REAC MAIN on the S-MADI to the [TO MASTER] REAC port on the R-1000. If you are using the unit with the factory-default settings unchanged, make the connection to the [A] port. - Page 33 For this connection, set the REAC setting on the R-1000 to “SOUND CHECK.” Refer to “About REAC Settings” (p. 36). * Connect REAC MAIN on the first S-MADI (the upper unit in the figure) to the R-1000’s [TO MASTER] REAC port [A]. Connect REAC MAIN on the second S-MADI (the lower unit in the figure) to the R-1000’s [TO MASTER] REAC port [B].
-
Page 34: Connecting Other Peripheral Devices
Connecting External Equipment Connecting Other Peripheral Devices Connecting Monitor Equipment This unit is equipped with balanced-type (XLR/TRS) connectors, which are wired as shown below. Check the wiring of the device you want to connect and make the connection. fig.XLR-TRS_jack.eps Connecting Monitor Speakers Connect monitor speakers to the MONITOR OUT connectors. -
Page 35: Connecting External Storage
For information on how to copy recorded data, refer to “Copying Recorded Data to External Storage” (p. 61). Connecting a Computer Connecting a computer with dedicated software (R-1000 RCS) enables you to remotely control the R-1000 unit from your computer. -
Page 36: About Reac Settings
Go back to the home screen. Press the [MENU] button to return to the home screen. The REAC mode of the R-1000’s REAC connectors A and B and the clock-source setting range are determined by the settings as shown below. fig.operation-mode.eps... -
Page 37: About Projects
You can change the song name from the date and time to a text string you prefer. Refer to “Changing a Song Name” (p. 58). When the data recorded on the R-1000 reaches a file size of 2 GB per track, it is automatically split into a new file. At the various different sampling rates, this splitting occurs automatically at the approximate times shown below. -
Page 38: Creating A New Project
About Projects Creating a New Project Display the project list. Press [MENU] button to open the menu screen and select [PROJECT]. The list of projects contained in the removable storage is displayed. fig.select-project-menu.eps Open new project creation screen. Touch [New] to switch to project setup screen. fig.new-project.eps Set the project parameters. -
Page 39: Selecting A Project
About Projects Selecting a Project Display the project list. Press [MENU] button to open the menu screen and select [PROJECT]. The list of projects contained in the removable storage is displayed. fig.load-project.eps Select the project to load. Select a project and touch [Load] to switch to confirmation screen. Touch [Load] on confirmation to load the selected project. Saving a Project (SAVE) Holding down the [SHIFT] button and press the [STOP] button to switch to the confirmation screen. -
Page 40: Selecting A Song
About Projects Selecting a Song Select a song for playback on the procedure described below. Display the song selection screen. At the home screen, touch the icon shown below to access the song selection screen. fig.load-project.eps Select the song. From the list, select the song you want to play. Touching [Load] switches to the confirmation screen. Touch [Load] on the confirmation screen to load the selected song. -
Page 41: Deleting A Song
About Projects Deleting a Song Deleting the Current Song At the home screen, touch the icon shown below to change to the confirmation screen for deleting the song. Touch [Delete] at the confirmation screen to delete the current song. Touching [Cancel] closes the confirmation screen and does not delete the song. -
Page 42: Performing Multi-Track Recording
On the R-1000, you can record up to 48 tracks at 44.1/48 kHz, or up to 24 tracks at 96 kHz. The R-1000 cannot perform sample rate conversion. Make the sampling rates of all connected REAC devices identical with the sampling rate of the REAC master device. - Page 43 TR 1 - 40 When Recording Input from Digital Snake Devices When the S-1608 and the S-4000S-3208 are connected to [TO SLAVE/SPLIT] REAC ports on the R-1000, the assignments are as shown below. Outputs from the R-1000 are also assigned to REAC A and B on the V-Mixer as shown below.
-
Page 44: Selecting A Recording Track Manually
Confirm the input-channel audio on a monitor. The level meter on the R-1000 is divided into groups of eight tracks. Touch the area of the level meter containing the track you want to confirm. Selecting a track at the [Solo] area outputs the audio on the channel to the monitor outputs and headphones. - Page 45 Performing Multi-track Recording Choose the track to record. Use the [Rec] area of the track status screen to select the track to record. Touching [All] lets you select all tracks as a group. When you finish making the settings, be sure to touch the [Done] icon to apply the settings. fig.select-rec-target.eps Check the status.
- Page 46 You can sequentially assign multiple consecutive input channels to consecutive recording tracks. For example, use this when you want to assign only channels 1 through 4 on the source device to tracks 1 through 4 on the R-1000. * Performing a similar operation at the [TRACK OUTPUT] screen sequentially assigns recorded data on multiple tracks to consecutive output channels.
- Page 47 You can save and call up assignments during recording or playback in the library of the R-1000. You can save up to 99 settings. The R-1000 has five preset libraries (P01 through P05) and 99 user libraries (U01 through U99). Settings can be saved only in user libraries. Preset libraries cannot be edited.
- Page 48 Performing Multi-track Recording Switching Level Meter Settings At the front panel, holding down the [SHIFT] button and pressing the [PEAK CLEAR] button makes the display change to the meter setup screen. Before you start recording, customize the behavior of the audio levels display. fig.call-meter-setup.eps At this screen, you can change the following parameters.
-
Page 49: Initiating Recording
About Automatic Splitting of Recording Data When the data recorded on the R-1000 reaches a file size of 2 GB per track, it is automatically split into a new file. This splitting occurs automatically at the approximate times shown below. -
Page 50: Operations Possible During Recording
Performing Multi-track Recording Operations Possible During Recording Adding Markers to Recording Data Pressing the Marker [SET] button during recording adds a marker to the data. Adding a marker lets you perform indexing during playback. * You can add up to 99 markers to one song. fig.marker-set.eps For information of using markers during playback, refer to “Using the Marker Feature”... -
Page 51: Performing Multi-Track Playback
Performing Multi-track Playback On the R-1000, you can perform playback of up to 48 tracks at 44.1/48 kHz, or up to 24 tracks at 96 kHz. The R-1000 cannot perform sample rate conversion. Make the sampling rates of all connected REAC devices identical with the sampling rate of the REAC master device. - Page 52 Checking Track Playback on Monitor Equipment The level meter on the R-1000 is divided into groups of eight tracks. Touch the area of the level meter you want to confirm. Selecting a track in the [Solo] area outputs the audio recorded on the track to the monitor equipment and headphones.
-
Page 53: Starting Playback
• S-4000R connected to a digital snake device • S-4000 RCS (dedicated remote-control software) connected to a digital snake device * To adjust output levels by remote control, you must set the R-1000 to receive remote control commands. Refer to “Virtual Preamp Setting Screen” (p. 68). -
Page 54: Useful Features During Playback
Performing Multi-track Playback Useful Features During Playback Indexing Using the SHUTTLE and JOG/VALUE Dials When playback is stopped, you can index using [JOG/VALUE] dial or the [SHUTTLE] dial. Turning the inner [JOG/VALUE] dial lets you move the current position forward and backward frame by frame. Turning the outer [SHUTTLE] dial lets you rapidly move the current position forward and backward. -
Page 55: Using The Marker Feature
Performing Multi-track Playback Using the Marker Feature Adding a marker to a song lets you carry out indexing in a single step. When adding markers during recording, refer to “Adding Markers to Recording Data” (p. 50). To add markers during playback or when playback is stopped, follow the steps below. * You can add up to 99 markers to one song. -
Page 56: Using The A/B Repeat Play Feature
To output audio to monitor equipment only, without outputting it from a V-Mixer or digital snake device, use the PREVIEW feature. Hold down the [SHIFT] button and press the [PLAY] button to cancel REAC output from the R-1000. You will output from the MONITOR OUT and PHONES connectors only. -
Page 57: About Other Features
About Other Features You can use the following features to make various settings or others on the R-1000. For information on using the menus, refer to “Menu Operations and Menu List” (p. 71). Locking and Unlocking Panel Operation You can lock the panel to prevent inadvertent operation. -
Page 58: Changing A Project Name/Song Name/Track Name
About Other Features Changing a Project Name/Song Name/Track Name Changing a Project Name You can change the project name with the steps below. Project sequence is determined by the project names (numerical and alphabetical order). Display the menu. Press the [MENU] button to display the menu screen. Access the project setting screen. - Page 59 About Other Features Return to the home screen. Press the [MENU] button to return to the home screen. Changing a Song Name You can also rename song in the same way as renaming projects. Display the song selection screen At the home screen, touch the icon below to access to the song selection screen. fig.song-selection-icon.eps Select the song Touch the song name.
- Page 60 About Other Features Select the track. Touch the track whose name you want to change. The display changes to a screen for renaming the track (Name Edit screen). fig.select-track-number.eps Rename the track. Use the Name Edit screen to rename the track. Finalize the track name.
-
Page 61: Copying Recorded Data To External Storage
Formatting External Storage When an external storage device that requires formatting is connected to the R-1000, a confirmation screen appears. Touch [Format] at the confirmation screen to start formatting. Before attempting copy operations, be sure to carry out formatting. - Page 62 About Other Features Select the project. Select the copy source project. Editing options for the project are displayed. fig.select-project.eps Select “Copy.” Select [Copy]. The display changes to a screen for selecting the copy destination. fig.select-copy.eps Select the copy destination. Select the copy destination storage device. To copy to external storage, select [EXTERNAL]. * You can also copy to removable storage by selecting [REMOVABLE].
-
Page 63: Importing Audio Data
Importing Audio Data You can import your own WAV files for playback on the R-1000. This is done by formatting your WAV files properly, then copying them to an external storage device, then copying from the external storage device to the removable storage drive. -
Page 64: Synchronizing The Operation With Video Equipment
You can connect a source device as shown below and synchronize the operation with a video camera, video deck, or other video equipment. For information on the connections and settings, download the separately available reference document (R-1000 Application Guide) from the following Roland website. -
Page 65: About The Home Screen
About the Home Screen Normal Home Screen fig.home-screen.eps 1. Level Meter This displays the input and output levels of each track. The tracks are divided into groups of eight. Touching any group displays the status of the eight tracks in it. The [M] meter displays the monitor output level. - Page 66 This changes the display to the preamp setting screen (next page) for a connected digital snake device. 8. Virtual Icon This changes the display to a screen for independently adjusting the output of individual tracks on the R-1000 during playback (p. 68).
- Page 67 R-1000. * Target channels are the source channels assigned to the R-1000’s tracks on its patchbay. In the [REAC] menu, setting [PREAMP CONTROL] to ON lets you change the settings for the digital snake device’s preamp by remote control.
- Page 68 About the Home Screen Virtual Preamp Setting Screen Touching the [Virtual] icon at the track status screen makes the display change to the following screen. fig.virtual.eps You can virtually adjust the playback volume of a selected track in this screen remotely from the devices listed below. •...
-
Page 69: Menu Operations And Menu List
Menu Operations and Menu List Menu Operations To display the menu screen, press the [MENU] button. You can use the touch panel and the [JOG/VALUE] dial to make various settings. Current position does not move even if you turn the [JOG/VALUE] dial while the menu screen is displayed. In Menu mode, the dial will only change menu parameter value. - Page 70 Menu Operations and Menu List Go back one screen. Touch the left-pointing cursor icon at the top of the screen to return to the previous screen. fig.prev-screen.eps Go back to the home screen. Press the [MENU] button to return to the home screen. fig.press-menu.eps...
-
Page 71: Menu List
This sets the offset for the timecode. TRACK NAME This changes the track name. PATCHBAY TRACK INPUT This opens the input patchbay to the R-1000. TRACK OUTPUT This opens the output patchbay from the R-1000. PROJECT This opens the screen to select a project. -
Page 72: Appendices
Impedance Owner's Manual Non Clip MONITOR OUT(1/2) +22 dBu (1 kHz, 20 k ohms load, typ.) Max Output Options Roland HDD-500G ( 500 GB HDD) (sold separately) Edirol F1-HD120 ( 120 GB HDD) Level PHONES 500 mW + 500 mW... -
Page 73: About Remote Control
Is the external storage device locked? Be sure to unlock it before connecting it to the R-1000. Audio data cannot be imported. Are you trying to import a file in a format that the R-1000 does not support? The R-1000 supports only 24-bit .wav files at 44.1 kHz, 48 kHz, or 96 kHz. -
Page 74: Error Messages
Error Messages Cannot record/Cannot play. Sampling frequency mismatch. The sampling frequency of the selected project does not match with the REAC system where the R-1000 is currently connected. It is not possible to carry out recording/playback. Cannot change. REAC SETUP is not EXT.CLOCK. -
Page 75: Dimensions
Appendices Dimensions fig.dimensions.eps Unit : mm... -
Page 76: Index
Index A/B Repeat ..................56 R-1000 RCS ..................35 Auto Map ..................42 Rack Mount ..................12 REAC connector cover ..............13 REAC Indicators ................24 Recording Time ................17 Clock Source .................. 26 removable storage ............... 18 Computer ..................35 rubber feet .................. - Page 77 CAUTION Danger of explosion if battery is Apparatus containing incorrectly replaced. Replace only with the same or Lithium batteries equivalent type recommended by the manufacturer. Discard used batteries according to the manufacturer s instructions. ADVARSEL! VARNING Lithiumbatteri - Eksplosionsfare ved Explosionsfara vid felaktigt batteribyte.
- Page 78 For EU Countries For EU Countries For China...
Need help?
Do you have a question about the R-1000 and is the answer not in the manual?
Questions and answers