Table of Contents
Advertisement
Advertisement
Table of Contents

Related Manuals for LAVAZZA Blue LB 2000


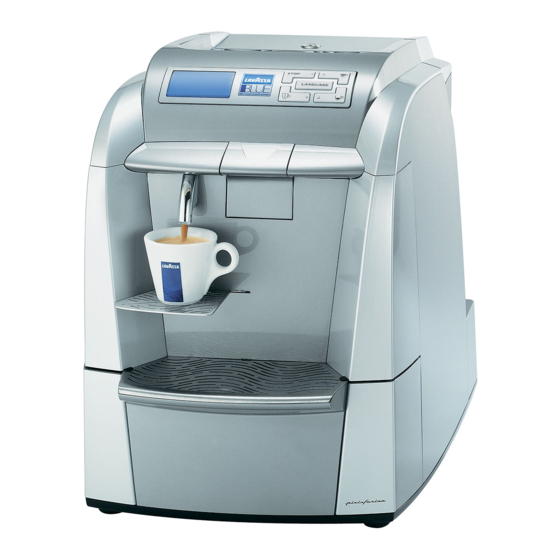
Summary of Contents for LAVAZZA Blue LB 2000
- Page 2 15 Diagram of the RS232 circuit interface TECHNICAL ASSISTANCE Tel. 0039.011.2398429 Fax 0039.011.23980466 E-mail: assistenzada@lavazza.it © Copyright LUIGI LAVAZZA S.p.A ESSEDI Manuali Tecnici - Torino (ITALY) • www.essedimanuali.it “LB 2000 OFFICE COFFEE SERVICE” 83356 / R . 0.00 / M...
- Page 3 Index General Information Designated personnel Manual structure 1.2.1 Scope and content 1.2.2 Users 1.2.3 Preservation 1.2.4 Symbols used “LB 2000 OFFICE COFFEE SERVICE” 83356 / R . 0.00 / M 2005 ANUAL CODE ARCH...
-
Page 4: Designated Personnel
General information Designated personnel The tasks described in this manual may only be carried out by a qualified technician who has read this manual and, moreover, who: • has the appropriate credentials to carry out repairs in the case of serious malfunction and who has read this manual and all the information relative to safety;... -
Page 5: Preservation
General information 1.2.3 Preservation In order to be able to guarantee the integrity and utility of this manual the following guidelines should be observed: • employ this manual in such a way that it remains undamaged and whole; • do not for any reason, remove, tear, or write over any part of the manual; •... -
Page 6: Stop Functions
Index General safety measures Stop functions “LB 2000 OFFICE COFFEE SERVICE” 83356 / R . 0.00 / M 2005 ANUAL CODE ARCH... - Page 7 General safety measures • Read the entire manual carefully. • Power connections should be made following the safety measures in the country of use. • The electric socket connecting the machine, should: - conform to the type of plug installed on the machine; - comply with the data provided on the plate on the bottom of the apparatus;...
- Page 8 Index Transpor t and storage Transport Storage Accessories included Assembly - positioning Disposal of packaging Electrical connections “LB 2000 OFFICE COFFEE SERVICE” 83356 / R . 0.00 / M 2005 ANUAL CODE ARCH...
-
Page 9: Transport
Transpor t and storage Transport During movement and transport, the machine must remain in a vertical position according to the directions on the packaging. Carry out lifting and positioning with care. Do not shake the machine. Attention! Ensure that nobody is in the vicinity when lifting and positioning of the load and, in difficult conditions, make appropriate personnel available to help with the placement. -
Page 10: Assembly - Positioning
Transpor t and storage Assembly- positioning Attention! It is prohibited to set up the machine outside or in an environment where water spray or steam is present. The presence of magnetic fields near the machine will generate disturbances, possibly causing malfunctions in the electronic controls of the machine. With temperatures approaching 0°C there is the risk of freezing internal parts of the machine which contain water. - Page 11 Transpor t and storage Before inserting the plug into the mains, ensure that the main switch is positioned at “0”. The electric connection of the machine is the responsibility of the manager. The machine should be connected to the mains by the plug on the electric cable, taking into consideration: •...
- Page 12 Index Disposal of the machine Disposal of the machine “LB 2000 OFFICE COFFEE SERVICE” 83356 / R . 0.00 / M 2005 ANUAL CODE ARCH...
- Page 13 Disposal of the machine Disposal of the machine Disposal of machine components, should be carried out with respect for the environment, avoiding pollution of the soil, water and air. Local legislation should be taken into consideration. To make the machine unusable, remove the power cord. Dispose of the machine at an appropriate collection centre.
- Page 14 Recommended tools In order to maintain the apparatus the following tools should be available: Screwdriver Torx T10 Philips-head screwdriver PH1 Philips-head screwdriver PH2 Screwdriver 0.8 x 4 x 80 Spanner 10 mm Scissors with insulation Standard pliers Attention! All the mechanical connections and cables use antislip safety fastons. If there is a faston cover squeeze the plastic as indicated in the figure and pull.
-
Page 15: Table Of Contents
Index Disassembly of the machine Disassembly of the body Disassembly of the GACO rubber gasket Replacement of the electrical cord Disassembly of the CPU card 6.4.1 Replacement of the silicone keyboard 6.4.2 Replacement of the display Disassembly of the POWER card Disassembly of the capsule release coil Disassembly of the pump Disassembly of the volume metering device... -
Page 16: Disassembly Of The Body
Machine disassembly 1/28 Machine disassembly This chapter describes the correct procedure to follow to access the parts installed in the machine in order to check and possibly replace them. Attention! Before beginning any procedures carefully read the directions in the Safety Measures. Disassembly of the body Remove the drip collection tank;... - Page 17 Machine disassembly 2/28 Attention! This operation should be carried out carefully, the panel may be damaged if it is removed in an incorrect fashion. Grasp the front panel as demonstrated in the figure and remove it by pulling first lightly downwards and then outwards.
- Page 18 Machine disassembly 3/28 Remove the water tank by lifting it by its handles. Undo the rear screws which hold the cover. Undo the 6 screws that secure the cover to the base of the machine. “LB 2000 OFFICE COFFEE SERVICE” 83356 / R .
- Page 19 Machine disassembly 4/28 Rest the machine on its base. Gently pull the cover with a little tug as shown in the figure. Now the operation of the internal components of the machine can be checked. Attention! The machine now has no shielding , in the machine there are electrical components and components which generate heat.
- Page 20 Machine disassembly 5/28 List of the machine components SUPPORT CPU CARD CPU CARD CAPSULE CAPSULE-LOADING RELEASE COIL AREA CAPSULE RELEASE CAM BOILER THERMOSTAT WATER PUMP SOLENOID VALVE GEAR MOTOR LINE FILTER VOLUME METERING POWER CARD DEVICE TRANSFORMER WATER TANK COUPLING COMPENSATION FUSES AND SAFETY...
-
Page 21: Disassembly Of The Gaco Rubber Gasket
Machine disassembly 6/28 Disassembly of the GACO rubber gasket Preparation: follow the procedure described in paragraph 6.1. Using a screwdriver, remove the cover of the rubber gasket. Remove the rubber gasket with a screwdriver. After having inserted a new rubber gasket , reposition the cover manually and press firmly. - Page 22 Machine disassembly 7/28 Replacement of electrical cord Preparation: follow the procedure described in paragraph 6.1. Undo the screws that secure the shield of the electrical cord space. RJ11 After the cover has been removed, the electrical cord can be removed and the fuses can be accessed.
- Page 23 Machine disassembly 8/28 CPU card disassembly Preparation: follow the procedure described in paragraph 6.1. Gently lift the upper panel that is resting on the upper plate. With two hands, grasp the support; gently pulling outwards and lift gently. Turn over the support on the back part of the upper plate.
- Page 24 Machine disassembly 9/28 6.4.1 Replacing the silicone keyboard Preparation: follow the procedure described in paragraph 6.4. After having removed the card from the support the silicone keyboard can be accessed. To remove the keyboard grasp firmly and pull. Correctly reposition the new keyboard on the card by pushing the rubber pins on the keyboard into the holes on the card.
-
Page 25: Replacement Of The Display
Machine disassembly 10/28 6.4.2 Replacement of the display Preparation: follow the procedure described in paragraph 6.5. Remove the display of the electronic card. Insert the new display taking care not to damage the cannections. “LB 2000 OFFICE COFFEE SERVICE” 83356 / R . -
Page 26: Disassembly Of The Power Card
Machine disassembly 11/28 Disassembly of the POWER card Preparation: follow the procedures described in paragraph 6.1. Attention! The POWER card is found on the side of the machine. The transformer is located under the POWER card. To remove the POWER card undo the 4 screws that secure it to the support. -
Page 27: Disassembly Of The Capsule Release Coil
Machine disassembly 12/28 Disassembly of the capsule release coil Preparation: follow the procedure described in paragraph 6.1. Before disassembling the capsule release, remove the thermal switch from its position. Then disconnect the electric cables. The capsule release coil can be removed from its position. -
Page 28: Disassembly Of The Pump
Machine disassembly 13/28 Disassembly of the pump Preparation: follow the procedures described in paragraph 6.1. The pump can be disassembled by simply turning the screws of the lock and pulling the rubber support that holds it upwards. Then the compensation/safety valve installed on the pump can be removed. -
Page 29: Disassembly Of The Volume Metering Device
Machine disassembly 14/28 Disassembly of the volume metering device Preparation: follow the procedures described in paragraph 6.1 The volume metering device can be removed and cleaned. Lift the device and remove it from its position. Remove the water connection tubes. Attention! It is important to carefully check the water connection tubes. -
Page 30: Disassembly Of The Capsule Release Unit
Machine disassembly 15/28 Disassembly of the capsule release unit Preparation: follow the procedure described in paragraph 6.1. Extract the support of the electric card (para 6.5) and disassemble the capsule release coil without disconnecting the cables (par. 6.7). To carry out maintenance of the capsule insertion and release unit, the screws that secure the upper support of the machine must be undone. - Page 31 Machine disassembly 16/28 Now the microswitch that determines whether the capsule insertion aperture is open can be accessed. To extract the microswitch, lightly widen the 2 locks and lift the microswitch. The unit can be checked by removing it from its position as indicated in the figure.
-
Page 32: Disassembly Of The Water Tank Support
Machine disassembly 17/28 6.10 Disassembly of the water tank support Preparation: follow the procedures described in paragraph 6.1. Remove the REED sensor from its position. Undo the screw under the POWER card that secures the support to the base. Undo the screw on the outside that secures the support to the base. - Page 33 Machine disassembly 18/28 Undo the screw that secures the pump support to the tank support. Undo the screws that secure the support to the base of the machine. Lift the water tank support and pull it outwards, so that the maintenance operations can be more easily carried out.
-
Page 34: Disassembly Of The Transformer
Machine disassembly 19/28 6.11 Disassembly of the transformer Preparation: follow the procedures described in paragraph 6.1. Disassemble the electronic POWER card as described in paragraph 6.6 and disassemble the water tank support as described in paragraph 6.11. Undo the screw that attaches the support of the pump found on the lower part. - Page 35 Machine disassembly 20/28 6.12 Disassembly of the resettable safety thermostats This paragraph describes how to disassemble the thermostats. Preparation: follow the procedures described in paragraph 6.1. Disconnect the electric connections of the thermostat (A). Undo the screw. Lever with a screwdriver to unlock the lock.
- Page 36 Machine disassembly 21/28 Extract the lock and remove the thermostats. “LB 2000 OFFICE COFFEE SERVICE” 83356 / R . 0.00 / M 2005 ANUAL CODE ARCH...
-
Page 37: Disassembly Of The Boiler
Machine disassembly 22/28 6.13 Disassembly of the boiler This paragraph describes how to disassemble the boiler of the coffee machine. Preparation: follow the procedures described in paragraph 6.1. Disassemble the thermostats as described in paragraph 6.13. Disconnect the electric connections of the boiler. Undo the nut (X), slip off the bracket and remove the teflon tube (Y), disconnect the silicone tube (Z). -
Page 38: Disassembly Of The Gear Motor
Machine disassembly 23/28 6.14 Disassembly of the gear motor Preparation: follow the procedures described in paragraph 6.1. Disassemble: the pump (para 6.8), the water tank support (par. 6.11), the transformer support (par. 6.12) and the boiler (para. 6.14). The used capsule collection drawer -presence microswitch (X) can now be accessed. -
Page 39: Disassembly Of The Filter Perforator
Machine disassembly 24/28 6.15 Disassembly of the filter perforator This paragraph describes how to disassemble the filter perforator and carry out maintenance on it. Preparation: follow the procedures described in paragraph 6.1. Push on the lever “PUSH” and remove the dispensing unit by pulling outwards. - Page 40 Machine disassembly 25/28 Gently widen the surface of the dispensing unit and slip off the fixed container for the coffee capsules. Undo the 3 screws that secure the perforator. Remove the old perforator and mount the new one. Note: the perforator can only be mounted in its predetermined position.
- Page 41 Machine disassembly 26/28 Once the piston has been removed all the gaskets can be easily replaced. To remount the piston, insert it again in its position as shown in the figure. Attention! At this stage the piston should remain pressed down towards the base. The lower perforator is present in the piston;...
- Page 42 Machine disassembly 27/28 Once the piston has been removed all the gaskets can be easily replaced. To remount the piston, insert it again in its position as shown in the figure. Attention! At this stage the piston should remain pressed down towards the base. The lower perforator is present in the piston;...
- Page 43 Machine disassembly 28/28 Once the rod is fixed in place the operation is finished. The fixed container for the coffee capsules that was previously removed can now be reinstalled. “LB 2000 OFFICE COFFEE SERVICE” 83356 / R . 0.00 / M 2005 ANUAL CODE ARCH...
- Page 44 Index Test mode Entry into test mode Test mode (Level 1) Test mode (Level 2) Test mode (Level 3) Test mode (Level 4) Test mode (Level 5) Test mode (Level 6) Exit from test mode “LB 2000 OFFICE COFFEE SERVICE” 83356 / R .
-
Page 45: Test Mode
Test mode 1/12 This mode checks the correct functioning of the various components, present within the machine, that are activated electrically. Attention! Be careful when in test mode, in this mode some of the safety measures included by the manufacturer are overridden. Note: the dispenser unit will work only if the used capsule collection drawer is correctly inserted. - Page 46 Test mode 2/12 LEGEND: Line 1 * Te s t M o d e L 1 * This line displays the test mode level that has been selected. 1 2 3 4 5 6 7 8 Pressing the ENTER button (Espresso) causes the next level to be reached, independent 1 2 3 4 5 of the function activated.
- Page 47 Test mode 3/12 * Te s t M o d e L 1 * Line 2 1 2 3 4 5 6 7 8 In this line the activated microswitches/sensors are displayed. Following is the list of 1 2 3 4 5 the parts that will be monitored.
- Page 48 Modo test 4/12 * Te s t M o d e L 1 * Line 3 1 2 3 4 5 6 7 8 In this line the button function is shown. Following is a list of the buttons present on 1 2 3 4 5 the machine.
- Page 49 Test mode 5/12 5 - LANGUAGE button (Language). * Te s t M o d e L 1 * Line 4 1 2 3 4 5 6 7 8 In this line the relative values of the components in their activated state can be seen. 1 2 3 4 5 To rq u e Level "L1”...
- Page 50 Test mode 6/12 Test Mode (Level 1) At this level the functioning of the dispenser unit and of the electromagnet of the capsule release are tested. By pressing UP the gear motor takes the dispenser unit to the upper end point (working position);...
- Page 51 Test mode 7/12 Test mode (Level 2) In this level the functioning of the pump and of the solenoid valve of the unit is tested. Pressing CANCEL will activate the solenoid valve. Pressing LANGUAGE will activate the pump and will allow the display of the flow in impulses/sec of the volume metering device.
- Page 52 Test mode 8/12 Test mode (Level 3) In this level the functioning of the heating element of the main boiler is tested. Pressing the button UP activates the heating element of the main boiler. Pressing the button CANCEL allows the display of the temperature in the last line of the LCD display (in degrees centigrade) measured by the sensor in the main boiler.
- Page 53 Test mode 9/12 Test mode (Level 4) Presently there are no functions assigned. “LB 2000 OFFICE COFFEE SERVICE” 83356 / R . 0.00 / M 2005 ANUAL CODE ARCH...
- Page 54 Test mode 10/12 Test mode (Level 5) In this level it is possible to vary the contrast of the LCD display. Keeping the button UP pressed progressively diminishes the contrast of the display to the minimum allowed. The number in the 4th line of the LCD display does not correspond with a unit of measure, it is simply the number used to maintain the memorised settings for the future restarts of the machine.
- Page 55 Test mode 11/12 Test mode (Level 6) In this level it is possible to vary the brightness of the LCD display. Keeping the button UP pressed progressively increases the brightness of the LCD display. The number in the 4th line of the LCD display does not correspond with a unit of measure, it is simply the number used to maintain the memorised settings in the future restarts of the machine.
- Page 56 Test mode 12/12 Exit from test mode. When in level 6, the button CANCEL exits from the test mode. Pressing the button CANCEL for less than 2 seconds has no effect, pressing for longer, when released causes the machine to automatically reset, and to restart in normal mode.
-
Page 57: Troubleshooting
Troubleshooting This chapter details troubleshooting procedures, to follow in the case of machine-signalled error. (•) = Alarm reset when the machine is switched off. (From software version 14 forward). Error What has happened Possible cause Where to find the cause code 11 (•) After the product selection... - Page 58 Troubleshooting Error What has happened Possible cause Where to find the cause code 21 (•) Hydraulic circuit Even though the machine is Hydraulic circuit tube interrupted, interrupted ready it does not detect clogged or disconnected water flow in the circuit Unit occluded Solenoid valve occluded or broken Pump damaged or interrupted...
- Page 59 Troubleshooting Error What has happened Possible cause Where to find the cause code Heating unit temperature Heating temperature out Thermostat on the heating unit error of control (eg. heating unit engaged. on and the temperature does not increase) Heating unit resistance broken Triac on POWER card broken Temperature sensor malfunction CPU card malfunction (it does not...
- Page 60 Troubleshooting Error What has happened Possible cause Where to find the cause code 83 (•) Out of maximum time for The dispenser unit has not Gear motor power insufficient dispensing been positioned in the or not appropriate dispenser position in the time predetermined by the Working microswitch broken or manufacturer...
- Page 61 Troubleshooting Error What has happened Possible cause Where to find the cause code 86 (•) The rest micro switch was The dispenser unit has Working micro switch broken or activated when the unit exceeded the dispenser disconnected was going into working position without stopping position Inverted wiring on the motor...
-
Page 62: Programming Menu
Programming menu Menu Notes Password Requested only if different to '0'. 0. Exit Exit with ENTER. 1. Identification 1.1. Machine code Identification of the machine. 1.2. Model Read-only. 1.3. Version Read-only. 1.4. Point-of-sale Identification of the user. 2. Settings 2.1. Temperature Hot"... - Page 63 Programming menu Menu Notes 2. Settings Enable/Disable the display of the credit inserted 2.8.2. Visual. credit in the slot. Default: No Enable/Disable the machine to dispense without 2.9. Check of used capsules controlling the number of used capsules inside the Default: Yes used-capsule collection drawer.
- Page 64 Ser vice menu Menù Note Password Requested only if different to '0' 0. Exit Exit with ENTER 1. Time/Date 1.1. Time Current timetable set 1.2. Date 1.2.1. Day 1.2.2. Month 1.2.3. Year 1.2.4. Day of the week 2. Statistics 2.1. Last Restart Read-only - Date and time of last initialisation 2.2.
- Page 65 Ser vice menu Menu Notes 5. Errors 5.1. Historical error Look through the last N errors: index 0 = oldest errors. 5.1.1. Display error Accessible only if there is at least one error. with up/down buttons 5.2. Historical Reset With "Yes" the last list of errors is cancelled. 5.3.
-
Page 66: Power Card
Power card Main component abbreviations Description Q1 + OP1 Capsule release Q4 + OP2 Main heating element 1000 W Q7 + OP3 Pump Q10 + OP4 Heating element 437 W (if present) Q11 + OP5 Steam solenoid valve (if present) Q12 + OP6 Solenoid valve water supply (if present) Q13 + OP7... - Page 67 CPU Card Main component abbreviations Description Battery plug (non removable) Hot water temperature sensor connection Serial card port cable connection 10-pin harness with POWER card Volume metering device harness Capsule presence microswitch harness Open capsule drawer microswitch harness Dispensing unit microswitch harness (Presence and work) Water sensor harness 7-pin harness with POWER card JP3 / JP4...
-
Page 68: Circuit Diagram
Circuit diagram “LB 2000 OFFICE COFFEE SERVICE” 83356 / R . 0.00 / M 2005 ANUAL CODE ARCH... -
Page 69: Hydraulic Diagram
Hydraulic diagram “LB 2000 OFFICE COFFEE SERVICE” 83356 / R . 0.00 / M 2005 ANUAL CODE ARCH... - Page 70 Index Inter face cable RS232diagram 15.1 Serial connections 15.2 Statistical data “LB 2000 OFFICE COFFEE SERVICE” 83356 / R . 0.00 / M 2005 ANUAL CODE ARCH...
- Page 71 Inter face cable RS232 diagram 15.1 Serial Connections The serial connections are used for the connection of the AUDIT systems. Connection: 4 contact telephone plug Characteristics of the physical link: RS232, 9600 baud Protocol: EVA-DTS This diagram shows how to correctly connect the connector RJ11 present on the machine and a connector RS232 present in the most up-to-date data acquisition equipment.
Need help?
Do you have a question about the Blue LB 2000 and is the answer not in the manual?
Questions and answers