Epson PM-400 User Manual
Hide thumbs
Also See for PM-400:
- Quick manual (53 pages) ,
- Start here (4 pages) ,
- How to set up (4 pages)
Table of Contents
Advertisement
Quick Links
Download this manual
See also:
Quick Manual
Advertisement
Table of Contents

Related Manuals for Epson PM-400


Summary of Contents for Epson PM-400
- Page 1 PM-400 User's Guide...
-
Page 3: Table Of Contents
Changing the Power and Sleep Timer Settings - Windows............18 Changing the Power and Sleep Timer Settings - OS X..............19 Epson Connect Solutions for Smartphones, Tablets, and More ............21 Using Epson Email Print ....................... 21 Using the Epson iPrint Mobile App ....................21 Using Epson Remote Print ...................... - Page 4 Loading Paper ............................38 Loading Paper in the Paper Feed Slot....................38 Paper Loading Capacity ........................41 Available Epson Papers ........................41 Borderless Paper Type Compatibility ....................42 Paper or Media Type Settings - Product Software................43 Selecting the Paper Source Settings - Control Panel ................. 43 Paper Type Settings - Control Panel .....................
- Page 5 Print Quality Settings - OS X ..................... 67 Print Options - OS X........................67 Selecting Page Setup Settings - OS X................... 68 Selecting Print Layout Options - OS X ................... 69 Sizing Printed Images - OS X ......................70 Managing Color - OS X........................70 Color Matching and Color Options - OS X.................
- Page 6 Checking Cartridge Status on the LCD Screen................94 Checking Cartridge Status with Windows ..................95 Checking Cartridge Status with OS X .................... 98 Purchase Epson Ink Cartridges......................99 Ink Cartridge Part Numbers ......................99 Removing and Installing the Ink Cartridge..................100 Adjusting Print Quality..........................
- Page 7 Network Software Cannot Find Product on a Network..............128 Product Does Not Appear in OS X Printer Window..............128 Cannot Print Over a Network....................... 129 Solving Paper Problems........................130 Paper Feeding Problems......................130 Paper Jam Problems Inside the Product ..................131 Paper Ejection Problems ......................
- Page 8 Wireless Connection Safety Instructions ..................161 FCC Compliance Statement......................162 Trademarks ............................162 Copyright Notice..........................163 A Note Concerning Responsible Use of Copyrighted Materials........... 164 Default Delay Times for Power Management for Epson Products ..........164 Copyright Attribution ........................164...
-
Page 9: Pm-400 User's Guide
PM-400 User's Guide Welcome to the PM-400 User's Guide. For a printable PDF copy of this guide, click here. -
Page 10: Product Basics
See these sections to learn about the basic features of your product. Using the Control Panel Product Parts Locations The Power Off and Sleep Timers Epson Connect Solutions for Smartphones, Tablets, and More Using AirPrint Using Google Cloud Print Using the Mopria Print Service Using the Control Panel See these sections to learn about the control panel and select control panel settings. -
Page 11: Control Panel Buttons
Control Panel Buttons power button home button The arrow buttons; navigate menus The + and – buttons; increase or decrease the number of copies stop button back button The OK button start button Parent topic: Using the Control Panel... -
Page 12: The Lcd Screen
The LCD Screen Displays network status You can scroll left or right when these arrows are displayed Displays available button options Screen name You can scroll up or down when these arrows are displayed Parent topic: Using the Control Panel Changing LCD Screen Language You can change the language used on the LCD screen. -
Page 13: Product Parts Locations
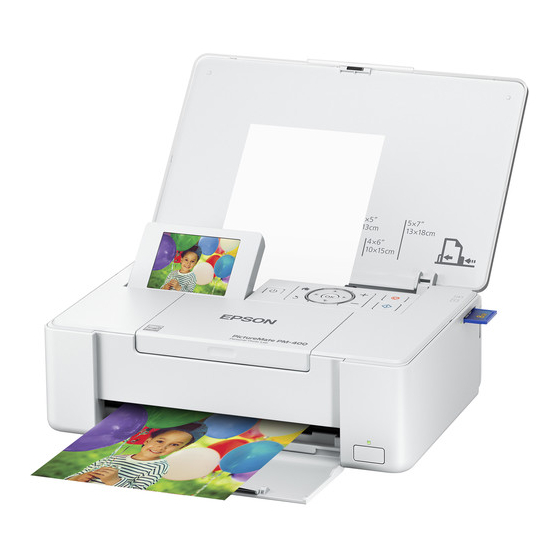
2. Press the arrow buttons to select Setup and press the OK button. 3. Select Printer Setup and press the OK button. 4. Select Sound and press the OK button. 5. Select Button Press and press the OK button. 6. Select Off and press the OK button. Parent topic: Using the Control Panel Product Parts Locations... - Page 14 Printer cover Rear paper feed Edge guide Inner cover LCD screen Power inlet Micro USB port Ink cartridge holder (do not remove) Memory card slot USB port Power light...
-
Page 15: The Power Off And Sleep Timers
Output tray and extension Parent topic: Product Parts Locations The Power Off and Sleep Timers The product enters sleep mode or turns off automatically if it is not used for a period of time. You can adjust the time period before power management, but increasing the time reduces the product's energy efficiency. -
Page 16: Changing The Sleep Timer Setting From The Control Panel
4. Select Power Off Timer and press the OK button. You see this screen: 5. Select the time period you want before the product automatically turns off when it is not in use and press the OK button. 6. Press the home button to exit. - Page 17 You see this screen: 4. Select Sleep Timer and press the OK button. You see this screen: 5. Select the time period you want before the product goes to sleep and press the OK button. 6. Press the home button to exit. Parent topic: The Power Off and Sleep Timers...
-
Page 18: Changing The Power And Sleep Timer Settings - Windows
Changing the Power and Sleep Timer Settings - Windows You can use the printer software to change the time period before the product enters sleep mode or turns off automatically. 1. Make sure your product is turned on. 2. Access the Windows Desktop and right-click the product icon in the Windows taskbar. 3. -
Page 19: Changing The Power And Sleep Timer Settings - Os X
8. Select the length of time after which you want the product to automatically turn off when it is not in use as the Power Off Timer setting. 9. Click Send. 10. Select the time period you want before the product goes to sleep as the Sleep Timer setting. 11. - Page 20 You see this window: 4. Turn on the Auto Power On setting if you want the product to automatically turn on when it receives a print job. Note: This setting works with print jobs sent over a USB or network connection. Enabling this setting slightly increases the product's power consumption in standby mode.
-
Page 21: Epson Connect Solutions For Smartphones, Tablets, And More
Using the Mopria Print Service Using Epson Email Print With Epson Email Print, you can print from any device that can send email, such as your smartphone, tablet, or laptop. Just activate your product's unique email address. When you want to print, attach a photo to an email and send it to your product. -
Page 22: Using Epson Remote Print
Remote Print and how to download the software. 3. Download and install the Remote Print software. 4. Obtain the email address and optional access key of the Epson product you want to use for printing, and enter this address during Remote Print setup. -
Page 23: Using Google Cloud Print
Wi-Fi Networking Using Google Cloud Print With a Google Account, you can print from your Apple or Android device to your Epson product. You can also print from Chromebooks and the Google Chrome browser without drivers or cables. Set up your Epson product for network printing. See the link below. -
Page 24: Setting Up Google Cloud Print On A Chromebook
With a Google Account, you can print from a Chromebook without drivers or cables. Set up your Epson product for network printing. See the link below. Note: Make sure your Epson product is connected to your wireless network before starting the Google Cloud Print setup. -
Page 25: Using The Mopria Print Service
You can use the Mopria Print Service to print from your Android phone or tablet (Android v4.4 or later) to your Epson product or any Mopria-certified product from other manufacturers. You can download the Mopria Print Service from Google Play. -
Page 26: Wi-Fi Networking
You can set up your product to communicate with your computer using a wireless router or access point. The wireless router or access point can be connected to your computer over a wireless or wired network. Epson product Wireless router or access point... -
Page 27: Selecting Wireless Network Settings From The Control Panel
Computer with a wireless interface Computer Internet Ethernet cable (used only for wired connection to the wireless router or access point) Selecting Wireless Network Settings from the Control Panel Parent topic: Wi-Fi Networking Selecting Wireless Network Settings from the Control Panel You can select or change wireless network settings using your product control panel. - Page 28 6. Press the arrow buttons to select the name of your wireless network and press the OK button. If you do not see your wireless network's name, you can enter it manually. Note: To enter the wireless network name manually, select Other Networks and press the OK button.
-
Page 29: Wi-Fi Direct Mode Setup
Wi-Fi Direct Mode Setup You can set up your product to communicate directly with your computer or another device without requiring a wireless router or access point. Epson product Computer with a wireless interface Other wireless device You can select one of these modes to communicate with your computer or device: Access point mode The product itself acts as the network access point for up to 4 devices. -
Page 30: Enabling Wi-Fi Direct Mode
To disconnect a peer-to-peer mode connection, release the connection to your product from your computer or other device. To enable peer-to-peer mode, you must select it from the Web Config Utility, under WiFi/Network Settings > Services > Wi-Fi Direct. Enabling Wi-Fi Direct Mode Parent topic: Wi-Fi Networking Related tasks... - Page 31 5. Press the down arrow button to change the password. Note: If you have already connected devices or computers to your product via Wi-Fi Direct, they will be disconnected when you change the password. 6. Select Yes and press the OK button. 7.
-
Page 32: Wi-Fi Protected Setup (Wps)
8. Press the down arrow button to view the Wi-Fi network name and password you selected. 9. Use your computer or wireless device to select the Wi-Fi network name (SSID) displayed on the LCD screen, then enter the password shown. 10. -
Page 33: Using Wps To Connect To A Network
Using WPS to Connect to a Network If you have a WPS-enabled wireless router or access point, you can use Wi-Fi Protected Setup (WPS) to connect your product to the network. 1. On the product, press the home button, if necessary. 2. - Page 34 You see this screen: 4. Select Network Status and press the OK button. You see a screen like this: Note: If you are connected to a network, the signal strength is displayed. 5. Press the up or down arrow button to view the product's network status. To view additional network details, press the left or right arrow button and select one of the options shown.
-
Page 35: Changing Or Updating Network Connections
Changing or Updating Network Connections See these sections to change or update how your product connects to a network. Accessing the Web Config Utility Changing a USB Connection to a Wi-Fi Connection Connecting to a New Wi-Fi Router Disabling Wi-Fi Features Parent topic: Wi-Fi Networking Related tasks... -
Page 36: Connecting To A New Wi-Fi Router
3. Download and install your product software from the Epson website using the instructions on the Start Here sheet. Parent topic: Changing or Updating Network Connections Related concepts Uninstall Your Product Software Connecting to a New Wi-Fi Router If you change the wireless router you have been using on your network, you need to update your product's Wi-Fi connection to the new router. - Page 37 You see this screen: 4. Select Wi-Fi Setup and press the OK button. 5. Select Disable Wi-Fi and press the OK button. 6. Select Yes and press the OK button to disable Wi-Fi. Parent topic: Changing or Updating Network Connections...
-
Page 38: Loading Paper
Before you print, load paper for the type of printing you will do. Loading Paper in the Paper Feed Slot Paper Loading Capacity Available Epson Papers Borderless Paper Type Compatibility Paper or Media Type Settings - Product Software Selecting the Paper Source Settings - Control Panel Loading Paper in the Paper Feed Slot You can print photos on a variety of paper types and sizes up to: 5 ×... - Page 39 2. Load paper, glossy or printable side up and short edge first, against the left side of the paper feed slot. Note: To load envelopes, insert the envelopes printable side up and flap edge left.
- Page 40 3. Slide the edge guide against the paper, but not too tightly. 4. If prompted by the product's LCD screen, select the size and type of the paper you loaded. Always follow these paper loading guidelines: • Load only the recommended number of sheets. •...
-
Page 41: Paper Loading Capacity
You can purchase genuine Epson ink and paper at epson.com/ink3 (U.S. sales) or epson.ca (Canadian sales). You can also purchase supplies from an Epson authorized reseller. To find the nearest one, call 800-GO-EPSON (800-463-7766). Note: Paper/media availability varies by country. Paper Type Size... -
Page 42: Borderless Paper Type Compatibility
5 × 7 inches (127 × 178 mm) S041464 Epson Premium Photo Paper 4 × 6 inches (102 × 152 mm) S041982 Semi-gloss Epson Ultra Premium Photo Paper 4 × 6 inches (102 × 152 mm) S042181 Glossy S042174 Parent topic: Loading Paper... -
Page 43: Paper Or Media Type Settings - Product Software
Paper or Media Type Settings - Product Software For this paper Select this Paper Type or Media Type setting Plain paper Plain Paper Epson Ultra Premium Photo Paper Glossy Ultra Premium Photo Paper Glossy Epson Premium Photo Paper Glossy Premium Photo Paper Glossy Epson Photo Paper Glossy... -
Page 44: Paper Type Settings - Control Panel
Loading Paper Paper Type Settings - Control Panel For this paper Select this Paper Type setting Plain paper Plain Paper Epson Ultra Premium Photo Paper Glossy Ultra Glossy Epson Premium Photo Paper Glossy Prem. Glossy Epson Photo Paper Glossy Glossy Epson Premium Photo Paper Semi-gloss Prem. -
Page 45: Printing From A Computer
Note: If you have an Internet connection, it is a good idea to check for updates to your product software on Epson's support website. If you see a Software Update screen, select Enable automatic checking and click OK. The update scans your system to see if you have the latest product software. Follow the on-screen instructions. - Page 46 3. If necessary, select your product name as the printer you want to use. Note: You may also need to select Properties or Preferences to view your print settings. You see the Main tab of your printer settings window: 4. Select the size of the paper you loaded as the Document Size setting. Note: You can also select the User-Defined setting to create a custom paper size, but you will not be able to use the Borderless setting.
-
Page 47: Print Quality Options - Windows
6. Select the orientation of your document. Note: If you are printing an envelope, select Landscape. 7. Select the type of paper you loaded as the Paper Type setting. Note: The setting may not exactly match the name of your paper. Check the paper type settings list for details. -
Page 48: Multi-Page Printing Options - Windows
High For text and graphics with high print quality. Parent topic: Selecting Basic Print Settings - Windows Multi-Page Printing Options - Windows You can select any of the available options in the Multi-Page menu to set up your multi-page print job. 2-Up and 4-Up Prints 2 or 4 pages on one sheet of paper. - Page 49 You see a window like this: 3. Select the double-sided printing options you want to use. 4. Click OK to return to the Main tab. 5. Print a test copy of your double-sided document to test the selected settings. 6. Follow any instructions displayed on the screen during printing. Note: The surface of the paper may smear during double-sided printing.
-
Page 50: Double-Sided Printing Options - Windows
Double-sided Printing Options - Windows You can select any of the available options on the 2-Sided Printing Settings window to set up your double-sided print job. Binding Edge Options Select a setting that orients double-sided print binding in the desired direction. Binding Margin Options Select options that define a wider margin to allow for binding. - Page 51 1. To change the size of your printed document or photo, select the Reduce/Enlarge Document checkbox and select one of these sizing options: • Select the Fit to Page option to size your image to fit the paper you loaded. Select the size of the your document or photo as the Document Size setting, and the size of your paper as the Output Paper setting.
-
Page 52: Custom Color Correction Options - Windows
Custom Color Correction Options - Windows You can select any of the available options in the Color Correction window to customize the image colors for your print job. -
Page 53: Image Options And Additional Settings - Windows
Color Controls Lets you select a Color Mode setting, individual settings for Brightness, Contrast, Saturation, and Density, and individual color tones. Depending on the selected color mode, you can also adjust the midtone density using the Gamma setting. Fix Photo Improves the color, contrast, and sharpness of flawed photos. -
Page 54: Selecting A Printing Preset - Windows
Selecting a Printing Preset - Windows For quick access to common groups of print settings, you can select a printing preset on the Main or More Options tab. Note: You can create your own preset by clicking the Add/Remove Presets button. 1. -
Page 55: Selecting Extended Settings - Windows
2. Place your cursor over one of the Printing Presets to view its list of settings. 3. Click on a preset to change its settings, or use any of the available options on the screen to control your printing presets. 4. -
Page 56: Extended Settings - Windows
You can select from these settings on the Extended Settings window. Show Progress Meter Displays the progress of print jobs as they are being printed. Enable EPSON Status Monitor 3 Enables product monitoring for ink and paper supplies and other issues. Check Paper Width Before Printing Prevents printing beyond the edges of the paper if the paper size setting is incorrect;... -
Page 57: Printing Your Document Or Photo - Windows
Page Rendering Mode Increases print speed when printing is extremely slow or the print head stops during printing. Print as Bitmap Increases print speed when printing is extremely slow or the print head stops during printing, and other settings do not help. Skip Blank Page Ensures that your product does not print pages that contain no text or images. - Page 58 You see your application's Print window, such as this one: 2. Click OK or Print to start printing. Checking Print Status - Windows Parent topic: Printing with Windows...
-
Page 59: Checking Print Status - Windows
Checking Print Status - Windows During printing, you see this window showing the progress of your print job. It allows you to control printing and check ink cartridge status. • To cancel printing, click Cancel. • To see print jobs waiting to print, click Print Queue. •... -
Page 60: Changing The Language Of The Printer Software Screens
You see the printer settings window: 3. Select the print settings you want to use as defaults in all your Windows programs. 4. Click OK. These settings are now the defaults selected for printing. You can still change them as needed for printing in any program session. -
Page 61: Changing Automatic Update Options
3. Click the Maintenance tab. You see the maintenance options: 4. Select the language you want to use as the Language setting. 5. Click OK to close the printer software window. The printer software screens appear in the language you selected the next time you access them. Parent topic: Selecting Default Print Settings - Windows Changing Automatic Update Options... -
Page 62: Printing With Os X
You can print with your product using any OS X printing program, as described in these sections. Note: If you have an Internet connection, it is a good idea to check for updates to your product software on Epson's support website. Selecting Basic Print Settings - OS X... -
Page 63: Selecting Basic Print Settings - Os X
Sizing Printed Images - OS X Managing Color - OS X Selecting Printing Preferences - OS X Printing Your Document or Photo - OS X Parent topic: Printing from a Computer Selecting Basic Print Settings - OS X Select the basic settings for the document or photo you want to print. 1. - Page 64 You see the expanded printer settings window for your product: Note: The print window may look different, depending on the version of OS X and the application you are using. 5. Select the Copies and Pages settings as necessary. Note: If you do not see these settings in the print window, check for them in your application before printing.
- Page 65 6. Select the page setup options: Paper Size and Orientation. Note: If you do not see these settings in the print window, check for them in your application before printing. They may be accessible by selecting Page Setup from the File menu. 7.
- Page 66 You see these settings: 9. Select the type of paper you loaded as the Media Type setting. Note: The setting may not exactly match the name of your paper. Check the paper type settings list for details. 10. Select the Print Quality setting you want to use. 11.
-
Page 67: Print Quality Settings - Os X
Print Quality Settings - OS X You can select any of the print quality settings to fine-tune the quality of your print. Some settings may be unavailable, depending on the paper type and border setting you have chosen. Normal For everyday text and image printing. Fine For text and graphics with good quality and print speed. -
Page 68: Selecting Page Setup Settings - Os X
Selecting Page Setup Settings - OS X Depending on your application, you may be able to select the paper size and orientation settings from the print window. Note: If you do not see these settings in the print window, check for them in your application before printing. -
Page 69: Selecting Print Layout Options - Os X
Selecting Print Layout Options - OS X You can select a variety of layout options for your document or photo by selecting Layout from the pop- up menu on the print window. • To print multiple pages on one sheet of paper, select the number of pages in the Pages per Sheet pop-up menu. -
Page 70: Sizing Printed Images - Os X
Sizing Printed Images - OS X You can adjust print order and the size of the image as you print it by selecting Paper Handling from the pop-up menu on the Print window. • To print only selected pages in a multi-page document, select an option from the Pages to Print pop- up menu. -
Page 71: Color Matching And Color Options - Os X
Color Matching and Color Options - OS X You can select from these settings on the Color Matching and Color Options menus. Color Matching Settings EPSON Color Controls Lets you manage color using controls in your printer software or turn off color management. ColorSync Prints using standard color profiles for your product and paper to help match image colors. -
Page 72: Selecting Printing Preferences - Os X
Color Options Settings Manual Settings Lets you select manual color adjustments. Click the arrow next to Advanced Settings and select settings for Brightness, Contrast, Saturation, and individual color tones. You can also select a color Mode setting for printing photos and graphics and the Fix Red-Eye setting to reduce or remove red- eye in photos. -
Page 73: Printing Preferences - Os X
You see a screen like this: 4. Select any of the available printing preferences. 5. Click OK. Printing Preferences - OS X Parent topic: Printing with OS X Printing Preferences - OS X You can select from these settings on the Options or Driver tab. Skip Blank Page Ensures that your product does not print pages that contain no text or images. -
Page 74: Printing Your Document Or Photo - Os X
Printing Your Document or Photo - OS X Once you have selected your print settings, you are ready to print. Click Print at the bottom of the print window. Checking Print Status - OS X Parent topic: Printing with OS X Checking Print Status - OS X During printing, you can view the progress of your print job, control printing, and check ink status. -
Page 75: Cancelling Printing Using A Product Button
You see the print status window: 2. Select the following options as necessary for your version of OS X: • To cancel printing, click the print job and click or Delete. • To pause a print job, click the print job and click or Hold. -
Page 76: Using Memory Cards With Your Product
Using Memory Cards With Your Product Follow the instructions here to work with a memory card inserted into your product. Inserting a Memory Card Printing from a Memory Card Transferring Photos on a Memory Card Inserting a Memory Card Insert only one memory card at a time into a memory card slot on your product. 1. -
Page 77: Memory Card Types
Removing a Memory Card Parent topic: Using Memory Cards With Your Product Memory Card Types You can insert these types of memory cards in your product. Note: Cards marked with an asterisk (*) require an adapter; consult your adapter documentation for details on using it. -
Page 78: Removing A Memory Card
Removing a Memory Card After you finish working with a memory card, check to make sure it is safe to remove it from your product. Caution: Do not remove a memory card or turn off your product while the memory card access light is flashing or you may lose data from the memory card. - Page 79 2. Press the arrow buttons to select Print Photos and press the OK button. 3. Select View and Print Photos and press the OK button. A photo on your memory card is displayed: 4. Press the right or left arrow button to scroll through your photos and display one that you want to print.
-
Page 80: Printing Photo Layouts
8. Select from the following options: • Browse to select photos by date • Select Photos to select all photos • Display Options to select how photos are displayed on the LCD screen • Print Settings to change the print settings •... - Page 81 You see this screen: 4. Select one of the layout options and press the OK button. 5. Select the paper size setting that matches the paper you loaded and press the OK button. 6. Select the paper type setting that matches the paper you loaded and press the OK button. 7.
-
Page 82: Photo Layout Options
the + or – button to select a photo for your layout. Press the down arrow button to view additional settings. Press the OK button when you're finished. • To place photos in the layout manually, select Place Photos Manually and press the OK button. Follow the instructions on the LCD screen to select and place photos on your layout sheet. -
Page 83: Print Setting Options
Photo ID Print 4 ID-sized photos on one sheet. P.I.F. This option is displayed if a P.I.F. frame is on your memory card. Parent topic: Printing Photo Layouts Print Setting Options Select the Print Settings options you want to use when printing photos from a memory card or external device. -
Page 84: Photo Adjustment Options
Parent topic: Printing from a Memory Card Related references Paper Type Settings - Control Panel Photo Adjustment Options Select the Photo Adjustment options you want to use when printing photos from a memory card or external device. The modifications affect only the printed copy of the photo, not the original file. Photo Adjustment Available options Description... -
Page 85: Transferring Photos On A Memory Card
face with an intentional color cast, such as a statue, you may want to turn off Fix Photo to retain the special color effects. Parent topic: Printing from a Memory Card Transferring Photos on a Memory Card You can transfer photos to and from a memory card inserted into a memory card slot on your product. Note: To use this feature, the product must be connected to your computer over a network. - Page 86 Parent topic: Transferring Photos on a Memory Card Related tasks Inserting a Memory Card Removing a Memory Card Viewing the Network Status...
-
Page 87: Using An External Device With Your Product
Check your camera manual to see if it is compatible. Note: Your photos must be in JPG format and sized from 80 × 80 to 10200 × 10200 pixels. Epson cannot guarantee the compatibility of your camera. Some combinations of paper type, size, and layout may not be supported, depending on your camera and the product settings. - Page 88 2. Press the arrow buttons to select Setup and press the OK button. 3. Select External Device Setup and press the OK button.
- Page 89 4. Select Print Settings and press the OK button. 5. Select the print settings you want to use. 6. When you are done, press the back button. 7. Select Photo Adjustments and press the OK button. 8. Select the photo adjustments you want to use, then press the home button to exit.
-
Page 90: Connecting And Printing From A Camera
Related references Print Setting Options Photo Adjustment Options Related tasks Connecting and Printing from a Camera Connecting and Printing from a Camera Before you connect your camera, make sure the product is turned on but not printing. 1. Remove any memory cards from the product. 2. -
Page 91: Printing From A Camera Wirelessly
5. Follow the instructions that came with your camera to select and print your photos. When you finish printing, turn off your camera and disconnect it from the product. Parent topic: Printing from a Camera Related tasks Removing a Memory Card Related topics Loading Paper Printing from a Camera Wirelessly... -
Page 92: Usb Device File Specifications
Connecting and Using a USB Flash Drive or External Device Before you connect your thumb drive or device, make sure the product is turned on but not printing. Note: Epson cannot guarantee the compatibility of your drive. 1. Remove any memory cards from the product. - Page 93 7. Select the photos to print from the LCD screen. When you finish printing, make sure the access light on the drive is not flashing, then remove or disconnect it from the product. Caution: Do not remove the USB drive or turn off the product when the access light is flashing, or you may lose photos on the drive.
-
Page 94: Replacing The Ink Cartridge
Note: Please dispose of your used Epson branded ink cartridges responsibly and in accordance with local requirements. If you would like to return your used ink cartridges to Epson for proper disposal, please go to epson.com/recycle... -
Page 95: Checking Cartridge Status With Windows
2. Press the arrow buttons to select Setup and press the OK button. 3. Select Ink Level and press the OK button. The ink cartridge status is displayed. Note: Displayed ink level is approximate. 4. Press the OK button to exit. Parent topic: Check Cartridge Status Related tasks... - Page 96 You see this window: 2. Replace or reinstall the ink cartridge, if necessary. Note: If the cartridge is broken, incompatible with the product model, or improperly installed, Epson Status Monitor will not display an accurate cartridge status. 3. To disable the low ink reminder, right-click the product icon in the Windows taskbar and select...
- Page 97 You see this window: 4. Deselect the See Low Ink Reminder alerts checkbox at the bottom of the screen. 5. To disable promotional offers, deselect the Display Epson Offers checkbox. Parent topic: Check Cartridge Status Related tasks Removing and Installing the Ink Cartridge...
-
Page 98: Checking Cartridge Status With Os X
1. In the Apple menu or the Dock, select System Preferences. Select Print & Fax, Print & Scan, or Printers & Scanners, select your product, and select Options & Supplies. Select Utility and select Open Printer Utility. 2. Select EPSON Status Monitor. You see a window like this: 3. Do the following as necessary:... -
Page 99: Purchase Epson Ink Cartridges
(U.S. sales) or epson.ca (Canadian sales). You can also purchase supplies from an Epson authorized reseller. To find the nearest one, call 800-GO-EPSON (800-463-7766). Note: This product uses only genuine Epson-brand cartridges. Other brands of ink cartridges and ink supplies are not compatible and, even if described as compatible, may not function properly. -
Page 100: Removing And Installing The Ink Cartridge
Removing and Installing the Ink Cartridge Make sure you have a replacement cartridge handy before you begin. You must install the new cartridge immediately after removing the old one. Caution: Leave your old cartridge in the printer until you are ready to replace it to prevent the print head nozzles from drying out. - Page 101 4. Remove the cap as shown. Retain the cap so that you can use it to recap the used cartridge you are replacing. Caution: Do not touch the ink cartridge areas shown here. Doing so may prevent normal operation and printing. Warning: If ink gets on your skin, wash it thoroughly with soap and water.
- Page 102 6. Open the inner cover. Caution: Do not move the print head by hand; otherwise, you may damage your product. Do not touch the flat white cable inside the product. 7. Press down the blue tab to unlock the used ink cartridge, then lift it out.
- Page 103 8. Use the cap from the replacement ink cartridge to recap the used cartridge before disposing of it. Note: Dispose of used cartridges carefully. Do not take the used cartridge apart or try to refill it. 9. Hold the cartridge with the green chip facing you and insert the cartridge at an angle as shown. Press down the ink cartridge until it clicks into place.
- Page 104 Store the ink cartridge in the same environment as the product. Do not leave the product with the ink cartridges removed for an extended period of time. Otherwise, ink remaining in the print head nozzles may dry out and you may not be able to print. Parent topic: Replacing the Ink Cartridge Related concepts Purchase Epson Ink Cartridges...
-
Page 105: Adjusting Print Quality
Adjusting Print Quality If your print quality declines, you may need to run a utility to clean or align the print head. If running these utilities does not solve the problem, you may need to replace the ink cartridge. Print Head Maintenance Print Head Alignment Cleaning the Paper Path Print Head Maintenance... - Page 106 3. Press the arrow buttons to select Setup and press the OK button. 4. Select Maintenance and press the OK button. 5. Select Nozzle Check and press the OK button. 6. Press the start button. The nozzle check pattern is printed.
-
Page 107: Checking The Nozzles Using A Computer Utility
If you don’t see any improvement after cleaning the print head up to 2 times, turn the product off and wait at least 6 hours. Then check the print head nozzles and try cleaning the print head again, if necessary. If quality still does not improve, contact Epson. Parent topic:... - Page 108 1. Make sure there are no errors on the LCD screen. 2. Load paper in this size in your product: 4 × 6 inches (102 × 152 mm). 3. Do one of the following: • Windows: Access the Windows Desktop and right-click the product icon in the Windows taskbar. •...
-
Page 109: Print Head Cleaning
6. Check the printed pattern to see if there are gaps in the lines. Print head is clean Print head needs cleaning 7. If there are no gaps, click Finish. If there are gaps or the pattern is faint, clean the print head. Parent topic: Print Head Nozzle Check Related tasks... -
Page 110: Cleaning The Print Head Using The Product Control Panel
Parent topic: Print Head Maintenance Related topics Replacing the Ink Cartridge Cleaning the Print Head Using the Product Control Panel You can clean the print head nozzles using the control panel on your product. 1. Load paper in this size in your product: 4 × 6 inches (102 × 152 mm). 2. -
Page 111: Cleaning The Print Head Using A Computer Utility
If you don’t see any improvement after cleaning the print head up to 2 times, turn the product off and wait at least 6 hours. Then check the print head nozzles and try cleaning the print head again, if necessary. If quality still does not improve, contact Epson. Parent topic:... - Page 112 1. Make sure there are no errors on the LCD screen. 2. Load paper in this size in your product: 4 × 6 inches (102 × 152 mm). 3. Do one of the following: • Windows: Access the Windows Desktop and right-click the product icon in the Windows taskbar. •...
-
Page 113: Print Head Alignment
If you don’t see any improvement after cleaning the print head up to 2 times, turn the product off and wait at least 6 hours. Then check the print head nozzles and try cleaning the print head again, if necessary. If quality still does not improve, contact Epson. Parent topic:... -
Page 114: Aligning The Print Head Using The Product Control Panel
Note: Banding may also occur if your print head nozzles need cleaning. Aligning the Print Head Using the Product Control Panel Parent topic: Adjusting Print Quality Aligning the Print Head Using the Product Control Panel You can align the print head using the control panel on your product. 1. -
Page 115: Cleaning The Paper Path
5. Select Print Head Alignment and press the OK button. 6. Press the start button to print an alignment sheet. Note: Do not cancel printing while you are printing a head alignment pattern. 7. Check the printed pattern and press the up or down arrow button to select the number representing the most solid printed pattern for the first set, then press the OK button. - Page 116 Caution: Do not use tissues to clean the rollers inside the product; lint from tissues may clog the print head nozzles. 1. Load a few sheets of plain paper in the product. 2. Press the home button, if necessary. 3. Press the arrow buttons to select Setup and press the OK button. 4.
-
Page 117: Transporting And Cleaning Your Product
Transporting and Cleaning Your Product Follow the instructions in these sections to transport your product or clean it if necessary. Carrying and Transporting Your Product Cleaning Your Product Carrying and Transporting Your Product Whenever you transport your product, prepare it as described here. Caution: Observe the following precautions when transporting the product: •... -
Page 118: Cleaning Your Product
6. Close the LCD screen, cover, and output tray. 7. Place the product in a bag if traveling a short distance, or in its original packaging materials (or equivalent packing materials) when transporting the product a long distance. If print quality has declined when you print again, clean and align the print head. Parent topic: Transporting and Cleaning Your Product Related concepts... - Page 119 1. Turn off the product. 2. Unplug the power cable. 3. Disconnect any connected cables. 4. Remove all the paper. 5. Remove any memory cards inserted in the product. 6. Clean the outer case and control panel with a soft, dry cloth. Do not use any liquid or chemical cleansers.
-
Page 120: Solving Problems
Where to Get Help Checking for Software Updates Periodically, it's a good idea to check Epson's support website for free updates to your product software. You can select Download the Latest Software from the Home screen of this manual or visit Epson's driver download site (U.S. -
Page 121: Product Status Messages
During the life of your product it may reach a condition where either satisfactory print quality cannot be maintained or the ink pads have reached the end of their usable life. The Epson Status Monitor, your LCD screen, or lights on the control panel will advise you when these parts need replacing. If this... -
Page 122: Running A Product Check
If the product is out of warranty, the pads can be replaced by any Epson authorized service provider. The waste ink pads are not a user-replaceable part. Parent topic: Solving Problems Related references... - Page 123 5. Select Maintenance and press the OK button. 6. Select Nozzle Check and press the OK button. 7. Press the start button. The nozzle check pattern is printed. 8. Do one of the following, depending on the results of the product check: •...
-
Page 124: Resetting Control Panel Defaults
• If the page prints but the nozzle check pattern has gaps, clean or align the print head. • If the page does not print, the product may have a problem. Check for other solutions. If they do not work, contact Epson. Parent topic:... -
Page 125: Solving Setup Problems
• If the product's print head stops moving or making noise, and the charging process has not finished after approximately 5 minutes, turn off your product. Turn it back on and check to see if charging is still in progress. If it is still in progress, contact Epson for help. Parent topic:... -
Page 126: Usb Connection Problems
Check these solutions if you have problems setting up or using your product on a network. Note: Breakdown or repair of this product may cause loss of network data and settings. Epson is not responsible for backing up or recovering data and settings during or after the warranty period. We recommend that you make your own backup or print out your network data and settings. - Page 127 • Make sure to place your product within contact range of your 2.4 GHz router or access point. Avoid placing your product near a microwave oven, 2.4 GHz cordless phone, or large metal object, such as a filing cabinet. Note: If you are using a 5 GHz wireless router, set the router to operate in dual band (2.4 GHz and 5 GHz) mode.
-
Page 128: Network Software Cannot Find Product On A Network
Note: If you are reading these instructions online, you will lose your Internet connection when you initialize your router, so note the next step before initializing it. 4. Download your product software from the Epson website using the instructions on the Start Here sheet. -
Page 129: Cannot Print Over A Network
• If you are connecting the product via Wi-Fi Protected Setup (WPS) and the Wi-Fi icon on your product's LCD screen is not lit, make sure you select one of the WPS options from the product control panel within 2 minutes of pressing the WPS button on your router. •... -
Page 130: Solving Paper Problems
• If you are connecting the product wirelessly via EpsonNet Setup and the Wi-Fi connection icon is not lit or does not appear on the product's LCD screen, make sure your product software was installed correctly. If necessary, reinstall your software. Parent topic: Solving Network Problems Related tasks... -
Page 131: Paper Jam Problems Inside The Product
Related references Paper Loading Capacity Paper Jam Problems Inside the Product Related tasks Loading Paper in the Paper Feed Slot Paper Jam Problems Inside the Product If paper has jammed inside the product, follow the steps below to clear the jam. 1. - Page 132 3. If necessary, carefully pull out any jammed paper from the front. 4. Open the inner cover and carefully remove any jammed paper.
-
Page 133: Paper Ejection Problems
Caution: Do not touch the flat white cable inside the printer. 5. Close the inner cover. 6. Follow the prompts on the LCD screen to clear any error messages. Parent topic: Solving Paper Problems Paper Ejection Problems If you have problems with paper ejecting properly, try these solutions: •... -
Page 134: Nothing Prints
Nothing Prints If you have sent a print job and nothing prints, try these solutions: • Make sure your product is turned on. • Make sure any interface cables are connected securely at both ends. • If you connected your product to a USB hub, make sure it is a first-tier hub. If it still does not print, connect your product directly to your computer instead of the hub. -
Page 135: Printing Is Slow
3. Click the Maintenance tab. 4. Click the Extended Settings button. 5. Select Enable EPSON Status Monitor 3, then click OK. 6. Click the Monitoring Preferences button. 7. Click the checkbox for the option that adds the shortcut icon to the taskbar. -
Page 136: Solving Page Layout And Content Problems
• Page Rendering Mode • Print as Bitmap Parent topic: Solving Problems Printing from a Computer Related references Windows System Requirements OS X System Requirements Paper or Media Type Settings - Product Software Related tasks Selecting Basic Print Settings - Windows Selecting Extended Settings - Windows Selecting Basic Print Settings - OS X Selecting Printing Preferences - OS X... -
Page 137: Too Many Copies Print
• Turn off the Mirror Image, Flip horizontally, or Reverse page orientation settings in your printer software. (This option has different names, depending on your operating system version.) Note: Leave these options turned on when you print on Epson Iron-on Cool Peel Transfer paper, if available for your product. -
Page 138: Incorrect Margins On Printout
Incorrect Margins on Printout If your printed page has incorrect margins, try these solutions: • Make sure you selected the correct paper size settings in your printing program and printer software. • Make sure you selected the correct margins for your paper size in your printing program. •... -
Page 139: Incorrect Characters Print
Selecting Basic Print Settings - OS X Selecting Page Setup Settings - OS X Incorrect Characters Print If incorrect characters appear in your prints, try these solutions before reprinting: • Make sure any cables are securely connected at both ends. •... -
Page 140: Slanted Printout
Slanted Printout If your printouts are slanted, try these solutions: • Slide the edge guide against the edge of the paper. • Select a higher print quality setting in your printer software. • Turn off any high speed settings in your product software. •... -
Page 141: Blurry Or Smeared Printout
• Make sure your paper meets the specifications for your product. • Use Epson papers to ensure proper saturation and absorption of genuine Epson inks. • Make sure the paper type setting in your product software matches the type of paper you loaded. -
Page 142: Faint Printout Or Printout Has Gaps
Related concepts Print Head Nozzle Check Print Head Cleaning Print Head Alignment Related references Available Epson Papers Paper Specifications Related tasks Selecting Basic Print Settings - Windows Selecting Additional Layout and Print Options - Windows Selecting Extended Settings - Windows... -
Page 143: Grainy Printout
• Make sure the paper type setting matches the type of paper you loaded. • Make sure your paper is not damp, curled, old, or loaded incorrectly in your product. • Align the print head. • Clean the paper path. Parent topic: Solving Print Quality Problems Related concepts... -
Page 144: Incorrect Colors
• Your printed colors can never exactly match your on-screen colors. However, you can use a color management system to get as close as possible. Try using the color management options in your printer software. • For best results, use genuine Epson ink and paper. Parent topic: Solving Print Quality Problems... -
Page 145: Solving Memory Card Problems
Related concepts Print Head Nozzle Check Print Head Cleaning Related tasks Selecting Basic Print Settings - Windows Selecting Additional Layout and Print Options - Windows Selecting Basic Print Settings - OS X Managing Color - OS X Related topics Replacing the Ink Cartridge Solving Memory Card Problems Check these solutions if you have problems using memory cards with your product. -
Page 146: Cannot Transfer Photos To Or From A Memory Card Or Device
• If you have too many photos on your memory card or device, you may not see all the photos you expect or may be prompted to select a group of photos by date. Reduce the number of photos on your card or select one group of photos at a time. -
Page 147: Uninstalling Printing Software - Windows
In the next window, select your product, if necessary, and click OK. Then follow any on-screen instructions. 4. Restart your computer, then re-install your software. Note: If you find that re-installing your product software does not solve a problem, contact Epson. Parent topic: Uninstall Your Product Software Uninstalling Product Software - OS X In most cases, you do not need to uninstall your product software before re-installing it. -
Page 148: Where To Get Help
Note: If you find that re-installing your product software does not solve a problem, contact Epson. 1. To download the Uninstaller utility, visit the Epson download site (U.S. downloads Canadian downloads). 2. Follow the instructions on the screen to install the Uninstaller utility. - Page 149 Purchase Supplies and Accessories You can purchase genuine Epson ink and paper at epson.com/ink3 (U.S. sales) or epson.ca (Canadian sales). You can also purchase supplies from an Epson authorized reseller. To find the nearest one, call 800-GO-EPSON (800-463-7766). Parent topic: Solving Problems...
-
Page 150: Technical Specifications
Technical Specifications These sections list the technical specifications for your product. Note: Epson offers a recycling program for end of life products. Please go to this site for information on how to return your products for proper disposal. Windows System Requirements... -
Page 151: Os X System Requirements
Note: Since the quality of any particular brand or type of paper may be changed by the manufacturer at any time, Epson cannot guarantee the quality of any non-Epson brand or type of paper. Always test a sample of paper stock before purchasing large quantities or printing large jobs. -
Page 152: Printable Area Specifications
Plain paper weight 17 lb (64 g/m ) to 24 lb (90 g/m Envelopes Size No. 10 (4.1 × 9.5 inches [105 × 241 mm]) Paper types Plain bond paper Weight 20 lb (75 g/m ) to 24 lb (90 g/m Parent topic: Technical Specifications Printable Area Specifications... - Page 153 Reduced print quality area/top: 1.46 inches (37 mm) minimum Reduced print quality area/bottom: 1.56 inches (39 mm) minimum Single sheets - borderless printing Reduced print quality area/top: 1.57 inches (40 mm) minimum Reduced print quality area/bottom: 1.65 inches (42 mm) minimum Envelopes Left/right margins: 0.12 inch (3 mm) minimum Top/bottom margins: 0.20 inch (5 mm) minimum...
-
Page 154: Ink Cartridge Specifications
Technical Specifications Ink Cartridge Specifications Note: We recommend that you use genuine Epson cartridges and do not refill them. The use of other products may affect your print quality and could result in printer damage. The cartridge included with the printer is designed for printer setup and not for resale. After some ink is used for charging, the rest is available for printing. -
Page 155: External Usb Device Specifications
• Security settings, such as password or encryption, etc. • Built-in USB hub Note: Use only external storage devices with independent AC power sources. External storage devices that are powered via USB are not recommended. Epson cannot guarantee the operation of externally connected devices. CD-ROM/CD-R drive... -
Page 156: Dimension Specifications
Parent topic: Technical Specifications Dimension Specifications Height Stored: 3.3 inches (85 mm) Printing: 7.9 inches (201 mm) Width Stored: 9.8 inches (249 mm) Printing: 9.8 inches (249 mm) Depth Stored: 6.9 inches (176 mm) Printing: 15.1 inches (383 mm) Weight 4.0 lb (1.8 kg) (without ink cartridge and AC adapter) -
Page 157: Environmental Specifications
For computer Hi-Speed USB For external USB and Hi-Speed USB PictBridge device Note: Epson cannot guarantee the operation of externally connected devices. Parent topic: Technical Specifications Network Interface Specifications Standards IEEE 802.11 b/g/n (complies with either IEEE 802.11 b/g or IEEE 802.11 b/g/n, depending on purchase location) -
Page 158: Safety And Approvals Specifications
• Manufacturer: Askey Computer Corporation. • Type: WLU6320-D69 (RoHS) This product conforms to Part 15 of FCC Rules and RSS-210 of the IC Rules. Epson cannot accept responsibility for any failure to satisfy the protection requirements resulting from a non-recommended modification of the product. -
Page 159: Notices
Notices Check these sections for important notices about your product. Note: Epson offers a recycling program for end of life products. Please go to this site for information on how to return your products for proper disposal. General Printer Safety Instructions... -
Page 160: Ink Cartridge Safety Instructions
• Leave enough room around the printer for sufficient ventilation. Do not block or cover openings in the case or insert objects through the slots. • Keep the printer away from potential sources of electromagnetic interference, such as loudspeakers or the base units of cordless telephones. -
Page 161: Lcd Screen Safety Instructions
• Use only a dry, soft cloth to clean the LCD screen. Do not use liquid or chemical cleansers. • If the LCD screen is damaged, contact Epson. If the liquid crystal solution gets on your hands, wash them thoroughly with soap and water. If the liquid crystal solution gets into your eyes, flush them immediately with water. -
Page 162: Fcc Compliance Statement
CAN ICES-3(B)/NMB-3(B) Parent topic: Notices Trademarks ® EPSON is a registered trademark, EPSON Exceed Your Vision is a registered logomark, and Epson Connect is a trademark of Seiko Epson Corporation. Epson iPrint and Remote Print are trademarks of Seiko Epson Corporation. -
Page 163: Copyright Notice
Seiko Epson Corporation. The information contained herein is designed only for use with this Epson product. Epson is not responsible for any use of this information as applied to other products. -
Page 164: A Note Concerning Responsible Use Of Copyrighted Materials
A Note Concerning Responsible Use of Copyrighted Materials Epson encourages each user to be responsible and respectful of the copyright laws when using any Epson product. While some countries' laws permit limited copying or reuse of copyrighted material in certain circumstances, those circumstances may not be as broad as some people assume. Contact your legal advisor for any questions regarding copyright law.
Need help?
Do you have a question about the PM-400 and is the answer not in the manual?
Questions and answers
The connection to the internet keeps dropping for the pm-400. I don’t experience this issue with the WF-7820. My internet signal is very strong. Do this primer needs to be replaced?
No, the Epson PM-400 does not necessarily need to be replaced if it keeps dropping the internet connection. The manual suggests troubleshooting steps for network problems, such as checking the router, ensuring compatibility with a 2.4 GHz network, and resetting the router. If issues persist, further troubleshooting or contacting Epson support may be necessary before considering replacement.
This answer is automatically generated
Thanks for your response. I have already completed a lot of troubleshooting. When I first started working on this issue it would not connect to the internet. Also, as previously mentioned I have an epson workforce 7820 all in one that connects without issue to the internet. The router isn’t the issue. The issue is with the PM-400 printer. Please provide the email address and phone number to customer support. Thanks