Table of Contents
Advertisement
Advertisement
Table of Contents

Subscribe to Our Youtube Channel
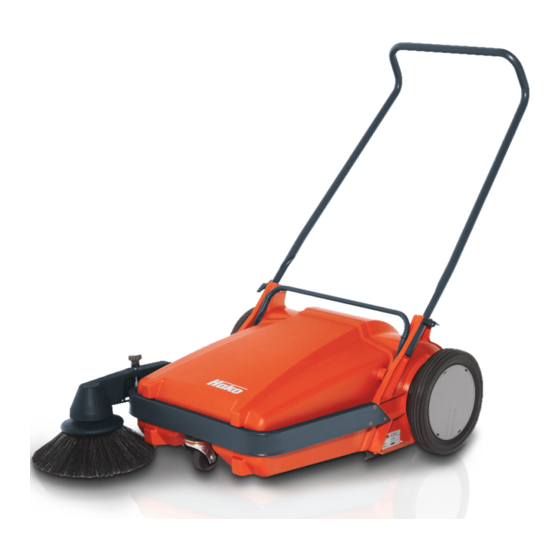
Summary of Contents for HAKO Sweepmaster M600
- Page 1 Sweepmaster M600...
-
Page 3: Table Of Contents
If repair work has to be performed, make sure that only genuine Hako spare parts may guarantee a de- pendable machine and will make sure that your rights under current warranty are not affected. -
Page 4: Provisions For Use
Provisions for use Acceptance It is our desire that the good charac- teristics of the Sweepmaster M600 of the machine The Sweepmaster M600 is designed should justify the confidence you demonstrated to us by making this exlusively for sweeping floors, e.g. -
Page 5: First Operation
For reasons of packaging, handlebar and side broom arm, to include broom and Vee belt are not assem- bled. After unpacking the Sweepmaster M600, first assemble the handlebar and the side broom next. Attach handlebar Note: The handlebar can be mounted... -
Page 6: Attach Side Broom
G Attach size broom arm with plug G Check belt tension, adjust tension Attach side broom (C/1) and safety pin (D/3). as required (refer to para. ”Side G Unpack side broom arm and Introduce plug from outside; broom“ on page 21). G Slue side broom down and adjust broom;... -
Page 7: Operating The Sweepmaster M600
All controls are identified by easy-to- stairs are easily overcome by the understand symbols which will help Sweepmaster M600. The large wheels you to get familiar with the machine. extend beyond the rear end of the The Sweepmaster M600 uses two machine. -
Page 8: Controls
Controls Note: Sweeping roller ground pres- 1 Handwheel for sweeping roller adjustment sure, if adjusted to too high a is used for adjustment of the swee- value, requires higher physical ping roller ground pressure. force to push the machine, and The sweeping roller ground pres- increases the wear of brooms. -
Page 9: Emptying The Dirt Hopper
4 Handwheel to adjust side broom The broom may touch the floor with the forward 2/3 of its circum- ference only so that it can feed the rubbish to the forward end of the main broom and not sweep it around only. -
Page 10: Replacement Of Main Broom
Replacement of main The broom roller is replaced as Remove three ea. Phillips screws, follows: turn broom roller 180°, remove broom G Slue side broom up Phillips screws from second half. Pull G Tilt machine back to rest on the The broom roller bears 10 ea. -
Page 11: Side Broom
Side broom The side broom is driven by a Vee belt from the RH wheel. Slueing down the side broom will tension the belt, and driving condition thus will be established. Replacement of side broom G Slue-up side broom arm G Remove clamp screw underneath side broom (spanner size 10 mm) G Pull out side broom... -
Page 12: Replacement Of Side Broom Vee Belt
G Fit new Vee belt on pulley and re- Replacement of side Location of key: (bottom view, into side broom arm) assemble (reverse the above pro- broom Vee belt cedure). To remove or to re-install a Vee-belt, Note: After having assembled the proceed in the following way: pulley, check for key in place (refer Sealing lips... -
Page 13: Greaser Track Wheels
G Then remove the circlip from the Grease track wheels wheel axle and remove the track For cleaning and greasing the axle wheel (fig. C). G Grease axle and pinion and pinion, remove track wheels as G Re-assemble track wheel. follows: G Remove hub caps Attach hub cap as shown in fig. -
Page 14: Technical Data
Technical Data unit of Dimensions, weights, ratings measures measurement width w/o side broom mm (") 720 (28.35) width with side broom mm (") 790 (31.10) height with handlebar, handlebar high position mm (") 1,060 (41.7) height with handlebar, handlebar low position mm (") 900 (35.4) height with folded handlebar... -
Page 15: Maintenance Work
G grease axles of track wheels Should your in-house workshop not be able to perform maintenance work and pinions G check drive belt tension, re-adjust per our schedule, please contact your local Hako dealer for concluding a as required maintenance agreement. - Page 16 Advanced Technology for a Cleaner, Better Environment Hako GmbH Hamburger Str. 209-239 23843 Bad Oldesloe, Germany · Phone +49 4531 806-0 Fax +49 4531 806-338...


Need help?
Do you have a question about the Sweepmaster M600 and is the answer not in the manual?
Questions and answers