Table of Contents
Advertisement
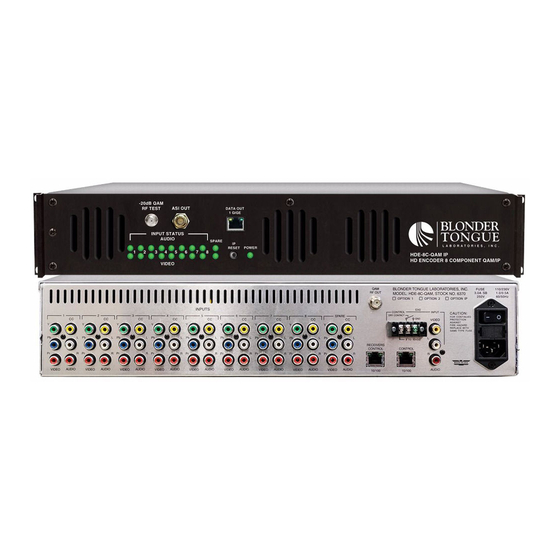
MPEG-2 HD Encoder
HDE-8C-QAM w/Opt 2
8xComponent/Composite + 1xSpare inputs
4xQAM + 1xASI outputs
EAS compatible
©2014 Blonder Tongue Laboratories, Inc. All rights reserved. Specifications are subject to change without notice. Trademarks are the property of their respective owner.
Status
Date
Active
December 19, 2014
Obsolete
October 28, 2014
Obsolete
May 16, 2014
800-523-6049
www.blondertongue.com
Document No.
Issue No.
651236600C
3
651236600B
2
651236600A
1
Stock
No. 6370-2
User Manual
Author
KK
KK
BM
Advertisement
Table of Contents

Related Manuals for Blonder tongue HDE-8C-QAM w/Opt 2


Summary of Contents for Blonder tongue HDE-8C-QAM w/Opt 2
- Page 1 Active December 19, 2014 651236600C Obsolete October 28, 2014 651236600B Obsolete May 16, 2014 651236600A 800-523-6049 www.blondertongue.com ©2014 Blonder Tongue Laboratories, Inc. All rights reserved. Specifications are subject to change without notice. Trademarks are the property of their respective owner.
- Page 2 The information contained herein is subject to change without notice. Revisions may be issued to advise of such changes and/or additions. Correspondence regarding this publication should be addressed directly to: Blonder Tongue Laboratories, Inc. One Jake Brown Road Old Bridge, NJ 08857 USA...
-
Page 3: Table Of Contents
HDE-8C-QAM Instruction Manual Table of Contents SECTION 1 – GENERAL & SAFETY INSTRUCTIONS ....................... 4 SECTION 2 – PRODUCT SUMMARY ..........................6 2.1 REVISION HISTORY & REASON ..........................6 2.2 PRODUCT APPLICATION & DESCRIPTION ......................6 2.3 PRODUCT SPECIFICATION ............................9 SECTION 3 – INSTALLATION & POWER-UP ........................10 3.1 UNPACKING ................................10 3.2 INSTALLATION ................................ 10 3.3 POWER-UP ................................ -
Page 4: Section 1 - General & Safety Instructions
4 HDE-8C-QAM Instruction Manual Section 1 — General & Safety Instructions The STOP sign symbol is intended to alert you to the presence of REQUIRED operating and maintenance (servicing) instructions that if not followed, may result in product failure or destruction. The YIELD sign symbol is intended to alert you to the presence of RECOMMENDED operating and maintenance (servicing) instructions. - Page 5 ➥ U nplug the unit from the AC power outlet before cleaning. Use only a damp cloth for cleaning the exterior of the unit. ➥ D o not use accessories or attachments not recommended by Blonder Tongue, as they may cause hazards, and will void the warranty.
-
Page 6: Section 2 - Product Summary
6 HDE-8C-QAM Instruction Manual Section 2 — Product Summary 2.1 Revision History & Reason The second release of the manual added single part virtual channel numbering capability. The third release updated the system connection diagram. 2.2 Product Application & Description Application: HDE-8C-QAM (MPEG-2 HD Encoder –... - Page 7 LED is Green = AC power is detected. LED is off = indicates (i) AC power is not connected, or (ii) AC power is connected but the power supply is defective. The unit must be sent to Blonder Tongue for repair for condition (ii).
- Page 8 8 HDE-8C-QAM Instruction Manual Rear panel connectors are: INPUTS #1 thru 8 + Spare: RCA connectors for Video and Audio inputs marked as follows: Y, Pb, Pr - Analog Component Video Y – Composite Video CC – A nalog NTSC Closed Captioning (EIA-608, also known as Line 21), which will then be digitized and inserted in the MPEG-2 Transport Stream of the Component inputs.
-
Page 9: Product Specification
HDE-8C-QAM Instruction Manual 2.3 Product Specification Specifications Input Output Component Primary Connectors: 8 sets each 3x RCA for Video Connector: 1x “F” Female (Y, Pb, Pr) (rear panel; up to 4x RF QAM ch. 8 sets each 2x RCA for Analog Audio Modulation: (L, R) combined) -
Page 10: Section 3 - Installation & Power-Up
10 HDE-8C-QAM Instruction Manual Section 3 – Installation & Power-up 3.1 Unpacking You will find the following items in the box: • HDE-8C-QAM Encoder (QTY=1) • Power Cord with IEC C13 line socket and 3-pin Type B NEMA 5 plug (QTY=1) •... -
Page 11: Section 4 - Communicating With The Unit
HDE-8C-QAM Instruction Manual Section 4 – Communicating with the Unit Local or remote communication with the unit is only possible through a GUI-based menu via any standard web browser. Before you can communicate with the unit, you must configure your computer’s IP address to be in the same subnet as the units default IP address. -
Page 12: Section 5 - Quick Start Guide
12 HDE-8C-QAM Instruction Manual Section 5 – Quick Start Guide STEP 1 - Connect the Inputs • Locate the blank receiver labels in the plastic bag supplied with the encoder. Number each label with UNIT numbers 1 through 9. • Find the receiver ID number label on the first receiver. Write the last 4 digits of the ID on label #1 (RX1_####__) and place on the front of the receiver. - Page 13 HDE-8C-QAM Instruction Manual STEP 2 - Login • Log in to the HDE-8C-QAM, using a standard web browser. This can be done through the Control 10/100 port, next to the Receiver Control port. Either go directly from a computer or through an Ethernet switch. •...
- Page 14 14 HDE-8C-QAM Instruction Manual Step 4 - TS Configuration • Go to the Main > Output > TS Config Tab Verify the Multiplexed MPTS Output default settings are suitable for your application - TS bitrate = QAM Modulator -Modulation Mode = QAM 256 -Out of band = disabled Verify the Output Mapping Section.
- Page 15 HDE-8C-QAM Instruction Manual Step 5 - Configure QAM Output • Setup the QAM output channels by going to the Main > Output > QAM tab Select the channel for the 1st QAM. The next 3 will be automatically assigned. Ensure all outputs are on and CW mode is not enabled. Click “SAVE”...
-
Page 16: Section 6 - Configuring The Unit
16 HDE-8C-QAM Instruction Manual Section 6 - Configuring the Unit 6.1 Accessing the Unit Via the Web Browser You must complete the steps described in Section 4 before proceeding as follows: (1) Open a web browser on your computer (Internet Explorer 7 or higher is recommended) and enter the following URL address (http://172.16.70.1). -
Page 17: Main > Status Screen
HDE-8C-QAM Instruction Manual 6.2 "Main > Status" Screen The “Main > Status” screen (Figure 6.2) is a “read only” screen and displays Input, PID and Output information of each of the four (4) transport streams (TS). Each TS contains two (2) programs: Color coding orange - spare input red - no input... -
Page 18: Main > Input Config Screen
18 HDE-8C-QAM Instruction Manual 6.3 "Main > Input Config" Screen The “Main > Input Config” screen (Figure 6.3) is a “user-configurable” screen where the following input source parameters can be configured: Figure 6.3 - "Main > Input Config" Screen Input #: indicates the physical input interface. Input Device: Displays the receiver’s ID number. -
Page 19: Main > Settop Control > Channel Config Screen
HDE-8C-QAM Instruction Manual 6.4 "Main > Settop Control> Channel Config” Screen The Channel Config menu facilitates setting the channel line up for the unit. Figure 6.4 - "Main > Settop Control" Channel Config Receiver # Software version of each receiver. Channel # = user entered channel number for the receiver. -
Page 20: Main > Settop Control > Diagnostics Screen
20 HDE-8C-QAM Instruction Manual 6.5 "Main > Settop Control> Diagnostics” Screen This page allows the user to remove receivers from the unit's database. Figure 6.5 - "Main > Settop Control > Diagnostics" Screen... - Page 21 HDE-8C-QAM Instruction Manual Line # - Not to be confused with Input #. This is the sequence the encoder obtained the receiver information. Select the receivers to be removed, then press SAVE Receiver #. Software Rev. Accessible thru IP, green=accessible, red=not. Receiver's channel number.
-
Page 22: Main > Settop Control > Dhcp Screen
22 HDE-8C-QAM Instruction Manual 6.6 "Main > Settop Control> DHCP” Screen The Dynamic Host Configuration Protocol (DHCP) screen is a read-only status of the server. DHCP is the communication protocol which centrally manages the assignment of receiver IP addresses. Figure 6.6 - "Main > Settop Control > DHCP" Screen DHCP Database: IP addresses in database assigned to each receiver Detected IPs: IP address retrieved from receivers. -
Page 23: Main > Encoder Screen
HDE-8C-QAM Instruction Manual 6.7 "Main > Encoder" Screen The “Main > Encoder” screen (Figure 6.10.1) is a “user-configurable” screen and includes the following sub-tabs: Video and Audio. 6.7.1 ”Main > Encoder > Video” Screen The “Main > Encoder > Video” screen (Figure 6.10.1) is a “user-configurable” screen to select the video encoder parameters for each input program: Figure 6.7.1 - "Main >... -
Page 24: Main > Audio > Screen
24 HDE-8C-QAM Instruction Manual 6.7.2 ”Main > Encoder > Audio” Screen The “Main > Encoder > Audio” screen (Figure 6.7.2) is a “user-configurable” screen where the following parameters associated with the Dolby® Digital encoded stereo audio are configured and displayed for the each audio input: Figure 6.7.2 - "Main >... - Page 25 HDE-8C-QAM Instruction Manual Data Rate: allows the user to select the audio encoding bitrate in Kbps (kilobits per second). The range is 96 to 448 kbps. The factory default value is 192 kbps that supports Audio Coding Mode 2/0:L, R. NOTE: See Dolby Encoding guidelines for additional information.
-
Page 26: Main > Audio > Screen
26 HDE-8C-QAM Instruction Manual 6.7.3 "Main> Output > Refresh" Tab The “Main> Output >Refresh” tab can be clicked while you are on any of the following sub-tabs screens: “Status”, “Inputs”, “Encoder”, and “Output”. When clicked, it will update all relevant fields/parameters of the active screen as that information is retrieved from the HDE-8C-QAM in a real-time basis. - Page 27 HDE-8C-QAM Instruction Manual In the section entitled “Multiplexed MPTS Output Configuration”, the user can select and configure the following parameters of the MPTS output stream: TS ID: user must enter the identification number for the output TS. The range is 1 to 65535. The TS ID assigned must be unique.
-
Page 28: Main > Output Qam Screen
28 HDE-8C-QAM Instruction Manual 6.8.2 ”Main > Output > QAM” Screen The “Main > Output > QAM” screen (Figure 6.8.2) is a “user-configurable” screen to assign QAM parameters to the TS: Figure 6.8.2 - “Main > Output > QAM” Screen... - Page 29 HDE-8C-QAM Instruction Manual Output Channel/Frequency: user must assign a RF channel number to the RF QAM output of the Quad-QAM module (i.e. RF channel 50, as shown in Figure 6.11.2). The remaining three RF QAM channels will be automatically assigned to the next adjacent channels (i.e.
-
Page 30: Main > Refresh > Screen
30 HDE-8C-QAM Instruction Manual 6.8.3 "Main> Output > Refresh" Tab The “Main> Output >Refresh” tab can be clicked while you are on any of the following sub-tabs screens: “Status”, “Inputs”, “Encoder”, and “Output”. When clicked, it will update all relevant fields/parameters of the active screen as that information is retrieved from the HDE-8C-QAM in a real-time basis. - Page 31 HDE-8C-QAM Instruction Manual Control Port MAC Address: indicates the MAC Address of the “Control 10/100” Port. Receivers Control Port MAC Address: indicates the MAC Address of the “Receivers Control 10/100” Port. Software Version: indicates the software version of the unit. FPGA1 Version: indicates the current hardware version of the unit’s FPGA1 chipset.
-
Page 32: Admin.html Hidden Screen
32 HDE-8C-QAM Instruction Manual "Admin.html" Hidden Screen To change/modify the IP network parameters, as well as the Username and Password values for the unit, you must be logged in to the unit as “Admin” to access a hidden screen shown in Figure 6.7.1 by typing the URL of the unit followed by a forward slash and Admin.html, for example: http://172.16.70.1/Admin.html. - Page 33 HDE-8C-QAM Instruction Manual The following parameters can be modified: Login: is the Administrator’s login (10 characters maximum). This login allows the user to make changes to any area of the unit. The factory default Login is “Admin”. Login is case sensitive. Current Password: is the Administrator’s Current Password (10 characters maximum).
-
Page 34: Time Screen
34 HDE-8C-QAM Instruction Manual 6.11 "Time" Screen The “Time” screen (Figure 6.11) allows you to set the current date and time for the HDE-8C-QAM. To remain compliant with ATSC and cable standards, it is important to have the accurate date and time stamps. For this reason, it is recommended to use the "Automatic"... - Page 35 HDE-8C-QAM Instruction Manual In the section entitled "Time Adjustments", the local time zone on Coordinated Universal Time (UTC) can be set. In the section entitled "Daylight Saving Time", the user can apply the Daylight Savings settings either manually or automatically using the DST Adjustment option. In the section entitled "NTP Server", the user can enter the IP address of the NPT server to acquire the time directly from NTP Server when an internet connection is available (see of Section 6.10 for details).
-
Page 36: Event Log Screen
36 HDE-8C-QAM Instruction Manual 6.12 "Event Log" Screen The “Event Log” screen (Figure 6.12) is a “read and write” screen where the following parameters can be displayed or configured. The data in Error Log can be forwarded to a SysLog database – (see &... - Page 37 HDE-8C-QAM Instruction Manual Event Log Destination: see of Section 6.10 for details. Log Destination Port #: see of Section 6.10 for details. Clear Log: allows the user to clear the records generated during unit’s boot-up process and operation afterward. The records are cleared if the unit loses power.
-
Page 38: Update Screen
38 HDE-8C-QAM Instruction Manual 6.13 "Update" Screen The “Update” screen (Figure 6.14) allows user to browse, select, and download/update the Config file. Figure 6.13 “Update” Screen Choose File: allows the user to select a desired configuration file to be uploaded to the unit from any location on the computer. -
Page 39: Appendix A: Updating The Software Remotely
HDE-8C-QAM Instruction Manual Appendix A: Updating the Software Remotely General background: There are two different PROMs that need to be programmed in HDE-8C-QAM. They are called PROM1 and PROM2. Please note not every software update requires both PROMs to be programmed. However, program both PROMs unless you get a written notice with Release notes to do otherwise. - Page 40 40 HDE-8C-QAM Instruction Manual Telnet to HDE-8C-QAM: There are two ways to telnet to the HDE-8C-QAM: (1) Use Command line and type in “telnet IP address” for example “telnet 172.16.70.1” (2) Use the Terminal program such as Putty to telnet. Use a terminal program such as Putty to telnet into the server board (can use Linux, DOS prompt, Putty, etc) You can save your configurations so it’s very quick and easy to telnet into the board again.
- Page 41 HDE-8C-QAM Instruction Manual Step 2: Update PROM1 and/or PROM2: Now you can use the field update utility (epcs) to program the EPCS PROMs. This is a custom utility that resides in HDE- 8C-QAM. Warning: Care should be taken at this time, if miss spelled characters or letters are typed by accident, or you have missed to type the bin command in Step 1, this could cause the HDE-8C-QAM Flash memory to be corrupted.
- Page 42 42 HDE-8C-QAM Instruction Manual NOTES...
- Page 43 10. The cost of the extended warranty is 8% of the purchase price for a 1 or 2 year extension beyond the Blonder Tongue standard warranty. e.g. A product price of $1000 will be $80 for the 1 year (12 mos) and additional $80 for 2 year (24 mos) extension for a total of $160.
- Page 44 BT may determine) any product manufactured by BT which proves to be defective in materials or workmanship or fails to Blonder Tongue Laboratories, Inc. (BT) will at its sole option, either repair or replace (with a new or factory reconditioned product, as BT may the case of software, licensed) by Seller which is defective in materials or workmanship or fails to meet the applicable specifications that are in effect on the date of meet the specifications which are in effect on the date of shipment or such other specifications as may have been expressly...
Need help?
Do you have a question about the HDE-8C-QAM w/Opt 2 and is the answer not in the manual?
Questions and answers