Table of Contents
Advertisement
Available languages
Available languages
Quick Links
DE-MDDT08
Σας ευχαριστούμε που επιλέξατε
τον αφυγραντήρα της INVENTOR.
Για τη σωστή χρήση της μονάδας
παρακαλούμε διαβάστε προσεκτικά
το παρόν εγχειρίδιο και φυλάξτε
το για αναφορά στο μέλλον.
Thank you for choosing INVENTOR
dehumidifier. For correct use of
this unit, please read this manual
carefully and keep it for future
reference.
User's Manual
Εγχειρίδιο Χρήσης
Dehumidifier
English/Ελληνικά/ Română
Advertisement
Table of Contents

Related Manuals for INVENTOR DE-MDDT08


Summary of Contents for INVENTOR DE-MDDT08
- Page 1 Για τη σωστή χρήση της μονάδας παρακαλούμε διαβάστε προσεκτικά το παρόν εγχειρίδιο και φυλάξτε το για αναφορά στο μέλλον. English/Ελληνικά/ Română Thank you for choosing INVENTOR dehumidifier. For correct use of this unit, please read this manual carefully and keep it for future reference.
- Page 2 SOCIABLE REMARK When using this dehumidifier in the European countries, the following information must be followed: DISPOSAL: Do not dispose this product as unsorted municipal waste. Collection of such waste separately for special treatment is necessary. It is prohibited to dispose of this appliance in domestic household waste. For disposal, there are several possibilities: A) The municipality has established collection systems, where electronic waste can be disposed of at least free of charge to the user.
-
Page 3: Table Of Contents
CONTENTS SAFETY PRECAUTIONS Warning........................................2 Caution ........................................2 Electrical information....................................3 CONTROL PADS ON THE DEHUMIDIFIER Indicator lights ......................................4 Control pads......................................4 Other features ......................................5 IDENTIFICATIO OF PARTSN Identification of parts....................................5 Positioning the unit ....................................6 OPERATIING THE UNIT When using the unit ....................................6 Removing the collected water ................................7 CARE AND MAINTENANCE Care and cleaning of the dehumidifier............................8 TROUBLESHOOTING TIPS... -
Page 4: Safety Precautions
SAFETY PRECAUTIONS To prevent injury to the user or other people and property damage, the following instructions must be followed. Incorrect operation due to ignoring of instructions may cause harm or damage. The seriousness is classified by the following indications. WA R NING This symbol indicates t he po ssibili ty of death o r serio us inju ry. -
Page 5: Electrical Information
SAFETY PRECAUTIONS CAUTION Do no t cov er the intak e or Care should be ta ken w hen Do not use in areas using the unit in a room with exhau st ope nings with where chemicals are the following pers ons: handled. -
Page 6: Control Pads On The Dehumidifier
CONTROL PADS ON THE DEHUMIDIFIER Th e c on tro l pa ne l of th e d eh um id ifi er y ou p ur ch as ed m ay b e lo ok li ke o ne o f th e fo llo wi ng : 1 0 1 0 1 11 2 12... -
Page 7: Other Features
IDENTIFICATION OF PARTS Other features Auto-Restart B ucket Full L ight G lows when the bucket is ready to be If the unit breaks off unexpectedly due to the power cut, it will restart emptied, or when the bucket is removed with the previous function s etting a utomatically when the power or not replaced in the proper position. -
Page 8: Positioning The Unit
OPERATING THE UNIT Positioning the unit A dehumidifier operating in a bas ement will have littl e or no 40cm or effect in drying an a djac ent enclose d storage area , s uch as a more c lose t, unless there is a dequate circulation of a ir in a nd out of Air outlet grille the area . -
Page 9: Removing The Collected Water
OPERATING THE UNIT Removing the collected water 1. Pull out the bucket a little. There are two ways to remove collected water. 1. Use the bucket When the bucket is full, the unit will automatically stop running, and the Full indicator light will flash. Slowly pull out the bucket. -
Page 10: Care And Maintenance
CARE AND MAINTENANCE Care and cleaning of the dehumidifier Turn the dehumidifier off and remove the plug from the wall outlet before cleaning. 1. Clean the Grille and Case Use water and a mild detergent. Do not use bleach or abrasives. Do not splash water directly onto the main unit. -
Page 11: Troubleshooting Tips
TROUBLESHOOTING TIPS Before calling for service, review the chart below first yourself. Problem What to check Make sure the dehumidifier s plug is pushed completely into the outlet. Check the house fuse/circuit breaker box. Unit does not start Dehumidifier has reached its preset level or bucket is full. Bucket is not in the proper position. - Page 12 Για την χρήση του αφυγραντήρα σε χώρες της Ευρωπαϊκής Ένωσης θα πρέπει να ακολουθούνται οι παρακάτω οδηγίες: ΑΠΟΡΡΙΨΗ: Μην απορρίπτετε το συγκεκριμένο προϊόν στα αστικά λύμματα, χρειάζεται ειδική περισυλλογή και επεξεργασία. Απαγορεύεται η απόρριψή του συγκεκριμένου προϊόντος μαζί με τα αστικά λύμματα. Για...
- Page 13 ΠΡΟΣΟΧΗ...
- Page 14 Για την αποφυγή τραυματισμού και φθοράς της μονάδας θα πρέπει να ακολουθηθούν οι παρακάτω οδηγίες. Η κατηγοριοποίηση γίνεται σύμφωνα με τις παρακάτω ενδείξεις ΠΡΟΣΟΧΗ Αυτό το σύμβολο υποδεικνύει πιθανότητα θανάτου ή σοβαρού τραυματισμού Αυτό το σύμβολο υποδεικνύει την πιθανότητα τραυματισμού ή φθορά της μονάδας ΠΡΟΣΟΧΗ...
- Page 15 ΠΡΟΣΟΧΗ Μην καλύπτετε τις εισόδους Θα πρέπει να δίνεται ιδιαίτερη προσοχή Μην χρησιμοποιείτε όταν η μονάδα χρησιμοποιείται σε χώρο και εξόδους του αέρα. τη μονάδα σε χώρους που υπάρχουν τα παρακάτω άτομα: όπου υπάρχουν χημικά. Θα προκληθεί φθορά στη μονάδα Έλλειψη...
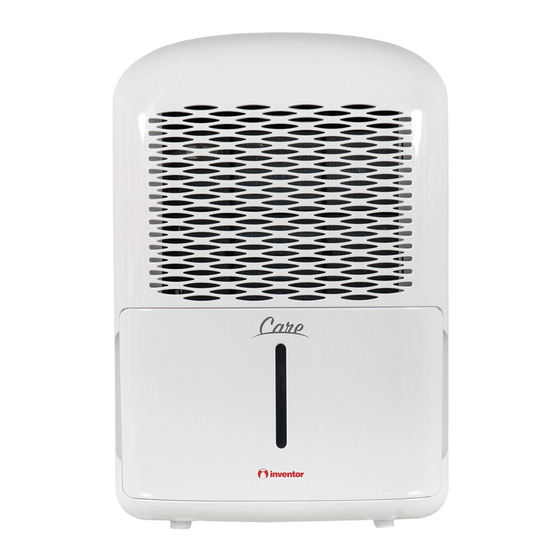
- Page 16 Το πάνελ χειρισμού του αφυγραντήρα που έχετε προμηθευτεί θα μοιάζει με κάποιο από τα παρακάτω:...
- Page 17 Πάνελ χειρισμού Πλέγμα εισόδου αέρα Δοχείο νερού Φίλτρο αέρα (πίσω από το πλέγμα εισόδου αέρα) Λαβή Πλέγμα εξόδου αέρα Σημείο πρόσδεσης καλωδίου τροφοδοσίας Εικ.1 (Χρησιμοποιείται μόνο όταν θέλετε να αποθηκεύσετε τη μονάδα) Έξοδος αγωγού αποστράγγισης (ανατρέξτε στην σελ.7) Καλώδιο τροφοδοσίας Φις...
- Page 18 Τουλάχιστον 40cm Πλέγμα εξόδου αέρα Πλέγμα εισόδου αέρα Τουλάχιστον Τουλάχιστον 20cm 20cm Τουλάχιστον 20cm Τουλάχιστον 20cm Εικ.4 Ροδάκια (Τοποθετήστε τα στην βάση της μονάδας) Τα ροδάκια μπορούν να κινηθούν μόνο πλευρικά. Μην κινείτε τα ροδάκια σε χαλί ή όταν το δοχείο νερού...
- Page 19 1. Τραβήξτε ελαφρώς το δοχείο Εικ.5 2. Κρατήστε το δοχείο και από τις 2 λαβές και αφαιρέστε το από τη μονάδα. Εικ.6 3. Αδειάστε το νερό Εικ.7 Έξοδος νερού Αφαιρέστε το επιστόμιο Εισάγετε τον αγωγό στη έξοδο αποστράγγισης Εικ.8 Εικ.9β Εικ.9α...
- Page 20 Πιάστε τη λαβή του φίλτρου και πιέστε το φίλτρο προς τα μέσα Εικ.10 Εικ.11 Βγάλτε το φίλτρο τραβώντας προς τα κάτω Εικ.12 Εικ.13 Πιέστε τη λαβή προς τα μέσα και σπρώξτε Εισάγετε το φίλτρο το φίλτρο προς τα επάνω Εικ.14 Εικ.15 Ταινία...
- Page 22 Atunci când folosiți dezumidificatorul în țările europene, trebuie urmărită următoarea informație: ELIMINARE: Nu aruncați acest produs ca și gunoi menajer. Este necesară colectarea unui astfel de deșeu separat pentru acordarea de tratament special. Este interzisă aruncarea acestui aparat în gunoiul menajer al gospodăriei. Pentru eliminare există...
- Page 23 CUPRINS M SURI DE SIGURAN Citi i acest manual ATENȚIE...
- Page 24 Pentru a preveni vătămarea utilizatorului sau a altor oameni sau distrugerea materială, trebuie urmate instrucțiunile de mai jos: folosirea incorectă datorată ignorării instrucțiunilor poate duce la vătămarea de persoane sau pagube materiale. Gravitatea este simbolizată de următoarele marcaje. Acest simbol indică posibilitatea vătămării sau a decesului. AVERTIZARE Acest simbol indică...
- Page 25 ATENȚIE Trebuie avut grijă la Nu acoperiți admisia sau Nu folosiți în zone folosirea aparatului evacuarea aerului cu cârpe de manevrare în cameră cu: sau prosoape. a chimicalelor. Va cauza deteriorarea Bebeluși, copii, oameni bătrâni Lipsa curentului de aer poate din cauza chimicalelor și persoane insensibile duce la supraîncălzire...
- Page 26 PANOUL DE CONTROL AL DEZUMIDIFICATORULUI Panoul de control al dezumidificatorului achiziționat poate arăta ca: PANOU DE CONTROL (1) PANOU DE CONTROL (2) Leduri indicatoare Butoane de control Butonul modul continuu Led indicator aprindere (verde) Ecran Butonul temporizator Coduri de eroare: Butoanele SUS (+) JOS(-) Cod de protec ie: Buton modul silen ios...
- Page 27 IDENTIFICAREA COMPONENTELOR Alte func ii Led indicator recipient plin Pornire automat Setarea temporizatorului PARTEA FRONTALA Identificarea componentelor Panou de control Grilaj admisie aer Recipient apă Filtru aer (în spatele grilajului de admisie aer) Mâner Grilaj evacuare aer Bandă prindere cablu alimentare (folosită doar la stocare) Fig.1 Ieșire furtun de scurgere (consultați pag.
- Page 28 FUNC IONAREA APARATULUI Pozi ionarea aparatului 40cm sau mail mult Grilaj evacuare aer Grilaj admisie aer 20cm sau mail mult 20cm sau mail mult C(41 20cm sau mail mult mici de 5 C(41 20cm sau mail mult Fig.4 Rotițe (instalate în toate cele patru puncte ale aparatului) Rotițele se pot mișca doar lateral.
- Page 29 F U N C I O N A R E A A P A R A T U L U I ndep rtarea apei adunate 1. Trageti putin afara recipientul E ist dou feluri de ndep rtare a apei acumulate. 1.
- Page 30 NTRE INERE I NGRIJIRE ngri irea i cur area dezumidificatorului 1. Cur area grila ului i a carcasei Prindeti gaicile filtrului si apasati-le inauntru 2. Cur area recipientului NOT : Fig.10 Fig.11 Gaica Trageti in jos de filtru 3. Cur area filtrului de aer NOT : NU CL TI I N I NU SP LA I FILTRUL N MA INA DE SP LAT ASE.
- Page 31 SFATURI PENTRU DEPANARE nainte de a apela service-ul consulta i tabelul de mai os pentru a vedea ce pute i rezolva singuri. Problem Ce trebuie verificat Aparatul nu porne te Dezumidificatorul nu usuc aerul a a cum ar trebui Aparatul scoate un zgomot mare c nd func ioneaz Se formeaz...
Need help?
Do you have a question about the DE-MDDT08 and is the answer not in the manual?
Questions and answers