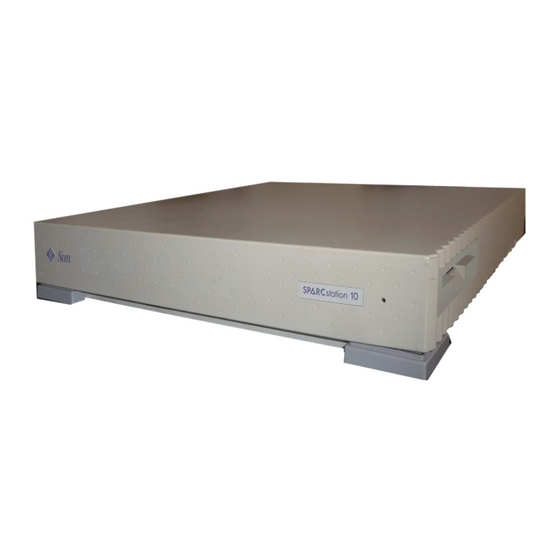
Sun Microsystems SPARCstation 10 Service Manual
Hide thumbs
Also See for SPARCstation 10:
- User manual (182 pages) ,
- Reference implementation installation manual (20 pages) ,
- Product notes (11 pages)

Related Manuals for Sun Microsystems SPARCstation 10


Summary of Contents for Sun Microsystems SPARCstation 10
- Page 1 SPARCstation 10 Service Manual A Sun Microsystems, Inc. Business 901 San Antonio Road Palo Alto, , CA 94303-4900 Part No: 800-6358-11 Revision A, July 1993...
- Page 2 USA 650 960-1300 fax 650 969-9131...
- Page 3 SPARCstation 10 Service Manual Part No: 800-6358-11 Revision A, July 1993...
- Page 4 52.227-14(g)(2)(6/87) and FAR 52.227-19(6/87), or DFAR 252.227-7015(b)(6/95) and DFAR 227.7202-3(a). Sun, Sun Microsystems, the Sun logo, and Solaris are trademarks or registered trademarks of Sun Microsystems, Inc. in the United States and in other countries. All SPARC trademarks are used under license and are trademarks or registered trademarks of SPARC International, Inc.
-
Page 5: Table Of Contents
Contents Preface x System Overview 1 System Unit 2 SBus Cards 6 Monitors, Keyboard, and Mouse 7 External Storage Modules 8 Diagnostics Overview 9 How It Fits Together 11 When to Use Diagnostics 12 Boot PROM Diagnostics 13 Power-On Self Test (POST) 13 Power-On Self Test Detailed Description 14 On-Board Diagnostics 14 SunDiag System Exerciser 20... - Page 6 Main Logic Board 39 Tools Needed 39 Preparing Your System 39 Removing an SBus Card 40 Removing an MBus Module 44 Disconnecting the Internal Cables 46 Removing the MLB 47 Preparing the MLB 49 SPARCstation 10 Service Manual ♦ Revision A, July 1993...
- Page 7 Removing Filler Panels 49 Setting Jumpers 51 Serial Port Jumpers 51 Clock Speed Jumpers 52 Three Clock Speed Jumpers 53 Single Clock Speed Jumper 55 Installing the MLB 56 NVRAM 59 Removing the NVRAM Chip 59 Installing the NVRAM Chip 60 Installing MBus Modules 61 Installing an SBus Card 63 Replacing DSIMMs 66...
- Page 8 Tools Needed 135 Removing the Diskette Drive 135 Preparing the Diskette Drive 137 Installing the Diskette Drive 138 DC Power Harness 141 Tools Needed 141 Removing the DC Power Harness 141 SPARCstation 10 Service Manual ♦ Revision A, July 1993...
- Page 9 Installing the DC Power Harness 144 Internal Disk Cable 147 Tools Needed 147 Removing the Internal Disk Cable 147 Installing the Internal Disk Cable 152 Light-Emitting Diode 161 Tools Needed 161 Removing the LED 161 Installing the LED 164 Powering On the System 169 Installing the System Unit Cover 169 Connecting a Desktop Storage Pack 171 Connecting an External Storage Module 171...
- Page 10 Keyboard/Mouse 191 Serial Ports A&B 191 Keyboard/Mouse and Serial Ports A&B- Signal Descriptions 192 Twisted Pair Ethernet 194 Twisted Pair Ethernet-Signal Description 194 SCSI 195 SCSI-Signal Description 196 Glossary 199 Index 205 SPARCstation 10 Service Manual ♦ Revision A, July 1993...
-
Page 11: Preface
4 Chapter 3, “Troubleshooting,” gives pointers for diagnosing a problem or failed component. 4 Chapter 4, “Preparing the System,” gives precautions and explains steps you need to perform before you halt the SPARCstation 10, disconnect peripheral devices, or open the system. Preface... - Page 12 (PTC) devices which are located on the main logic board (MLB) in place of fuses. 4 Appendix D, “Signal Descriptions,” gives signal descriptions and connector pinouts and assignments. SPARCstation 10 Service Manual ♦ Revision A, July 1993...
-
Page 13: Document Conventions
®® providers. Only people who have been trained by the Sun Microsystems training facilities (or by Sun Microsystems affiliates) and have been certified as required by local and national laws are considered qualified. Note - Before you begin, carefully read each of the procedures in this manual. - Page 14 OpenBoot Forth Interpreter commands. 4 SunDiag User’s Guide covers information about Sundiag, a system exerciser that runs under the SunOS Operating System. Sundiag displays real-time use of system resources and peripherals. SPARCstation 10 Service Manual ♦ Revision A, July 1993 xiii...
- Page 15 4 Desktop SPARC Hardware Owner’s Guide provides step-by-step instructions on how to install the system hardware and software. 4 SPARCstation 10 DSIMMs Installation provides step-by-step information on how to install DSIMMs in the SPARCstation 10 system. 4 424-Mbyte Disk Drive Installation Guide provides information on how to install 424MB drives in the SPARCstation 10 system.
- Page 16 SPARCstation 10 Service Manual ♦ Revision A, July 1993...
-
Page 17: System Overview
CHAPTER System Overview This overview of the SPARCstation 10 system hardware is helpful in servicing and maintaining hardware equipment. The system major components usually consist of the following: 4 System unit 4 Video monitor (or a terminal) 4 Keyboard 4 Mouse... -
Page 18: System Unit
Figure 1–1 Connecting the Major Components of the System System Unit The heart of the SPARCstation 10 system is contained in a main chassis or system unit. A SPARCstation 10 system contains: 4 Main Logic Board (MLB) 4 MBus modules (up to 2 modules) - Page 19 4 Figure 1–5 presents the main logic board layout. 4 Figure 1–6 and Figure 1–7 are exploded views of the SPARCstation 10 assembly. 4 Table 1–1 lists the acronyms used for certain parts, and their full expressions. 4 Table 1–2 describes video monitors.
- Page 20 Figure 1–5 Main Logic Board List of Acronyms TABLE 1–1 Acronyms Full Expression NVRAM Non-volatile Random Access Memory EPROM Erasable Programmable Read-Only Memory Temperature DSIMM Single SPARCstation 10 Service Manual ♦ Revision A, July 1993...
- Page 21 Figure 1–6 Exploded View of the SPARCstation 10 System—MLB System Overview...
-
Page 22: Sbus Cards
These triple-width SBus cards are installed in the top SBus slot, so you cannot install a second MBus module. This option provides 24-bit color and 3-dimensional graphics capabilities. It also requires a 76 Hz color monitor. SPARCstation 10 Service Manual ♦ Revision A, July 1993... -
Page 23: Monitors, Keyboard, And Mouse
4 Video Frame Capture Card This card occupies one SBus slot. This card takes video input and displays it on color or monochrome monitors. 4 SBus Printer Card This card occupies one SBus slot. This card connects the system to printing, plotting and scanning devices. -
Page 24: External Storage Modules
4 Desktop Storage Module 5.0 Gbytes tape drive 4 SCSI Expansion Pedestal w/ 1.3 Gbyte single-ended drives 4 SCSI Expansion Pedestal w/ 2.1 Gbyte differential drives You can daisy-chain these units together. SPARCstation 10 Service Manual ♦ Revision A, July 1993... -
Page 25: Diagnostics Overview
CHAPTER Diagnostics Overview This chapter describes the different types of diagnostic firmware and software tools available to you and how they are related. The main categories of diagnostics are: 4 Boot PROM diagnostics 4 Power-On Self-Test (POST) 4 On-Board Diagnostics 4 SunDiag System Exerciser 4 SunDiagnostic Executive 4 Forth Toolkit... -
Page 26: Sparcstation
Figure 2–1 Default Boot Mode Flowchart SPARCstation 10 Service Manual ♦ Revision A, July 1993... -
Page 27: How It Fits Together
How It Fits Together This section describes how the various diagnostic tools work together in the different power-on modes. This description assumes you are using a graphics monitor to view test results. The flowchart in Figure 2–1 outlines the roles played by various diagnostics during the default boot mode. -
Page 28: When To Use Diagnostics
Allows input to the system at the boot PROM level. Supports functions such as changing NVRAM parameters, resetting the system, running diagnostic tests, displaying system information, and redirecting input and output. See the Open Boot 2.0 Command Reference for more information. SPARCstation 10 Service Manual ♦ Revision A, July 1993... -
Page 29: Boot Prom Diagnostics
Boot PROM Diagnostics The diagnostics stored in the boot PROM include the following: 4 Power-On Self-Test 4 On-Board Diagnostics If there is system trouble, you may want to run extended on-board diagnostics to take advantage of thorough tests including — but not limited to — Ethernet, memory, and diskette drive tests. -
Page 30: Power-On Self Test Detailed Description
SunOS. See the latest version of SunDiagnostic Executive User’s Guide for the SPARCstations. On-Board Diagnostics You have access to a number of tests called On-board diagnostics. You must enter the Forth Toolkit to invoke these tests. SPARCstation 10 Service Manual ♦ Revision A, July 1993... - Page 31 Caution - In order to run On-board diagnostics, you must halt the system in an orderly manner. Do not use the Stop(L1)-a keys to halt the system when the operating system or any other stand-alone program has already booted. Abruptly aborting program execution may cause damage to data files.
- Page 32 See the following example. ok test floppy Testing floppy disk system. A formatted disk should be in the drive. Test succeeded. The following tests are supported in the SPARCstation 10 system. Supported Tests TABLE 2–4 Type of Tests Description Tests the system video graphics hardware and monitor.
- Page 33 Supported Tests TABLE 2–4 (continued) Type of Tests Description Tests internal or external SCSI disks which have a self diagnostic test disk program contained in the drive controller. The drive must be test disk0 spinning before this test is executed or the test will fail. Enter a boot test disk1 <disk alias>...
- Page 34 Type any key to stop......................The SPARCstation 10 system has two types of on-board Ethernet interfaces, 10BaseT (also called twisted-pair Ethernet or TPE) and 10Base5 (also called thick Ethernet or AUI). Only one on-board interface may be connected at a time. The system can automatically select which interface is connected and active.
- Page 35 The probe-scsi test sends an inquiry command to internal and external SCSI devices connected to the SPARCstation 10 on-board SCSI interface. If a SCSI device is connected and powered up, the target address, unit number, device type, and manufacturer name should be displayed.
-
Page 36: Sundiag System Exerciser
SunDiag System Exerciser Use the SunDiag System Exerciser, which runs under SunOS, to determine real-time use of system resources and peripheral equipment such as Desktop Storage Packs SPARCstation 10 Service Manual ♦ Revision A, July 1993... -
Page 37: Sundiagnostic Executive
External Storage Modules. The SunDiag System Exerciser verifies that the system is functioning properly. The exerciser is shipped with SunOS and is preinstalled on a SPARCstation 10 system. If selected during the SunInstall (operating system loading) procedure, the exerciser can be run at any time. The SunDiag System Exerciser is in the directory/usr/diag/sundiag (for SunOS 4.1.3) or in the directory... - Page 38 3. The system automatically enters the Forth Toolkit. The ok prompt shows that you are in the Forth Toolkit. For extensive information on tests you can run from the Forth Toolkit see Open Boot 2.0 Command Reference. SPARCstation 10 Service Manual ♦ Revision A, July 1993...
-
Page 39: Troubleshooting
CHAPTER Troubleshooting This chapter describes how to diagnose a problem with a SPARCstation 10 system. Keep in mind that this chapter does not cover all the symptoms you might experience, nor does it cover all steps which can be done to repair the SPARCstation 10 system. -
Page 40: Symptom
+12V, -12V, and +5.1V power pins individually with the positive probe. Table 3–1 lists the pin assignments on the power supply connector. SPARCstation 10 Service Manual ♦ Revision A, July 1993... - Page 41 Figure 3–1 Power Supply Connector Power Supply Connector Pin Assignments TABLE 3–1 Pin # Assignment Assignment +12V Logic Ground -12V Logic Ground +5.1V Logic Ground +5.1V Logic Ground +5.1V Logic Ground +5.1V Logic Ground +5.1V Logic Ground Power On Power OK (reset) Power Off No Connection Replace the power supply assembly if any of the voltages are not present.
-
Page 42: Mlb Test
Remove the other parts and test the system again to eliminate the possibility that optional parts are causing a failure. To receive additional POST failure information, connect a terminal to serial port A on the SPARCstation 10 system. SPARCstation 10 Service Manual ♦ Revision A, July 1993... -
Page 43: Disk Drive Errors
Disk Drive Errors Symptom Disk drive read, write, or parity errors are reported by the operating system or customer applications. Action Replace the disk drive indicated by the failure messages. The operating system identifies the internal disk drive 0 (SCSI target address 3) as sd0 or c0t3d0 and internal disk drive 1 (SCSI target address 1) as sd1 or c0t1d0. -
Page 44: Determining A Failed Dsimm
16-Mbyte DSIMM is installed in a bank, the unused addresses are “mapped out” by the memory management hardware. The physical memory starting address of any capacity DSIMM installed will always be as listed in Table 3–3. SPARCstation 10 Service Manual ♦ Revision A, July 1993... -
Page 45: Preparing The System
CHAPTER Preparing the System This chapter explains steps to perform before removing a replaceable part. Topics covered in this chapter include the following: 4 How to halt the system 4 Tools needed 4 How to disconnect the external SCSI peripherals 4 How to remove the system unit’s cover 4 How to attach a wrist strap Halting the System... -
Page 46: Halting A System That Is Hung
Should your system be hung or unresponsive to commands, perform the following steps: 1. Press Stop(L1)-a. The system displays the ok prompt. If the monitor prompt (>) is displayed, go to step 2; otherwise, go to step3. SPARCstation 10 Service Manual ♦ Revision A, July 1993... -
Page 47: Tools Needed
4. Wait until the system boots and displays a system login prompt. 5. Turn off the power in this order: 4 External drive unit(s) (if you have any) 4 SPARCstation 10 system unit 4 Monitor (Press Stop(L1)-a) Type help for more information ok sync (System panic and boot messages.) -
Page 48: Antistatic Surface
2. Pull the connector to disconnect. This action disconnects the SCSI cable from the system unit. Removing the System Unit Cover You need a Phillips screwdriver size #2 to remove the cover from the system unit. SPARCstation 10 Service Manual ♦ Revision A, July 1993... - Page 49 Caution - Hot surfaces are present. Use care when opening the system chassis or handling components. 1. Make sure that the power to your system unit is turned off, but that the power cord remains plugged into the system unit and to the power source. See “Halting the System”...
-
Page 50: Attaching The Wrist Strap
Before powering on your system again, you must replace the cover following the procedure later in this chapter. It is not safe to operate the SPARCstation 10 system without the top cover in place. Attaching the Wrist Strap The wrist strap provides grounding for static electricity between your body and the system unit chassis. - Page 51 Figure 4–4 Wrapping the Wrist Strap Around Your Wrist 2. Peel the liner from the copper foil at the opposite end of the wrist strap. 3. Affix the adhesive copper end of the wrist strap to the top of the metal casing of the power supply.
-
Page 52: Replacing The Cover
3. Gently press down on the left and right sides of the cover. Guide the cover so that the retainer clip snaps the cover to the back panel. See Figure 4–7. SPARCstation 10 Service Manual ♦ Revision A, July 1993... - Page 53 Figure 4–7 Closing the Cover 4. Tighten the captive screw at the top right side of the rear panel to the cover using a Phillips screwdriver. Do not over tighten the screw. Figure 4–8 Tightening the Captive Screw Preparing the System...
- Page 54 SPARCstation 10 Service Manual ♦ Revision A, July 1993...
-
Page 55: Main Logic Board
CHAPTER Main Logic Board This chapter explains how to remove and install a SPARCstation 10 system main logic board (MLB) and its main components. Tools Needed You will need the following tools and materials to remove and install the MLB, its major cards, and components. -
Page 56: Removing An Sbus Card
Start with cards mounted on the top slots first. Figure 5–1 shows the SBus slot locations on the main logic board (MLB). Figure 5–1 SBus Slot Locations on the Main Logic Board SPARCstation 10 Service Manual ♦ Revision A, July 1993... - Page 57 2. Remove the screws and washers from the outer rear panel that secure the SBus card(s). Figure 5–2 shows fastening hardware for a single-width SBus card. Note - Single-width SBus cards have two sets of screws and washers. Double-width SBus cards have four sets of screws and washers. Triple-width SBus cards have six sets of screws and washers.
- Page 58 fingers or thumbs on the corners of the SBus card near the SBus connector. Pull up on the card. Figure 5–5 shows a single-width SBus card and Figure 5–6 shows a double-width SBus card. SPARCstation 10 Service Manual ♦ Revision A, July 1993...
- Page 59 Figure 5–5 Removing a Single-width SBus Card Figure 5–6 Removing a Double-width SBus Card 1. Remove the card extractor(s) from the SBus card. a. Bend one leg of the extractor slightly to the outside until the hook clears the hole in the SBus card. b.
-
Page 60: Removing An Mbus Module
1. Push back the module retainers for the MBus module. If the system has two MBus modules (slot 1 on top of slot 0), remove the top module first. See Figure 5–7. SPARCstation 10 Service Manual ♦ Revision A, July 1993... - Page 61 Figure 5–7 MBus Module—Retainers and Extractor 2. Install the card extractor on the MBus module. 3. Hold edges of the card extractor and pull upwards slowly until the MBus module is out of the slot. Note - If your system was not shipped with a card extractor, place your thumb and one finger on the corners of the MBus module near the module connector.
-
Page 62: Disconnecting The Internal Cables
Disconnecting the Internal Cables 1. Disconnect the internal drive connector (J0101) from the MLB (J0601). See Figure 5–9. 2. Disconnect the DC power connector from the MLB (J1501). See Figure 5–9. SPARCstation 10 Service Manual ♦ Revision A, July 1993... -
Page 63: Removing The Mlb
Figure 5–9 DC Power Harness and Internal Disk Cable Layout Removing the MLB All SBus cards and MBus modules should be removed at this point. The internal disk connector (J0101) and DC power connector (P1) should be disconnected. 1. Remove the MLB. a. - Page 64 Loosen the two captive retainer screws securing the MLB to the rear of the chassis. Figure 5–11. Figure 5–11 MLB Retainer Screws at the Rear of the Chassis c. Slide the board toward the front of the chassis. See Figure 5–12. SPARCstation 10 Service Manual ♦ Revision A, July 1993...
-
Page 65: Preparing The Mlb
Figure 5–12 Removing the MLB d. Tilt the rear side of the board and lift it up and over the rear of the chassis. 2. Place the board on an antistatic surface. Preparing the MLB Unpack the replacement MLB. Follow the instructions shipped with the board. Removing Filler Panels 1. - Page 66 Use both hands. The panel releases toward the front of the system. d. Put the filler panel aside. 2. Repeat Step 1.a through Step 1.d for each filler panel that must be removed. SPARCstation 10 Service Manual ♦ Revision A, July 1993...
-
Page 67: Setting Jumpers
RS-232 mode (for users in the Federal Republic of Germany and Australia) or as RS-423 mode for other users. If you use your SPARCstation 10 system for connection to a public X.25 network in Europe, you must configure the serial ports on your system to operate in the RS232 mode. -
Page 68: Clock Speed Jumpers
Both tables give the proper jumper settings. See Table 5–1 if you know your system model number; or see Table 5–2 to find the jumper settings based on your MBus module numbers. System Clock Speed Jumper Settings Based on SPARCstation 10 Model TABLE 5–1 Number... -
Page 69: Three Clock Speed Jumpers
System Clock Speed Jumper Settings Based on SPARCstation 10 Model TABLE 5–1 Number (continued) System Clock MBus Clock SPARCstation 10 Model Number Jumper Setting Speed Speed Model 51 80 MHz 40 MHz Model 512 MP (2x SM51) 80 MHz 40 MHz System Clock Speed Jumper Settings Based on MBus Module TABLE 5–2... - Page 70 2. Set the mode B clock speed jumpers. Use a pair of needle nose pliers to move the jumpers to the correct positions. See Figure 5–18. Figure 5–18 Mode B Clock Speed Jumper Speed Setting (3-Jumper Board) SPARCstation 10 Service Manual ♦ Revision A, July 1993...
-
Page 71: Single Clock Speed Jumper
Single Clock Speed Jumper The second type of board has only one jumper (J1401). This jumper must be set for either mode A operation or mode B operation, based on your system model number (Table 5–1) or MBus modules installed (Table 5–2). 1. -
Page 72: Installing The Mlb
4. Lower the board into the chassis and slide it to the rear of the chassis. The eight locating posts in the chassis should fit the eight slots on the MLB. See Figure 5–21. SPARCstation 10 Service Manual ♦ Revision A, July 1993... - Page 73 Figure 5–21 Lowering the System Board into the Chassis 5. Connect the DC power to the MLB (J1501). See Figure 5–22. 6. Connect the internal drive connector to the MLB (J0601). See Figure 5–22. Main Logic Board...
- Page 74 Do not overtighten the captive screws or the lock block screw Figure 5–23 MLB Retainer Screws at the Rear of the Chassis 8. Install the lock block by inserting the screw through the lock block. See Figure 5–24. SPARCstation 10 Service Manual ♦ Revision A, July 1993...
-
Page 75: Nvram
Figure 5–24 Lock Block Location NVRAM This section describes how to remove and replace the NVRAM (Non-Volatile Random Access Memory) chip. Removing the NVRAM Chip 1. Locate the NVRAM chip on the MLB in the chassis. See Figure 5–25. Main Logic Board... -
Page 76: Installing The Nvram Chip
MLB in the chassis. The carrier is keyed so the NVRAM can be installed only one way. 3. Push the NVRAM chip into the carrier until it sits tightly in the socket. SPARCstation 10 Service Manual ♦ Revision A, July 1993... -
Page 77: Installing Mbus Modules
Installing MBus Modules If the system has two MBus modules (slot 1 on the top of slot 0), you must install the first module in slot 0. Then, repeat steps 1 through 4 to install the second module in slot 1. Note - If there is an MBus module installed in slot 1 (the upper MBus slot), you must remove it before you can install an MBus module in slot 0. - Page 78 4. Lock the module retainers in place by pushing the arms over the edge of the MBus module. See Figure 5–28. Note - The MBus module must be properly seated so that the module retainers lock securely over the module edges. SPARCstation 10 Service Manual ♦ Revision A, July 1993...
-
Page 79: Installing An Sbus Card
Figure 5–28 MBus Module Retainers 5. To replace an MBus module in slot 1, perform steps 1 through 4. Installing an SBus Card 1. If required for your card, set the jumpers or switches on the card. Refer to the guide for your SBus product for the proper settings. 2. - Page 80 Installing an SBus Card Note - The SPARCstation 10 has 4 SBus slots. SBus slot 1 is above SBus slot 0 and SBus slot 3 is above SBus slot 2. Install SBus cards in the lower SBus slots first. Figure 5–30 Location of SBus Slots on Main Logic Board SPARCstation 10 Service Manual ♦...
- Page 81 4. Align the plug with the socket. Press the corners of the card to push the plug into the socket. See Figure 5–31. Caution - Do not force the card. Using excessive force may bend or damage the pins. Figure 5–31 SBus Card Plug, Socket and Retainers 5.
-
Page 82: Replacing Dsimms
Remove all of the DSIMMs from the defective MLB and install them in the corresponding slots on the new MLB mounted in the chassis. Figure 5–33 and Figure 5–34 show the back and front views of a SPARCstation 10 DSIMM. The surface with the center vertical chip should face the system unit back panel when installed. - Page 83 Figure 5–34 SPARCstation 10 DSIMM, Front Panel View To replace a DSIMM: 1. Locate the DSIMM slots on the main logic board. See Figure 5–35. Figure 5–35 DSIMM Slot Locations on Main Logic Board 2. See Table 5–3 for the proper installation sequence.
-
Page 84: Dsimm Insertion Tool
Slot J0201 must always have a DSIMM installed in order for the system to function properly. In any SPARCstation 10 system, it is the first slot to be filled with a DSIMM. Each additional DSIMM should be installed in the sequence shown in Table 5–3. - Page 85 Figure 5–36 Insertion Tool, Pushing Surface Figure 5–37 Insertion Tool, Grooved Surface 2. Holding a DSIMM at its edges, place it into the DSIMM plastic guides. The surface without a center vertical chip must face the system unit front panel. Be sure the center vertical chip is visible and that the key notch.
- Page 86 4. Place the heel of each hand on each side of the insertion tool’s pushing surface, and press firmly with both hands on the tool until the DSIMM snaps into place. See Figure 5–39 and Figure 5–40. SPARCstation 10 Service Manual ♦ Revision A, July 1993...
- Page 87 Figure 5–39 Heel of Each Hand Figure 5–40 Using the Insertion Tool 5. Put the insertion tool away in a toolbox or other storage place. Do not leave the tool inside the system. 6. Follow the instructions in Chapter 17 to detach the wrist strap, install the cover, connect the expansion unit(s), and power on the system.
- Page 88 SPARCstation 10 Service Manual ♦ Revision A, July 1993...
-
Page 89: Open Boot Prom
CHAPTER Open Boot PROM This chapter explains how to remove and install a SPARCstation 10 system Open Boot PROM. Tools Needed To remove and install the open boot PROM you need the following tools and materials: 4 Phillips screwdriver (size #1) - Page 90 Single width SBus cards have two screws and washers. Double width SBus cards have four screws and washers. Triple width SBus cards have six screws and washers. Save the screws and washers for future use. Figure 6–1 Rear Panel—Screws and Washers SPARCstation 10 Service Manual ♦ Revision A, July 1993...
- Page 91 7. Push back all card retainers holding an SBus card. If the SBus card occupies one or two slots go to step d. Go to the next step if the SBus card occupies three slots. 8. Hold both corners of the card and pull it out until the connectors are out of the slot.
- Page 92 11. Remove the card extractor from the SBus card. Save the card extractor for future use. 12. Place the SBus card on the antistatic surface. 13. Locate the open boot PROM on the MLB. SPARCstation 10 Service Manual ♦ Revision A, July 1993...
- Page 93 See Figure 6–5. Figure 6–5 Location of Open Boot PROM 14. Remove the open boot PROM. Use an IC extractor or small flat-bladed screwdriver to remove the open boot PROM from its socket. See Figure 6–6. Open Boot PROM...
-
Page 94: Installing The Open Boot Prom
Do not touch the pins. 3. Align the pins and insert the open boot PROM in the socket. Match the pin 1 indicator on the open boot PROM with the indicator on the socket. SPARCstation 10 Service Manual ♦ Revision A, July 1993... - Page 95 Caution - Inserting the PROM backwards will damage the PROM. 4. Install the SBus card in slot 2 or 3 (if you removed them). Go to step 5 otherwise. a. Make sure that the card retainers are pushed back. b. Slide the SBus card at an angle into the back panel of the system unit (See Figure 6–7).
- Page 96 Figure 6–8 Rear Panel—Screws and Washers 5. Follow the instructions in Chapter 17 to detach the wrist strap, install the cover, connect any of the expansion unit(s) and power on the system. SPARCstation 10 Service Manual ♦ Revision A, July 1993...
-
Page 97: Non-Volatile Ram (Nvram)
CHAPTER Non-Volatile RAM (NVRAM) This chapter explains how to remove and install a Non-Volatile RAM (NVRAM) from the SPARCstation 10 system. Tools Needed To remove and install the NVRAM, you need the following tools and materials: 4 Phillips screwdriver (size #1) - Page 98 Push back all card retainers holding an SBus card. If the SBus card occupies one or two slots go to step d. See Figure 7–2. Go to the next step if the SBus card occupies three slots. SPARCstation 10 Service Manual ♦ Revision A, July 1993...
- Page 99 Figure 7–2 SBus Card—Card Retainers and Card Extractor c. Hold both corners of the card and pull it out until the connectors are out of the slot. You do not need card extractors to remove a triple width SBus card. Go to step g.
- Page 100 Removing a Double Width SBus Card i. Remove the card extractor from the SBus card. Save the card extractor for future use. ii. Place the SBus card on the antistatic surface. SPARCstation 10 Service Manual ♦ Revision A, July 1993...
-
Page 101: Installing The Nvram
6. Locate the NVRAM chip on the MLB. See Figure 7–5. Figure 7–5 Location of the NVRAM on the MLB 7. Hold the NVRAM chip carrier on both ends and lift it straight up. Gently wiggle the carrier as necessary. 8. - Page 102 fingers on the corners of the SBus card. Caution - Excessive force may bend or damage the pins. 9. Slide the card retainers over the edge of the SBus card. SPARCstation 10 Service Manual ♦ Revision A, July 1993...
- Page 103 10. Install a washer and a screw into the screw hole adjacent to the SBus card on the rear panel each at two places. Double width SBus cards requires screws and washers in four places. Triple width SBus cards require screws and washers in six places. The long side of the washer should be oriented vertically.
- Page 104 SPARCstation 10 Service Manual ♦ Revision A, July 1993...
-
Page 105: Dsimms
CHAPTER DSIMMs This chapter explains how to remove and install a DRAM Single Inline Memory Module (DSIMM) from a SPARCstation 10. Tools Needed To remove and install a DSIMM, you need the following tools and materials: 4 Phillips screwdriver (size #2) - Page 106 3. Locate the DSIMM slots on the main logic board (MLB). See Figure 8–1. Note the slot location of the DSIMM to be removed. Figure 8–1 Location of DSIMMs on the MLB SPARCstation 10 Service Manual ♦ Revision A, July 1993...
-
Page 107: Installing The Dsimm
7. Pull up on both corners (B and C) of the DSIMM until the board clears the socket. Caution - DSIMMs installed in your SPARCstation 10 system must be specifically designed to operate in it. Do not remove DSIMMs from a different Sun system and install them in a SPARCstation 10. - Page 108 Slot J0201 must always have a DSIMM installed in order for your system to function properly. In any SPARCstation 10 system, it is the first slot to be filled with a DSIMM. Each additional DSIMM should be installed in the sequence shown in Table 8–1.
- Page 109 DSIMM Installation Sequence TABLE 8–1 Installation Sequence Slot J0201 J0304 J0203 J0302 J0303 J0301 J0305 J0202 If your system did not come with a DSIMM Insertion Tool, press the DSIMM into place with your fingers. If your system did come with a DSIMM Insertion tool, (see Figure 8–4 and Figure 8–5), follow the instructions in Steps 1 through 5.
- Page 110 Be sure the center vertical chip is visible and that the key notch. See Figure 8–6. Figure 8–6 Inserting a DSIMM, Front Panel View 8. Place the grooved surface of the insertion tool on the upper edge of the DSIMM board. See Figure 8–7. SPARCstation 10 Service Manual ♦ Revision A, July 1993...
- Page 111 Figure 8–7 Using the Insertion Tool 9. Place the heel of each hand on each side of the insertion tool’s pushing surface, and press the tool down firmly until the DSIMM snaps into place. See Figure 8–8. Figure 8–8 Heel of Each Hand 10.
- Page 112 SPARCstation 10 Service Manual ♦ Revision A, July 1993...
-
Page 113: Mbus Modules
CHAPTER MBus Modules If you remove a defective MBus module, install the replacement MBus module in the same slot. Tools Needed To remove and install an MBus module you need the following tools and materials: 4 Phillips screwdriver (size #2) 4 Card extractor 4 Wrist strap 4 Antistatic surface... - Page 114 5. Push back both card retainers for the MBus module. If the system has two MBus modules (slot 1 on top of slot 0), and slot 0 is the defective module, remove the top module first. See Figure 9–1. SPARCstation 10 Service Manual ♦ Revision A, July 1993...
- Page 115 Figure 9–1 MBus Module—Card Retainers and Card Extractor 6. Install the card extractor on the MBus module. See Figure 9–2. MBus Modules...
- Page 116 7. Grasp both edges of the card extractor with your fingers and pull up on both corners of the MBus module until the connector is out of the slot. See Figure 9–3. SPARCstation 10 Service Manual ♦ Revision A, July 1993...
-
Page 117: Installing An Mbus Module
Figure 9–3 Removing an MBus Module 8. Remove the card extractor from the MBus module. Save the card extractor for future use. 9. Place the MBus module on the antistatic surface. 10. Repeat steps 6 through 10 to remove the module from slot 0, if it is to be replaced. - Page 118 Hold the corners of the MBus module connector. b. Press down firmly until the module sits into place. Make sure the module is fully inserted into the slot. Caution - Excessive force may bend or damage the pins. SPARCstation 10 Service Manual ♦ Revision A, July 1993...
- Page 119 Figure 9–5 Locking the MBus Module Retainers 4. Push and lock the retainer arms over the edge of the MBus module. See Figure 9–5. If the system has two MBus modules (slot 1 on top of slot 0), and the defective module is in slot 0, install the module in slot 0 first. Follow steps 2 through 6 to replace module in slot 1.
- Page 120 SPARCstation 10 Service Manual ♦ Revision A, July 1993...
-
Page 121: Sbus Cards
CHAPTER SBus Cards If you are removing a defective SBus card, install the replacement card in the same slot. Refer to the documentation shipped with the SBus card for installation information. Tools Needed To remove and install an SBus card you will need the following tools and materials: 4 Phillips screwdriver (size #1) 4 Phillips screwdriver (size #2) 4 Card extractor... - Page 122 SBus card is fastened. See Figure 10–2. Single-width SBus cards have two sets of fastening hardware, double-width SBus cards have four sets, and triple-width SBus cards have six sets. Save the screws and washers for future use. SPARCstation 10 Service Manual ♦ Revision A, July 1993...
- Page 123 Figure 10–2 Rear Panel—Screws and Washers 8. Push the rear card retainers away from the edge of the SBus card. See Figure 10–3. Figure 10–3 SBus Rear Card Connectors 9. Install the card extractor (shipped with the system) on the SBus card. Insert the legs of the extractor into the holes on either side of the connector.
- Page 124 10. Hold both ends of the card extractor and pull upwards slowly until the connector is out of the slot. See Figure 10–5 and Figure 10–6. Figure 10–5 Removing a Single-Width SBus Card SPARCstation 10 Service Manual ♦ Revision A, July 1993...
- Page 125 Figure 10–6 Removing a Double-Width SBus Card Figure 10–7 Removing a Double-width SBus Card 11. Remove the card extractor(s) from the SBus card. Save the card extractor(s) for future use. 12. Place the SBus card on an antistatic surface. Save the SBus card for reuse. SBus Cards...
-
Page 126: Installing An Sbus Card
Figure 10–8 Removing the Adapter Bracket from the SBus Card b. Save the adapter bracket and the screws. You might need to use them when installing SBus cards in other systems. SPARCstation 10 Service Manual ♦ Revision A, July 1993... - Page 127 5. If there are filler panels where you are going to install the SBus card, you must remove them. See Figure 10–9. Figure 10–9 Removing a Filler Panel 6. Push both rear card retainers back. See Figure 10–10. SBus Cards...
- Page 128 Bend one leg of the retainer slightly to the outside until the hook clears the hole in the SBus card. b. Remove the other side of the retainer which should come out easily without bending it. Figure 10–11 Removing the SBus Card Retainer SPARCstation 10 Service Manual ♦ Revision A, July 1993...
- Page 129 8. Remove the card extractor from the replacement SBus card if it is installed. Save the SBus card extractor for future use. 9. Slide the card at an angle into the back panel of the system. Hook the card backplate under the lip on the back panel. Be sure the card backplate shows through the slots on the back panel.
- Page 130 13. To install top SBus cards, repeat steps 1 through 12. 14. Follow the instructions in Chapter 17 to detach the wrist strap, install the cover, connect the expansion unit(s), and power on the system. SPARCstation 10 Service Manual ♦ Revision A, July 1993...
-
Page 131: Power Supply Assembly
CHAPTER Power Supply Assembly This chapter describes how to remove and install the power supply assembly. The power supply assembly also contains fans. Tools Needed To remove and install the power supply assembly you need the following tools and materials: 4 Phillips screwdriver (size #2) Caution - Make sure to disconnect the power cord from the back panel of the... - Page 132 Disconnecting the Power Supply 9. Slide the power supply assembly toward the front of the chassis. Sliding the power supply assembly unlocks the power supply from the power supply mounts. See Figure 11–2. SPARCstation 10 Service Manual ♦ Revision A, July 1993...
-
Page 133: Installing The Power Supply Assembly
Figure 11–2 Power Supply Chassis Mounts 10. Lift the power supply assembly from the chassis. Installing the Power Supply Assembly 1. Align the power supply assembly in the chassis. 2. Slide the power supply assembly toward the rear of the chassis until it locks in the power supply mounts. - Page 134 O. 7. Plug in the system unit power cord. 8. Follow the instructions in Chapter 17 to install the cover, connect any expansion unit(s), and power on the system. SPARCstation 10 Service Manual ♦ Revision A, July 1993...
-
Page 135: Hard Disk Drives
SPARCstation 10 system. Note - The SPARCstation 10 supports the 424-Mbyte and 1.05-Gbyte hard disk drives, called “fast SCSI” drives. You must inspect and, if necessary, reset the SCSI Device ID jumpers for the type of drive you are installing. When the jumpers are properly set, each drive is automatically assigned a specific and unique SCSI Device ID number. - Page 136 Drive 0 is mounted toward the center of the chassis, and drive 1 is mounted next to it. If the system has one hard disk drive, it should be mounted toward the center of the chassis (drive 0). See Figure 12–1. SPARCstation 10 Service Manual ♦ Revision A, July 1993...
- Page 137 Figure 12–1 Hard Disk Drive Locations 7. Slide the hard disk drive toward the rear of the chassis to free the grommets from the drive mounts. See Figure 12–2. Hard Disk Drives...
-
Page 138: Installing A Hard Disk Drive
4 Determine the location and type of drive to be installed 4 Verify, and if necessary, change the SCSI address jumpers 4 Verify that the configuration jumpers are set correctly 4 Install the disk drive SPARCstation 10 Service Manual ♦ Revision A, July 1993... -
Page 139: Drive Locations
Figure 12–3 Hard Disk Drive Locations Supported Hard Disk Drives The following hard disk drives are supported for the SPARCstation 10: 4 424-Mbyte hard disk drive 4 1.05-Gbyte hard disk drive Depending on the drive, the jumpers are either located near the lower right corner of the drive controller board, or near the lower left corner. -
Page 140: Checking And Setting Scsi Jumpers
2. Compare the SCSI device ID and configuration jumper settings to Figure 12–5. Set the jumper settings to match Figure 12–5 using needlenose pliers. SPARCstation 10 Service Manual ♦ Revision A, July 1993... -
Page 141: Installing A 424 Mbyte Drive
Figure 12–5 SCSI Address and Configuration Jumper Settings for 424-Mbyte Drive Position 0 and 1 Installing a 424 Mbyte Drive 1. Complete the procedure for setting drive jumpers. See the “Checking and Setting SCSI Jumpers” on page 124. 2. Remove the drive grommets from the defective drive. 3. -
Page 142: Installing A 1.05 Gbyte Drive
1. Put the replacement drive on the antistatic bag the drive was shipped in. 2. Set the SCSI ID jumper settings according to the drive position. See Table 12–2 and Figure 12–7. SPARCstation 10 Service Manual ♦ Revision A, July 1993... - Page 143 SCSI Target ID Jumper Settings TABLE 12–2 Drive Position Target ID Jumper Settings SCSI Address A0 installed (middle of chassis) A1 installed A2 not installed A0 installed (corner of chassis) A1 not installed A2 not installed Figure 12–7 SCSI Addresses of Both Disk Drives 3.
- Page 144 Definition Reserved Delayed Start Motor Enable (Remote Spin-up) Write Protect Parity Enable Reserved Term Power from Drive Term Power to SCSI Bus 4. Remove the drive grommets from the defective drive. SPARCstation 10 Service Manual ♦ Revision A, July 1993...
- Page 145 5. A new mounting bracket must be installed on 1.05 Gbyte drives. Position the drive with the circuit board up so you have access to the drive bottom. 6. Check that the mounting bracket kit contains the following items: 4 Metal mounting bracket 4 Six screws 4 Two slip-on grommets 4 Two screw-in grommets with split washers...
- Page 146 9. Position the bracket over the drive and align the screw slots over the drive circuit board. 10. Insert one screw on each side of the bracket to fasten the bracket sides to the drive sides. SPARCstation 10 Service Manual ♦ Revision A, July 1993...
- Page 147 11. Secure the bracket base to the drive bottom (board side) with four screws. 12. Route the drive power harness and the internal disk data cable to lie flat under the disk drive. Fold the internal disk cable and power cable out toward the front of the chassis so they will be in position for connecting to the drive.
- Page 148 To connect drive 0, attach the internal disk data connector labeled J0107 on the system board to the drive. b. To connect drive 1, attach the internal disk data connector labeled J0106 on the system board to the drive. See Figure 12–13. SPARCstation 10 Service Manual ♦ Revision A, July 1993...
- Page 149 Figure 12–13 Connecting the Internal Disk and Power Cables to Drive 1 17. Lower the drive into the chassis, press the four drive grommets into the drive mounts. Firmly seat the grommets by moving the drive forward toward the front of the chassis until the grommets sit tightly in the drive mounts. See Figure 12–14.
- Page 150 19. Connect any expansion units you previously removed to the system. 20. Power on the system. Perform the steps in the section “Turn On the Power” on page 172 in Chapter 17. SPARCstation 10 Service Manual ♦ Revision A, July 1993...
-
Page 151: Diskette Drive
CHAPTER Diskette Drive This chapter explains how to remove and install a diskette drive for the SPARCstation 10 system. Caution - The diskette drive contains electronic components that are extremely sensitive to static electricity. Ordinary amounts of static from your clothes or work environment can destroy the components. - Page 152 See Figure 13–1. Figure 13–1 Removing Diskette Drive Clips 6. Slide the diskette drive toward the outer side of the chassis to free the grommets from the drive mounts. See Figure 13–2. SPARCstation 10 Service Manual ♦ Revision A, July 1993...
-
Page 153: Preparing The Diskette Drive
Figure 13–2 Removing a Diskette Drive 7. Disconnect the DC power connector and the internal disk connector from the diskette drive. See Figure 13–2. 8. Lift the diskette drive out of the chassis and put it on an antistatic surface. Preparing the Diskette Drive Before installing a diskette drive, you must check the diskette drive switch setting and make sure that the switch is set correctly, as shown in Figure 13–3. -
Page 154: Installing The Diskette Drive
1. Position the drive unit so that its data and power cables are facing the inner part of the chassis. See Figure 13–4. 2. Lower the drive into the chassis and align the three grommets into the drive mounts. SPARCstation 10 Service Manual ♦ Revision A, July 1993... - Page 155 Figure 13–4 Installing a Diskette Drive 3. Connect the DC power connector to the diskette drive and the internal disk connector to the diskette drive. The connectors are keyed so that it will fit only one way. See Figure 13–4. 4.
- Page 156 The system cover may not close, if the diskette drive is not seated correctly in the drive mounts. 6. Follow the instructions in Chapter 17 to detach the wrist strap, install the cover, connect the expansion unit(s), and power on the system. SPARCstation 10 Service Manual ♦ Revision A, July 1993...
-
Page 157: Dc Power Harness
CHAPTER DC Power Harness This chapter explains how to remove and install the DC power harness for a SPARCstation 10 system. Tools Needed To remove and install the DC power harness you will need the following tools and materials: 4 Phillips screwdriver (size #2) - Page 158 Refer to “Attaching the Wrist Strap” on page 34 in Chapter 4. e. Slide the disk drive toward the rear of the chassis to free the grommets from the drive mounts. See Figure 14–1. Figure 14–1 Removing a Disk Drive SPARCstation 10 Service Manual ♦ Revision A, July 1993...
- Page 159 f. Disconnect the DC power connector from the disk drive. See Figure 14–1. g. Disconnect the internal disk connector from the disk drive. See Figure 14–1. h. Lift the hard disk drive out of the chassis and put it on an antistatic surface for future use.
-
Page 160: Installing The Dc Power Harness
Make sure that the DC power harness and the internal drive cable lay flat. 4. Verify that the jumper setting is correct for the drive location. Figure 14–4 shows the proper jumper settings for drive 0 and drive 1. SPARCstation 10 Service Manual ♦ Revision A, July 1993... - Page 161 Figure 14–4 Jumper Settings for Drive 0 and 1 5. Position the drive connectors toward the front of the chassis. See Figure 14–5. 6. Lower the drive into the chassis and align the grommets on the drive mounts. See Figure 14–5. DC Power Harness...
- Page 162 The system cover may not close correctly, if the drive is not pushed forward far enough. 11. Follow the instructions in Chapter 17 to detach the wrist strap, install the cover, connect the expansion unit(s), and power on the system. SPARCstation 10 Service Manual ♦ Revision A, July 1993...
-
Page 163: Internal Disk Cable
CHAPTER Internal Disk Cable This chapter explains how to remove and install the internal disk cable in a SPARCstation 10 system. Tools Needed To remove and install the internal disk cable, you will need the following tools and materials: 4 Phillips screwdriver (size #2) - Page 164 Slide the disk drive toward the rear of the chassis to free the grommets from the drive mounts and lift the drive. See Figure 15–1. Figure 15–1 Removing the Disk Drive SPARCstation 10 Service Manual ♦ Revision A, July 1993...
- Page 165 f. Disconnect the DC power connector from the disk drive. See Figure 15–1. g. Disconnect the internal disk connector from the disk drive. See Figure 15–1. h. Lift the hard disk drive out of the chassis. Put it aside on an antistatic surface for future use. i.
- Page 166 Slide the DC power harness out of the cable clips in the base of the system and remove the DC power harness from the chassis. See Figure 15–3. 4. Disconnect the LED connector from the LED. See Figure 15–4. SPARCstation 10 Service Manual ♦ Revision A, July 1993...
- Page 167 Figure 15–4 Disconnecting the LED Connector from the LED 5. Disconnect the internal disk connector from the MLB. See Figure 15–5. 6. Slide the internal disk cable out of the cable clips in the system base and remove it from the chassis. Internal Disk Cable...
-
Page 168: Installing The Internal Disk Cable
Figure 15–5 Internal Disk Cable Installing the Internal Disk Cable 1. Lay out the internal disk cable on the chassis and slide it under the cable clips. See Figure 15–6. SPARCstation 10 Service Manual ♦ Revision A, July 1993... - Page 169 Figure 15–6 Internal Disk Cable Layout 2. Connect the internal disk connector to the MLB. 3. Insert the LED into the LED connector. The longer LED pin should be inserted into the LED connector with the red wire. See Figure 15–7. Figure 15–7 Inserting the LED into the LED Connector Internal Disk Cable...
- Page 170 See Figure 15–8. Figure 15–8 Connecting the LED Connector to the LED 5. Lay out the DC power harness in the chassis. See Figure 15–9. SPARCstation 10 Service Manual ♦ Revision A, July 1993...
- Page 171 Figure 15–9 DC Power Harness Layout 6. Install the diskette drive. a. Connect the DC power connector to the power supply. See Figure 15–9. b. Position the drive unit so the data and power cables face the inside of the chassis.
- Page 172 The system cover may not close, if the diskette drive is not seated correctly in the drive mounts. g. Insert a clip into the diskette drive mounts at two places after installing the diskette drive. See Figure 15–11. SPARCstation 10 Service Manual ♦ Revision A, July 1993...
- Page 173 Figure 15–11 Installing Diskette Drive Clips 7. Install the hard disk drive. a. Verify that the jumper setting is correct for the drive location. Figure 15–12 shows the proper jumper settings for drive 0 and drive 1. Internal Disk Cable...
- Page 174 Jumper Settings for Hard Disk Drive 0 and 1 b. Lower the drive into the chassis. The connector side of the drive should be facing the front of the chassis. See Figure 15–13. SPARCstation 10 Service Manual ♦ Revision A, July 1993...
- Page 175 Figure 15–13 Reconnecting the Disk Drive c. Connect the internal disk connector to the disk drive. The connector is keyed so it fits only one way. d. Connect the DC power connector to the disk drive. The connector is keyed so it will fit only one way. e.
- Page 176 Figure 15–14 Installing the Disk Drive 8. Follow the instructions in Chapter 17 to detach the wrist strap, install the cover, connect the expansion unit(s), and power on the system. SPARCstation 10 Service Manual ♦ Revision A, July 1993...
-
Page 177: Light-Emitting Diode
CHAPTER Light-Emitting Diode This chapter explains how to remove and install the light-emitting diode (LED). Tools Needed To remove and install the LED you will need the following tools and materials: 4 Phillips screwdriver (size #2) 4 Wrist strap 4 Antistatic surface Removing the LED Follow the instructions in Chapter 4 to power off the system and disconnect the expansion units. - Page 178 Slide the diskette drive toward the outer side of the chassis to free the grommets from the drive mounts. See Figure 16–1. Figure 16–1 Removing a Diskette Drive b. Disconnect the DC power connector from the diskette drive. See Figure 16–1. SPARCstation 10 Service Manual ♦ Revision A, July 1993...
- Page 179 c. Disconnect the internal disk connector from the diskette drive. See Figure 16–1. d. Lift the diskette drive out of the chassis and place it on an antistatic surface. 5. Disconnect the LED connector from the LED. See Figure 16–2. Figure 16–2 Disconnecting the LED from the LED Connector 6.
-
Page 180: Installing The Led
Removing the LED from the Chassis 7. Slide the LED out of the chassis. Installing the LED To install the LED: 1. Insert the longer LED pin into the LED connector with the red wire. SPARCstation 10 Service Manual ♦ Revision A, July 1993... - Page 181 2. Connect the LED to the LED connector. See Figure 16–4. Figure 16–4 Connecting the LED to the LED Connector 3. Slide the LED into the LED cavity. Push it into the cavity until it comes in contact with the locating stop. See Figure 16–5.
- Page 182 Position the drive unit so the data and power cables face the inside of the chassis. b. Lower the drive into the chassis and align the three grommets into the drive mounts. SPARCstation 10 Service Manual ♦ Revision A, July 1993...
- Page 183 Figure 16–6 Installing the Diskette Drive c. Connect the DC power harness to the diskette drive. The connector is keyed so that it will fit only one way. d. Connect the internal disk connector to the diskette drive. The connector is keyed so that it will fit only one way. e.
- Page 184 Figure 16–7 Installing Diskette Drive Clips 5. Follow the instructions in Chapter 17 to detach the wrist strap, install the cover, connect the expansion unit(s), and power on the system. SPARCstation 10 Service Manual ♦ Revision A, July 1993...
-
Page 185: Powering On The System
CHAPTER Powering On the System This chapter explains the steps to perform before and after replacing a part. Unwrap the wrist strap from your wrist and detach the adhesive copper strip from the power supply. Topics covered in this chapter include the following: 4 Installing the system unit cover 4 Connecting peripheral(s) to the system 4 Turning the power on... - Page 186 See Figure 17–2. Figure 17–2 Pushing Down on the Rear Cover Edges 4. Guide the cover down so that the plastic retainer clip snaps the cover to the rear panel. See Figure 17–2. SPARCstation 10 Service Manual ♦ Revision A, July 1993...
-
Page 187: Connecting A Desktop Storage Pack
5. Use a Phillips screwdriver to tighten the captive screw on the rear panel. Do not over tighten the screw. See Figure 17–3. Figure 17–3 Rear Panel Captive Retainer Screws Connecting a Desktop Storage Pack To connect a Desktop Storage Pack (DSP) to the system unit: 1. -
Page 188: Connecting A Video Monitor
Connecting a Video Monitor There are several different types of monitors and cabling. The color and grayscale monitors use cables with 13W3 connectors. See Appendix C of the SPARCstation 10 Installation Guide for more specific information on monitors. Connecting a Mouse The optical mouse connects to one of two jacks in the back of the keyboard. - Page 189 Caution - Always allow 10 seconds between turning off the power and turning it back on again. This pause prevents possible damage to power supply components in your system unit. Caution - Hot surfaces are present. Use care when opening the system chassis or handling components.
- Page 190 SPARCstation 10 Service Manual ♦ Revision A, July 1993...
-
Page 191: System Specifications
APPENDIX System Specifications This appendix contains the input power requirements, environmental requirements, physical dimensions, packaging dimensions, and regulatory compliance information. Power Input Requirements Table A–1 lists the power input requirements for the system unit. The maximum power dissipated is less than, or equal to, 187 watts. The power supply automatically selects the correct AC voltage range. - Page 192 1 rotational flat drop each edge, 1 rotational edge drop each edge 80 mm drop height, 40 mm block height Mechanical 100 inserts per connector, 100 opening/closing of top cover, 100 on/off Connections operations of each switch SPARCstation 10 Service Manual ♦ Revision A, July 1993...
-
Page 193: System Placement Requirement
System Placement Requirement The SPARCstation 10 system unit has vents on its left and right panels for ventilation and a slot on its right panel for diskettes. When you place the unit on a desktop, make sure that objects do not block the vents on either side of the unit. -
Page 194: Packaging Dimensions
X-Ray Emissions UL 1950 FCC Class B German Federal DHHS, PTB CSA C22.2 No. 950 VDE Class B Republic ZH 1/618 IEC 380 DOC Class B EN 60950 VCCI Class 2 SPARCstation 10 Service Manual ♦ Revision A, July 1993... -
Page 195: Replacement Parts List
Replacement Parts List This appendix lists part numbers and describes replacement parts for the SPARCstation 10 system. Although these part numbers are correct as of the publication date of this document, they are subject to change. Consult your authorized Sun sales representative or service provider to confirm part numbers before you order new or replacement parts. - Page 196 Triple Density Floppy Drive Drive Mounting 330-1390 Drive Mounting Grommet Grommet Drive Securing 330-1448 Floppy Drive Securing Clip Clip Speaker 501-1943 Speaker Box Assembly 150-1891 Light, Pipe, LED (Light Emitting Diode) SPARCstation 10 Service Manual ♦ Revision A, July 1993...
- Page 197 Replacement Parts List TABLE B–1 (continued) Replacement Parts Part Number Description Internal Cables 530-1848 DC Power Harness 530-1847 Internal Disk Cable External Cables 530-1898 Video, 4.5m 530-1856 AUI/Audio Adapter 530-1857 Centronics Parallel Printer, 5.0m 530-1861 IBM Parallel Printer, 5.0m 530-1869 Serial Port “Y”...
- Page 198 SPARCstation 10 Service Manual ♦ Revision A, July 1993...
-
Page 199: Positive Temperature Coefficient Devices
APPENDIX Positive Temperature Coefficient Devices This appendix provides general information about positive temperature coefficient (PTC) devices which are located on the main logic board (MLB) in place of fuses. These devices are self healing; they reset after a fault occurs and do not require replacement. -
Page 200: Keyboard And Mouse Ptc
The Ethernet PTC protects the Ethernet transceiver from short circuits or overcurrent. If you plug the Ethernet cable into the MLB and the Ethernet transceiver LED does not light, the Ethernet PTC may be open. SPARCstation 10 Service Manual ♦ Revision A, July 1993... -
Page 201: Scsi Termination Ptc
Note - The Ethernet transceiver is not a part of the workstation. It is connected to the main Ethernet network cable. If the Ethernet transceiver LED does not light: 4 The transceiver may be bad. 4 The connection on the Ethernet cable may be bad. 4 The Ethernet cable or transceiver may have a problem such as a bad connection, shorted center conductor to the shield, or a broken cable segment. - Page 202 SPARCstation 10 Service Manual ♦ Revision A, July 1993...
-
Page 203: Stacked Micro High Density Connectors
APPENDIX Signal Descriptions Stacked Micro High Density Connectors Figure D–1 Parallel and Audio/AUI Connectors Parallel Connector Pin Assignments TABLE D–1 Function O L evel Function O L evel 1 D ataStrobe* 24 ma OC 14 AutoFeed* O 2 4 ma TTL 2 D ata Bit 0 24 ma OC 15 Error*... - Page 204 Function Level Function Level 1 A UI_DO- Analog 14 AUI_DO+ Analog 2 A UI_DI+ Analog 15 AUI_DI_ Analog 3 A UI_CI- Analog 16 AUI_CI+ Analog 4 + 12 VDC 17 Ground SPARCstation 10 Service Manual ♦ Revision A, July 1993...
-
Page 205: Stacked Micro High Density Connectors- Signal Descriptions
Audio/AUI Connector Pin Assignments TABLE D–2 (continued) Function Level Function Level 5 E MCTL I&O 18 CHI_ResetS I&O 6 C HI_DX I&O 19 CHI_DR I&O 7 C HI_CLK I&O 20 CHI_FS I&O 8 C HI_DFSYNC I&O 21 D/C I&O 9 N .C. 22 N.C. - Page 206 Digital Audio Data Transmit CHI_CLK Digital Audio Clock CHI_FS Digital Audio Frame Select CHI_DFSYNC Digital Audio Frame Sync CHI_RESET Digital Audio Reset CHI_DR Digital Audio Data Receive EMCTL External Mode Control Data/Control Select SPARCstation 10 Service Manual ♦ Revision A, July 1993...
-
Page 207: Keyboard/Mouse And Serial Ports A&B
Keyboard/Mouse and Serial Ports A&B Keyboard/Mouse Figure D–2 Keyboard/Mouse Connector Keyboard/Mouse Connector Pin Assignments TABLE D–4 Function O L evel Function Level 1 G round O G ND 5 K eyBd Out 2 S hield Shield 6 K eyBd In 3 + 5 VDC O V CC 7 P owerOn*... -
Page 208: Keyboard/Mouse And Serial Ports A&B- Signal Descriptions
13 CTS B I R S232/423 Keyboard/Mouse and Serial Ports A&B- Signal Descriptions Keyboard/Mouse and Serial Ports A&B Signal Descriptions TABLE D–6 Signal Descriptions Mouse In Input From Mouse KeyBoardOut Output to Keyboard SPARCstation 10 Service Manual ♦ Revision A, July 1993... - Page 209 Keyboard/Mouse and Serial Ports A&B Signal Descriptions TABLE D–6 (continued) Signal Descriptions KeyBoardIn Input From Keyboard XmitDataA Transmit Data Port A RecDataA Receive Data Port A RTS A Request to Send Port A CTS A Clear to Send Port A DSR A Data Set Ready Port A DCD A...
-
Page 210: Twisted Pair Ethernet
8 N .C. Twisted Pair Ethernet Twisted Pair Ethernet-Signal Description Twisted Pair Ethernet Signal Description TABLE D–8 Signal Descriptions TPO+/- Differential Twisted Pair Transmit Data TPI+/- Differential Twisted Pair Receive Data SPARCstation 10 Service Manual ♦ Revision A, July 1993... -
Page 211: Scsi
SCSI Figure D–5 SCSI Connector SCSI Pin Assignments TABLE D–9 Function O L evel Function Level 1 G round 26 sd0* I&O 2 G round 27 sd1* I&O 3 G round 28 sd2* I&O 4 G round 29 sd3* I&O 5 G round 30 sd4* I&O... -
Page 212: Scsi-Signal Description
50 io* SCSI-Signal Description SCSI Signal Descriptions TABLE D–10 Signal Descriptions sd<0-7>* SCSI Data Bits 0 to 7 sdp* SCSI Data Parity atn* Attention bsy* Busy ack* Acknowledge rst* Reset msg* Message SPARCstation 10 Service Manual ♦ Revision A, July 1993... - Page 213 SCSI Signal Descriptions TABLE D–10 (continued) Signal Descriptions sel* Select Control/Data req* Request Input/Output Termpower Termination Voltage Signal Descriptions...
- Page 214 SPARCstation 10 Service Manual ♦ Revision A, July 1993...
-
Page 215: Glossary
A RMS Amperes root mean square. RMS is often used in power measurements for electronic equipment. attachment unit The port on the SPARCstation 10 system unit where the AUI interface (AUI) port adapter cable is connected. board See printed circuit board. - Page 216 External cache is a cache that is located external to the microprocessor. See cache. External Storage Module. An external unit that contains disk and/or tape drive(s) that can be connected to a SPARCstation 10. SPARCstation 10 Service Manual ♦ Revision A, July 1993 Glossary-200...
- Page 217 Forth Toolkit. If disaster happened to your operating system, the Monitor automatically starts. Monitor 2) A video display unit that is part of the SPARCstation 10 system. It is not the same thing as a terminal. Memory Management Unit. NVRAM Non-Volatile RAM.
- Page 218 Diagnostic software that runs under SunOS system software; Exerciser displays real-time use of system resources and peripheral equipment such as Desktop Storage Packs and External Storage Modules. system Monitor See Monitor 1) or 2). SPARCstation 10 Service Manual ♦ Revision A, July 1993 Glossary-202...
- Page 219 A terminal may be connected to either of the RS-423/RS-232 serial interface ports on the back panel of the SPARCstation 10 system. It is not the same thing as a monitor. Time of Day clock.
- Page 220 SPARCstation 10 Service Manual ♦ Revision A, July 1993 Glossary-204...
-
Page 221: Index
Index Index-205...
Need help?
Do you have a question about the SPARCstation 10 and is the answer not in the manual?
Questions and answers