Table of Contents

Subscribe to Our Youtube Channel
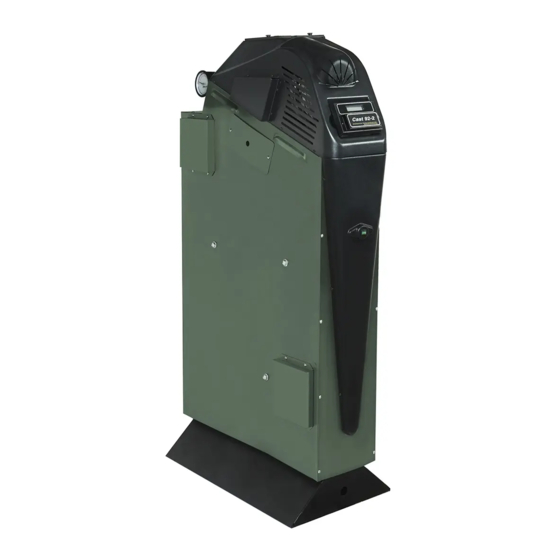
Related Manuals for PEERLESS CAST 92


Summary of Contents for PEERLESS CAST 92
- Page 1 Peerless CAST 92 Boilers As an ENERGY STAR ® Partner, PB Heat, LLC has determined that this product meets the ENERGY STAR guidelines for energy efficiency. I n s t a l l a t i o n , O p e r a t i o n &...
-
Page 2: Table Of Contents
TABLE OF CONTENTS TABLE OF CONTENTS USING THIS MANUAL 3B. VENT & AIR PIPING: THROUGH THE ROOF (AIR PIPED THROUGH SIDE WALL) A. INSTALLATION SEQUENCE ... . .1 A. BOILER VENT CONNECTION ...17 B. - Page 3 D. CIRCULATOR WIRING ....77 A. THE CAST 92 BOILER CONTROL ..55 E. 4-20MA OPERATION ....79 B.
- Page 4 TABLE OF CONTENTS J. SET CONTROL PARAMETERS ON O. MEASURE FLAME CURRENT ...93 KEYPADS ......82 P .
-
Page 5: Using This Manual
USING THIS MANUAL USING THIS MANUAL A. INSTALLATION SEQUENCE DANGER Follow the installation instructions provided in this manual Indicates a condition or hazard which will cause in the order shown. The order of these instructions has severe personal injury, death or major property been set in order to provide the installer with a logical damage. -
Page 6: Preinstallation
A. GENERAL Massachusetts requires manufacturers of Side Wall Vented boilers to provide the following information 1. Cast 92 boilers are supplied completely assembled as from the Massachusetts code: packaged boilers. The package should be inspected for damage upon receipt and any damage to the unit ·... -
Page 7: Boiler Location Requirements
PREINSTALLATION c. Buildings will require the installation of a fresh air C. BOILER LOCATION REQUIREMENTS duct or other means of providing make-up air if the intake air option isn't used. Any building WARNING utilizing other gas burning appliances, a fireplace, wood stove or any type of exhaust fan must be Do not install the boiler unless the location meets all checked for adequate combustion air when all of... -
Page 8: Clearance Requirements
1 square inch intake, follow instructions in Section 3, “Venting & per BTUH input of all Cast 92 boilers in the room. Air Inlet Piping”. EXCEPTION: Ventilation openings are not required if b. - Page 9 Caulking or sealants are applied to areas such area of: as joints around windows and door frames, 1 in per 1,000 BTUH of all Cast 92 boilers in the between sole plates and floors, between wall- room. ceiling joints, between wall panels, at penetrations for plumbing, electrical, and gas lines, and in other openings.
- Page 10 Size each opening to provide minimum free area of: 1 in per 4,000 BTUH of all Cast 92 boilers in the room. 1 in per 3,000 BTUH of all Cast 92 boilers in the room.
-
Page 11: Boiler Set-Up
BOILER SET-UP 2. BOILER SET-UP A. REMOVE THE BOILER FROM THE CRATE CAUTION Cold weather handling — The boiler jacket includes plastic parts. If the boiler has been in a cold environment (below 0°F), allow the boiler to warm to room temperature before handling. - Page 12 BOILER SET-UP • All applicable local codes and ordinances must also be followed. • A minimum clearance of 1" (25 mm) must be maintained between heating system pipes and all combustible construction. • All heating system piping must be supported by suitable hangers —...
-
Page 13: Venting & Air Inlet Piping
VENTING & AIR INLET PIPING 3. VENTING & AIR INLET PIPING WARNING DO NOT install a Cast 92 boiler on a common vent system. All Cast 92 boilers must be individually vented. Failure to comply could result in improper operation of any of the appliances on the vent system, resulting in possible severe personal injury, death or substantial property damage. -
Page 14: Vent And Air Piping, General
92-4 Vent Components 1. Category II & IV Venting Only: Heat-Fab Z-Flex Heat-Fab Z-Flex All Cast 92 boilers require vent piping listed for use in Vent Piping/Components EZ-Seal Z-Vent EZ-Seal Z-Vent pressurized, condensing operation. Use only the (Incl. Supports, Thimbles, etc.) 3"... -
Page 15: Vent Piped Through The Roof (Air Piped Through Side Wall)
VENTING & AIR INLET PIPING G. VENT PIPED THROUGH THE ROOF H. VENT & AIR PIPED THROUGH THE ROOF (AIR PIPED THROUGH SIDE WALL) (SEPARATE VENT AND AIR TERMINATIONS) 92-2 92-4 92-2 92-4 Vent Components Vent Components Heat-Fab Z-Flex Heat-Fab Z-Flex Heat-Fab Z-Flex... -
Page 16: Vent Piped Through A Side Wall (Separate Vent And Air Terminations)
VENTING & AIR INLET PIPING VENT PIPED THROUGH A SIDE WALL J. VENT & AIR PIPED THROUGH A SIDE WALL (COMBUSTION AIR FROM THE BOILER ROOM) (SEPARATE VENT AND AIR TERMINATIONS) 92-2 92-4 92-2 92-4 Vent Components Vent Components Heat-Fab Z-Flex Heat-Fab Z-Flex... -
Page 17: Vent & Air Piped Through Aside Wall (Concentric Vent/Air Termination)
VENTING & AIR INLET PIPING K. VENT & AIR PIPED THROUGH A SIDE WALL (CONCENTRIC VENT/AIR TERMINATION) 92-2 92-4 Vent Components Heat-Fab Heat-Fab EZ-Seal, 3" Piping EZ-Seal, 4" Piping Vent Piping/Components Saf-T Vent SC Fittings for Saf-T Vent SC Fittings for (Incl. -
Page 18: Vent & Air Piping: Through The Roof
VENT & AIR PIPING: THROUGH THE ROOF 3A. VENT & AIR PIPING: THROUGH THE ROOF (COMBUSTION AIR FROM THE BOILER ROOM) 2. EZ-Seal Connection: Insert EZ-Seal pipe male end WARNING into the boiler connection. Make sure the locking tabs slide under the EZ-Seal locking ring. Bend back The vent piping operates with positive pressure. -
Page 19: Vent Piping Components
VENT & AIR PIPING: THROUGH THE ROOF 4. Slope horizontal runs toward the boiler. All horizontal 2. Vent piping cannot be supported from above (such as runs of vent pipe must slope continuously at least 1/4" relying on roof jack sections). You must install supports per foot (21 mm per meter) to ensure condensate on the horizontal piping before the vent turns upward. -
Page 20: Combustion Air Openings
VENT & AIR PIPING: THROUGH THE ROOF G. COMBUSTION AIR OPENINGS H. MULTIPLE BOILER INSTALLATIONS Combustion air must be supplied from the boiler room as 1. Each boiler must be individually vented. DO NOT use shown in Figure 1.1. Make sure the installation provides combined venting. -
Page 21: Vent & Air Piping: Through The Roof
VENT & AIR PIPING: THROUGH THE ROOF 3B. VENT & AIR PIPING: THROUGH THE ROOF (AIR PIPED THROUGH SIDE WALL) 2. EZ-Seal Connection: Insert EZ-Seal pipe male end WARNING into the boiler connection. Make sure the locking tabs slide under the EZ-Seal locking ring. Bend back The vent piping operates with positive pressure. -
Page 22: Vent Piping Components
VENT & AIR PIPING: THROUGH THE ROOF 4. Slope horizontal runs toward the boiler. All horizontal 2. Install at least one support on every horizontal run. runs of vent pipe must slope continuously at least 1/4" For horizontal runs longer than 5 feet (1.5 m), install a per foot (21 mm per meter) to ensure condensate support every 3 feet (0.9 m). -
Page 23: Air Pipe Connection
VENT & AIR PIPING: THROUGH THE ROOF 4. If the installation is required to meet direct vent (sealed combustion) requirements, seal all joints withe silicone RTV. The air pipe installation must be air-tight and water-tight. 5. Maximum air piping length: See the table in Figure 3B.1, for the maximum allowable length. - Page 24 VENT & AIR PIPING: THROUGH THE ROOF c. Gear Clamp: Use a hose clamp or a gear clamp manufactured by the vent manufacturer (see Table 3B.2). Slide the clamp over the male end of the pipe after the pipe has been inserted from outside. From the inside, pull the pipe so it is firmly against the outside plate.
-
Page 25: Multiple Boiler Installations
VENT & AIR PIPING: THROUGH THE ROOF J. MULTIPLE BOILER INSTALLATIONS 1. Venting Multiple Boilers: a. Each boiler must be individually vented. DO NOT use combined venting. b. Install multiple vents through the roof following all guidelines for single-vent installations. c. -
Page 26: Vent Piping: Through The Roof
VENT & AIR PIPING: THROUGH THE ROOF 3C. VENT PIPING: THROUGH THE ROOF (SEPARATE TERMINATIONS) 2. EZ-Seal Connection: Insert EZ-Seal pipe male end WARNING into the boiler connection. Make sure the locking tabs slide under the EZ-Seal locking ring. Bend back The vent piping operates with positive pressure. -
Page 27: Vent Piping Components
VENT & AIR PIPING: THROUGH THE ROOF 4. Slope horizontal runs toward the boiler. All horizontal 8. If the pipe passes through an occupied space, install a runs of vent pipe must slope continuously at least 1/4" chase around the pipe, following the vent pipe per foot (21 mm per meter) to ensure condensate instructions and applicable codes. -
Page 28: Air Pipe Connection
VENT & AIR PIPING: THROUGH THE ROOF 3. See Figure 3C.2 for additional minimum clearances. 2. Attach the air piping to the boiler air connection, The vent must always terminate at least 4 feet (1.2 m) preferably using silicone RTV to seal the connection. If above the air intake termination. -
Page 29: Multiple Boiler Installations
VENT & AIR PIPING: THROUGH THE ROOF 2. Air Piping for Multiple Boilers: J. MULTIPLE BOILER INSTALLATIONS a. Air for each boiler must be individually piped. DO 1. Venting Multiple Boilers: NOT use combined air piping. a. Each boiler must be individually vented. DO NOT b. -
Page 30: Vent & Air Piping: Through A Side Wall
VENT & AIR PIPING: THROUGH A SIDE WALL 3D. VENT & AIR PIPING: THROUGH A SIDE WALL (COMBUSTION AIR FROM THE BOILER ROOM) 2. EZ-Seal Connection: Insert EZ-Seal pipe male end WARNING into the boiler connection. Make sure the locking tabs slide under the EZ-Seal locking ring. -
Page 31: Vent Piping Components
VENT & AIR PIPING: THROUGH A SIDE WALL 4. Slope horizontal runs toward the boiler. All horizontal 9. Clearance from Combustible Materials: Provide runs of vent pipe must slope continuously at least 1/4" minimum clearance to all combustible materials of at per foot (21 mm per meter) to ensure condensate least 2 inches (51 mm). - Page 32 VENT & AIR PIPING: THROUGH A SIDE WALL Exiting below grade or snow line: See Figure 3D.4. When the vent pipe must exit the building grade or below the minimum height for the termination elbow, install vertical piping as necessary for the termination elbow to be high enough to meet the minimum clearances of Figure 3D.3.
-
Page 33: Combustion Air Openings
VENT & AIR PIPING: THROUGH A SIDE WALL E. COMBUSTION AIR OPENINGS Combustion air must be supplied from the boiler room as shown in Figure 1.1. Make sure the installation provides air openings as required by applicable codes and the Boiler manual. -
Page 34: Vent & Air Piping: Through A Side Wall
VENT & AIR PIPING: THROUGH A SIDE WALL 3E. VENT & AIR PIPING: THROUGH A SIDE WALL (SEPARATE TERMINATIONS) 2. EZ-Seal Connection: Insert EZ-Seal pipe male end WARNING into the boiler connection. Make sure the locking tabs slide under the EZ-Seal locking ring. Bend back The vent piping operates with positive pressure. -
Page 35: Vent Piping Components
VENT & AIR PIPING: THROUGH A SIDE WALL 4. Slope horizontal runs toward the boiler. All horizontal 8. Insulate the vent piping where it passes through runs of vent pipe must slope continuously at least 1/4" unheated areas to prevent condensate freeze-up. If the per foot (21 mm per meter) to ensure condensate vent terminates through a combustible wall, leave the drains completely back to the boiler. -
Page 36: Supporting Air Piping
VENT & AIR PIPING: THROUGH A SIDE WALL 4. If the installation is required to meet direct vent b. Length of Vent Pipe: Use a 1-foot length of vent (sealed combustion) requirements, seal all joints withe pipe as listed in Table 3E.1 unless the wall silicone RTV. - Page 37 VENT & AIR PIPING: THROUGH A SIDE WALL Insert the termination elbow and secure using the Exiting Below Grade or Snow Line: See Figure vent pipe manufacturer’s joint assembly procedure. 3E.4. When the vent pipe must exit the building below grade or below the minimum height for the Termination Location: Install the vent pipe termination elbow, install vertical piping as termination where it meets the minimum...
-
Page 38: Multiple Boiler Installations
VENT & AIR PIPING: THROUGH A SIDE WALL If the vent pipe extends more than 3 feet (0.9 m), G. MULTIPLE BOILER INSTALLATIONS insulate the external portion of the pipe and fittings with at least 1/2" closed-cell foam 1. Each boiler must be individually vented and air pipes polyolefin pipe insulation. -
Page 39: Wall (Concentric Termination)
VENT & AIR PIPING: THROUGH A SIDE WALL 3F. VENT & AIR PIPING: THROUGH A SIDE WALL (CONCENTRIC TERMINATION) 2. Insert EZ-Seal pipe male end into the boiler WARNING connection. Make sure the locking tabs slide under the EZ-Seal locking ring. Bend back locking tabs to The vent piping operates with positive pressure. -
Page 40: Vent Piping Components
VENT & AIR PIPING: THROUGH A SIDE WALL 4. Slope horizontal runs toward the boiler. All horizontal C. SUPPORT THE VENT PIPING runs of vent pipe must slope continuously at least 1/4" COMPLETELY per foot (21 mm per meter) to ensure condensate drains completely back to the boiler. -
Page 41: Supporting Air Piping
VENT & AIR PIPING: THROUGH A SIDE WALL 2. Termination Locations: Place all terminations so they E. SUPPORTING AIR PIPING meet the clearances shown in Figure 3F.3. 1. DO NOT use the boiler air connection to support the air piping. Provide support straps from the ceiling or install wall brackets. - Page 42 VENT & AIR PIPING: THROUGH A SIDE WALL Figure 3F.4: Minimum Spacing Between Terminations (Terminations must also be Placed to Meet the Minimum Spacings Shown in Figure 3F.3) Figure 3F.3: Termination Minimum Clearances (See Figure 3F.4 for Required Spacing Between Terminations) To convert to metric dimensions: meters=feet x 0.3 millimeters=inches x 25.4...
-
Page 43: Water Piping & Controls
The postpurge circulator is only used by the 92-2 for 1. Design Options: postpurge flow to remove residual heat in the The Cast 92 boiler works well in a single or multiple- combustion zone. The postpurge circulator includes boiler application for any type of system. The... -
Page 44: Additional Controls
The Cast 92 Control provides an isolated contact to operate the boiler circulator (or boiler/system Make sure the limit control is set at least 20 °F above the highest operating temperature of the Cast 92 circulator). - Page 45 WATER PIPING AND CONTROLS Figure 4.2: Diaphragm or Bladder-yype Expansion Figure 4.3: Closed-type Expansion Tank Suggested Tank Suggested Piping Piping 2. Closed-type Expansion Tank: 3. Cold Water Fill: Closed-type tanks are those that have air above the Follow all applicable codes when connecting the cold water, in direct contact with the water.
-
Page 46: Zoning With Zone Valves
Make sure to incorporate flow/check valves as shown. These prevent forced flow in idle zones. Some systems may require balancing valves to control flow in the loops. Cast 92 Boiler Boiler Circulator System Circulator Boiler/System Circulator Indirect-fired DHW Tank (when used) -
Page 47: Zoning With Circulators
Make sure to incorporate flow/check valves as shown. Provide flow/check valves where shown to prevent These prevent forced flow in idle zones. gravity circulation or forced flow in idle zones. Cast 92 boiler Boiler circulator Boiler/system circulator Indirect-fired DHW tank (when used) -
Page 48: Multiple Boilers, Primary/Secondary
Make sure to incorporate flow/check valves as shown. These prevent forced flow in idle zones. Provide flow/check valves where shown to prevent gravity circulation or forced flow in idle zones. Cast 92 boiler Boiler circulator System circulator Indirect-fired DHW tank (when used) -
Page 49: Multiple Boilers, Parallel Flow
Do not exceed the maximum flow of 50 GPM through any boiler. Cast 92 boiler Boiler/system circulator Indirect-fired DHW tank (when used) DHW circulator... -
Page 50: Chilled Water Systems
WATER PIPING AND CONTROLS 3. Expansion Tank/Air Control: J. CHILLED WATER SYSTEMS Chilled water systems generally use closed-type expansion tanks. DO NOT use automatic air vents in 1. General: these systems. All air must be return to the expansion Provide the piping components shown in Figure 4.8 tank for the system to operate reliably. -
Page 51: Fuel Piping
Support the gas line with hangers. DO NOT allow gas train weight to rest on or cause The Cast 92 comes from the factory ready to be piped to bending of the boiler gas connection fitting. the gas supply. If for any reason the boiler is not for the type of gas available at the installation site, call your PB 3. -
Page 52: Gas Piping Joints
Undersized gas supply piping can cause the gas line pressure to become negative during operation of the Cast 92 boiler. This can cause pilot outages and operation failures of other appliances connected to the line, including gas ranges, water heaters, etc. -
Page 53: Condensate Drain Piping
CONDENSATE DRAIN PIPING 6. CONDENSATE DRAIN PIPING 6. Neutralization: A. FILL THE CONDENSATE TRAP When required by codes or preference, install an appropriate condensate neutralization system. Before installing the condensate line, you must fill the condensate trap with water. This will prevent flue products from escaping into the room. -
Page 54: Electrical Connections
2. Boiler Circulator: See Section 4 of this manual for circulator piping. Figure 7.5 shows wiring of the Boiler circulator (or boiler/system circulator) to the terminal strip of the Cast 92 electrical connection board. Figure 7.1: Electrical Connection Board... -
Page 55: Sensor Wiring
ELECTRICAL CONNECTIONS DO NOT directly connect a circulator with a motor 3. Return Water Temperature Sensor: The return water larger than 1/4 hp. For larger motors, install a temperature sensor is optional, only needed if you circulator relay or motor contactor . Figures 7.3 and want to automatically control the boiler postpurge 7.4 show the correct ways to install the boiler pump cycle time. -
Page 56: Iar (Indoor Air Reset) Wiring, When Used
ELECTRICAL CONNECTIONS E. IAR (INDOOR AIR RESET) WIRING, WHEN USED 1. Heat Demand Terminal Connections: The end switch leads from the zone valves must connect to the Heat Demand terminals on the electrical connection board as shown in Figure 7.6 and Figure 7.7a. 2. - Page 57 ELECTRICAL CONNECTIONS Figure 7.7A: Cast 92 Wiring Summary...
- Page 58 ELECTRICAL CONNECTIONS (KN-2 only) (92-2 only) Figure 7.7B: Cast 92 Wiring Summary...
-
Page 59: Boiler Control: Operation
With a few key strokes on the key pad, the Cast 92 control can Among the advanced design features of the Cast 92 operate as a sophisticated multiple-boiler controller, control is the MOD-MAX setting. -
Page 60: Before Control Setup
BOILER CONTROL: OPERATION B. BEFORE CONTROL SETUP CAUTION Before beginning the control setup, remove the wires connected to the HEAT DEMAND and DHW DEMAND terminals on the electrical connection board (see Figure 7.7A). These must be removed to prevent a call for heat during the setup process. -
Page 61: Recommended Settings
BOILER CONTROL: OPERATION f. The cursor moves to the second line, indicating c. Press the SELECT button to change the local this option could now be selected with the setpoint value. SELECT key. d. The cursor will move to the temperature number. g. -
Page 62: Indoor Air
BOILER CONTROL: OPERATION 5. The LIMIT BAND: G. OUTDOOR AIR Do not change the LIMIT BAND setting unless specific 1. General: application demands require a change or when directed by the factory. NOTICE 6. Return to Main Menus: Skip this procedure if there is no outdoor sensor NOTICE present. -
Page 63: Set The System Clock
BOILER CONTROL: OPERATION d. Press SELECT, then BACK. 8. LO OA: This is the ODT, or design outdoor temperature for maximum heating e. If outdoor reset is enabled, set the reset requirements from the system. temperatures as follows: 9. Use the arrow keys to navigate to each of the 1. - Page 64 BOILER CONTROL: OPERATION Table 8.1: Setup Menus To Enter Setup: From STANDBY, hold BACK for 5 seconds. Then press SELECT with cursor on SETUP . Make sure there is no call for heat at the boiler before attempting to perform setup adjustments. To return to STANDBY, press/release BACK until the display returns to standby, or turn boiler ON/OFF switch off, then on.
- Page 65 BOILER CONTROL: OPERATION Table 8.1 (cont’d): Setup Menus Total time gas valve has been RUN HRS RUN HRS 1240 open LOG ENTRY Current entry in the log LOG ENTRY LOG/RUNTIME SIZE The size of the data log SIZE 1000 Number of times gas valve has BOILER CYC BOILER CYC 5021...
- Page 66 SOURCE SETPOINTS The option is “4-20ma.” If 4-20 ma is selected, the Cast 92 control determines setpoint based on the signal it receives at the 4-20ma terminals on the connection board. The setpoint temperature (°F) equals the signal current (ma) divided by 0.09; example, a signal of 10ma will cause a setpoint of 10/0.09 = 110°F .
- Page 67 BOILER CONTROL: OPERATION Table 8.2 (cont’d): Setup Menus – Parameter Explanations Menu Item Under... Explanation These temperatures determine the reset curve for supply water temperature. High water at low outside air means LOW WATER@ HI OA the design water temperature for maximum load (at ODT, or outside design temperature for the installation).
- Page 68 BOILER CONTROL: OPERATION Table 8.2 (cont’d): Setup Menus – Parameter Explanations Menu Item Under... Explanation This is used only when the boilers are regulated by a building management system, using MODBUS, ADVANCED CONSOLE ADD BACNET or LONWORKS. Assign each member boiler AND the master boiler a unique address, an value SETUPDISTRIB CTRL from 1 to 247.
- Page 69 BOILER CONTROL: OPERATION Table 8.2 (cont’d): Setup Menus – Parameter Explanations Menu Item Under... Explanation ADVANCED SETUP PARITY Select even or odd as required by communications port used. COMMUNICATIONS ADVANCED SETUP MODEM Select “YES” only if a modem is installed. COMMUNICATIONS Load the factory defaults when you want to be sure nothing has been changed or after you have loaded new firmware.
-
Page 70: Boiler Control: Multiple Boilers Overview
9A: MULTIPLE BOILERS – CAST 92 CONTROL 9C: MULTIPLE BOILERS – EXTERNAL 4-20MA CONTROL • The Cast 92 control can control up to (16) Cast 92 boilers using built-in software and hardware. • Up to 5 boilers can be controlled by an external control that provides a 4-20ma input signal. -
Page 71: Boiler Control: Multiple Boilers (Cast 92 Control)
BOILER CONTROL: MULTIPLE BOILERS 9A. BOILER CONTROL: MULTIPLE BOILERS (CAST 92 CONTROL) 9. Follow the instructions in this manual to start-up each WARNING boiler before proceeding further. Electrical shock hazard – Disconnect all electrical 10. Finish by connecting cables between the... -
Page 72: Iar (Indoor Air Reset) Wiring, When Used
BOILER CONTROL: MULTIPLE BOILERS Figure 9A.4: Wiring the Boiler Circulator Using a Relay or Starter (Required for Motors over 1/4 hp) Figure 9A.2: 120VAC Power Service Terminals on Electrical Connection Board Figure 9A.3: Wiring the Boiler Circulator Using a Circulator Relay (Required for Motors over 1/4 hp) D. -
Page 73: Sensor Wiring
BOILER CONTROL: MULTIPLE BOILERS DHW WIRING CAUTION 1. To operate the boiler for domestic water heating with Polarity – The connections to the IAR positive a storage tank, install and pipe the tank according to terminals (IAR +) must be to the same location on the the tank manufacturer’s instructions and the zone valve as the thermostat wire, as shown in recommended piping diagrams in this manual. - Page 74 BOILER CONTROL: MULTIPLE BOILERS Figure 9A.7: Cast 92 Wiring Summary — Wiring to Electrical Connection Board...
- Page 75 BOILER CONTROL: MULTIPLE BOILERS (KN-2 only) (92-2 only) Figure 9A.8: Cast 92 Wiring Summary — Wiring to Electrical Connection Board (Continued)
-
Page 76: External Interlocks
H. OVERRIDES — CONTROL PRIORITIES 1. The Cast 92 control can provide override operation for any or all member boilers in a network. This requires the boilers be piped with appropriate isolation piping and controls. -
Page 77: Set Control Parameters On Keypads
BOILER CONTROL: MULTIPLE BOILERS Table 9A.2: Control Parameters J. SET CONTROL PARAMETERS ON KEYPADS Member Boiler Parameter Master Boiler (see notes) NOTICE HEAT BAND Set on master boiler only LOC SETPOI NT HD only1 Before turning boilers on to set parameters, SOURCE HD or DHW only1,2 disconnect all call for heat wiring at the electrical... -
Page 78: Member Boiler Cables
9. If a FAULT message is displayed, clear the faults until RJ45 cable from building management system, when used the STANDBY message is displayed. Refer to Plug for insertion into Cast 92 control electrical connection panel troubleshooting suggestions at the end of this manual if you cannot resolve the issue. -
Page 79: Boiler Control: Multiple
Unsigned 60°F -150 °F periodically to allow the boiler system to revert to the High Outside Air Cast 92 local control from the master boiler in the 40007 Unsigned High Outside Air Temperature 50°F -90 °F event communications is lost. -
Page 80: Bacnet Or Lonworks Protocols
BOILER CONTROL: MULTIPLE BOILERS Table 9B.3: Modbus Input (Read-only) Registers C. BACNET OR LONWORKS PROTOCOLS Data 1. Install the correct bridge to adapt to building Address Description Valid Values/Range Type management systems using BACnet or LonWorks 30001 Unsigned Boilers Running 0 –... -
Page 81: Boiler Control: Multiple Boilers External 4-20Ma Control
BOILER CONTROL: MULTIPLE BOILERS 9C. BOILER CONTROL: MULTIPLE BOILERS EXTERNAL 4–20MA CONTROL 8. Follow the instructions in this manual to start-up each WARNING boiler before proceeding further. Electrical shock hazard – Disconnect all electrical 9. Finish by reconnecting call for heat wiring, then power sources to the boiler before making any operating the complete system to verify operation in electrical connections. - Page 82 BOILER CONTROL: MULTIPLE BOILERS DO NOT directly connect a circulator with a motor larger than 1/4 hp. For larger motors, install a circulator relay or motor contactor . Figure 9C.3 and Figure 9C.4 show the correct ways to install the boiler circulator using a relay or motor starter.
-
Page 83: 4-20Ma Operation
Override would occur when a contact closed across the Heat 1. The Cast 92 control can provide override operation Demand terminals. While this contact is closed, the for any or all member boilers. This requires the boilers... - Page 84 BOILER CONTROL: MULTIPLE BOILERS Figure 9C.6: Cast 92 Wiring Summary — Wiring to Electrical Connection Board...
- Page 85 BOILER CONTROL: MULTIPLE BOILERS (KN-2 only) Figure 9C.7: Cast 92 Wiring Summary — Wiring to Electrical Connection Board (Continued)
-
Page 86: Set Control Parameters On Keypads
BOILER CONTROL: MULTIPLE BOILERS 3. Turn on power to all boilers and turn the on/off WARNING switches to ON. Close the external manual gas valve on every boiler 4. The boilers should now operate normally. before proceeding. DO NOT open any gas valve, or attempt to fire any boiler, until the boilers have been 5. -
Page 87: Fill And Test The System
A. CLOSED SYSTEMS ONLY E. PURGE AIR FROM THE SYSTEM Do not apply the Cast 92 boiler on open systems, such as direct heating of domestic water, swimming pool heating 1. The system should be installed with purge valves such or process applications that use system water. -
Page 88: Water Ph
FILL AND TEST THE SYSTEM G. WATER PH WARNING 1. The boiler water must be slightly basic, never acidic. Use only antifreeze sold for use in hydronic systems Use litmus paper to check pH, which should range — Never use automotive antifreeze. Automotive from 6.5 minimum to 11 maximum. -
Page 89: Final Checks
FILL AND TEST THE SYSTEM J. FINAL CHECKS WARNING 1. After the system is cleaned, filled and purged, and the Eliminate all system leaks to prevent excessive system pressure is correctly set, make sure the water make-up water, which introduces oxygen as well as chemistry is correct. -
Page 90: Start-Up Procedure
START-UP PROCEDURE 11. START-UP PROCEDURE WARNING WARNING Failure to adhere to the following could result in Should overheating occur or gas supply fail to severe personal injury, death or substantial property shut off: damage. Do not interrupt water flow to the boiler. Instead, shut off gas supply to the boiler with the manual valve in 1. - Page 91 Connect a manometer to the manual gas valve outlet test port. Open the valve and measure the gas Read about the Cast 92 control display on page 88. pressure. It must not be above 1/2 psig (3.5 kPa). Then start the boiler following the Operating instructions on page 89.
- Page 92 START-UP PROCEDURE NOTICE NOTICE To reset the Cast 92 control from lockout: Turn the For more information: See Sections 8, 9A, 9B, 9C and boiler on/off switch OFF, then back ON. 12 for additional information and troubleshooting. Figure 11.1: HeatNet Control Display During Operation Table 11.1: Boiler Sequence of Operation, Fault States and HeatNet Control Display Information...
-
Page 93: Lighting & Operating Procedures
START-UP PROCEDURE B. LIGHTING & OPERATING PROCEDURES FOR YOUR SAFETY READ BEFORE OPERATING If you do not follow these instructions exactly, a fire or explosion may result, causing WARNING WARNING property damage, personal injury or loss of life. A. This boiler does not have a pilot. It is equipped C. -
Page 94: Turn The Boiler Off
START-UP PROCEDURE C. TURN THE BOILER OFF WARNING 1. Turn OFF the boiler on/off switch and allow the boiler Electrical shock hazard — The electrical box contains to cycle off. line-voltage wiring and contacts. Use caution when working in the electrical box to avoid contact with 2. -
Page 95: Adjust Gas Valve Throttle Setting
START-UP PROCEDURE 3. Adjusting Gas Input with Throttle Screw – Max Input: a. Adjust gas input with the throttle screw adjustment using a long-shank common bit screwdriver inserted through the hole in the jacket top, Figure 11.5. Figure 11.4: Electrical Panel G. -
Page 96: To Meter Gas Input (Natural Gas Only)
START-UP PROCEDURE TO METER GAS INPUT (NATURAL K. WHEN IS LOW FIRE ADJUSTMENT GAS ONLY) REQUIRED? 1. Meter gas input with the high-fire jumper in place. NOTICE 2. Turn off all other gas appliances that use the same gas Adjust the gas valve low-fire setting ONLY if the meter as the boiler. -
Page 97: Adjusting The Low-Fire Setting
Figure 11.7: Gas Valve Adjustments 2. The boiler firing rate should change to meet demand. The Cast 92 control display will show the percentage 2. When adjusting the low-fire setting, make changes in of maximum firing rate (between 20% and 100%). -
Page 98: Test Flame Failure Modes
After three failed ignition attempts, the Fenwal control will lockout. h. The boiler will shut off and the Cast 92 control display will show “LOCKOUT.” i. Open the manual gas valve. j. Reset the controls by turning the boiler on/off switch off, then on again. -
Page 99: Troubleshooting
TROUBLESHOOTING 12. TROUBLESHOOTING Table 12.1 Accessing and using the LogEnter Setup: From STANDBY, hold BACK for 5 seconds. Then press DOWN until the cursor points to VIEW LOG. Press SELECT with the cursor on VIEW LOG. The screen will now show the most recent entry in the log. Use the arrow keys to scroll through the log entries (entry number and date are on the first line of the log screen). - Page 100 24vac output is low, the transformer may be damaged or a 24vac circuit may be miswired. 4. The Cast 92 control is equipped with resettable fuses on the power input circuit. Wiring power incorrectly to the unit will cause these fuses to open.
-
Page 101: Maintenance
Failure to adhere to the following could result in severe personal injury, death or substantial property damage. The Cast 92 boiler contains some ceramic fiber and fiberglass materials. Ceramic fiber materials, such as the burner gasket, may contain carcinogenic particles 1. -
Page 102: Accessing The Electrode Assembly
MAINTENANCE WARNING If the filter enclosure and blower inlet show signs of drywall dust, construction debris or other deposits, you may need to inspect the burner. Follow the procedure in this section. Accumulation of debris in the burner can result in burner damage and potential for severe personal injury, death or substantial property damage. -
Page 103: Accessing The Burner
MAINTENANCE 11. Lift the burner up as in Figure 13.5 and inspect both E. ACCESSING THE BURNER sides. (The burner gasket is adhered to the bottom the cover with silicone RTV.) WARNING 12. Look down into the section assembly to verify it is If the filter enclosure and blower inlet show signs of clean. -
Page 104: Annual Start-Up Overview
MAINTENANCE ANNUAL START-UP OVERVIEW 1. Perform Start-up, Section 11: Perform the complete start-up, testing and inspection procedures given on pages 86 through 94 to ensure the boiler and system comply with the requirements in this manual. In addition, perform the additional follow-up procedures given below. - Page 105 MAINTENANCE 4. Check Expansion Tank & Air Vents: b. Remove the condensate line at the boiler hose barb connection. a. Inspect the relief valve and piping to be sure there are no signs of relief valve leakage. c. Pour water into the line and make sure the water drains freely.
-
Page 106: Repair Parts
Repair parts are available from your local PB Heat, LLC distributor or from Parts To Your Door (www.partstoyourdoor.com). Note: Remember to include the boiler model number and serial number when ordering parts. Figure 14.1: General Repair Parts – Cast 92-2... - Page 107 REPAIR PARTS Table 14.1: General Repair Parts – Cast 92-2 Quantity Description Stock Code Required TRIDICATOR 20-1022 54353 RIGHT JACKET PANEL 03-1752 ABS SIDE MEDALLION 60-5625 OFF LABEL 42-5238 MAIN POWER SWITCH 58-1555 54354 ON LABEL 42-5237 BASE ASSEMBLY 70-1223...
- Page 108 REPAIR PARTS * Available as Complete Drain Assembly Figure 14.2: General Repair Parts – Cast 92-4...
- Page 109 REPAIR PARTS Figure 14.2 (cont’d): General Repair Parts – Cast 92-4...
- Page 110 REPAIR PARTS Table 14.2: General Repair Parts – Cast 92-4 Quantity Description Stock Code Required ABS UPPER COVER 60-5646 RIGHT SIDE JACKET PANEL 03-1806 FRONT JACKET WELDMENT 70-1672 DISPLAY MOUNT PLATE 03-1809 CONTROL OVERLAY 60-5645 ILLUMINATED ROCKER SWITCH 58-1536 54390...
- Page 111 REPAIR PARTS Table 14.2 (cont’d): General Repair Parts – Cast 92-4 Quantity Description Stock Code Required PIPE SEALING GROMMET 59-1115 54408 FILTER BOX COVER 03-1811 54409 FILTERBOX GASKET – CLOSED CELL NEOPRENE 59-1113 54410 COMBUSTION AIR FILTER 59-1109 54411 FILTER BOX 03-1810...
-
Page 112: Boiler Ratings & Specifications
BOILER RATINGS & SPECIFICATIONS 15. BOILER RATINGS & SPECIFICATIONS Table 15.1: Boiler Ratings & Specifications CAST 92 BOILER RATINGS AND SPECIFICATIONS Boiler Model Units 92-2 92-4 92.7 (Thermal) AFUE (Doe Seasonal Efficiency) 92.7 87.7 (Combustion) CSA Input (Max) Btuh 199,000... -
Page 113: Appendix A. Suggested Wiring
APPENDIX A. SUGGESTED WIRING APPENDIX A. SUGGESTED WIRING IAR (INDOOR AIR RESET) WIRING, WHEN USED WIRING FOR 3-WIRE ZONE VALVES WITHOUT A ZONE CONTROLLER 1. Heat Demand Terminal Connections Using 3-wire Zone Valves: The end switch leads from the zone valves must connect to the Heat Demand LEFT SIDE (+) terminal on the electrical connection board as shown in Figure A1. -
Page 114: Iar (Indoor Air Reset) Wiring, When Used Wiring For Circulator Relays (Relays Must Have 24Vac Common Terminals)
APPENDIX A. SUGGESTED WIRING IAR (INDOOR AIR RESET) WIRING, WHEN USED WIRING FOR CIRCULATOR RELAYS (RELAYS MUST HAVE 24VAC COMMON TERMINALS) NOTICE Relays must have a 24VAC common terminal: The IAR inputs require a connection to the 24VAC common of the circulator relay to operate. If the circulator relays do not have a 24VAC common terminal, you cannot connect to the IAR inputs. -
Page 115: Iar (Indoor Air Reset) Wiring, When Used Wiring For Typical Zone Controller
APPENDIX A. SUGGESTED WIRING IAR (INDOOR AIR RESET) WIRING, WHEN USED NOTICE WIRING FOR TYPICAL ZONE CONTROLLER Thermostat terminal connections: Use a voltmeter to 1. Heat Demand Terminal Connections: The end switch verify the wiring is correct. Measure the voltage on leads from the controller must connect to the Heat the thermostat terminals with the zone controller Demand terminals on the electrical connection board... - Page 116 APPENDIX A. SUGGESTED WIRING Figure A3: Indoor Air Reset Wiring to IAR Terminals, Heat Demand and DHW Demand Using Typical Zone Controller for Either Circulators or Zone Valves (See Figure 7.7A for terminal block 2 and 6 locations)
-
Page 117: Appendix B. Combustion Test Record
APPENDIX B. COMBUSTION TEST RECORD APPENDIX B. COMBUSTION TEST RECORD Peerless ® ® Combustion Test Record Contact: Company Name: Address: Phone Number: Fax Number: Email Address: Jobsite Data Job Name: Jobsite Address: Boiler Data Boiler Model: Boiler Serial No.: Manufacture Date:... - Page 118 NOTES...
- Page 119 NOTES...
- Page 120 Peerless CAST 92 Boilers I n s t a l l a t i o n , O p e r a t i o n & M a i n t e n a n c e M a n u a l...
Need help?
Do you have a question about the CAST 92 and is the answer not in the manual?
Questions and answers