
Related Manuals for PEERLESS PUREFIRE PFC-850


Summary of Contents for PEERLESS PUREFIRE PFC-850
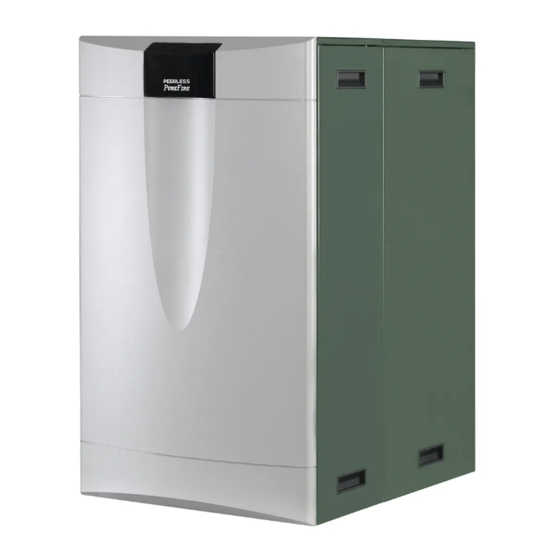
- Page 1 ® ® Boilers PFC-850 PFC-1000 PFC-1500 I n s t a l l a t i o n , O p e r a t i o n & M a i n t e n a n c e M a n u a l...
-
Page 2: Table Of Contents
TABLE OF CONTENTS TABLE OF CONTENTS USING THIS MANUAL 8. BOILER CONTROL: OPERATION A. IGNITION SEQUENCE ....34 A. INSTALLATION SEQUENCE ....1 B. -
Page 3: Using This Manual
USING THIS MANUAL USING THIS MANUAL A. INSTALLATION SEQUENCE DANGER Follow the installation instructions provided in this Indicates a condition or hazard which will cause manual in the order shown. The order of these severe personal injury, death or major property instructions has been set in order to provide the installer damage. -
Page 4: Preinstallation
PREINSTALLATION 1. PREINSTALLATION A. GENERAL **Please read if installing in Massachusetts** Massachusetts requires manufacturers of Side Wall 1. P boilers are supplied completely assembled Vented boilers to provide the following information ® as packaged boilers. The package should be inspected from the Massachusetts code: ·... -
Page 5: Accessibility Clearances
PREINSTALLATION C. ACCESSIBILITY CLEARANCES 3. Required Combustion Air Volume: The total required volume of indoor air is to be the sum of the 1. The P boiler is certified for closet installations required volumes for all appliances located within ® with zero clearance to combustible construction. - Page 6 PREINSTALLATION 4. Indoor Air Opening Size and Location: Openings 5. Outdoor Combustion Air: Outdoor combustion air connecting indoor spaces shall be sized and located as is to be provided through one or two permanent follows: openings. The minimum dimension of these air openings is 3 inches (76 mm).
- Page 7 PREINSTALLATION ii. Where communicating with the outdoors 6. Combination Indoor and Outdoor Combustion Air: through horizontal ducts, each opening shall If the required volume of indoor air exceeds the have a minimum free area of 1 in per 2000 available indoor air volume, outdoor air openings or Btu/hr (22 cm per 2000 W) of total rated ducts may be used to supplement the available indoor...
-
Page 8: Planning The Layout
PREINSTALLATION i. The interlock shall prevent the main burner E. PLANNING THE LAYOUT from igniting if the damper fails to open during burner startup. 1. Prepare sketches and notes showing the layout of the boiler installation to minimize the possibility of ii. -
Page 9: Boiler Set-Up
BOILER SET-UP 2. BOILER SET-UP A. GENERAL 1. P boilers are intended for installation in an ® area with a floor drain or in a suitable drain pan. Do not install any boiler where leaks or relief valve discharge will cause property damage. 2. -
Page 10: Venting & Air Inlet Piping
VENTING & AIR INLET PIPING 3. VENTING & AIR INLET PIPING A. GENERAL WARNING 1. Install the P boiler venting system in ® Only the materials listed below are approved for use accordance with these instructions and with the National with the P ®... - Page 11 VENTING & AIR INLET PIPING 4. The Peerless boiler, like all high efficiency, ® ® gas-fired appliances, is likely to produce a vapor plume due to condensation. Surfaces near the vent termination will likely become coated with condensation. WARNING Covering non-metallic exhaust venting material is prohibited and may result in severe personal injury, death, or major property damage.
- Page 12 VENTING & AIR INLET PIPING • Do not locate the exhaust exit terminal over ii. Locate the opening of the exhaust vent pipe a public walkways where condensate could drip minimum of 12” above the air inlet opening to prevent flue gas from recirculating to the air and create a hazard or nuisance.
- Page 13 VENTING & AIR INLET PIPING Figure 3.8: Vertical Exhaust Routed Through an Figure 3.6: Vertical Exhaust and Air Inlet Pipe Unused Chimney with Outdoor Air Figure 3.9: Drain Tee and Air Inlet Connections Figure 3.7: Vertical Exhaust Routed Through an Unused Chimney with Indoor Air...
-
Page 14: Exhaust Vent/Air Intake Pipe Sizing
VENTING & AIR INLET PIPING D. EXHAUST VENT/AIR INTAKE PIPE SIZING 5. Care should be taken to prevent dirt or debris from entering the air intake connection. A screen is 1. A list of approved venting materials for the exhaust is provided inside the Air Intake fitting to prevent large provided in Table 3.1 and a list of approved materials objects from entering the combustion system. -
Page 15: Test Port For Exhaust Sampling
VENTING & AIR INLET PIPING 7. All piping must be fully supported. Use pipe hangers 2. Figure 3.11 shows two P boilers connected ® at a minimum of 4 foot (1.22 meter) intervals to with a common vent system. prevent sagging of the pipe. a. -
Page 16: Boiler Removal From Common Venting System
VENTING & AIR INLET PIPING H. BOILER REMOVAL FROM COMMON 6. Place in operation the appliance being inspected. Follow the lighting instructions. Adjust thermostat so VENTING SYSTEM appliance will operate continuously. At the time of removal of an existing boiler, follow these Mettre en service l’appareil à... -
Page 17: Water Piping & Controls
WATER PIPING & CONTROLS 4. WATER PIPING & CONTROLS A. GENERAL 1. Water hardness must be between 3 Grains/Gal (gpg) and 9 Grains/Gal (gpg). Use of a water treatment 1. Size water supply and return piping in accordance with system may be required on make-up water in areas system requirements rather than the boiler connections. -
Page 18: Operating Parameters
WATER PIPING & CONTROLS b. It is recommended that a water meter be installed D. SYSTEM COMPONENTS on the system fresh water intake to monitor the Figure 4.1 shows the symbol key for piping diagrams in system for any leaks by monitoring make-up water this section. - Page 19 WATER PIPING & CONTROLS Figure 4.1: Piping Symbol Key 5. Flow Control Valve: Flow control valves such as the 8. Pressure Relief Valve: The boiler pressure relief valve TACO Flo-Chek or Bell & Gossett Flo-Control™ are is shipped in the miscellaneous parts box for field used to prevent gravity circulation by incorporating a installation.
- Page 20 WATER PIPING & CONTROLS 9. Circulator: The boiler circulator is to be sized to overcome the pressure drop of the system while providing the flow required by the boiler. a. If the boiler is piped in a secondary loop of a primary/secondary heating system, the circulator will need only to overcome the resistance of the boiler and any fittings in that loop.
- Page 21 WATER PIPING & CONTROLS e. Table 4.4 provides the flow rate and pressure drop NOTICE information that corresponds to various boiler temperature rise values (DT). The pressure drop The circulator sizing given is for primary/secondary shown is for the boiler only. If there is significant installations only.
-
Page 22: System Piping
WATER PIPING & CONTROLS E. SYSTEM PIPING 8. Glycol solution is expensive and leaks should be avoided. Weld or solder joints should be used where 1. Figure 4.4 shows a single boiler with multiple heating possible and threaded joints should be avoided. zones. - Page 23 WATER PIPING & CONTROLS...
- Page 24 WATER PIPING & CONTROLS...
- Page 25 WATER PIPING & CONTROLS...
-
Page 26: G Special Applications
WATER PIPING & CONTROLS G. SPECIAL APPLICATIONS c. See Figure 4.7 for recommended system piping for chiller operation. 1. If the P boiler is used in conjunction with a ® 2. For boilers connected to heating coils in a forced chilled medium system, pipe the chiller in a separate air system where they may be exposed to chilled secondary loop. -
Page 27: Fuel Piping
FUEL PIPING 5. FUEL PIPING Table 5.2: Pipe Capacity – Natural Gas A. GENERAL Maximum Capacity of pipe in cubic feet per hour (cubic meters 1. All fuel piping to the P boiler is to be in ® per hour) with a pressure drop of 0.3” of water (75 Pa). accordance with local codes. -
Page 28: Gas Supply Piping - Operation
FUEL PIPING 2. A sediment trap is included from the factory into D. GAS SUPPLY PIPING - OPERATION the supply piping at the boiler. Figure 5.1 shows the 1. The gas line must be properly purged of air to allow sediment trap at the rear of the boiler near the base. -
Page 29: Main Gas Valves - Operation
FUEL PIPING l. Turn on the gas shutoff valve and the boiler 5. Refer to Section 3, Venting and Air Inlet Piping for service switch. information on obtaining exhaust vent samples from this boiler. m. Start the boiler and check for fuel gas odor around the gas valve. -
Page 30: Condensate Trap & Drain System
CONDENSATE TRAP & DRAIN SYSTEM 6. CONDENSATE TRAP & DRAIN SYSTEM A. GENERAL 1. The disposal of all condensate into public sewage systems is to be in accordance with local codes and regulations. In the absence of such codes, follow these instructions. - Page 31 CONDENSATE TRAP & DRAIN SYSTEM 2. Tubing Size: The connection at the rear of the heat 5. Condensate Pumps: If the boiler drain is above the exchanger is designed for connection to 3/4” ID level of a gravity drain, a condensate pump should be PVC or similar tubing.
-
Page 32: Electrical Connections & Internal Wiring
ELECTRICAL CONNECTIONS & INTERNAL WIRING 7. ELECTRICAL CONNECTIONS & INTERNAL WIRING A. GENERAL b. The terminal strips can be removed by gently pulling them away from the wired blocks. This This appliance is to be wired in accordance with local allows the installer to attach wires to the connector codes and regulations as defined by the Authority having before plugging the terminal strip into the... -
Page 33: Zone Circulator Wiring
ELECTRICAL CONNECTIONS & INTERNAL WIRING Figure 7.2: Customer Connection – PFC-850, PFC-1000 & PFC-1500 C. ZONE CIRCULATOR WIRING D. INTERNAL WIRING Figure 7.4 shows the complete boiler wiring schematic for PFC-850, PFC-1000 and PFC-1500 boilers. The following is a list of internal wiring components and a short description of each: 1. - Page 34 ELECTRICAL CONNECTIONS & INTERNAL WIRING...
- Page 35 ELECTRICAL CONNECTIONS & INTERNAL WIRING 4. Relay Module: This fused module provides isolation 9. Flue Temperature Sensor: The 12kD flue temperature for the pump contacts on the main control board. sensor provides the exhaust vent temperature to the managing control to prevent unsafe operation of the The maximum rating for each pump attached is 10 amps.
-
Page 36: Boiler Control: Operation
BOILER CONTROL: OPERATION 8. BOILER CONTROL: OPERATION A. IGNITION SEQUENCE Figure 8.1 shows the ignition sequence for the P ® boiler control. Table 8.1 describes each step in the sequence in detail. The P boiler control provides ® dual sensing of the flame to maximize the reliability. The control senses the burner flame with both the flame sensor and the ignition electrode. - Page 37 BOILER CONTROL: OPERATION Table 8.1: Ignition Sequence (cont’d) Period Demand Status Burner LCD Display A heat demand has no influence in the Safety On/Off period. The Safety On/Off step will continue even if the demand Safety On/ has ended. This step very quickly opens and closes the gas valve relays and determines if the control is operating correctly. The CH pump is turned off during this test.
-
Page 38: Status Display
BOILER CONTROL: OPERATION B. STATUS DISPLAY 2. Managing Burner LCD Display: This display is located on the right side of the boiler behind the heat The P boiler display screens are designed to exchanger side panel. The managing burner display is ®... - Page 39 BOILER CONTROL: OPERATION Table 8.3: Display Screens Under Various Conditions Pixel Displays LCD Displays Managing (Boiler—Pressing the up or down key Standby displays the boiler system information) Dependent Managing (Boiler) Central Heating (CH) Demand Dependent Managing Domestic Hot Water (DHW) Demand Dependent Supply at...
- Page 40 BOILER CONTROL: OPERATION Table 8.3: Display Screens Under Various Conditions (cont’d) Pixel Displays LCD Displays Ignition Failure Error Handling Flame Failure Error Handling Ignition Retry Pixel Displays Dependent LCD Displays Error Handling Managing LCD Display Pixel Displays LCD Displays Service Notification...
-
Page 41: User Menu
BOILER CONTROL: OPERATION C. USER MENU A value of 50°F (-10°C) indicates an open sensor and a value of 244°F(118°C) indicates a short. Since To access the user menu for each burner, simply press boilers installed in low temperature environments such the “Menu”... - Page 42 BOILER CONTROL: OPERATION Table 8.4: CH Setpoint Range & Defaults Table 8.6: DHW Tank Setpoint Range & Default Minimum Maximum Default Minimum Maximum Default Central DHW Tank Heating 50°F 195°F 160°F 50°F 158°F 120°F Setpoint Setpoint 10°C 91°C 71°C 10°C 70°C 49°C NOTICE...
-
Page 43: Installer Menu
BOILER CONTROL: OPERATION a. Last Lockout Error: The last lock menu allows b. Dependent Burner (Burner D): The bottom burner the user to view the reason for the last lockout. on each boiler is designated as the “Burner D” or See Table 10.2 for a list of locking errors and “dependent”... - Page 44 If there reset the burner once the condition causing the are a large number of flame failures showing on error has been corrected. Ignition Failure, Flame this screen, contact your Peerless Representative. ® Failure and High Limit Temperature are examples On Screens #5 and #6, the Flame Measurement of this type of error.
- Page 45 BOILER CONTROL: OPERATION Table 8.7: Boiler Address e. Freeze Protection: Freeze protection is intended to prevent freezing the central heating system. Boiler Address Description Value Stand-Alone Boiler Master Boiler in a Cascade System 2-16 Dependent Boilers in a Cascade System Figure 8.23: Burner Settings –...
- Page 46 BOILER CONTROL: OPERATION Managing Burner Only Figure 8.25: Burner Settings – Additional Safety Functions • Low Water Cut Off: This is the default selection on the control. When installing a probe type low water cut off, locate the LWCO in the boiler supply above the top jacket panel.
- Page 47 If the boiler reaches a temperature of 9°F (5°C) If these conditions are not met, contact your above the setpoint before the heat demand ends, Peerless Representative for assistance. ® the burner will shut down. If the heat demand continues and the boiler temperature drops 9°F...
- Page 48 BOILER CONTROL: OPERATION c. CH Modes: The CH modes allow the operator • Mode 4, 0 -10V Input to Modulate Setpoint: to change the way the boiler operates to satisfy This allows the boiler supply target to be set central heating demands. by an external analog 0-10 volt signal.
- Page 49 BOILER CONTROL: OPERATION Table 8.17: System Type Presets If the installer prefers to use custom values for the outdoor reset parameters, the following provides Temperatures guidance. System Type Boiler Mild Weather h. Design Point: The design point is defined by the Design Boiler outdoor design temperature and the boiler...
- Page 50 BOILER CONTROL: OPERATION k. Mild Weather Point: The mild weather point is p. Boiler Max: The boiler will not target a defined by the mild weather outdoor temperature temperature higher than that chosen in this menu. and the mild weather boiler temperature. This can be useful to prevent damage due to high temperatures in temperature sensitive situations such as radiant floors.
- Page 51 BOILER CONTROL: OPERATION r. Anti-Cycling Time: This function allows the installer to set the minimum amount of time that the boiler can be off on setpoint before recycling. If the supply temperature drops by a value higher than Tdiff, the boiler will ignore the minimum off Figure 8.42: CH Settings –...
- Page 52 BOILER CONTROL: OPERATION When this mode is chosen, the DHW Boiler Temperature and the DHW Tank Temperature setpoint values are available on the User Menu. The control will modulate the burner input based on feedback from the boiler supply Figure 8.45: DHW Settings – Heat Dump temperature sensor.
- Page 53 BOILER CONTROL: OPERATION If desired, the installer can select a specific date for • Press select to activate System Test. The the Service Notification. Simply press the “Select” burner will ignite and then operate at the key when viewing the “Notification on:” date screen. selected input rate until “Off”...
- Page 54 BOILER CONTROL: OPERATION Table 8.30: Sequence Menu, Ranges & Defaults Ranges & Defaults Menu Screen Minimum Default Maximum 1 Minute 2 Minutes 15 Minutes 1 Minute 2 Minutes 15 Minutes 1°F 9°F 23°F (0.6°C) (5°C) (13°C) 1°F 18°F 45°F (0.6°C) (10°C) (25°C) 0°F...
-
Page 55: Defaults
BOILER CONTROL: OPERATION 8. Sequence (Managing Burner Display Only) 3. Site Defaults – Reset: To restore the “Site Adjustments in the sequence menu affect the Defaults,” press the “Select” key while in the following sequence of burner operation. The first six parameters menu.F: MULTIPLE BOILERS will stop and start burners as follows: a. - Page 56 BOILER CONTROL: OPERATION Figure 8.53: Mutiple Boiler Wiring – Daisy Chain Configuration Figure 8.54: Multiple Boiler Wiring – Independent Connection to each Dependent Boiler...
- Page 57 BOILER CONTROL: OPERATION Table 8.31: Multiple Boiler Menu Options (Pixel Display on the front of the boiler) This value determines the status of the boiler in a cascade system. The default, “0”, indicates it is a Boiler stand-alone boiler. “1” is to be assigned to the master boiler in the system and “2” up to “16” are Address assigned to dependent boilers.
- Page 58 BOILER CONTROL: OPERATION b. The default address for each boiler is “0” i) If the output from the P-Value is 1, the dependent setpoint will be set to the minimum c. Selecting a boiler address of “1” assigns the boiler value (104°F in this case).
-
Page 59: Start-Up Procedure
START-UP PROCEDURE 9. START-UP PROCEDURE A. GENERAL D. CHECK GAS PIPING 1. Confirm all water, gas and electricity supplies to the 1. Turn off the gas shut-off valve to each burner. These boiler are off. valves are located in the vestibule area at the front of the boiler. -
Page 60: Test Operating Limit
START-UP PROCEDURE a. ON THE DEPENDENT BURNER enter the 3. Managing burner combustion test at high fire (100% Modulation): “Installer Menu” and choose “System Test”. b. Press select and use the “ò” key to scroll down to NOTICE “High Power”. c. -
Page 61: Test High Limit
START-UP PROCEDURE H. TEST HIGH LIMIT MULTIPLE BOILER SYSTEMS Check that each burner will shut down when the high 1. Since all heat distribution circulating pumps (CH/ limit circuit is open. DHW) are connected to the master boiler, it may be necessary to run one of these pumps to get sufficient 1. -
Page 62: Lighting & Operating Instructions
START-UP PROCEDURE J. LIGHTING & OPERATING INSTRUCTIONS Figure 9.1: Lighting & Operating Instructions... -
Page 63: Troubleshooting
TROUBLESHOOTING 10. TROUBLESHOOTING A. ERRORS 1. When an error occurs, the pixel display on the front of the boiler will display a wrench instead of one of the blowers and a message will appear indicating what Figure 10.2: Locking Error Display the error is. -
Page 64: Special Ignition/Flame Failure
TROUBLESHOOTING 5. No Comm. Error: a. If the dependent burner is not communicating with the managing burner and it is set as “dependent burner” in the Installer Menu, the screen will blink and the following message will be displayed on the dependent burner LCD screen. - Page 65 TROUBLESHOOTING 2. If a temporary jumper between terminals #11 & #12 allows the boiler to proceed to “Trial for Ignition” then one of the external interlocks (LWCO, etc.) may be open. Do not leave a jumper installed if there are interlocks attached to these terminals.
- Page 66 TROUBLESHOOTING Table 10.1: Blocking Error Codes (automatic reset): “E” Error Display Error Description Corrective Actions CODE SUPPLY SENSOR Supply sensor circuit is open. NOT CONNECTED 1. Check sensor connection to be sure it is fully engaged. 2. Check continuity of both harness leads. RETURN SENSOR 3.
- Page 67 TROUBLESHOOTING Table 10.1 (cont’d): Blocking Error Codes (automatic reset): “E” Error Display Error Description Corrective Actions CODE 1. Check for blockage in condensate system. BLOCKED CONDENSATE Open Float switch circuit in 2. Clean condensate system. DRAIN condensate collector cap. 3. Check for broken wires or bad connections. 1.
- Page 68 TROUBLESHOOTING Table 10.2: Locking Error Codes (manual reset): “A” Error Display Error Description Corrective Actions CODE 1. Watch igniter through the observation window. 2. If a flame is present but the burner shuts down: – Check the flame signal ignition log in the “Installer Menu” under “Status”.
- Page 69 TROUBLESHOOTING Table 10.2 (cont’d): Locking Error Codes (manual reset): “A” Error Display Error Description Corrective Actions CODE Unexpected flame signal 1. Check for presence of flame in the combustion chamber. FALSE FLAME DETECTED detected more than 10 seconds 2. Check igniter for a short to ground AFTER SHUTDOWN after closing the gas valve.
- Page 70 TROUBLESHOOTING Table 10.3: Control Board Warning Error Codes “W” Error Error Display Corrective Action CODE Description 1) Check wiring connection to Outdoor Sensor. 2) Remove the wires from terminals #3 and #4 on the boiler and check the resistance between them. Outdoor Sensor •...
-
Page 71: Maintenance
MAINTENANCE 11. MAINTENANCE WARNING Product Safety Information Refractory Ceramic Fiber Product This appliance contains materials made from refractory ceramic fibers (RCF). Airborne RCF fibers, when inhaled, have been classified by the International Agency for Research on Cancer (IARC), as a possible carcinogen to humans. After the RCF materials have been exposed to temperatures above 1800°F, they can change into crystalline silica, which has been classified by the IARC as carcinogenic to humans. -
Page 72: Annually (Before The Start Of Heating Season)
MAINTENANCE DANGER C. ANNUALLY (BEFORE THE START OF HEATING SEASON) When servicing or replacing components, be absolutely sure that the following conditions are met: CAUTION • Water, gas and electricity are off. The following annual inspection must be performed • The boiler is at room temperature. by a qualified service technician. -
Page 73: Combusion Chamber Coil Cleaning Instructions
MAINTENANCE d. Connect the wires to the blocked condensate 4. Spray coils with clear water, making sure to confine float switch in the lid of the condensate collector. the spray to the area being cleaned (try to avoid wetting the back ceramic wall of the unit). Flush the e. -
Page 74: Boiler Dimensions & Ratings
"H" FRONT VIEW (PFC-850/1000 ONLY) 14 1/2" 3/4" CONDENSATE DRAIN LEFT SIDE VIEW REAR VIEW Figure 12.1: Dimensional Drawing – PFC-850, PFC-1000 & PFC-1500 Table 12.1: Boiler Dimensions SERIES PEERLESS PUREFIRE DIMENSIONS ® ® Boiler “A” “B” “C” “D” “E”... - Page 75 BOILER DIMENSIONS & RATINGS Table 12.4: P Main Control Specifications ® SERIES PEERLESS PUREFIRE MAIN CONTROL SPECIFICATIONS ® ® Voltage 120 VAC Nominal (102-132 VAC) Power Supply Frequency 60 Hz Nominal (40 Hz to 70 Hz) Primary Control 3.15 Amp, 250 VAC...
-
Page 76: Repair Parts
REPAIR PARTS 13. REPAIR PARTS Repair parts are available from your local PB Heat, LLC distributor or from Parts To Your Door at 1 (610) 916-5380 (www.partstoyourdoor.com). Note: Remember to include the boiler model number and serial number when ordering parts. Figure 13.1: Heat Exchanger Repair Parts... - Page 77 REPAIR PARTS Table 13.1: Heat Exchanger Quantity Required Stock Description Code PFC-850 PFC-1000 PFC-1500 Heat Exchanger - PFC-850 – – 5651 Heat Exchanger - PFC-1000 – – 5652 Heat Exchanger - PFC-1500 – – 5703 Burner Mounting Plate (Includes 2A & 2B) 54430 Burner Mounting Plate Fiberglass Rope Gasket 52”...
- Page 78 REPAIR PARTS Figure 13.2a: Blower Gas Train Assembly – PFC-850/1000 Figure 13.2b: Blower Gas Train Assembly – PFC-1500...
- Page 79 REPAIR PARTS Table 13.2a: Blower/Gas Train Assembly – PFC-850/1000 Quantity Required Stock Description Code PFC-850 PFC-1000 Combustion Air Blower - PFC-850/1000 54428 3/4” Flanged Elbow 5543 Gas Valve GB-057 54429 1” NPT x 16” Flexible Gas Line 54439 1” NPT Gas Shutoff Valve 51703 Low Gas Pressure Switch 50700...
- Page 80 REPAIR PARTS Figure 13.3a: Jacket Assembly – PFC-850/1000 Figure 13.3b: Jacket Assembly – PFC-1500...
- Page 81 REPAIR PARTS Table 13.3: Jacket Assembly Quantity Required Stock Description Code PFC-850 PFC-1000 PFC-1500 Heat Exchanger Support Panel - Front PF-850/1000 – PFC2016 Heat Exhcanger Support Panel - Front PF-1500 – – PFC2037 Heat Exchanger Support Panel - Rear PF-850/1000 –...
- Page 82 REPAIR PARTS Figure 13.4: Control System...
- Page 83 REPAIR PARTS Table 13.4: Control System Quantity Required Stock Description Code PFC-850 PFC-1000 PFC-1500 Primary Burner Safety Control - PFC-850 – – 54731 Primary Burner Safety Control - PFC-1000 – – 54732 Primary Burner Safety Control - PFC-1500 – – 54733 User Interface Pixel Display 54738...
- Page 84 REPAIR PARTS Figure 13.5: Condensate System...
- Page 85 REPAIR PARTS Table 13.5: Condensate System Quantity Required Stock Description Code PFC-850 PFC-1000 PFC-1500 Condensate Receiver Container 54120 Condensate Neutralizer Container 54121 Condensate Blocked Drain Switch 54137 1” OD x 3/4” ID PVC Condensate Hose 6 in 6 in 15 in 5417 5/8”...
-
Page 86: Appendix A. Pixel Display Screen
APPENDIX A. PIXEL DISPLAY SCREEN APPENDIX A. PIXEL DISPLAY SCREEN A. STAND ALONE PIXEL DISPLAY Figure A.1 below is a map of the boiler pixel display screen for a multiple boiler. When operating as a “stand-alone” boiler, the keys on the pixel display are not active. - Page 87 APPENDIX A. PIXEL DISPLAY SCREEN Table A.1 shows the cascade menu screen which is accessed by pressing the button labeled s for 5 seconds and releasing it. Table A.1: Cascade Menu Cascade Menu • Boiler Address: Start Delay Time: 4 min Stop Delay Time: 4 min Start Boiler Diff:...
-
Page 88: Screens
APPENDIX B. BURNER LCD STATUS SCREENS APPENDIX B. BURNER LCD STATUS SCREENS Initialization Screen Status Screens Boiler Screens Failure Screens Error Handling – Blocking Errors Error Handling – Locking Errors Warning Screen... - Page 89 APPENDIX B. BURNER LCD STATUS SCREENS CH Burn Cycle DHW Burn Cycle Special Functions DHW Tank Warm Hold...
-
Page 90: Appendix C. User Menu
APPENDIX C. USER MENU APPENDIX C. USER MENU Figure C.1: User Menu – Managing Burner... - Page 91 APPENDIX C. USER MENU Figure C.1: User Menu – Dependent Burner...
-
Page 92: Appendix D. Installer Menu Structure
APPENDIX D. INSTALLER MENU STRUCTURE APPENDIX D. INSTALLER MENU STRUCTURE... - Page 93 APPENDIX D. INSTALLER MENU STRUCTURE...
-
Page 94: Appendix E. Combustion Test Record
APPENDIX E. COMBUSTION TEST RECORD APPENDIX E. COMBUSTION TEST RECORD Installation Information Contact: Phone Number: Service Contractor: Fax Number: Contractor Address: Email Address: Job Name: Jobsite Address: Boiler Model: Boiler Serial No.: Manufacture Date: Conversion Date: Pressure Readings Inlet Gas Pressure – Static Inlet Gas Pressure Drop (in. -
Page 95: Service Log
SERVICE LOG SERVICE LOG Serial Number Date Serviced By Description of Service... - Page 96 NOTES...
- Page 97 NOTES...
- Page 98 ® ® Boilers PFC-850 PFC-1000 PFC-1500 I n s t a l l a t i o n , O p e r a t i o n & M a i n t e n a n c e M a n u a l TO T H E I N S TA L L E R : This manual is the property of the owner and must...
Need help?
Do you have a question about the PUREFIRE PFC-850 and is the answer not in the manual?
Questions and answers