Varimixer ERGO60 Operation Manual
Hide thumbs
Also See for ERGO60:
- Operating instructions manual (24 pages) ,
- Operating instructions manual (28 pages)
Table of Contents
Advertisement
Quick Links
Advertisement
Table of Contents

Related Manuals for Varimixer ERGO60


Summary of Contents for Varimixer ERGO60
- Page 1 FOOD MIXER Model ERGO60 SPARE PART AND OPERATION MANUAL ERGO100 ERGO150 012016...
- Page 2 Caution -READ BEFORE OPERATING- Caution Varimixer recommends that mixer operators be at least 18 years of age and be thoroughly trained on the use, cleaning and lubrication of the mixer. This manual should be seen as an integral part of the mixer and should be kept by the machine throughout its working life.
-
Page 3: Limited Warranty
LIMITATIONS OF LIABILITY In the event of warranty claim or otherwise, the sole obligation of Varimixer shall be the repair and/or replacement at the option of Varimixer, of the appliance or component or part thereof Such repair or replacement shall be the expense of Varimixer except that travel over 100 miles or two hours, overtime, and holiday charges shall be,, the expense of the purchaser. -
Page 4: Table Of Contents
Load per leg not to exceed: In case of complaints, please contact your dealer. ERGO60 - 2500 N ERGO140 - 4000 N The guarantee does not cover faults resulting from faulty operation, overloading and lacking observance of directions ERGO100 - 3200 N of maintenance. -
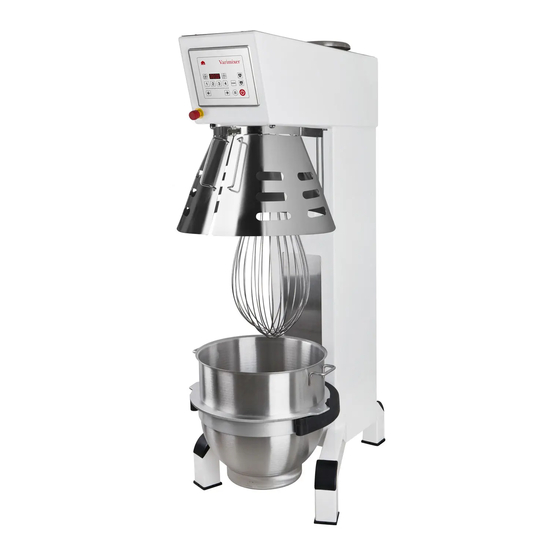
Page 5: Onstruction Of The Mixer
onStruCtIon of the mIxer Magnetic sensor, which VL-4 control panel with is activated by the screen Remix function when the screen is See page 7 for an explana- closed. tion of the panel. Bowl screen – removable. Emergency stop The screen must be closed before the tool can rotate. -
Page 6: M Aximum Capacity Of The Mixer
CaPaCIty of the mIxer AR = Absorption Ratio (%AR) Capacities per mix ERGO60 ERGP100 ERGO150 (Liquid in % of solids) Dough, Bread 65%AR 90 lbs. 155 lbs. 190 lbs. Water weights Dough, Bread 50%AR 75 lbs. 135 lbs. 175 lbs. -
Page 7: P Vl4
Vl4: ontrol anel REMIX Text field / display Time up Used to store a recipe. Displays operation time, Used to set operation time. The time can be set before/ See the section ”REMIX programme numbers and after starting the mixer and can be changed while the function”. -
Page 8: Emergency Stop
Control Panel SurVey of VarIouS oPeratInG SItuatIonS The following pictures show various operating situations and corresponding explanation: If the field is activated REMIX while the mixer is running, the chosen operation time is reset Time up and the speed is set to mini- mum. - Page 9 REMIX REMIX REMIX REMIX The mixer is running - green diode in the field is constantly The mixer is ready to run by activating the field alight when the chosen speed has been reached. Speed 2 is chosen. The operation time can be changed by activating the fields An operation time has been chosen by activating the field .
-
Page 10: Peration Of The Mixer
PeratIon of the mIxer REMIX Time up Text field Time down Bowl up Fixed speeds Bowl down Speed indicator Start/Stop Speed down Speed up Pause Emergency stop Before starting the mixer: Indication of operation time: Before starting the mixer, an operation time for the mixer can Mount the required tool in the bayonet shaft. -
Page 11: Rocedure In Case Of Overloading
Verload eadInG the number of oPeratInG hourS dayS yearS Do not overload the mixer. Sticky and heavy doughs can overload the mixer. Overloading is further exac- It is possible to read how long the mixer has been in opera- erbated if the speed of the mixing tool is increased tion (operation = tool revolving). -
Page 12: Echanical Component Error
eChanICal ComPonent error The bowl is too tight or too loose in the bowl arms. Solution: “Adjustment of bowl clamping and centering”, page 14 The tool hits the sides of the bowl. Solution: “Adjustment of bowl clamping and centering”, page 14 Abnormal noise from the lifting actuator: Solution: Lubrication of actuator;... -
Page 13: All Up An Error Log Of The Last
all uP an error loG of the laSt dISConneCtIonS The last 10 disconnections due to errors resulting in code can be read on the mixer display: • Press the emergency stop • Press to browse the log • The diodes on the speed indicator light up. The age of the error is indicated by the diode that illuminates: The first diode lights up –... - Page 14 CenterInG erGo100: First find the present bowl centering: mount the beater and the bowl, then raise the bowl arms up to normal working posi- tion. With your hand turn the beater, and then measure the distance between beater and bowl edge. By removing the rear covering the bowl arm guide plate is now accessible (E).
-
Page 15: Djusting Of Bowl Clamping And Centering
erGo150: djuStInG of bowl ClamPInG and CenterInG In the rear part of the bowl arms (J) a shaft with an eccentric stud (K) has been mounted, on which the ball bearing is mounted. By turning the eccentric stud, the bowl arms can be opened and closed so that the clamping and the centering of the bowl can be adjusted. -
Page 16: Components
leCtrICal ComPonentS N r : F a r v e : B l å R ø d C O N T R O L P A N E L W I T H G r ø n P I E Z Z O K E Y S L i l l a G u l / s o r t H v i d / s o r t... -
Page 17: Afety Circuit
afety CIrCuIt D e s c r i p t i o n o f t h e S D I s a f e t y i n p u t o n t h e L e r o y i n v e r t e r P C B 1 7 ( t o P C B ) E m e r g e n c y s w i t c h... -
Page 18: Lectrical Iagrams
leCtrICal IaGramS... -
Page 20: O Replace A Belt
Lift the bowl arms to the top position. Adjusting CE-microswitch: Lower the bowl arms to a pressure relief point set at approx. ERGO60 and ERGO100, se Fig. 4, page 24. midway. ERGO150, se Fig. 4a, page 24. It is very important that the bowl arms are low-... - Page 21 ERGO60: 1 3/8” Fig 4 Adjusting the CE microswitch on ERGO60 9 1/16” and ERGO100: C = 20 15/32” The measurement A must be 1 1/2”. ERGO100: 2 33/64” 9 27/32” C = 24 51/64” ERGO150: 19/32” 7 7/8”...
-
Page 22: Tuning Eed Contacts And
ubrICatIon oVerVIew Part Location Oil/grease Explanation Frequency Bushings Item Organic oil or grease, e.g Remove the back cover. Per 5,000 batches or in the min. once yearly or in Fig.6 Texaco StartPlex EP Lubricate the bowl arm axle with grease. bowl arms case of unusual noise.
Need help?
Do you have a question about the ERGO60 and is the answer not in the manual?
Questions and answers