Table of Contents
Advertisement
Advertisement
Table of Contents

Related Manuals for DeDietrich DOP1190


Summary of Contents for DeDietrich DOP1190
- Page 1 EN USER GUIDE Oven...
- Page 2 Dear Customer, When you discover D D e e D D i i e e t t r r i i c c h h products you experience the same feelings that only objects of value can arouse. You are immediately attracted as soon as you see them. The quality of the desi- gn is illustrated by its timelessness, degree of refinement and elegance, and high standard of finish, resulting in perfect harmony between different ap- pliances.
-
Page 3: Table Of Contents
CONTENTS 1/ DESCRIPTION OF YOUR APPLIANCE • • Introduction to your oven ____________________________________ • • Introduction to the programmer ______________________________ 2 /USING YOUR APPLIANCE • • Cooking __________________________________________________ • • Using the programmer º Choosing the language _________________________________ º Resetting the time______________________________________ º... -
Page 4: Introduction To Your Oven
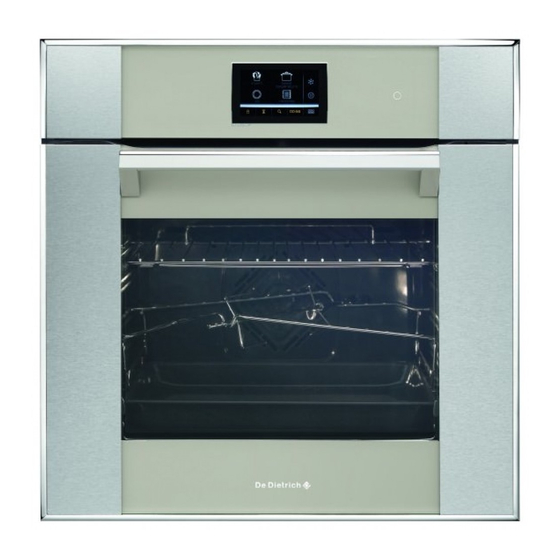
1/ DESCRIPTION OF YOUR APPLIANCE • • INTRODUCTION TO YOUR OVEN Programmer Wire shelf supports Standby mode exit button Hole for rotisserie Lamp... -
Page 5: Introduction To The Programmer
1/ DESCRIPTION OF YOUR APPLIANCE • • INTRODUCTION TO THE PROGRAMMER Keypad locking symbol (child safety Cleaning indicator device). “Minute minder” symbol Settings Recipe search Cooking mode display Clock display Return to main menu... -
Page 6: Cooking
2 / USING YOUR APPLIANCE • • COOKING This oven provides four different types of programming depending on the amount of knowledge you have about preparing the recipe in question: - A recipe for which you know all the settings (you will choose on your own the type of cooking, temperature and cooking time): select t t h h e e “... -
Page 7: Using The Programmer
2 / USING YOUR APPLIANCE • • USING THE PROGRAMMER • Choosing the language FRANCAIS When power is switched on DEUTCH PORTUGUES - You are asked to choose a language - Select the language Press OK to confirm. FRANCAIS DEUTCH PORTUGUES •... -
Page 8: º How To Alter The Time
2 / USING YOUR APPLIANCE • • USING THE PROGRAMMER • Changing the time — The programmer displays the home screen. - Select the setting mode. - Select Screen options. - Select Time. AUDIO DISPLAY OPTIONS COOKING OPTIONS - Change the time using the touch HELP keyboard. -
Page 9: Immediate Cooking
2 / USING YOUR APPLIANCE • • USING THE PROGRAMMER •Immediate cooking — The programmer displays the home screen. - Select E E X X P P E E R R T T cooking mode. - Select the cooking type. E.g. -
Page 10: º Customising The Recommended Temperature
2 / USING YOUR APPLIANCE • • USING THE PROGRAMMER •Immediate cooking TEMPERATURE DURATION - - S S e e t t t t i i n n g g ( ( a a d d j j u u s s t t i i n n g g ) ) y y o o u u r r c c o o o o k k i i n n g g FINISH TIME T T h h e e c c o o o o k k i i n n g g s s e e t t t t i i n n g g s s c c r r e e e e n n g g i i v v e e s s y y o o u u s s e e v v e e r r a a l l o o p p t t i i o o n n s s : :... -
Page 11: º Immediate Start And Set Cooking Time
2 / USING YOUR APPLIANCE PROGRAMMED COOKING • • TEMPERATURE DURATION DURATIO Cooking with immediate start and pro- grammed cooking time FINISH TIME BOOST - Select the cooking time tab. - Adjust the cooking time using the touch keyboard. Example: 01:45. - When you have set the time, press OK to confirm. -
Page 12: º Delayed Start And Selected End Of Cooking Time
2 / USING YOUR APPLIANCE PROGRAMMED COOKING • • Cooking with delayed start and selec- TEMPERATURE ted cooking end time DURATION Set the cooking time. FINISH TIME FINISH TIME - When you have set the time, press OK to confirm. BOOST - Select the end of cooking time tab. -
Page 13: Low Temperature" Function
2 / USING YOUR APPLIANCE “LOW TEMPERATURE” FUNCTION • • I I t t i i s s a a b b s s o o l l u u t t e e l l y y e e s s s s e e n n t t i i a a l l t t h h a a t t “ “ L L O O W W T T E E M M P P E E R R A A - - T T U U R R E E ”... -
Page 14: Recipe" Function
2 / USING YOUR APPLIANCE “RECIPE” FUNCTION • • The “Recipe” function selects the appropriate cooking parameters for you based on the food being prepared and its weight. - Select “Recipes” - The oven then suggests different food categories. Select from the categories shown: - - W W h h i i t t e e m m e e a a t t ·... - Page 15 2 / USING YOUR APPLIANCE “RECIPE” FUNCTION • • - Confirm by pressing Start; the oven switches on. - The oven beeps and switches off when Chicken the cooking time has finished and animated display wishes you “Bon appetit”! • • Additional details for cooking with the “Recipe”...
- Page 16 2 / USING YOUR APPLIANCE No. 4 VEGETABLES: No. 1 WHITE MEAT: No. 1 chicory No.1 quail vegetable flans duck potato gratin veal ribs lasagne whole ham stuffed peppers rabbit rice or paella pork loin stuffed tomatoes duck breast goose No.
- Page 17 2 / USING YOUR APPLIANCE • • Beef, pork, lamb You m m u u s s t t take all meat out of the refrigerator well before cooking it: a sudden transition from cold to hot temperatures makes the meat tough; this produces roast beef which is golden outside, red inside and warm in the middle.
-
Page 18: Ics" Function
2 / USING YOUR APPLIANCE “ICS” FUNCTION • • The ICS (Intelligent Cooking System) function makes the entire cooking task easier as the oven automatically calculates the cooking settings depending on the dish selected (temperature, cooking time, type of cooking). by means of electronic sensors placed in the oven which continually measure the degree of humidity and temperature variation. - Page 19 2 / USING YOUR APPLIANCE • • USING THE “ICS” FUNCTION N N . . B B . . : : N N o o p p r r e e h h e e a a t t i i n n g g i i s s r r e e q q u u i i r r e e d d w w h h e e n n u u s s i i n n g g t t h h e e I I C C S S f f u u n n c c t t i i o o n n .
-
Page 20: º º G G U U I I D D E E T T O O " " I I C C S S " " F F U U N N C C T T I I O O N N S S
GUIDE TO THE “I.C.S.” FUNCTIONS • fresh store-bought pizza • ready-to-use pizza dough i i z z z z a a • home-made pizza dough • frozen pizza • fresh quiches a a r r t t s s • frozen quiches ( ( s s a a v v o o u u r r y y ) ) •... - Page 21 GUIDE TO THE “I.C.S.” FUNCTIONS • Place it on the grid for a crispy crust (you can place a sheet of parchment paper between the grid and the pizza to protect the oven from cheese drip- pings) • place the pizza on the baking tray for a soft crust. •...
- Page 22 TIPS AND HINTS FOR ICS P P i i z z z z a a To prevent cheese or tomato sauce from dripping in the oven, you can place a piece of parchment paper between the grid and the pizza. T T a a r r t t s s / / Q Q u u i i c c h h e e s s : : Avoid glass and porcelain dishes: they are too thick and extend the cooking time resulting in the bottom of the crust not being crispy.
- Page 23 SOME ICS RECIPES P P i i z z z z a a Base: 1 pizza crust *with vegetables : 6 tablespoons tomato sauce + 100 g diced courgettes + 50 g diced bell peppers + 50 g sliced aubergines + 2 small sliced tomatoes + 50 g shredded gruyere + oregano + salt + pepper.
- Page 24 SOME ICS RECIPES F F i i s s h h Black sea bream with dry cider: 1 bream weighing 1.5 kg. 500 g button mushrooms. 2 sour apples. 2 shallots. 2 tablespoons heavy cream. 100 g butter. 1/2 litre cider. Salt, pepper. Gut and scale the fish.
- Page 25 SOME ICS RECIPES I I n n d d i i v v i i d d u u a a l l c c h h o o c c o o l l a a t t e e c c a a k k e e s s 12 individual aluminium ramekins 60 g butter 200 g bitter chocolate (more than 50% cocoa)
-
Page 26: Using The Timer Function
2 / USING YOUR APPLIANCE USING THE TIMER FUNCTION • • Y Y o o u u r r o o v v e e n n ’ ’ s s p p r r o o g g r r a a m m m m e e r r c c a a n n b b e e u u s s e e d d a a s s a a n n i i n n d d e e p p e e n n d d e e n n t t t t i i m m e e r r t t h h a a t t a a l l l l o o w w s s y y o o u u t t o o c c o o u u n n t t d d o o w w n n t t i i m m e e w w i i t t h h o o u u t t u u s s i i n n g g t t h h e e o o v v e e n n . -
Page 27: Using The Search Function
2 / USING YOUR APPLIANCE USING THE SEARCH FUNCTION • • Y Y o o u u r r o o v v e e n n h h a a s s a a “ “ s s e e a a r r c c h h ” ” b b u u t t t t o o n n w w h h i i c c h h a a l l - - l l o o w w s s y y o o u u t t o o a a c c c c e e s s s s t t h h e e v v a a r r i i o o u u s s o o v v e e n n p p r r o o - - g g r r a a m m s s b b y y t t y y p p e e o o f f f f o o o o d d : : - Press the button... -
Page 28: Locking The Controls
2 / USING YOUR APPLIANCE • • LOCKING THE CONTROLS (CHILD SAFETY) OVEN OFF You have the option of preventing access to the oven controls by taking the following steps: - when the oven is off, press the “pad- lock” button for a few seconds. A beep sounds. -
Page 29: Oven Cooking Modes
3 / OVEN COOKING MODES F F A A N N C C O O O O K K I I N N G G (recommended temperature 1 1 9 9 0 0 ° ° C C min 35°C max 250°C) •... - Page 30 3 / OVEN COOKING MODES K K E E E E P P W W A A R R M M (recommended temperature 6 6 0 0 ° ° C C min 35°C max 100°C) • This position allows you to keep your food warm by spurts of heat from the element at the back of the oven combined with fan.
-
Page 31: Maintaining And Cleaning Your Oven
4 / MAINTAINING AND CLEANING YOUR OVEN • • PERFORMING A PYROLYSIS • Immediate pyrolysis Note Take the grills and trays out of the oven and clean up any major spills. — The programmer displays the home screen. You can choose between 3 pyrolysis cycle times: pyrolysis time 1 hour 30 minutes. -
Page 32: Performing A Pyrolysis
4 / MAINTAINING AND CLEANING YOUR OVEN • • PERFORMING A PYROLYSIS • Immediate pyrolysis - Confirm by pressing the START but- ton. LAST PYRO 21 january 2010 15:30 If you want to delay the start of the pyrolysis cycle select the end of cooking tab. PYRO CONTROL Adjust the end of cooking time using the touch keyboard. -
Page 33: After-Sales Service
5 / AFTER-SALES SERVICE • SERVICE CALLS Any repair made to your appliance must be carried out by a qualified professional, authori- sed to work on the brand. When you call, state your appliance’s complete reference informa- tion (model, type, serial number). This informa- tion appears on the manufacturer’s nameplate (Fig.1).
Need help?
Do you have a question about the DOP1190 and is the answer not in the manual?
Questions and answers