Table of Contents
Advertisement
Advertisement
Table of Contents

Related Manuals for Sinclair AMC-09C


Summary of Contents for Sinclair AMC-09C
- Page 1 USER'S MANUAL MOBILE SERIES AMC-09C...
-
Page 3: Table Of Contents
CONTENTS ..........Summary ........Working principle ........Models & specifications ..........Structure ........Operating methods ........ Names and Functions of the Remote Controller 9-10 ........COOL mode operation ........DRY mode operation ........SLEEP mode operation ........AUTO mode operation ......... -
Page 4: Summary
SUMMARY This MOBILE AIR CONDITIONER is a small, moveable air conditioner. It possessed the functions of COOL, HEAT, DRY and the Separate Ventilation, and depends on different places, it can be moved as will. It is fit for home and office use, especially fit for the house with many rooms. With the compact configuration, excellent workmanship, elegant appearance, it looks like a standing Benz car. -
Page 5: Models & Specifications
MODELS AND SPECIFICATIONS Model AMC-09C Cooling Capacity(W) 2600W 220-240V ~ 50Hz Power Source Rated Input Current(A) Rated Power Input(W) 1200 Flow Volume(m Sound Press Level dB(A) Refrigerant R407C Net Weight(Kg) Dimension(Body)(H × W 840×450×370 ×D) (mm) Dimension(Package)(H× 880×685×425 W×D) (mm)... -
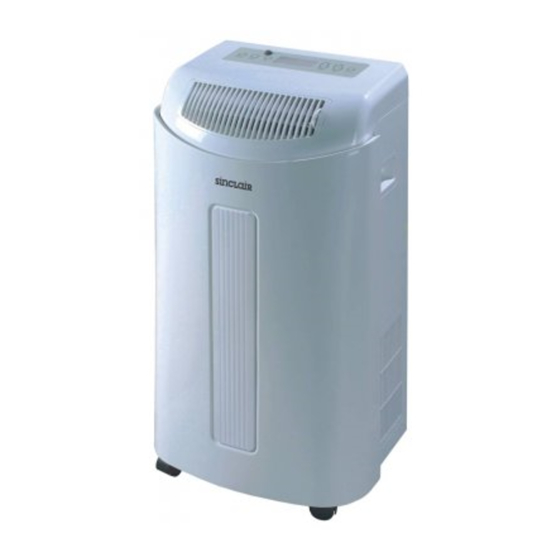
Page 6: Structure
STRUCTURE Front Control panel Air outlet Handle Lower air inlet Rear Upper air inlet grille Power cable Air exhaust outlet Lower air inlet grille -3-... -
Page 7: Operating Methods
OPERATING METHODS The working range of COOL The working range of COOL mode is 16℃-35℃, the working range of mode and DRY mode DRY mode is 16℃-35℃. Location conditions When operating, the unit should be placed on the horizontal place and more than 50cm away from the wall or other obstructions. - Page 8 OPERATING METHODS ● Can not use steel wire or brass wire to replace fuse, the capability of fuse must be appropriate. In order to avoid damage to power cord and electrical leakage, do not fix the power supply on the knife edge or sharp object.
- Page 9 OPERATING METHODS LCD instruction (dynamic display) Names and Functions- Remote Controller Remote Control window SET TEMP. SET SLEEP FAN SPEED ON/ OFF LCD screen SET TIMER MODE -6-...
- Page 10 OPERATING METHODS Control panel and the function 1. "ON/ OFF "key Press once to start and press once more to stop the unit. 2."MODE" key Press this button to change operation mode in order of: FAN → COOL → DRY → AUTO → FAN 3 "FAN SPEED"...
-
Page 11: Operating Methods
OPERATING METHODS COOL mode 1). Select a place that near door and window, install the exhaust duct (the installation method please refer to P19), put the exhaust duct out of the door, do not close the door and window tightly, leave enough space for air flow, for example, open the window or door to keep a good ventilation. -
Page 12: Names And Functions Of The Remote Controller
NAMES AND FUNCTIONS OF THE REMOTE CONTROLLER LCD screen It shows all set contents SEND key Press this key to transmit the operation, the screen will show the operation. HIGH TIME SLEEP key Press this key to set SLEEP operation, and press the "Hr"... -
Page 13: Names And Functions Of The Remote Controller
NAMES AND FUNCTIONS OF THE REMOTE CONTROLLER MODE key Press the "MODE" key step by step, the LCD will display the COOL-FAN-HEAT- AUTO mode, circularly. TEMP key Press once, the SET TEMP. will decrease 1℃. Press once, the SET TEMP. will HIGH increase 1℃. -
Page 14: Cool Mode Operation
COOL MODE OPERATION 1. After inserting the batteries, press "ON/OFF" key to start the unit. 2. Press "MODE" key, to choose "COOL" mode. 18 C 0 HIGH TIME 3. Press "FAN" key, to set fan speed. SEND 4. Press "TEMP" key, to set the desired temp. -
Page 15: Dry Mode Operation
DRY MODE OPERATION 1.After inserting the batteries, press "ON/OFF" key to start the unit. 2.Press "DRY" key, to set "DRY" mode, 18 C 0 when repress the key, it will run in original HIGH operation. TIME 3.Press "TEMP" key, to set desired temp. SEND 4.Press "FAN"... -
Page 16: Sleep Mode Operation
SLEEP MODE OPERATION 1. After inserting the batteries, press "ON/OFF" key to start the unit. 2. Press "MODE" key, to select the operation mode. 18 C 0 HIGH TIME 3. Press "TEMP" key, to set desired SLEEP temp. SEND 4. Press "FAN" key to set fan speed. 5. -
Page 17: Auto Mode Operation
AUTO MODE OPERATION 1. After inserting the batteries, press HIGH "ON/OFF" key to start the unit. TIMER 2. Press "MODE" key, select "AUTO" mode, according to the room temp, the SEND microcomputer will adjust the turn on or turn off of the compressor and fan motor automatically to offer comfortable effect. -
Page 18: Timer Mode Operation
TIMER MODE OPERATION 1. When the unit is running, press "TIMER" key, to set the TIMER operation. HIGH TIMER 2. Press "Hr/Min" key, to set the TIMER ON, it can be selected in the range of 1-18 hours. SEND 3. Press "SEND" key to transmit the operation to the unit. -
Page 19: Installation Guide For Castor, Drainage Pipe And Air Exhaust Accessory
INSTALLATION GUIDE FOR CASTOR, DRAINAGE PIPE AND AIR EXHAUST ACCESSORY THE AIR EXHAUST 1.Install the adjutable window silder kit or drill a hole at the DUCT MOUNTING nearest window. 2.Fix the square end of the exhaust duct to the exhaust terminal METHOD of the unit as depicted in Fig 4. - Page 20 INSTALLATION GUIDE FOR CASTOR, DRAINAGE PIPE AND AIR EXHAUST ACCESSORY CAUTION 1.In order to correctly installing the air exhaust duct please contact your local dealer for the service. 2.When mounting, try to keep the square end of the exhaust duct horizonal. 3.Don't add or connect other pipes to it, otherwise it will cause mechanical malfunction.
- Page 21 THE INSTALLATION GUIDE FOR ACCESSORY OF EXHAUST DUCT If the exhaust duct requires bend, please refer to the following installation dimensions 55cm CAUTION ! 55cm The wrong mounting diagram (if the exhaust duct is bent too great, it could cause malfunction easily.) -19-...
-
Page 22: Care And Maintenance
CARE AND MAINTENANCE The mobile air There are castors at the bottom Hook Hook conditioner of the unit, according to the demand, it can be moved in the room very conveniently. Air inlet grille Before maintenance, please WARNING ! pull out the power plug and cut off power supply to avoid electric shock. - Page 23 CARE AND MAINTENANCE Clean the air Please use a cloth that slightly moistened with water whose temperature is conditioner below 40℃(or the soap water or the water with cleanser) after wiping the dirt. Do not use gasoline, diesel oil or the congeneric substance to clean the unit.
-
Page 24: Trouble Shooting
TROUBLE SHOOTING If malfunction occur, please check the following before maintenance: Solutions Troubles Possible Causes The air conditioner doesn't start. The power supply is not connected well. 1. Insert the power plug tightly. The power plug is not inserted tightly. 2. -
Page 25: User Notices
USER NOTICES Location ● Do not install the unit in the hermetic place, and keep well ventilation, to avoid malfunction occurs. ● Do not install the unit at where it will be exposed to direct sunlight, in order to avoid fading and efficiency reducing. ● ... -
Page 26: After Service
USER NOTICES ● Do not incline or overturn. If the abnormal phenomenon occurred, please pull out the power plug at once, and inform the dealer to check and maintain. ● Do not use the insecticide or other sprays, it can cause deformation or crack.. -
Page 27: Circuit Diagram
CIRCUIT DIAGRAM AMC-09C The circuit diagrams of all above are for reference, they are subject to be changed without notice. -25-...
Need help?
Do you have a question about the AMC-09C and is the answer not in the manual?
Questions and answers