Table of Contents
Advertisement
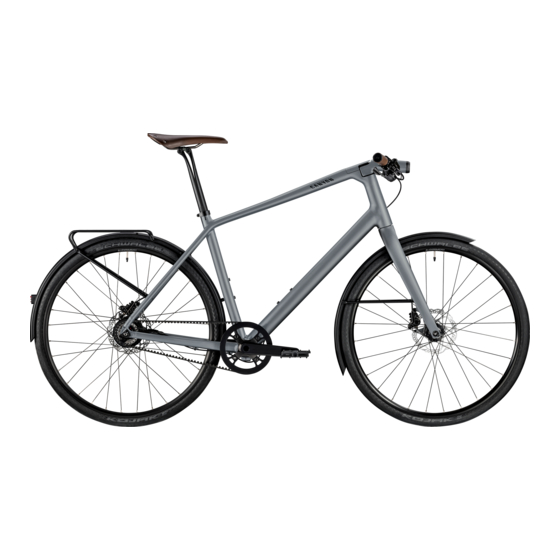
PURE CYCLING
B
MANUAL URBAN BIKE
Important: Assembly instructions page 11. Before your first ride read pages 4-10.
1
2
3
4
c
5
e
6
7
8
d
9
10
11
12
Your bicycle and this bicycle manual comply with the safety requirements laid down in the EN
!
standard 14764 as well as in the ISO standards 4210:2014 Cycles - Safety requirements for bicycles.
a
f
b
C
13
14
15
16
17
18
5
23
19
20
21
22
24
25
26
27
28
Advertisement
Table of Contents

Related Manuals for Canyon Urban


Summary of Contents for Canyon Urban
- Page 1 PURE CYCLING MANUAL URBAN BIKE Your bicycle and this bicycle manual comply with the safety requirements laid down in the EN standard 14764 as well as in the ISO standards 4210:2014 Cycles - Safety requirements for bicycles. Important: Assembly instructions page 11. Before your first ride read pages 4-10.
-
Page 2: Table Of Contents
Seat post clamp/ Care instructions Wheelguard with rear light Wheel: After an accident Mudguard Valve Adjusting the Urban bike to the rider Rear brake Wheelguard Adjusting the saddle to the correct height Cassette sprockets Spoke Fore-to-aft-position and saddle tilt Rear derailleur... - Page 3 This manual cannot teach you tach additional manuals. Visit www.canyon.com for in your manual only refer to this Canyon bike and that riding a bike or make you familiar with the traffic supplementary manuals.
-
Page 4: Intended Use
The only way of riding with baggage is by us- Do not use the Canyon bike on a bicycle trainer to which it is attached straight handlebars, triathlon or time trial bicycles. -
Page 5: Before Your First Ride
The saddle of road conditions where you are riding on. Attend your Urban bike should be set to a height from a riding technique course. For more information which you can just reach the pedal in its lowest Note that the assignment of brake lever to visit www.canyon.com... -
Page 6: Before Every Ride
“Service” at our website 8. Is your Urban bike equipped with a Gates belt drive? www.canyon.com or contact our service hotline at Make sure the belt is always correctly tightened +44 208 5496001. -
Page 7: Assembly From The Bikeguard
“Lighting” and “Legal requirements for riding on public roads”. BIKEGUARD 5. Let your Urban bike bounce on the ground from a small height. If there is any rattling, see where it Assembling the bike from the BikeGuard is no witch- craft, but you should proceed with care and deliber- comes from. - Page 8 Put the matching bit into the holder of the Canyon We from Canyon regard the use of a torque wrench as Carbon fibre components are particularly vulnera- find more information under “Service” at our web- torque wrench.
- Page 9 BikeGuard in a dry place. If you in- seat post to make sure they do not fall down and ing scratched. This is normal wear and no reason tend to ship your Canyon or to take it with you on get damaged. for complaint.
- Page 10 8 Nm. Use the Canyon torque wrench. “General notes on care and inspection“. Also ob- Pull the seat post out again. Apply a little Canyon as- serve the instructions of the component manu- sembly paste to the bottom part of the seat post and facturer.
- Page 11 Take the Canyon torque wrench and put the bit match- ing the handlebar bolts into the holder. Undo the band with Velcro fastener fastening the left-...
- Page 12 Position the fork and the stem in direction of motion. Position the stem clamp in the middle of your new Turn in the individual bolts of Canyon stems with a Continue by tightening both lower bolts (pos. 4+2) Unscrew the clamping bolts of the faceplate com- Canyon handlebars so that the handlebars extend precisely fitting Allen key by a few turns.
- Page 13 Do not use a box cutter. Remove the transport locks from the front wheel The wheels of your Canyon Urban bike do not have Insert the Wheelguard into the hollow axle of the If you have disc brakes, check before mounting the brake.
- Page 14 Canyon Urban bike firmly back and forth with the wheel remaining on the ground. If there is play in the bearing, there will be a light jerk and the...
- Page 15 ASSEMBLY FROM THE BIKEGUARD MOUNTING THE PEDALS CHECKING AND ADJUSTING Canyon Urban bikes can be fitted with standard ped- Apply a thin layer of standard assembly grease on the Some pedal types have to be tightened with an Allen After mounting the wheel and tightening the Wheel- key.
- Page 16 Check the proper functioning of the gears. Shift If your Urban bike has a Gates belt drive, two yellow Adjust the position of the saddle and handlebars and Inflate both tyres to the maximum pressure indicated through all the gears.
-
Page 17: Packing Your Urban Bike
PACKING YOUR URBAN HOW TO USE THE BIKE WHEELGUARD If you pack your Urban bike, e.g. to send it in for ser- NOTES ON MOUNTING WHEELS WITH WHEELGUARD vicing to our workshop, or if you want to take it with ALLURE GRAVITY you on holidays, you must bear in mind a few things to bring your bike safe and sound to its destination. -
Page 18: What To Bear In Mind When Adding Components Or Making Changes
Bring your serious accidents. Safety-relevant bolts must be Canyon to the Canyon service workshop, if you have If your bicycle has a Wheelguard, be sure tightened to their prescribed torque values. -
Page 19: Special Characteristics Of Carbon
Special pads protect carbon from damage solvent-containing cleaning agents that could attack Carbon Canyon for many years and have full confidence in its the surface! material. You can use car wax to protect the surface and make Carbon fibre reinforced plastic has proved its value in it shine. -
Page 20: After An Accident
AFTER AN ACCIDENT AFTER AN ACCIDENT AFTER AN ACCIDENT 4. If your Canyon Urban bike has a Gates belt drive, check whether the belt is still correctly tightened and runs properly over the front and rear belt 1. Check whether the wheels are still firmly fixed in wheels. -
Page 21: Adjusting The Urban Bike To The Rider
RIDER CORRECT HEIGHT No matter whether you want to ride in streamlined The correct saddle height on an Urban bike is all a position or relaxed on a Canyon Urban bike. The matter of how it allows you to pedal. -
Page 22: Fore-To-Aft-Position And Saddle Tilt
Check the tight fit of the seat post. Take hold of the pedal in a relaxed manner. If it is tilted, you will con- Tighten the locknut by using the Canyon torque wrench according to stantly have to lean against the handlebars to prevent... -
Page 23: Adjusting Saddle Position And Tilt
ADJUSTMENT TO THE RIDER FORE-TO-AFT POSITION AND SADDLE FORE-TO-AFT POSITION AND SADDLE ADJUSTMENT TO THE RIDER ADJUSTING SADDLE POSITION AND TILT Clamping with two bolts in line Release both bolts by two to three turns at the most, SEAT POST VCLS 2.0 otherwise the whole assembly can come apart. -
Page 24: Shifter And Brake Lever Adjustment
Handlebar at the Canyon Urban (Canyon H27 Flat AL) Turn the brake and shift lever on the handlebars. Sit Bar ends on Urban bikes are usually fitted slightly an- on the saddle and place your fingers on the brake gled. Adjust the handlebars so that you can rest your levers. -
Page 25: Adjusting The Brake Lever Reach
With many brake systems the distance between the your Canyon to a halt as quickly as possible. Such brake levers and the handlebar grips is adjustable. emergency stops are also a study in physics. In the This gives riders with small hands the convenience process of braking, the rider’s weight shifts forward,... -
Page 26: The Gears
(large) sprockets. fic until you are familiar with the functioning of the different levers or twist grips of your Urban In the case of multi-speed hubs and gearbox shift sys- bike. -
Page 27: Readjusting The Tension On Canyon Urban Bikes With Eccentric Bearing
In the bearing with the Allen key in this position. Fix the case of a new Canyon Urban bike check the tension eccentric bearing by retightening the bolts on the more often and later on every 500 to 1,000 kilometres... -
Page 28: Lighting
Check all important components regularly of your Canyon and protecting them from corrosion. REAR LIGHT Do not clean your Canyon with a steam jet. This clean- ing method is quick, but it entails serious drawbacks: LEDs beam through a (red) diffusion disc rearwards As the water is ejected at high pressure in a narrowly and are visible at best even from the side. -
Page 29: Safekeeping And Storing Your Canyon
Inflated inner tubes tend to gradually lose air when a soft cloth to give them a nice shine and make them the bike is not used for a long time. If your Canyon water-repellent. is left standing on flat tyres for an extended period, this can cause damage to the structure of the tyres. -
Page 30: Servicing And Inspection
A special maintenance schedule has been developed After the bedding-in period you need to have your 60 to 100 hours). If your Canyon does harder service, by our experienced technicians. On the first kilo- bike serviced by an expert at regular intervals. The... -
Page 31: Recommended Torque Values
SERVICE AND MAINTENANCE SCHEDULE RECOMMENDED TORQUE VALUES RECOMMENDED TORQUE VALUES Component What to do Before Monthly Annually Other every ride intervals Coating Polish • Component Bolted connection Shimano* SRAM ** Miranda*** At least every Rear derailleur Fastening bolt 8-10 Nm 8-10 Nm 6 months Cable fixing bolt... - Page 32 USING THE CANYON TORQUE WRENCH Canyon frame: Bottle cage bolts 4.5 Nm We from Canyon regard the use of a torque wrench as Replaceable derailleur hanger 1.5 Nm essential so as to ensure that two parts can be fixed together securely and safely.
-
Page 33: Legal Requirements For Riding On Public Roads
RECOMMENDED TORQUE VALUES LEGAL REQUIREMENTS DISC BRAKES LEGAL REQUIREMENTS FOR RIDING ON PUBLIC Shimano Magura Avid Formula Brake calliper bolt at frame/fork 6-8 Nm 6 Nm 5-7 Nm (RW) 9 Nm ROADS 9-10 Nm (FW) Brake lever clamp bolt 6-8 Nm 4 Nm In Great Britain Single-bolt clamping... -
Page 34: Warranty
Brake pads with a width of less than a millimetre must be replaced herent in the manufacturing process. This does nance can render the Urban bike unsafe. Risk of with original spare parts not constitute a defect. -
Page 35: Crash Replacement
We reserve the right to suspend this service if we detect that the damage has been caused unrea- sonably. Crash Replacement – Damaged Canyon frames are replaced at re- In order to claim the CR-service, please contact our duced prices service hotline at +44 208 5496001.
Need help?
Do you have a question about the Urban and is the answer not in the manual?
Questions and answers