Table of Contents
Advertisement
PURE
CYCLING
MANUAL
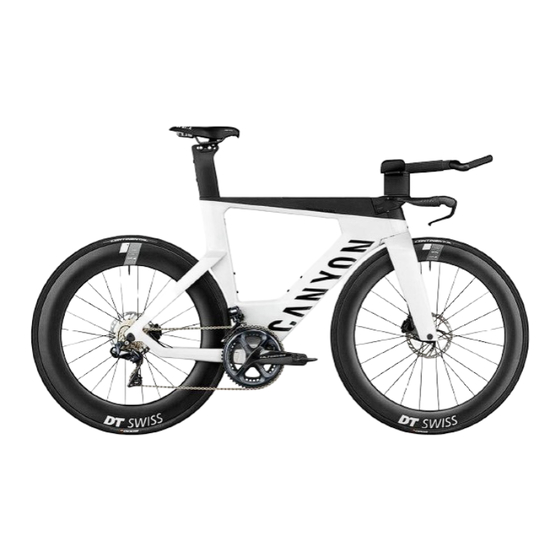
BICYCLE MANUAL SPEEDMAX
1
2
3
4
c
5
6
e
7
8
9
d
10
11
12
13
These are additional instructions for the Canyon Speedmax. Always refer to the Canyon bicycle
manual road bike that you find at www.canyon.com
Important: Assembly instructions page 7. Read pages 2 to 6 before your first ride!
Your bicycle and this manual comply with the safety requirements of the EN ISO standard
4210‑2.
14
15
16
17
18
a
19
20
b
21
22
23
24
25
26
27
28
29
Advertisement
Table of Contents

Related Manuals for Canyon SPEEDMAX


Summary of Contents for Canyon SPEEDMAX
- Page 1 MANUAL BICYCLE MANUAL SPEEDMAX These are additional instructions for the Canyon Speedmax. Always refer to the Canyon bicycle manual road bike that you find at www.canyon.com Important: Assembly instructions page 7. Read pages 2 to 6 before your first ride! Your bicycle and this manual comply with the safety requirements of the EN ISO standard 4210‑2.
-
Page 2: Table Of Contents
These are additional instructions for the Canyon Speedmax. The chapters of this table of contents printed in black refer to your Canyon Speedmax; there is no supplementary information in the Canyon This symbol indicates an imminent risk This symbol signifies information about bicycle manual road bike. -
Page 3: Welcome
Furthermore, you will find numerous service mov‑ are tired. Do not ride with a second person on your Your Canyon team wishes you lots of fun with ies on our website www.canyon.com that will bike and never ride without having your hands on your Canyon! refer to the chapter “Intended use”... -
Page 4: Intended Use
INTENDED USE Strictly observe the category to which your Speedmax belongs. You can determine the cat‑ egory of your Speedmax by means of the frame To define the intended purposes for the different marking according to the following symbol. The... -
Page 5: Before Your First Ride
In the BikeGuard you find the assembled frame Unfold the front cover of this manual. Here you with all add‑on parts, separately front and rear Before riding your new Canyon Speedmax for the find a Canyon Speedmax showing all the essential wheel packed individually in boxes, sometimes first time, read at least the chapter “Before your... - Page 6 We from Canyon regard the use of a torque wrench Put the matching bit into the holder of the Canyon Carbon fibre components are particularly vulner‑...
- Page 7 BikeGuard in a dry place. If with a specific aero profile. The pointed you intend to ship your Canyon or to take it end of the TRI CF seat post at the top of the Wheel bags are not supplied with every...
- Page 8 Tighten the Allen bolt of the seat post clamp/ Your Speedmax is attached with the fork and the Hold your Speedmax tight so that it does not top‑ clamp mechanism to a torque value of max. 4 Nm. rear frame to the protective cardboard carton. Re‑...
- Page 9 However, do not use any tools. Insert the rotor at the same time into the brake calliper. Hold your Speedmax tight so that it does not top‑ Pull the lever outwards against the preload. While ple over. Loosen the thru axle of the front wheel holding the lever in this position, you can turn the with an Allen key and turn the thru axle anti‑...
- Page 10 This allows the chain using a Canyon torque wrench to a torque wrench trary to the direction you are accustomed to, i.e. to position properly on a sprocket of the cassette.
- Page 11 SHIMANO Di2 BATTERY AND CHARGER SRAM ETAP/AXS ROAD Fix the white reflector to the handlebars, the red The Di2 battery of the Canyon Speedmax is lo‑ Remove the faceplate subsequently. In the case of SRAM’s eTAP/AXS Road there is one reflector to the seat post and the spoke reflectors cated in the lower third of the down tube.
- Page 12 “Adjusting the Canyon Speedmax to the rider”. For more information on how to adjust the gears read the chapter “The gears” in your bicycle man‑...
-
Page 13: Special Features Of Triathlon Bikes And Time Trial Machines
Canyon in a flat, non‑traffic area (e.g. in a parking area)! Faulty assembly or improper adjustments that become apparent in... -
Page 14: Special Features Of Carbon Wheels
The Shimano Di2 groupset on your Speedmax is pre‑set with Shimano Syncro Shift. With the left You find more information on carbon wheels and control button you shift to the easier gears, with care instructions in the chapter “Special features... -
Page 15: Adjusting The Canyon Speedmax To The Rider
ADJUSTING TO THE RIDER ADJUSTING THE Align the handlebars in a way that you have your Canyon Speedmax fully under control even in crit‑ ical riding situations and can steer and brake at CANYON SPEEDMAX all times without any restrictions. Check this by... -
Page 16: Fore-To-Aft Position And Saddle Tilt
(0.5 Nm increments) and check in between the proper fit of the component. Nev‑ er exceed the maximum torque value indicated by Canyon! Do not ride if the seat post has been pulled out beyond the line with the MAX... - Page 17 ADJUSTING TO THE RIDER FORE-TO-AFT POSITION AND SADDLE FORE-TO-AFT POSITION AND SADDLE ADJUSTING TO THE RIDER First, loosen the two horizontally positioned Allen If the range is insufficient, you can further loosen If the adjustment range is still not sufficient, ful‑ As a further option, the saddle clamping bolts can bolts of the saddle slide clamp by two to three the two almost vertical bolts.
-
Page 18: Adjusting The Height Of The Handlebars
They can be assembled in different combinations. Your Speedmax is fitted with the cockpit com‑ ponents selected by you. They were selected in advance by the service centre based on your fore‑... - Page 19 Mono Grips FITTING KIT The mono grips are available in two lengths. Dif‑ Your Speedmax is supplied with a FITTING KIT in‑ Further height adjustments up to a maximum Always make sure the spherical washers are ference is made between the pair lh/rh short and cluding FITTING KIT manual.
- Page 20 ADJUSTING TO THE RIDER EXTENSIONS AND ARMRESTS EXTENSIONS AND ARMRESTS ADJUSTING TO THE RIDER Adjusting the mono grips The angle of the mono grips can be adjusted. Ob‑ The FITTING KIT includes two grip width spacers You can mount the armrests lengthways in three Insert the fixing bolts into the thread holes as far serve that the right and left grip are connected that can be used to enlarge the distance between...
-
Page 21: The Headset
THE HEADSET THE HEADSET THE HEADSET If your Speedmax makes knocking noises when Subsequently, remove the cover above the stem. Carefully tighten the centre adjusting screw clock‑ Check the bearing for ease of running, by lifting you are riding or braking, you should check the This is only a clip‑on cover. -
Page 22: Integrated Hydration System
INTEGRATED HYDRATION SYSTEM IMPACT PROTECTION UNIT (IPU) Your Canyon Speedmax is fitted with an end stop, You can fit your Canyon Speedmax with the Inte‑ The best way to fill the system is to position your Remove the cover at the upper headset. -
Page 23: Integrated Top Tube Bento Box
Make sure to insert the hydration system back into the frame at the internal stiffening. Finish by pressing the hydration bladder including mount Your Canyon Speedmax is equipped with the inte‑ The integrated bottom bracket storage (BB stands To re‑mount the cover on the frame position the into the seat of the frame. -
Page 24: Additional Accessories
ADDITIONAL ACCESSORIES WARRANTY AND GUARANTEE ADDITIONAL WARRANTY ACCESSORIES Your bike was manufactured with care and deliv‑ ered to you largely pre‑assembled. We are obliged by law to guarantee that your bike is free of any TRI BOTTLE ADAPTER defects which considerably reduce its value or fit‑ ness for use or make it worthless or useless. -
Page 25: Guarantee
Canyon road, time trial, triathlon or track bikes are high‑end sports equip‑ ment, representing lightweight construction as pinnacle of engineering. Also be a professional when it comes to handling of the material. -
Page 26: Crash Replacement
With our Crash Replacement (CR) programme we offer you the opportunity to replace your damaged Canyon frame at a greatly reduced cost. This offer is valid up to three years after the date of pur‑ chase. You’ll receive the same or a similar frame Crash Replacement –...
Need help?
Do you have a question about the SPEEDMAX and is the answer not in the manual?
Questions and answers