Table of Contents
Advertisement
Quick Links
Advertisement
Table of Contents

Related Manuals for Yamaha DPX-830


Summary of Contents for Yamaha DPX-830
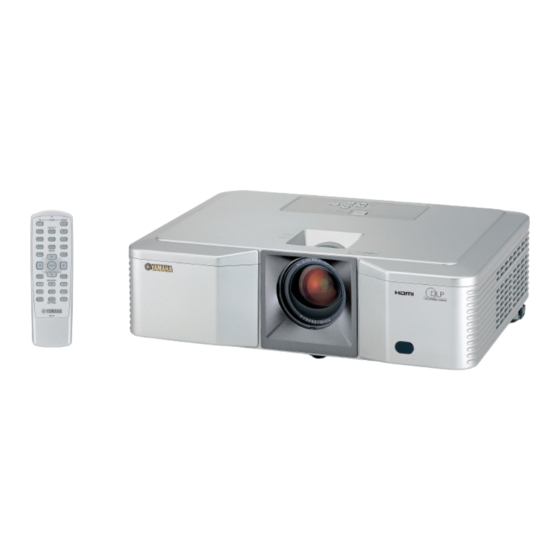
- Page 1 DPX-830 Digital Cinema Projector Projecteur Cineme Numerique OWNER ’ S MANUAL MODE D’EMPLOI BEDIENUNGSANLEITUNG BRUKSANVISNING MANUALE DI ISTRUZIONI MANUAL DE INSTRUCCIONES GEBRUIKSAANWIJZING http://www.pureglare.com.au Downloaded from www.Manualslib.com manuals search engine...
-
Page 2: Important Safety Instructions
IMPORTANT SAFETY INSTRUCTIONS 7 Water and moisture: Do not use this projector near water or in contact with water. CAUTION 8 Accessories: Do not place this projector on RISK OF ELECTRIC SHOCK an unstable cart, stand, tripod, bracket or DO NOT OPEN table. - Page 3 FCC requirements. problem by using one of the following measures: Modifications not expressly approved by Yamaha may void your authority, granted by the FCC, to use the product. Relocate either this product or the device that is being affected by the interference.
- Page 4 Caution: Read this before operating this unit. Warning Place of installation For safety reasons, refrain from setting the projector at any place • This unit must be grounded subjected to high temperature and high humidity. Maintain an • Do not use this projector in a computer room operating temperature, humidity and setting as specified below: This projector is not for use in a computer room as defined in •...
-
Page 5: Table Of Contents
Table of contents 1 Getting started 8 Adjusting video images Inappropriate places for installation .....2 Selecting the gamma mode (GAMMA) ..... 27 Accessory check ..........3 Customizing the gamma mode (GAMMA) ..27 Inserting the batteries into the remote control..4 Adjusting brightness (CONTRAST and BRIGHTNESS).......... -
Page 6: Getting Started
Getting started ◆ Inappropriate places for installation If this unit is not correctly installed in an appropriate place, it may cause fire or failure, or damage the unit itself. Carefully choose the place to install this unit by avoiding the places listed below. 1. -
Page 7: Accessory Check
RGB cable for PC RS-232C cable Power cable (WF76940) (WF76930) • Used for adjustment by service person. ■ Remote control parts ■ Others DPX-830 Digital Cinema Projector Projecteur Cineme Numerique OWNER ’ S MANUAL MODE D’EMPLOI BEDIENUNGSANLEITUNG BRUKSANVISNING MANUALE DI ISTRUZIONI... -
Page 8: Inserting The Batteries Into The Remote Control
◆ Inserting the batteries into the remote control 1. Remove the rear lid of the remote control. 2. Check the polarity markings (+, –) of the batteries, and set them correctly, inserting their (–) side first. • If the battery is inserted from the (+) side first, inserting the (–) side becomes difficult because the coil spring end hits on the battery side. -
Page 9: Controls And Functions
Important MENU • While the menu is on the screen, the KEYSTONE button functions as the ENTER button and the D-SUB/HDMI, DIGITAL CINEMA PROJECTOR DPX-830 VIDEO/S/COMP., and AUTO SYNC buttons function as , and buttons respectively. Rear panel 1. AC IN 2. -
Page 10: Remote Control Overview
◆ Remote control overview 1. IR signal transmitter 2. ON ( I ) button 3. AUTO button 4. NORMAL button 5. HDMI button 6. D-SUB button 7. Cursor buttons ( 8. MENU button POWER STANDBY 9. MEMORY buttons ASPECT 10. The picture quality adjusting buttons* AUTO ASPECT HIDE... -
Page 11: Using The Remote Control
Using the remote control ◆ Operational range Operate the remote control within a distance of 10 m from the projector, pointing the light beam at the remote control sensor (front Front panel Rear panel or rear) of the projector. AC IN Distance to sensor Angle to sensor 10 m... -
Page 12: Installation
AUTO SYNC ENTER MENU DIGITAL CINEMA PROJECTOR DPX-830 Projected distance • Do not place this projector on a carpet or blanket because the intake vent on the bottom surface will be blocked and the inside of the projector will overheat, causing a breakdown or fire. -
Page 13: Mounting The Projector On The Ceiling
When the projector is installed on the ceiling, the special ceiling mount bracket, which is commercially available, is required. Be sure to ask a certified installation specialist for installation of the projector. Contact your dealer for details. • Yamaha assumes no responsibilities for any damage caused by use of other manufacturer’s ceiling bracket and by inadequate installation conditions even within the warranty period. -
Page 14: Screen Size And Projection Distance
◆ Screen size and projection distance Refer to the following diagram to determine the screen size. When the aspect ratio of the screen is 16:9 Screen size 16:9 Projected distance (L) Diagonal Height A Width B Min. Max. Screen size inch inch inch... -
Page 15: Connections
Connections ◆ Basic home theater system connection Important • Make sure that the power of the projector and that of the video equipment are turned off. • Connection methods and terminal names may differ depending on the video equipment you are connnecting. Refer to the instruction manual for the video equipment. -
Page 16: Connecting To A Video Player, Etc
◆ Connecting to a video player, etc. Using the VIDEO terminal 1. Connect one end (yellow) of a commercially available video Video player, etc. cable to the VIDEO input terminal of this projector. 2. Connect the other end (yellow) of the video cable to the To VIDEO VIDEO output terminal of the video equipment. -
Page 17: Hdmi Or Dvi Connections
◆ HDMI or DVI connections You can project high-quality images by connecting the HDMI input terminal of this projector to video equipment having a HDMI output terminal or a DVI-D output terminal. In addition, this projector supports HDCP and is able to receive encrypted digital video data that are output from DVD players. -
Page 18: Connecting To A Computer
◆ Connecting to a computer Important • Make sure that the power of the projector and that of the computer are turned off. • When connecting the projector to a desktop computer, disconnect the RGB cable that is connected to the monitor. •... -
Page 19: Trigger Terminal
◆ TRIGGER terminal The TRIGGER terminal on the rear of the projector is a terminal that outputs 12 V signal to control an externally connected equipment when images are projected. To use the TRIGGER terminal, set TRIGGER OUT to ON in the SETUP menu. -
Page 20: Projection
D-SUB S-VIDEO STANDBY/ON button ENTER STANDBY/ON POWER STATUS AUTO SYNC MENU KEYSTN ENTER MENU MEMORY DIGITAL CINEMA PROJECTOR DPX-830 CONT. BRIGHT C.TEMP GAMMA SHARP IRIS SETTING D-SUB/HDMI RDP-81 button VIDEO/S/COMP. button 1. Confirm the POWER indicator lights up red. • If the projector was turned off before the lamp was cooled down sufficiently last time, the fan may start rotating and the STANDBY/ON button may not work after the power cable is plugged. -
Page 21: Keystone Adjustment
To stop projecting: 1. Press the STANDBY/ON ( ) button on the projector or the STANDBY ( ) button on the remote control. • A confirmation message is displayed. • To cancel the procedure, wait a while or press the MENU button. 2. -
Page 22: Examples Of The Aspect Ratio
Examples of the aspect ratio You can change the aspect ratio of the input video signal (or the ratio of width to height of the image). Display pattern changes according to the setting of SCREEN ASPECT in the INITIAL menu. The following table is in the case of 16:9 screen. Change the setting according to the type of the input video signal. -
Page 23: Viewing Computer Images
D-SUB button D-SUB S-VIDEO STANDBY/ON button ENTER STANDBY/ON POWER STATUS AUTO SYNC MENU KEYSTN ENTER MENU DIGITAL CINEMA PROJECTOR DPX-830 MEMORY CONT. BRIGHT C.TEMP AUTO SYNC button GAMMA SHARP IRIS SETTING D-SUB/HDMI button RDP-81 1. Confirm the POWER indicator lights up red. -
Page 24: Auto / Auto Sync Buttons
To stop projecting: 1. Press the STANDBY/ON ( ) button on the projector or the STANDBY ( ) button on the remote control. • A confirmation message is displayed. • To cancel the procedure, wait a while or press the MENU button. 2. -
Page 25: Menu
Menu ◆ Menu overview Menus are not displayed when no signal is received by the projector. IMAGE GAMMA DEFAULT DYNAMIC STANDARD REFERENCE DYNAMIC, STANDARD, CINEMA CINEMA GAMMA - CUSTOM1 ± 5 CUSTOM1 , CUSTOM2 GAMMA - CUSTOM2 ± 5 ± 30 CONTRAST ±... -
Page 26: How To Set The Menus
SATURATION Unavailable when the input source is HDMI or D-SUB source is an RGB signal. Available only when the VIDEO or S-VIDEO source is NTSC or 4.43NTSC signal. SHARPNESS Unavailable when the D-SUB or HDMI source is a computer signal. PROGRESSIVE MODE Available only when the input signal is TV50, TV60, 480i or 576i. -
Page 27: Menu Settings
◆ Menu settings The following items in the menus enable you to customize this projector. 1. IMAGE menu TV60 IMAGE GAMMA DEFAULT CONTRAST BRIGHTNESS COLOR TEMP. SATURATION SHARPNESS BrilliantColor ITEM SETTING FUNCTION GAMMA DEFAULT The appropriate gamma mode is automatically selected depending on the input signal. Select DEFAULT for normal use. - Page 28 2. SETUP menu TV60 SETUP SCREEN ASPECT 16:9 VERTICAL LOCATION LAMP MODE CINEMA AUTO POWER AUTO POWER SPLASH SCREEN HIDE SCREEN BLUE COLOR LOCATION FRONT/TABLE TRIGGER OUT TEST PATTERN CROSS HATCH ITEM SETTING FUNCTION SCREEN ASPECT 16:9, 4:3 Use to select the screen size. VERTICAL ±...
- Page 29 3. INITIAL menu TV60 INITIAL ASPECT DEFAULT MENU POSITION UPPER LEFT PROGRESSIVE AUTO MODE COLOR SYSTEM AUTO SET UP LEVEL DEFAULT SCART INPUT LANGUAGE ENGLISH RESET ALL EXECUTE ITEM SETTING FUNCTION ASPECT DEFAULT The appropriate aspect ratio is automatically selected depending on the input signal. Select DEFAULT for normal use.
- Page 30 4. SIGNAL menu TV60 SIGNAL HORIZ. POSITION 0 - 999 VERT. POSITON 0 - 999 PHASE 0 - 31 TRACKING 0 - 999 OVER SCAN 100 - 90% D-SUB INPUT AUTO BLACK MASK EXECUTE SYNC NOISE MASK A/D SETTING EXECUTE ITEM SETTING FUNCTION...
-
Page 31: Adjusting Video Images
8 Adjusting video images ◆ Selecting the gamma mode (GAMMA) You can select a preset gamma mode by using the menu (see page 23). 1. Display the IMAGE menu. 2. Select GAMMA by pressing the button. 3. Select your desired gamma mode by pressing the button. -
Page 32: Selecting The Color Temperature (Color Temp.)
◆ Selecting the color temperature (COLOR TEMP.) You can select a preset color temperature (white tone) using the menu (see page 23). 1. Display the IMAGE menu. 2. Select COLOR TEMP. by pressing the button. 3. Select your desired color temperature by pressing the button. -
Page 33: Adjusting Color (Saturation And Hue)
◆ Adjusting color (SATURATION and HUE) You can adjust the color of the projected image using the menu (see page 23). 1. Display the IMAGE menu. 2. Select SATURATION or HUE by pressing the button. 3. Adjust the selected item by pressing the button. -
Page 34: Memory Function
9 MEMORY function ◆ Saving memory settings The memory function saves up to 3 patterns of the image quality settings for each input source. Following is the list of items that can be saved. • GAMMA* • SATURATION • CONTRAST •... -
Page 35: Adjusting Computer Images
10 Adjusting computer images This projector automatically and properly projects video signals supplied from the computer. However, some video signals may not be projected depending on the type of the computer. In such cases, press the AUTO SYNC button on the projector or the AUTO button on the remote control (see page 20). -
Page 36: Replacing The Lamp
Replacing the lamp This projector is equipped with a lamp to project images. This lamp is a consumable, so it may burn out or its brightness may decrease during use. If this happens, replace the lamp with a new one as soon as possible. Be sure to replace the lamp with a new, commercially available lamp that is exclusive to this projector. -
Page 37: Replacing The Lamp
◆ Replacing the lamp Warning • Do not replace the lamp immediately after using the projector because the lamp would be extremely hot and it may cause burns. 1. Carefully turn the projector upside-down (a). 2. Loosen the screw (b) using a Phillips screwdriver (+), and remove the lamp cover (c). -
Page 38: Attaching A Lens Filter And Cap
• Do not force the lens cap onto the projector. • Make sure that the YAMAHA name on the lens cap is aligned parallel to the top and bottom edges of the projector. • The lens cap can be placed over the lens filter if a lens filter has been installed. -
Page 39: Troubleshooting
Troubleshooting ◆ Troubleshooting Refer to the chart below when this projector does not function properly. If the problem you are experiencing is not listed below or if the instructions do not help, stop using the projector and contact your dealer. No image appears on the screen. - Page 40 Problem Solution “NO SIGNAL” is displayed. • Turn on the power of the connected equipment, or check whether there is something wrong with the connected equipment. • Check whether the external equipment outputs signals. (Check this especially when the external equipment is a notebook computer.) •...
- Page 41 Others Problem Solution The exhaust vents emit warm • This air comes out after cooling the inside of the projector. It may feel hot, but this is not a malfunction. air. The menu can not be used. • The microcomputers inside the projector may be wrongly operating because of noise. ➜Press the STANDBY/ON button to turn off the lamp and unplug the power cable from the wall outlet.
-
Page 42: Indicators
Indicators This projector has two indicators, each of which shows the operation condition of the projector. Refer to Troubleshooting for additional indication signals. POWER indicator STATUS indicator STANDBY/ON button ◆ Normal conditions POWER STATUS CONDITION NOTE Stand-by. Steady red Warming up period (about 1 minute). The STANDBY/ON button cannot be used until the STATUS indicator is steady green. -
Page 43: Specifications
◆ Projector specifications The specifications and outside appearance of the projector are subject to change without prior notice. Type DLP™ projector Model DPX-830 Display Technology 0.65-inch Single chip DMD Pixel 1280 × 768 = 983040 pixels Projection lens F 2.4 – 2.6 f= 23 – 27.6 mm... -
Page 44: Component Signal Specifications
◆ Composite / S-video signal specifications Signal mode Resolution Horizontal frequency Vertical frequency Default mode for Default mode for Through mode (H × V) (kHz) (Hz) 16:9 screen 4:3 screen (H × V) (H × V) (H × V) TV60 (525i) –... -
Page 45: Dimension Drawings
*1: When ASPECT in the INITIAL menu is set to DEFAULT, and SCREEN ASPECT in the SETUP menu is set to 16:9. *2: When ASPECT in the INITIAL menu is set to DEFAULT, and SCREEN ASPECT in the SETUP menu is set to 4:3. *3: Available with RGB-CS (4 line) sources from SCART terminal. - Page 46 YAMAHA ELECTRONICS (UK) LTD. YAMAHA HOUSE, 200 RICKMANSWORTH ROAD WATFORD, HERTS WD18 7GQ, ENGLAND YAMAHA SCANDINAVIA A.B. J A WETTERGRENS GATA 1, BOX 30053, 400 43 VÄSTRA FRÖLUNDA, SWEDEN YAMAHA MUSIC AUSTRALIA PTY, LTD. 17-33 MARKET ST., SOUTH MELBOURNE, 3205 VIC., AUSTRALIA http://www.pureglare.com.au...
Need help?
Do you have a question about the DPX-830 and is the answer not in the manual?
Questions and answers