
Related Manuals for Campomatic FRZ360N


Summary of Contents for Campomatic FRZ360N
- Page 1 FRZ360N / FRZ360NS Installation, use and maintenance instructions Made in Italy INSTRUCTION MANUAL WWW.CAMPOMATIC.COM...
- Page 2 Mod. A Mod. B STANDARDS-WARNINGS AND RECOMMENDATIONS Thank you for purchasing one of our appliances. Please read these notes thoroughly as they have been written to help you obtain the maximum performance from the appliance. The quality of the appliance is guaranteed as each one of our products is fully tested as it comes off the production line.
- Page 3 Mod. A Mod. B STANDARDS-WARNINGS AND RECOMMENDATIONS This is an important safety requirement and must be complied with. In case of doubt, have the mains supply checked by a qualifi ed electrician. As with any other electrical appliance, a few fundamental rules must be observed during use: •...
- Page 4 STANDARDS-WARNINGS AND RECOMMENDATIONS When disposing of the appliance, comply with local waste disposal regulations. For further information on the treatment, recovery and recycling of this product, refer to the appropriate offi ces, local domestic waste collection service or the retailer from where the appliance was purchased. WARNING! At the end of the useful life of an appliance that makes use of R 600a refrigeration gas (isobu- tane) and fl...
-
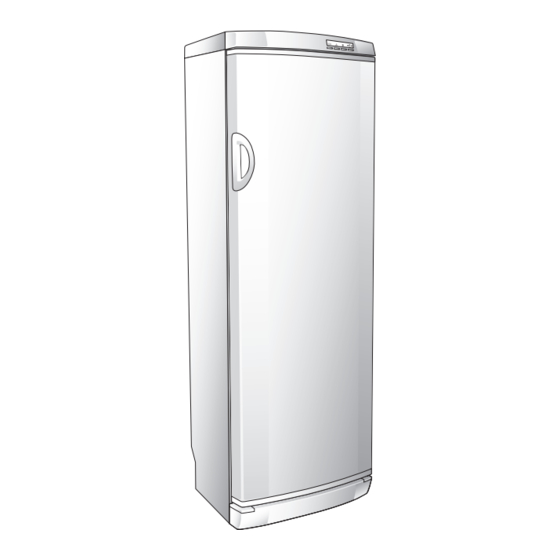
Page 5: Description Of The Appliance
Mod. A Mod. B DESCRIPTION OF THE APPLIANCE Upright units are large capacity domestic appliances for freezing, storing and refrigerating any types of food. The load-bearing STRUCTURE has been fabricated in steel panels which have been treated and electrostatically painted to resist mistreatment and to ensure that its “new” look remains unaltered over time. The INSULATION MATERIALS have been specially selected to ensure that the INTERNAL temperature remains constant and to pro- vide maximum storage space. - Page 6 REMOVING THE TRANSPORT PROTECTION DEVICES Check that the appliance is undamaged. The retailer must be informed of any damage to the appliance within 24 hours of delivery. 1 Remove the protection from the door gasket. The protection is used to protect the gasket during transport. The protection must be removed in order to ensure that the door seal functions correctly.
- Page 7 POSITIONING AND INSTALLING THE APPLIANCE Once the appliance has been unpacked, check that the mains voltage is the same as that indicated on the rating plate. If the door opening direction is as required, go to Point Otherwise, reverse the position of the hinges. To do this, carefully place the appliance on its back.
- Page 8 POSITIONING AND INSTALLING THE APPLIANCE 2e Replace the door. 2f Fit the pin from the lower hinge onto that supplied, then fi t the hinge and tighten the door. 2g Replace the hole plugs in the plinth with those supplied. 2h Replace the plinth by pushing it.
- Page 9 POSITIONING AND INSTALLING THE APPLIANCE 3 Level the fridge by adjusting the feet. When installing the appliance, remember the following: A Do not install it near to sources of heat such as heaters, radiators, cookers, etc. or in direct sunlight. B Position the appliance in a dry well-ventilated location.
-
Page 10: Electrical Connection
Green and 13 amp Fuse Yellow to Earth Brown Blue to to Live Neutral Cord Clamp ELECTRICAL CONNECTION Check that the mains voltage complies with that indicated on the rating plate located on the bottom left of the freezer compartment. If the mains socket does not have an earth connection or if the plug is not suitable for the mains supply system, refer to a qualifi... -
Page 11: Description Of The Control Panel
Fig.1 Fig.2 USING THE FREEZER COMPARTMENT Mod. A DESCRIPTION OF THE CONTROL PANEL Figure 1 shows the Display in normal position, while fi gure 2 shows the active position T1 “ECO” BUTTON T2 “ALARM-RESET” BUTTON T3 “SUPER” BUTTON T4 “FREEZER TEMPERATURE CONTROL” BUTTON S1 “ECO”... -
Page 12: Switching On The Appliance
Fig.a Fig.b Fig.c Fig.d USING THE FREEZER COMPARTMENT Mod. A SWITCHING ON THE APPLIANCE Close the door, insert the plug in the mains socket and set the required temperature. Allow the fridge to run empty until the set temperature appears on the display, then place the food in the compartment and close the door. T4 SETTING THE TEMPERATURE To start the appliance, press button “T4”... -
Page 13: "Super" Function
Fig.e Fig.f Fig.g Fig.h USING THE FREEZER COMPARTMENT Mod. A “SUPER” FUNCTION “S3” The “SUPER” function is used for quick freezing of food and must be activated at least 3 hours before placing the food in the freezer. The compressor will function continuously for “28 hours”. When button “T3” is pressed, the symbol “S3”... - Page 14 Fig.h USING THE FREEZER COMPARTMENT Mod. A IMPORTANT If the Alarm is activated (red background on the display), the food should be consumed immediately. If it is not possible to determine the precise time that the food started thawing, it is advisable to throw away all the food kept in the freezer in order to avoid any health risks.
-
Page 15: Freezing Fresh Food
Fig.i USING THE FREEZER COMPARTMENT Mod. A DOOR OPEN ALARM AND RESET FUNCTION “S4-S2” Opening the door activates both the audible alarm RESET “S2” and the door open symbol on the display “S2” “S4”. 40 seconds after the door has been opened, the door open alarm is activated. The alarm can be silenced either by pressing the RESET button (fi... - Page 16 Fig. 1 Fig. 2 S3-S4 USING THE FREEZER COMPARTMENT Mod. B DESCRIPTION OF THE CONTROL PANEL Figure 1 shows the Display in normal position, while fi gure 2 shows the active position T1 “ECO” BUTTON T2 “SUPER” BUTTON T3 “FREEZER TEMPERATURE CONTROL” BUTTON S1 “ECO”...
- Page 17 Fig.a Fig.b Fig.c Fig.d USING THE FREEZER COMPARTMENT Mod. B SWITCHING ON THE APPLIANCE Close the door, insert the plug in the mains socket and set the required temperature. Allow the fridge to run empty until the set temperature appears on the display, then place the food in the compartment and close the door. T3 SETTING THE TEMPERATURE To start the appliance, press button “T3”...
- Page 18 Fig.e Fig.f Fig.g USING THE FREEZER COMPARTMENT Mod. B “SUPER” FUNCTION “S2” The “SUPER” function is used for quick freezing of food and must be activated at least 3 hours before placing the food in the freezer. The compressor will function continuously for “28 hours”. When button “T2” is pressed, the symbol “S2”...
- Page 19 Fig.h USING THE FREEZER COMPARTMENT Mod. B “S3” DOOR OPEN ALARM FUNCTION Once the door has been opened for 10 seconds, the “ “ symbol runs across the display (fi g. h). 40 seconds after the door has been opened, the audible door open alarm will sound: both the display and audible alarm will cease once the door has been closed.
-
Page 20: Using The Freezer Compartment
USING THE FREEZER COMPARTMENT RECOMMENDATIONS: NEVER place ice cubes in the mouth or eat ice-lollies that have just been taken out of the freezer, as these can cause ice burns. DO NOT place sealed containers containing liquids such as soft-drinks or similar in the freezer. Hot foods and drinks must be allowed to cool before being placed in the freezer. -
Page 21: Defrosting - Cleaning
DEFROSTING - CLEANING In the case of the NO-FROST freezer model (A-B), defrosting is automatic and therefore does not require any intervention by the user. WARNING! Do not use any mechanical devices or other artifi cial methods other that those recommended by the manufacturer for accelerating the defrosting process. - Page 22 CLEANING For prolonged absences - Empty the compartments. - Disconnect the appliance from the mains electricity supply. - Clean both the compartments and dry them. - Leave the doors open to prevent bad smells or mould from forming. Power supply cable - Periodically inspect the power cable to check its condition.
-
Page 23: Troubleshooting
TROUBLESHOOTING 1) The appliance does not work. - Is there a power cut? - Is the plug inserted properly in the mains socket? - Is the power supply cable damaged? - Is the temperature setting correct?. 2) The temperature inside the compartments is not low enough. - Do the doors close properly? - Is the appliance installed near to a heat source? - Is the temperature setting correct?. -
Page 24: Technical Assistance Service
TECHNICAL ASSISTANCE SERVICE Before contacting the Assistance Service: - Check whether it is possible to rectify the problem by referring to the “Troubleshooting” guide. - Restart the appliance to check whether the problem has been resolved. If the problem still exists, disconnect the appliance from the mains electricity supply and repeat the operation after one hour. - Page 30 Fig.h...
- Page 31 Fig.e Fig.f Fig.g...
- Page 32 Fig.a Fig.b Fig.c Fig.d...
- Page 33 Fig. 1 Fig. 2 S3-S4...
- Page 34 Fig.i...
- Page 35 Fig.h...
- Page 36 Fig.e Fig.f Fig.g Fig.h...
- Page 37 Fig.a Fig.b Fig.c Fig.d...
- Page 38 Fig.1 Fig.2...
- Page 39 Green and 13 amp Fuse Yellow to Earth Brown Blue to to Live Neutral Cord Clamp...
- Page 44 Mod. A Mod. B...
- Page 46 Mod. A Mod. B...
- Page 47 Mod. A Mod. B...
- Page 48 FRZ360N / FRZ360NS ﺗﻌﻠﻴﻤﺎﺕ ﺍﻟﺘﺮﻛﻴﺐ ، ﺍﻻﺳﺘﺨﺪﺍﻡ ﻭﺍﻟﺼﻴﺎﻧﺔ ﺻﻨﻊ ﺇﻳﻄﺎﻟﻴﺎ Campomatic S.R.L. Via Configliachi 5/B . 35031, Abano Terme (Padova), ITALIA WWW.CAMPOMATIC.COM...
Need help?
Do you have a question about the FRZ360N and is the answer not in the manual?
Questions and answers