Table of Contents
Advertisement
Available languages
Available languages
FRANÇAIS
ENGLISH
ESPAÑOL
®
ULTRASHINE
Model Part No.:
®
1000150
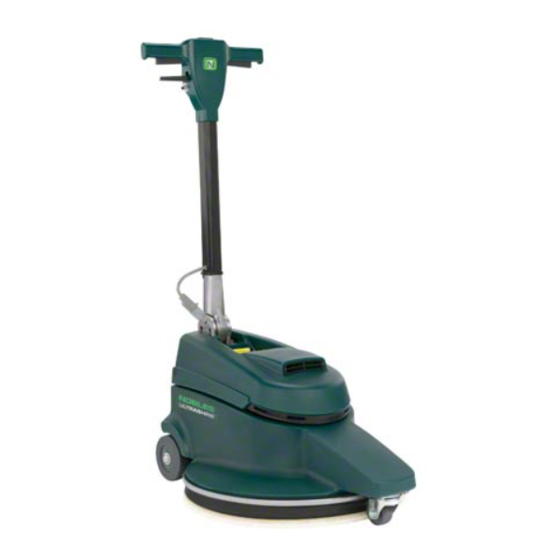
DUST CONTROL BURNISHER
PULIDORA CON CONTROL DE POLVO
MACHINE À POLIR À SYSTÈME DE CONTRÔLE DE LA POUSSIÈRE
OPERATOR AND PARTS MANUAL
MANUAL DEL OPERADOR Y REPUESTOS
MANUEL OPÉRATEUR ET PIÉCES
1001426
Rev. 04 (11-2006)
*1001426*
www.nobles.com
Advertisement
Chapters
Table of Contents

Related Manuals for Nobles Ultrashine 1000150


Summary of Contents for Nobles Ultrashine 1000150
- Page 1 Model Part No.: ® 1000150 DUST CONTROL BURNISHER PULIDORA CON CONTROL DE POLVO MACHINE À POLIR À SYSTÈME DE CONTRÔLE DE LA POUSSIÈRE OPERATOR AND PARTS MANUAL MANUAL DEL OPERADOR Y REPUESTOS MANUEL OPÉRATEUR ET PIÉCES 1001426 Rev. 04 (11-2006) *1001426* www.nobles.com...
-
Page 2: Important Safety Instructions
IMPORTANT SAFETY INSTRUCTIONS When using an electrical appliance, basic precautions should always be followed, including the following: READ ALL INSTRUCTIONS BEFORE USING (THIS APPLIANCE) WARNING - To reduce the risk of fire, explosion, electric shock, or injury: 1. Do not use appliance with flammable or combustible liquids/fumes such as gasoline or use in areas where they may be present. - Page 3 INSTRUCCIONES IMPORTANTES DE SEGURIDAD Deben observarse siempre instrucciones básicas de seguridad al usar artefactos eléctricos incluyendo las siguientes: LEER TODAS LAS INSTRUCCIONES DE SEGURIDAD ANTES DE USAR (ESTE ARTEFACTO) ADVERTENCIA - - Para reducir el riesgo de incendio, choque eléctrico o lesiones: 1.
- Page 4 LIRE TOUTES LES INSTRUCTIONS AVANT DE FAIRE FONCTIONNER (CET APPAREIL) ADVERTISSEMENT - Pour réduire les risques d’incendie, l’explosion, de choc électrique ou de blessure: 1. Ne pas aspirer des liquides/vapeurs inflammables ou combustibles, comme de l’essence, et ne pas faire fonctionner dans des endroits où peuvente se trouver de tels liquides. 2.
- Page 5 GROUNDING INSTRUCTIONS This appliance must be grounded. If it should malfunction or breakdown, grounding provides a path of least resistance for electric current to reduce the risk of electric shock. This appliance is equipped with a cord having an equipment--grounding conductor and grounding plug. The plug must be plugged into an appropriate outlet that is properly installed and grounded in accordance with all local codes and ordinances.
- Page 6 Este artefacto es para usar en un circuito nominal de 120 voltios y tiene un enchufe de aditamen- to para conectar a tierra que se parece al enchufe ilustrado en la figura. Asegurarse que el arte- facto esté conectado a un tomacorrientes con la misma configuración que el enchufe. No se debe usar un adaptador con este artefacto.
-
Page 7: Table Of Contents
Minneapolis, MN 55440 old machine components such as Phone: (800) 553--8033 or (763) 513--2850 batteries, hazardous fluids such as www.nobles.com antifreeze and oil, in a safe environmentally way according to your Specifications and parts are subject to change without notice. -
Page 8: Safety Precautions
OPERATION Unless trained and authorized. SAFETY PRECAUTIONS Unless operator manual is read and understood. Unless cord is properly grounded. This machine is intended for commercial use. It is With damaged cord or plug. designed exclusively to burnish dry hard floors in If not in proper operating condition. -
Page 9: Grounding Instructions
OPERATION 6. When transporting machine: The plug must be plugged into an appropriate outlet that is properly installed in accordance with Get assistance when lifting machine. all local codes and ordinances. Do not remove Unplug cord from wall outlet. ground pin; if missing, replace plug before use. Use tie- -down straps to secure machine to truck or trailer. -
Page 10: Machine Components
OPERATION MACHINE COMPONENTS MACHINE SETUP Carefully check carton for signs of damage. Report damages at once to carrier. INSTALLING PAD 1. Unplug the cord from the wall outlet. FOR SAFETY: Before leaving or servicing machine, unplug cord from wall outlet. 2. -
Page 11: Installing Dust Control Bag
OPERATION 2. Plug the power cord into a grounded wall outlet (Figure 5). INSTALLING DUST CONTROL BAG 1. Open the dust bag compartment at rear of Grounded 3 Hole Outlet machine by the the knob counter-clockwise (Figure 3). 2. Slide the dust control bag collar over the intake tube as shown. -
Page 12: Machine Maintenance
OPERATION 5. To adjust the pad pressure, turn the adjustment knob counter-clockwise to increase pad pressure MACHINE MAINTENANCE and clockwise to decrease (Figure 8). Do not adjust the pad pressure meter in the red zone, motor and floor damage may result. FOR SAFETY: Before leaving or servicing machine, unplug cord from wall outlet. -
Page 13: Transporting Machine
OPERATION TRANSPORTING MACHINE RECOMMENDED STOCK ITEMS 1. Unplug the power cord and remove the pad from Refer to the Parts List section for recommended stock the machine. Neatly coil the cord around the cord items. Stock Items are clearly identified with a bullet hook and handle to prevent cord damage. -
Page 14: Specifications
OPERATION SPECIFICATIONS MODEL UltraShine LENGTH 800mm (31.5 in) WIDTH 584mm (23 in) HEIGHT 1194mm (47 in) HEIGHT -- HANDLE FOLDED 470mm (18.5 in) WEIGHT 42 Kg (92 lbs) / 36 Kg (80 lbs) less power cord DRIVE MOTOR 120V -- 1.5 hp 15AMP 60Hz PAD/BRUSH SPEED 2000 RPM BRUSH PAD DIAMETER... - Page 15 OPERACIÓN Este manual se provee con cada nuevo modelo. Proporciona las instrucciones necesarias de operación DATOS DE LA MAQUINA y mantenimiento y una lista ilustrada de piezas. Leer este manual completamente y entender la Por favor complete al momento de la instalación para máquina antes de operar o prestar servicio.
-
Page 16: Precauciones De Seguridad
OPERACIÓN La información siguiente señala condiciones potencialmente peligrosas para el operador o el PRECAUCIONES DE SEGURIDAD equipo: PARA SEGURIDAD: Esta máquina sólo se usa para uso comercial. 1. No opere la máquina: Está diseñada exclusivamente para pulir pisos Con líquidos inflamables o cerca de los secos duros en un ambiente interior y no se vapores inflamables ya que puede ocurrir construye para ningún otro uso. -
Page 17: Instrucciones De Conexiona Tierra
OPERACIÓN 4. Antes de dejar o reparar la máquina: INSTRUCCIONES DE CONEXION A TIERRA Apague la máquina. La máquina debe conectarse a tierra. En caso de Desconecte el cable del enchufe de la mal funcionamiento o desarreglo, la conexión a pared. -
Page 18: Adhesivo De Seguridad
OPERACIÓN ADHESIVO DE SEGURIDAD La adhesivo de seguridad aparece en la máquina en la localización indicada. Sustituya el adhesivo si se ha desprendido, o está deteriorado o son ilegible. ETIQUETA DE ADVERTENCIA -- Ubicada encima de la máquina. UltraShine Burnisher (11- -06) -
Page 19: Componentes De La Maquina
OPERACIÓN COMPONENTES DE LA MAQUINA PREPARACION DE LA MAQUINA Inspeccionar cuidadosamente la caja por señales de daños. Informar inmediatamente acerca de daños, al transportista. INSTALACION DE LA ALMOHADILLA 1. Desenchufar el cordón del tomacorrientes de la pared. PARA SEGURIDAD: Antes de dejar o reparar la máquina, desconecte el cable del enchufe de la pared. -
Page 20: Instalacion De La Bolsa De Control De Polvo
OPERACIÓN 5. Después de instalar la almohadilla, retornar la 1. Tirar y girar el gancho para de desenganche máquina a la posición vertical. rápido para enrollar el cordón eléctrico hacia arriba y extraer el cordón eléctrico de la máquina (Figura 4). INSTALACION DE LA BOLSA DE CONTROL DE POLVO 1. -
Page 21: Mantenimiento De La Maquina
OPERACIÓN 4. Para comenzar a pulir, oprimir el botón de traba 7. No operar la máquina en el mismo lugar por un de seguridad, ubicado al tope del mango, y tirar período prolongado ya que puede resultar en de las palancas On/Off. Una vez que la máquina daños al piso. -
Page 22: Almacenamiento De La Maquina
OPERACIÓN ALMACENAMIENTO DE LA MAQUINA TRANSPORTE DE LA MAQUINA 1. Desenchufe el cordón eléctrico y extraiga la 1. Desenchufe el cordón eléctrico y extraiga la almohadilla de la máquina. Enrolle prolijamente el almohadilla de la máquina. Enrolle prolijamente el cordón alrededor del gancho del cordón y el cordón alrededor del gancho del cordón y el mango (Figura 9). -
Page 23: Localizacion De Fallas
OPERACIÓN LOCALIZACION DE FALLAS PROBLEMA CAUSA SOLUCION La máquina no funciona. La máquina está desenchufada. Enchufar la máquina. La conexión del cordón entre el Asegurar una conexión apropiada del mango y la base no está bien firme. cordón. Está activado el interruptor de Regraduar el interruptor de circuitos circuitos. -
Page 24: Especificaciones
OPERACIÓN ESPECIFICACIONES MODELO UltraShine LONGITUD 800mm (31.5 pulg.) ANCHO 584mm (23 pulg.) ALTURA 1194mm (47 pulg.) ALTURA -- MANGO PLEGADO 470mm (18.5 pulg.) PESO 42 Kg (92 lbs) / 36 Kg (80 lbs) menos el cordón eléctrico MOTOR IMPULSOR 120V -- 1.5 hp 15AMP 60Hz VELOCIDAD DE LA ALMOHADILLA/CEPILLO 2000 RPM DIAMETRO DE LA ALMOHADILLA CEPILLO... - Page 25 FONCTIONNEMENT Ce manuel est fourni avec chaque nouveau modèle. Il fournit les instructions nécessaires au fonctionnement DONNÉES DE LA MACHINE et à l’entretien. Lisez complètement ce manuel et familiarisez- -vous avec la machine avant de A remplir au moment de l’installation à titre de référence. l’utiliser ou de l’entretenir.
-
Page 26: Mesures De Sécurité
FONCTIONNEMENT MISE EN GARDE: N’utilisez pas la machine MESURES DE SÉCURITÉ en extérieur. N’exposez pas la machine à la pluie. Entreposez la machine à l’intérieur. Cette machine est conçue pour un usage Les signaux d’information ci- -après indiquent les commercial. Elle est destinée exclusivement au situations potentiellement dangereuses pour polissage des sols intérieurs à... -
Page 27: Instructions De Mise A La Terre
FONCTIONNEMENT Ne relâchez la poignée qu’après l’arrêt complet du patin. INSTRUCTIONS DE MISE A LA TERRE Roulez lentement sur les pentes et sur les La machine doit être mise à la terre. En cas de surfaces glissantes. dysfonctionnement ou de panne, la mise à la terre Empêchez les enfants de jouer à... -
Page 28: Étiquettes De Mise En Garde
FONCTIONNEMENT ÉTIQUETTES DE MISE EN GARDE L’étiquette de mise en garde apparaît sur la machine à l’emplacement indiqué. Remplacez l’étiquette lorsqu’elle est endommagées ou qu’elle devient illisible. ÉTIQUETTE MISE EN GARDE - - SITUÉE AU--DESSUS DE LA MACHINE. UltraShine Burnisher (11- -06) -
Page 29: Composants De La Machine
FONCTIONNEMENT COMPOSANTS DE LA MACHINE MISE EN SERVICE DE LA MACHINE Vérifiez soigneusement si le carton ne présente pas de dommages. Signalez immédiatement tout dommage au transporteur. MISE EN PLACE DU PATIN 1. Débranchez le cordon de la prise murale. POUR VOTRE SECURITE: Avant de quitter ou d’entretenir la machine, débranchez le cordon de la prise murale. -
Page 30: Installation Du Sac A Poussiere
FONCTIONNEMENT 4. Pour installer le patin, retirez la bague de blocage central en plastique du pignon menant du patin, en FONCTIONNEMENT DE LA MACHINE la tournant dans le sens contraire des aiguilles d’une montre. Positionnez le patin sur le pignon menant et réinsérez la bague en la faisant pivoter POUR VOTRE SECURITE: N’utilisez pas la dans le sens des aiguilles d’une montre. - Page 31 FONCTIONNEMENT 3. Abaissez la poignée à une hauteur de manipulation souhaitée en tirant sur le levier d’ajustement de hauteur de la poignée. Relâchez le levier pour engager la poignée (Figure 6). FIG. 8 6. Commencez le polissage en vous éloignant du cordon et de la prise murale.
-
Page 32: Entretien De La Machine
FONCTIONNEMENT ENTRETIEN DE LA MACHINE POUR VOTRE SECURITE: Avant d’entretenir ou de réparer la machine, débranchez le cordon de la prise murale. 1. Après chaque utilisation, vérifiez l’usure du patin de polissage. Si le patin est usé, retirez--le et retournez--le ou remplacez--le 2. -
Page 33: Depistage Des Pannes
FONCTIONNEMENT DEPISTAGE DES PANNES PROBLEME CAUSE REMEDE La machine ne fonctionne pas. La machine est débranchée. Branchez la machine. Le connecteur du cordon entre la Branchez correctement le poignée et la base n’est pas connecteur. correctement branché. Coupe--circuit de la machine Réenclenchez le coupe--circuit de la déclenché. -
Page 34: Donnees Techniques
FONCTIONNEMENT DONNEES TECHNIQUES MODELE UltraShine LONGUEUR 800mm (31.5 in) LARGEUR 584mm (23 in) HAUTEUR 1194mm (47 in) HAUTEUR – POIGNEE REPLIEE 470mm (18.5 in) POIDS 42 Kg (92 lbs) / 36 Kg (80 lbs) moins de cordon de secteur MOTEUR D’ENTRAINEMENT 120V -- 1.5 hp 15AMP 60Hz VITESSE DU PATIN 2000 RPM @ 15 AMPS... -
Page 35: Electrical Diagram
ELECTRICAL DIAGRAMS - DIAGRAMAS ELECTRICA - SYSTÈM ÉLECTRIQUE 120V MAIN SWITCH BLACK BLACK CIRCUIT BREAKER WHITE POWER CORD GREEN CORD GROUND TO MOTOR HANDLE COVER GREEN WHITE BLACK BLACK WHITE TOP OF MOTOR PRESSURE METER UltraShine Burnisher (01- -02) -
Page 36: Parts List
PARTS LIST - LISTA DE PIEZAS - LISTE DES PIÈCES HANDLE GROUP / GRUPO DE LE MANIJA / GROUPE POIGNÉE 50 51 UltraShine Burnisher (11- -06) - Page 37 612863 NUT, M4 603108 SPRING 612456 WASHER, PLAIN 140239 SCREW, 3/8X1- -3/4 SHOULDER 612388 SCREW, M4X8 PANPHL 612770 LABEL, NOBLES HANDLE 1001649 ROD, HANDLE 612477 COVER, GEAR 1000482 TUBE, HANDLE 130176 DBELT CLIP, STRAIN- -RELIEF (OPTIONAL) 1001169 DCIRCUIT BREAKER, 17AMP 612919 ASM., WIRE #12BLKX100MM...
-
Page 38: Base Group
PARTS LIST - LISTA DE PIEZAS - LISTE DES PIÈCES BASE GROUP / BASE GRUPO / GROUPE BASE UltraShine Burnisher (11- -06) - Page 39 PARTS LIST - LISTA DE PIEZAS - LISTE DES PIÈCES BASE GROUP / BASE GRUPO / GROUPE BASE PART # DESCRIPTION QTY. PART # DESCRIPTION QTY. 15678 SCREW, M6X1.0X16 HXHDCP 15675 SCREW, M8X1.25X16 HXHDCP 140016 WASHER, 1/4 LOCK ∇ 26 600974 DKNOB, STAR 4 EAR 3/8ID W/SET SCREW...
-
Page 40: Pad Driver Group
PARTS LIST - LISTA DE PIEZAS - LISTE DES PIÈCES PAD DRIVER GROUP / GRUPO IMPULSOR DE LA ALMOHADILLA / GROUPE ENTRAINEMENT DU PATIN Before SN 10218332 UltraShine Burnisher (11- -06) - Page 41 PARTS LIST - LISTA DE PIEZAS - LISTE DES PIÈCES PAD DRIVER GROUP / GRUPO IMPULSOR DE LA ALMOHADILLA / GROUPE ENTRAINEMENT DU PATIN PART # DESCRIPTION QTY. PART # DESCRIPTION QTY. 613910 STRAP, MOTOR STOP 20536- -2 WASHER, FLAT, 0.47B 1.19D .03 140003 WASHER, 1/4X1 FENDER 611859...
Need help?
Do you have a question about the Ultrashine 1000150 and is the answer not in the manual?
Questions and answers