Table of Contents
Advertisement
Quick Links
Advertisement
Table of Contents

Subscribe to Our Youtube Channel
Related Manuals for Aztech HIPC700


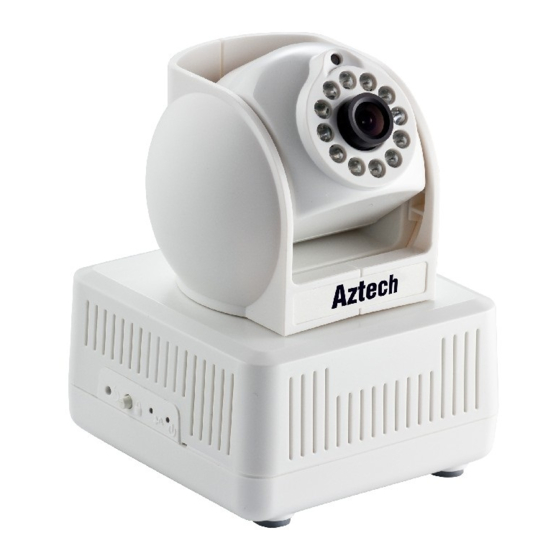
Summary of Contents for Aztech HIPC700
- Page 1 Aztech HIPC700 Aztech HomePlug IP Camera V1.0...
- Page 2 User Manual Legal Notice 2013 © All rights reserved. Version 1.0 No part of this document may be reproduced, republished, or retransmitted in any form or by any means whatsoever, whether electronically or mechanically, including, but not limited to, by way of photocopying, recording, information recording, or through retrieval systems without the express written permission.
-
Page 3: Table Of Contents
User Manual Contents About the Product ..............4 How Does It Work? ....................... 4 Package Contents ....................5 Pairing the Device ........................ 7 How to Use Simple Connect ....................8 Creating a Secured HomePlug AV Network ............10 Joining an Existing Secured HomePlug AV Network ..........15 Enhance your HomePlug AV Performance .............. -
Page 4: About The Product
User Manual About the Product The HIPC700 HPCam home monitoring solution is the first of its kind using HomePlug AV- compliant Powerline Communications (PLC) technology. The advanced Plug and Play Technology automatically configures and connects the HIPC700 HPCam to the plugCAM App. -
Page 5: Package Contents
User Manual Package Contents The package contains the following items: Aztech HIPC700 Power Cord Easy Start Guide Page 5 of 43... - Page 6 User Manual EVICE ESIGN Item Name Description Light Sensor Side Panel Lens Lens with IR reflection coating IR Light LED For night vision Press and hold for over 1 second to reset factory default Reset Button Press 1 to 3 seconds to enter into “Pairing Procedure” (creating an encrypted PLC network).
-
Page 7: Pairing The Device
Modem Router’s Ethernet LAN port using an Ethernet cable. 3. In ROOM B plug in your HIPC700 HPCam into the wall outlet then connect it to your computer’s Ethernet Port using an Ethernet cable. Your HIPC700 HPCam is now ready to use. -
Page 8: How To Use Simple Connect
User Manual How to Use Simple Connect Simple Connect provides a more convenient way of creating your HomePlug AV network without the need to open the HomePlug AV Web User Interface from a computer. The button has three main functions which include: ... - Page 9 Ethernet LED will turn off on turn on adapter to pair the devices. The Power LED (Ethernet is connected). The Powerline will blink to indicate that the button is pressed Activity LED will switch OFF on both units. HIPC700 HPCamera HomePlug AV Page 9 of 43...
-
Page 10: Creating A Secured Homeplug Av Network
Press the Simple Connect button of HomePlug AV X for 10 seconds. Powerline Activity LED will turn OFF. Power LED will Turn off and ON indicating that the Private Network Name has been randomized. HomePlug AV HIPC700 HPCamera Page 10 of 43... - Page 11 User Manual Step 2 Press Simple Connect for two seconds on your HIPC700 HPCam. After you release the button, the Power LED will blink. If the Power LED did not blink, press Simple Connect again for two seconds. Note: Do not press Simple Connect for more than two seconds.
- Page 12 User Manual HIPC700 HPCamera HomePlug AV Step 4 To confirm if the connection was established, check the LEDs. The Power LEDs and the Powerline Activity LEDs on both HomePlugs are ON. HIPC700 HPCamera HomePlug AV Page 12 of 43...
- Page 13 HomePlug X or HomePlug Y is off, this means the pairing is not successful. In this case, you have to redo the entire process again (simply repeat steps 1 to 3). HIPC700 HPCamera HomePlug AV Page 13 of 43...
- Page 14 User Manual Step 5 Unplug the HomePlug AVs and then connect them to your Ethernet devices using the Ethernet cables from the product package. After connecting the Ethernet cable, plug the HomePlugs directly to a wall outlet. An Ethernet-enabled device can be a router, computer, hub, gaming console, IP phone, network printer, or IP TV set-top box.
-
Page 15: Joining An Existing Secured Homeplug Av Network
User Manual Joining an Existing Secured HomePlug AV Network To enable a new device to join an existing network, Simple Connect will copy the Private Network Name of the existing network to the new HomePlug AV. You only have to pair the new Homeplug AV device to any of the devices within the existing Homeplug AV Network by pressing the Simple connect. - Page 16 User Manual Step 2 Press Simple Connect for 10 seconds from HomePlug AV Z. After you release the button, Power LED and Ethernet LED (if Ethernet is connected) will turn off and turn on. Note: If the Power and Ethernet LED did not turn off and on, press Simple Connect again for 5-8 seconds.
- Page 17 User Manual Step 3 Press Simple Connect Button for two seconds on the existing HomePlug AV device. After you release the button, the Power LED will continuously blink. If the Power LED did not blink, press Simple Connect again for two seconds. Make sure to press Simple Connect Button again on the HomePlug AV Z within two minutes after you press Simple Connect from the existing network.
- Page 18 User Manual Step 4 To confirm if the connection was established, check the LEDs. The Power LEDs and the Powerline Activity LEDs on all HomePlugs are on If the Powerline Activity LED on HomePlug Z is off, this means the pairing was unsuccessful. You have to repeat steps 1 to 3 again until all LEDS in all Homeplug AV devices are on .
-
Page 19: Enhance Your Homeplug Av Performance
User Manual Step 5 Unplug HomePlug Z and then connect it to your Ethernet device using the Ethernet cables from the product package. After connecting the Ethernet cable, plug HomePlug Z directly to a wall outlet. An Ethernet-enabled device can be a router, computer, hub, gaming console, IP phone, network printer, or IP TV set-top box. - Page 20 User Manual The following connections are NOT recommended. Connection via Power Strip If a HomePlug AV device would be plugged via power strip, ensure that the power strip does not support a noise filter or a surge protector. Electrical Interference Some household appliances may produce noise emission.
-
Page 21: Using The Plugcam App
User Manual Using the PlugCam App Plug Cam Installation Search and download the free PlugCam App on Apple Store or Google Play to your smartphones. Interface Overview Main Screen Page 21 of 43... -
Page 22: Add Camera
Show App and plugCAM information Add Camera Allows you to add camera onto your smartphone, there 3 options to add camera, “QR Code Scan”, “Local Search” and “Manual”. P.S. Each HIPC700 HPCamera adapter can support up to 7 plugCAMs. Page 22 of 43... -
Page 23: Qr Code Scan
QR Code Scan 1. Tap on to start QR code scan. 2. Scan the QR code that located beneath your HIPC700 HPCamera. 3. Tap “Save” add camera list Local Search Ensure that your HPCamera and your mobile device are registered under the same network. -
Page 24: Add Manually
User Manual Add Manually 1. Tap on to manually add a camera. 2. Type the HPCamera’s Camera ID and Password. 3. Tap “Save” to add the HPCamera to the Camera list. Activating Your Camera 1. Connect to the HPCamera with its default password. 2. - Page 25 User Manual View Images 1. Select a camera from the camera list 2. If ID and Password are all correct, plugCAM App will start loading camera image 3. If the camera is offline, please check if you have installed the camera properly Page 25 of 43...
-
Page 26: Reload Camera
User Manual Take a Snapshot 1. While accessing the camera, you can tap the icon to take a quick snapshot. 2. The snapshot will then be saved to album. Reload Camera 1. Tap to reload the camera image Cameras Delete Camera 1. - Page 27 User Manual Page 27 of 43...
-
Page 28: Time & Date
User Manual Time & Date 1. The default setting is Off, tap “On” to turn on time & date information. 2. Tap “Done” to confirm, then time & date will show up on the viewing screen. Albums View Albums to start. Page 28 of 43... -
Page 29: Delete Albums
User Manual Delete Albums 1. “Edit” > “Delete” > “Done” to confirm. View & Delete, Email Pictures 1. Select an album 2. Tap on the picture you want to see for larger view Page 29 of 43... -
Page 30: Passcode Lock
User Manual 3. Tap on to Delete, Email, and Save picture. If your don’t want to do any change, just press “Cancel “ to go back App Settings to start Passcode lock Default setting is “Off”. Turn on “Passcode Lock” can help prevent others connect to your plugCAM without your permission. -
Page 31: Background Skin
User Manual Turn ON Passcode 1. Tap on the Passcode Lock 2. Enter passcode and confirm it again Turn OFF Passcode 1. Tap on the passcode lock 2. Enter passcode again to turn off passcode lock Background Skin 1. Tap on Background skin 2. - Page 32 User Manual About 1. Tap to start. Page 32 of 43...
- Page 33 User Manual Aztech HPCamera System PC Software Installation Insert the software CD to your CD-R device or download the Aztech HPCamera System from our official website. 3. Double click setup.exe to start with the installation. 4. Wait for the setup to initialize.
- Page 34 User Manual 4. Wait for the Installation Procedure to complete automatically. 5. The Set-up wizard will notify you about the successful installation, and would also be creating a shortcut on your desktop. Shortcut on desktop Program main screen Page 34 of 43...
- Page 35 User Manual Camera Function Introduction Main Function Display Setting Camera Settings Page 35 of 43...
- Page 36 User Manual Search Camera in Local Network 1. Select an empty channel. 2. Click to add in a new plugCAM device. 3. Click search to find plugCAM in the same network, wait for plugCAM ID shows up, and then type in password, press “ Save “. 4.
- Page 37 User Manual Add Camera Manually 1. Select an empty channel 2. Click to add in a new plugCAM device 3. Type in ID and password, press “Save”. 4. Click selected channel to connect to camera. 5. plugCAM image will show on the display channel Page 37 of 43...
-
Page 38: Basic Information
User Manual Edit Camera Basic Information, Alarm, and Recording Function Click for setting up basic info, recording, motion detection, and email alert…etc Basic Information Change password and name of selected plugCAM Alarm Setting Enable alarm: choose Page 38 of 43... - Page 39 User Manual Full-time Alert If you want to set Full-time Alert, you may adjust the sensitivity by clicking the setting button of Motion Detection Then set Alarm Methods: Alarm sound, Snapshot, Recording, Send E-mail Clicking the Setting button to enter E-mail address Warming: Web-based POP/SMTP Email server such as Gmail and Hotmail are not supported.
-
Page 40: 5.5.4 Schedule Recording
User Manual 5.5.4 Schedule Recording to add duration to edit selected duration to delete selected duration 5.5.4.1 Take Snapshot 1. Click the snapshot button to take snapshot from the camera 2. You can see the picture you take immediately; you can also open the file folder to delete snapshots. - Page 41 User Manual Set Snapshot and Video Recording Path Click to choose a folder that you want to save pictures and videos Start to activate MPEG 4 recording. Click to show history of video or snapshot Playback Saved Videos 1. Click on ‘Playback’, then choose a camera to see its record 2.
-
Page 42: Appendix
User Manual Appendix FCC Statement This equipment has been tested and complies with the specifications for a Class B digital device, pursuant to Part 15 of the FCC Rules. These limits are designed to provide reasonable protection against harmful interference in a residential installation. This equipment generates, uses, and can radiate radio frequency energy and, if not installed and used according to the instructions, may cause harmful interference to radio communications. -
Page 43: Safety Warnings
User Manual Safety Warnings For your safety, be sure to read and follow all warning notices and instructions. Do not open the device. Opening or removing the device cover can expose you to dangerous high voltage points or other risks. Only qualified service personnel can service the device.
Need help?
Do you have a question about the HIPC700 and is the answer not in the manual?
Questions and answers