Table of Contents
Advertisement
Advertisement
Table of Contents

Related Manuals for Aztech WIPC411FHD


Summary of Contents for Aztech WIPC411FHD
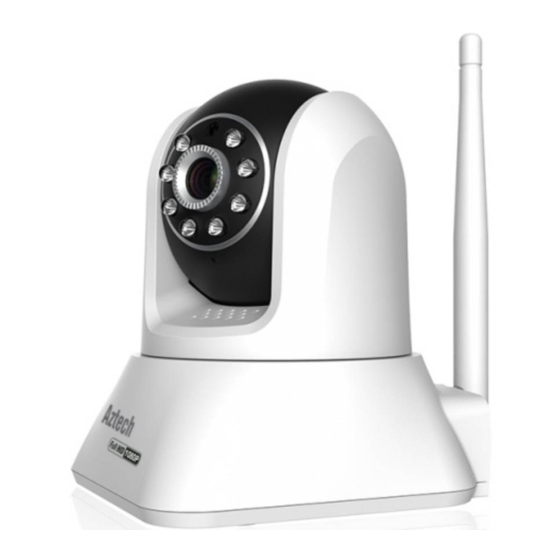
- Page 1 WIPC411FHD FULL HD WIRELESS IP CAMERA WITH PAN AND TILT V1.0...
- Page 2 User Manual...
- Page 3 User Manual © Copyright 2016 All rights reserved. Ver1.0 No part of this document may be reproduced, republished, or retransmitted in any form or by any means whatsoever, whether electronically or mechanically, including, but not limited to, by way of photocopying, recording, information recording, or through retrieval systems without the express written permission.
-
Page 4: Table Of Contents
About the Product ........................5 Function and Features ......................6 Appearance and Interface ....................7 Appearance..........................7 Interfaces of the WIPC411FHD ....................7 LAN Port LED Behaviors ......................8 Surveillance Basics ........................8 The Setup............................. 8 What you have to Prepare First ....................8 Viewing the IP Camera ...................... -
Page 5: About The Product
Your IP Camera package should contain the following items. If any of the listed items are missing, please contact your reseller from where you purchased the camera for assistance. The Package includes: WIPC411FHD Wireless Antenna 5V Power Adapter ... -
Page 6: Function And Features
Viewing. Empowering you further with a complete area surveillance experience, the WIPC411FHD is also equipped with a 355° horizontal pan, a 120° vertical tilt, and 3 x digital zoom features for more camera control. It also sports improved 85° Angle of View (AoV) to ensure an effective surveillance area range. -
Page 7: Appearance And Interface
2. WPS Button. Press this button for 2 seconds to enable the WPS connectivity of the WIPC411FHD to a wireless router that has a WPS feature. You may have to browse your router’s instruction manual to know how many seconds it has to be pressed for a successful WPS pairing. -
Page 8: Lan Port Led Behaviors
Surveillance Basics The Setup As seen on the diagram above, the WIPC411FHD is required to have an active internet connection. Hence, IP camera to a router with an active internet connection is needed. You can do this in two (2) ways: a. - Page 9 Configuring your HOME router’s Port Forward settings for your IP Camera. For Aztech routers, you may refer to the Port Forwarding section of this user manual and/or download the Port Forwarding Instructions using this LINK. This is ESSENTIAL since the PC that you have at the OFFICE would be accessing your IP Camera through your HOME ROUTER.
-
Page 10: Viewing The Ip Camera
Viewing the IP Camera Viewing the IP Camera using IP Cam App 1. Download, install, and launch the Aztech IP Cam App 2 at Google Play Store or iTunes/AppStore. You may scan the QR Code found at the Packaging Box to automatically search for the app. -
Page 11: Viewing The Ip Camera From Your Home Pc
SECONDS to reset the device to its factory defaults. To start viewing the IP Camera from your HOME PC: 1. Run the WIPC411FHD Utility on your HOME PC downloadable from the Aztech Support Site (www.aztech.com/support). NOTE: If a firewall is enabled in your PC, a popup window will ask for your confirmation if you would be blocking or allowing the software to run. -
Page 12: Viewing The Ip Camera Remotely From A Pc
Viewing the IP Camera REMOTELY from a PC If you want to remotely view your HOME IP Camera OUTSIDE or from the OFFICE, you can use the WIPC411FHD Utility to get the DDNS Link or the External Access Link. NOTE : For the external access address / DDNS Link to work, a successful port forwarding setup for your HOME IP CAMERA (or for each IP Camera that you have at home) on your HOME ROUTER is needed. - Page 13 User Manual d. Copy the URL generated on the External Access field. This link would allow you to access your HOME IP camera outside or from your OFFICE as long as the devices that you would use (e.g. laptop, smartphone) have a 4G/3G/Wi-Fi connection.
-
Page 14: The Web User Interface
NOTE: Internet Explorer users (especially if you are using Windows 7 and lower versions) are strongly advised to add the Aztech WIPC411FHD’s web user interface to its Compatibility Viewing list. Ensure to update your web browsers. For Google Chrome, Safari, Mozilla Firefox, and Internet Explorer 11 / Win 8, there is no need to install ActiveX. -
Page 15: View
User Manual View Provides a real time view of the area being monitored including pan/tilt, viewing resolution and control, including an attached SD Card’s accessibility. 1. Resolution. Allows you to change the current viewing resolution of the viewing area. This can be useful if you are viewing your IP camera remotely to save bandwidth and/or data usage. -
Page 16: Media
User Manual Media Allows you to configure the media settings of video, audio, and image properties such as an image’s brightness and contrast, A. Video Allows you to configure the frequency used, including the resolution settings of all streams including screen captures, and the modification of time and camera name stamp settings. - Page 17 Overlay Options. Through this setting, you can add the Time and Camera Name to the images captured by your IP Camera. You can also assign a camera name for your WIPC411FHD camera as preferred. B. Audio Allows you to configure the volume for both input and output, enable and disable speakers, and even modify the audio capture and audio type method used in all streams.
- Page 18 User Manual C. Image. Allows you to configure the IR and LED settings, its night mode, including the brightness and contrast of your IP Camera Live Camera Feed. Provides live camera preview which you can easily refer to upon adjusting the settings. ...
-
Page 19: Network
User Manual Network Allows you to configure the LAN Settings, Port Settings, WiFi Setting, including the remote accessibility settings of your IP Camera. A. Network. Allows you to configure the LAN Settings and port settings of your router. LAN Settings. The default LAN settings are set to Dynamic, with its DNS Configuration type set to DHCP. - Page 20 User Manual You can click the “Search” button, and it will show you a list of WIFI networks detected. By selecting one SSID, all data fields will be filled up automatically (e.g. SSID, encryption algorithm etc.). All you have to do is to enter the wireless password in the Key and the Re-Type Key field correctly.
- Page 21 User Manual suggested to set a Port Forwarding Function on your router. Internet IP Address (WAN IP Test). Click the “Show” button, it will show you another page displaying the WAN IP address when it is connected to the Internet.
-
Page 22: Alarm
User Manual Alarm A. Motion Detection Setting. Allows you to monitor movements made on the monitored area. Four area frames can be enabled/disabled, managed, resized, and distributed across the monitored area window. Movements detected within each window would be able to trigger an alarm. Detection sensitivity settings for each corresponding area window can also be configured in this area. - Page 23 User Manual Record a 30-second video on the SD card (including a 5-second duration video before the alarm was triggered). Send the recorded video / live picture on the SD card to the FTP server. You may have to enable “Save the video/picture on TF/SD card” function, and ensure that an SD card is inserted in your camera first.
-
Page 24: Advanced
User Manual Advanced A. User. Allows you to configure the user name and password of the three IP camera viewing account levels : Admin, User, and Guest. The Admin account has the highest authority and can perform all possible changes on the IP Camera’s settings. - Page 25 User Manual The Guest account can only monitor the surveillance area without any pan / tilt / cruise control. This account does not have any authority to change your IP Camera’s settings. B. Auto Capture Setting Allows you to configure the Auto image capture settings of your IP Camera.
- Page 26 User Manual C. FTP Setting. In order to use FTP function, you should first set a valid username and password of your FTP Server. Storage and the authority to write and create sub-category into it is also required for the FTP Auto Capture Setting to work.
- Page 27 User Manual E. Schedule Recording. Allows you to configure the recording settings of each stream, including the recording properties such as its duration, and the days, and selected hours/minutes wherein video will be recorded. F. Terminal. Allows you to configure the number of cruise laps your camera would make upon pressing the cruise buttons , and even modify your IP Camera’s pan/tilt/zoom speed.
-
Page 28: System
User Manual System A. Device Information Checking. Displays your IP Camera’s basic device properties such as its current connection status, its MAC address, the Subnet Mask and its default gateway, the primary and secondary DNS, the running duration time, and the SD Card status. NOTE : The device supports a maximum of 128GB SD card. - Page 29 Camera. Simply click the browse button, locate the firmware file, and click confirm. After the upgrade, the IP Camera will restart with the upgraded firmware loaded. NOTE: It is important to ONLY use firmware OFFICIALLY RELEASED by Aztech. These can be downloaded from the Aztech Support Site (www.aztech.com/support).
- Page 30 User Manual D. System Log. Displays the current activities made in your IP Camera, such as logins and logouts of various devices, and other device oriented activities.
-
Page 31: Configuring Other Settings
Configuring Other Settings Android and iPhone Mobile Application Set Up 1. Download and Install Aztech IP Cam 2 app at Google Play Store or the Aztech IP Cam app on iTunes/AppStore. You may scan the QR Code found at the Packaging Box to automatically search for the app. -
Page 32: Mobile Phone Browsing
User Manual Mobile Phone Browsing After connecting to the network, you can view the IP Camera’s monitored area through its mobile phone. The device will then send MJPEG picture to the mobile phone, using the image resolution preferred (mentioned on Chapter 7.1.1). Viewing ways are found below: 1)... -
Page 33: Port Forwarding
User Manual Port Forwarding This section provides procedure in setting the Port Forwarding Function of your router. Please take note that the IP Camera must be connected to the Router and the Internet Connection is up. After it has been configured successfully, user may now be able to access the IP Camera remotely using another computer. - Page 34 User Manual To know if the Port Forwarding process is successful, you would be able to access the IP Camera through the following: To access the IP Camera at home: a. Launch a web browser. b. On the address bar, simply type in the IP Address and the Port Number of the IP Camera separated by a colon (e.g.
-
Page 35: Ddns
A. Manufacturer’s Domain Name Each Aztech IP camera is configured with a unique DDNS setting. The domain name has been integrated into devices during production. For example, if you enter the domain name seen below (this can be found on the Network>Remote Access page), your web browser will automatically connect to the IP camera and display the IP address. - Page 36 User Manual Additional Notes : The domain name is made possible through port forwarding. The domain name will change into the IP address and port number of the device when visited through its domain name. If the IP camera can be visited through its IP address but cannot be visited through its manufacturer’s domain name, please check the DNS info if it is available or not and make sure that the DNS setting is the same with the DNS setting of the PC that you have at home.
-
Page 37: Multiple Device Monitor System (Mdms)
Multi Device Monitor System is a free software offered in conjunction with the WIPC411FHD which allows several IP Cameras on the LAN and WAN to be browsed at the same time. The software also supports snapshots, video recording and so on. -
Page 38: Adding The Web Ui To Your Ie's Compatibility View List
> Compatibility View Settings. 3. On the Compatibility View Settings window, the current site’s domain (in this case, aztech.com) is automatically entered on the Add this website field. Simply press the Add button and it would immediately be listed on the Websites you’ve added to Compatibility View list. - Page 39 User Manual...
- Page 40 User Manual Copyright © 2016 Aztech Technologies Pte Ltd (CRN:199800635M). All rights reserved.
Need help?
Do you have a question about the WIPC411FHD and is the answer not in the manual?
Questions and answers