Aztech WIPC302 User Manual
Wireless n ip camera
Hide thumbs
Also See for WIPC302:
- User manual (51 pages) ,
- Quick manual (2 pages) ,
- Start manual (2 pages)
Table of Contents
Advertisement
Quick Links
Advertisement
Table of Contents

Related Manuals for Aztech WIPC302


Summary of Contents for Aztech WIPC302
- Page 1 WIPC302 Wireless N IP Camera...
- Page 2 User Manual © Copyright 2012 All rights reserved. Ver 1.2 No part of this document may be reproduced, republished, or retransmitted in any form or by any means whatsoever, whether electronically or mechanically, including, but not limited to, by way of photocopying, recording, information recording, or through retrieval systems without the express written permission.
-
Page 3: Table Of Contents
Setting up your IP Camera via Wireless connection ..............11 Setting Port Forwarding on 2wire 5012NV-002 ............15 Setting Port Forwarding on Aztech DSL1015EW(S) ..........22 Setting Port Forwarding on 2Wire 2700HGV-2/2701HGV-E ........25 Setting up your IP Camera via Wired Connection ..............31 Setting Port Forwarding on 2wire 5012NV-002 ............ -
Page 4: About The Device
User Manual About the Device Aztech WIPC302 is a Wireless N lite IP Camera that supports 802.11 b/g/n targeted at providing good video quality to the end users via wired and wireless connection. Wireless supports WEP/WPA /WPA2 encryption. The video is compressed by MJPEG and allows user to change video resolution according to their demands to satisfy their own visual preferences. -
Page 5: Package Contents
User Manual Package Contents Package contents are listed below. For any missing items, please contact your dealer immediately. Product contents vary for different models. WIPC302 Ethernet cable Camera Stand 5V 2.0A DC Power Adapter Easy Start Guide Resource CD Warranty Card... -
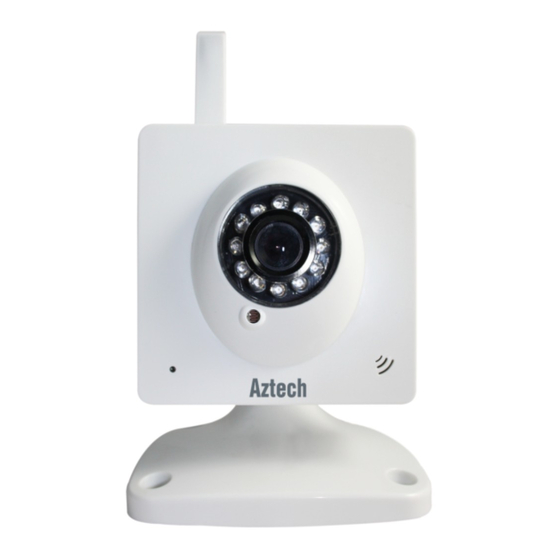
Page 6: Device Design
User Manual Device Design Label Description Ethernet Port Connect to your Modem/Router using an Ethernet cable. Power Jack Connect the 5v 2.0A Power adapter. Camera Lens CMOS sensor with fixed focus LENS. Infrared LED Automatically activates for night vision. Light Sensor Automatically activates Infrared LED for night vision. - Page 7 User Manual Label Description Audio out Connect to your external speaker. Press for 10 seconds or wait until the Network LED to stop Reset blinking. Page 7 of 48...
-
Page 8: Getting Started
User Manual Getting Started Setting up the device is easy. The flowchart below provides an outline of the steps needed to complete the installation. Brief descriptions appear beside each step. Detailed instructions are provided in the subsequent pages. Plan your Network Remove/Disable You may need to check some setting or disable some application... -
Page 9: Planning Your Network
User Manual Planning Your Network Before moving ahead to setup your network, it is a good idea to draw out a network diagram to help identify your network devices and plan out how to connect these devices. The illustration below is an example of a network diagram. Wired Connection Wireless Connection Page 9 of 48... -
Page 10: Wipc302 Utility
5. Launch the WIPC302 Utility then click Search(F3) to search for all available WIPC302 IP camera that is connected on your network. 6. Select your WIPC302 device then click Browse (F4) to launch the WIP302 WEB User Interface. Page 10 of 48... -
Page 11: Setting Up Your Ip Camera Via Wireless Connection
2. Make user that your Modem/Router's Internet connection is UP to allow you to access your IP camera via the Internet. 3. Connect the Power Adapter to your Aztech WIPC302 and plug it into the power outlet then switch it ON. - Page 12 User Manual 6. Click Browse to launch the IP camera’s WEB UI. 7. Input admin for both Username and password then click OK. Page 12 of 48...
- Page 13 User Manual 8. Then click Sign in here for IE browser or Sign in here for Firefox, Safari and Google Browser. 9. Click Quick Setup. Take note of the Port number of the IP camera. Page 13 of 48...
- Page 14 IP camera’s Ethernet port from router’s Ethernet port. 14. Wait until the Network LED to turn Blue then use the utility again to search for the WIPC302 IP camera. Take note of the IP camera’s IP Address and Http port (Port number)
-
Page 15: Setting Port Forwarding On 2Wire 5012Nv-002
User Manual 15. From your router it is a MUST to configure the router’s Port Forwarding to allow you to view your IP camera via the internet. Setting Port Forwarding on 2wire 5012NV-002 1. Launch the Internet browser on your computer and input 192.168.1.254. This will launch your Router’s WEB User Interface. - Page 16 User Manual 2. Select Gaming and Communications to modify the firewall settings of your router. Page 16 of 48...
- Page 17 User Manual 3. Select Choose WIPC302 with Wireless Icon since your IP camera is connected to the router via Wireless. 4. Under Edit firewall settings for this computer select Add a new user-defined application. Page 17 of 48...
- Page 18 User Manual 5. Under Application Profile Name input your IP camera’s name and select TCP under Protocol then input 8081 for the IP under Port (or Range). Click Add To List for the configuration save on the table list. Page 18 of 48...
- Page 19 User Manual 6. Click Back to go back to the Firewall Settings menu of the router. Page 19 of 48...
- Page 20 7. Under Select a Computer list select Choose WIP302 with Wireless icon 8. Under the Application List box select the WIPC302 then click Add for the application to be added on the Hosted Application list. Click Save to save the settings.
- Page 21 User Manual 9. Open the WIPC302 Utility again click Search and select your WIPC302 IP camera then UNCHECK Set IP automatically to save the current IP address of your WIPC302 IP camera. Page 21 of 48...
-
Page 22: Setting Port Forwarding On Aztech Dsl1015Ew(S)
User Manual 10. Under Viewing Account and Password input your WIPC302 IP camera username and password then click Update to save the settings. Setting Port Forwarding on Aztech DSL1015EW(S) 1. Launch the Internet browser on your computer and input 192.168.1.254. This will launch your Router’s WEB User Interface. - Page 23 User Manual 2. Click Firewall Configuration then click Port Forwarding. 3. Click Custom Server then input the IP camera’s name. Under Server IP address Input the IP camera’s IP address. 4. Input the IP Camera’s Port number under External Port Start and End then select the TCP/UDP under the Protocol drop down box then click Save/Apply.
- Page 24 User Manual 5. Open the WIPC302 Utility again click Search and select your WIPC302 IP camera then UNCHECK Set IP automatically to save the current IP address of your WIPC302 IP camera. 6. Under Viewing Account and Password input your WIPC302 IP camera username and password then click Update to save the settings.
-
Page 25: Setting Port Forwarding On 2Wire 2700Hgv-2/2701Hgv-E
User Manual Setting Port Forwarding on 2Wire 2700HGV- 2/2701HGV-E 1. Launch the Internet browser on your computer and input 192.168.1.254. This will launch your Router’s WEB User Interface. 2. Click Connection Status, this will launch the configuration page. Page 25 of 48... - Page 26 User Manual 3. Select Home Network Tab and click Edit Firewall Settings. Take note of the wireless connection icon Page 26 of 48...
- Page 27 User Manual 4. Click Allow individual application(s) and select User-defined from the drop down box then click Add a new user-defined application. 5. On the Application Name box input the IP camera’s Name, select TCP on the Protocol option. Input 8081 on under the Port (or Range) field then click ADD DEFINITION.
- Page 28 User Manual 6. WIPC302 IP camera configuration will be added on the Definition List table. Click Back to return the Firewall Settings. 7. Click Home Network then select Edit firewall settings. Page 28 of 48...
- Page 29 User Manual 8. Under the All Application box select WIPC302 then click ADD for the application to be added on the Hosted Application list. Click DONE for the settings to take effect. 9. Open the WIPC302 Utility again click Search and select your WIPC302 IP camera then UNCHECK Set IP automatically to save the current IP address of your WIPC302 IP camera.
- Page 30 User Manual 10. Under Viewing Account and Password input your WIPC302 IP camera username and password then click Update to save the settings. Page 30 of 48...
-
Page 31: Setting Up Your Ip Camera Via Wired Connection
2. Make user that your Modem/Router's Internet connection is UP to allow you to access your IP camera via the Internet. 3. Connect the Power Adapter to your Aztech WIPC302 and plug it into the power outlet then switch it ON. - Page 32 User Manual 6. Click Browse to launch the IP camera’s WEB UI. 7. Input admin for both Username and password then click OK. Page 32 of 48...
- Page 33 User Manual 8. Then click Sign in here for IE browser or Sign in here for Firefox, Safari and Google Browser. 9. Click Quick Setup then uncheck DHCP/Static box. This will display the IP camera’s IP addresses. Take note of the IP address and Port number of the IP camera. Page 33 of 48...
-
Page 34: Setting Port Forwarding On 2Wire 5012Nv-002
User Manual 10. Click Submit for the settings to take effect. 11. From your router it is a MUST to configure the router’s Port Forwarding to allow you to view your IP camera via the internet. Setting Port Forwarding on 2wire 5012NV-002 1. - Page 35 User Manual 2. Click Gaming and Communications to modify the firewall settings of your router. Page 35 of 48...
- Page 36 User Manual 3. Click Choose WIPC302 with Wired connection then click Add a new user-defined application. Page 36 of 48...
- Page 37 User Manual 4. Under Application Profile Name input your IP camera’s name and select TCP under Protocol then input 8081 for the IP under Port (or Range). Click Add To List for the configuration save on the table list. Click Back to save the settings. Page 37 of 48...
- Page 38 User Manual Page 38 of 48...
- Page 39 User Manual Page 39 of 48...
- Page 40 User Manual 5. Under the Application List box select the WIPC302 then click Add for the application to be added on the Hosted Application. 6. Click Save for the settings to take effect. Page 40 of 48...
-
Page 41: Setting Port Forwarding On Aztech Dsl1015Ew(S)
7. Configuration Successful page will be displayed to confirm that the settings have been saved. Setting Port Forwarding on Aztech DSL1015EW(S) 1. Launch the Internet browser on your computer and input 192.168.1.254. This will launch your Router’s WEB User Interface. - Page 42 User Manual 2. Click Firewall Configuration then click Port Forwarding. 3. Click Custom Server then input the IP camera’s name. Under Server IP address Input the IP camera’s IP address. 4. Input the IP Camera’s Port number under External Port Start and End then select the TCP/UDP under the Protocol drop down box then click Save/Apply.
-
Page 43: Setting Port Forwarding On 2Wire 2700Hgv-2/2701Hgv-E
User Manual Setting Port Forwarding on 2Wire 2700HGV- 2/2701HGV-E 1. Launch the Internet browser on your computer and input 192.168.1.254. This will launch your Router’s WEB User Interface. 2. Click Connection Status, this will launch the configuration page. Page 43 of 48... - Page 44 User Manual 3. Select Home Network tab then click Edit firewall settings. Take note of the WIPC302 Wired connection icon Page 44 of 48...
- Page 45 User Manual 4. Click Allow individual application(s) and select User-defined from the drop down box then click Add a new user-defined application. 5. On the Application Name box input the IP camera’s Name, select TCP on the Protocol option. Input 8081 on under the Port (or Range) field then click ADD DEFINITION.
- Page 46 User Manual 6. WIPC302 IP camera configuration will be added on the Definition List table. Click Back to return the Firewall Settings. Page 46 of 48...
- Page 47 7. Click Home Network again then click Edit firewall settings on the WIPC302 Wired connection. 8. Under the All Application box select WIPC302 then click ADD for the application to be added on the Hosted Application list. Click DONE for the settings to take effect.
-
Page 48: Safety Instructions
User Manual Safety Instructions For your safety, be sure to read and follow all warning notices and instructions. Do not open the device. Opening or removing the device cover can expose you to dangerous high voltage points or other risks. Only qualified service personnel can service the device.
Need help?
Do you have a question about the WIPC302 and is the answer not in the manual?
Questions and answers