Advertisement
Advertisement

Related Manuals for Geonav 3


Summary of Contents for Geonav 3
- Page 1 User and Installation Guide...
-
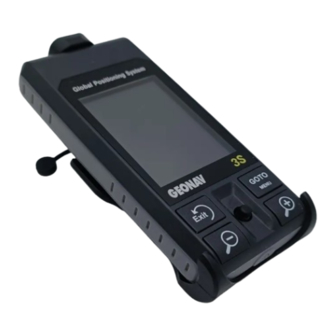
Page 3: Introduction
(IP57), the unit is equipped with a daylight visible, color TFT display. Thanks to the GEONAV and a NAVIONICS Platinum™ or Gold™ electronic chart, you will never get lost even in case of fog, bad weather or dark. - Page 4 Introduction NOTE: This guide applies to the GEONAV 3 and GEONAV 3S models. The functions and figures peculiar to the GEONAV 3S model are highlighted in the text. Unless otherwise specified, functions are intended as common to all models. The technical characteristics and functions described in this manual are subject to change as a result of improvements or changes to the product.
-
Page 5: Characteristics
Characteristics CHARACTERISTICS General characteristics • Portable chart plotter with built-in GPS receiver and an- tenna • 12-channel internal GPS supporting WAAS/EGNOS • Satellite acquisition time: Approx. 15 seconds (hot start) Approx. 2 minutes (cold start) • 3D magnetic compass • Built-in barometer •... - Page 6 Characteristics • Battery pack: rechargeable, Li Polymer batteries (3.7V - 1250 mAh) • Battery operation: approx. 9 h (with backlight off and un- used battery. Battery life may become shorter as batteries wear) • Built-in battery charger; recharge life: approx. 2½ h •...
- Page 7 English...
-
Page 8: Installation And Precautions
Installation and Precautions INSTALLATION AND PRECAUTIONS Precautions To avoid electromagnetic interference, the GEONAV must be positioned at least 15 cm (or 60 cm if the speaker is used) away from magnetic compasses or flux-gate sensors, such as those used on autopilots and remote electronic compasses. - Page 9 Installation The GEONAV package includes several accessories. The cradle, a standard accessory, allows connecting the unit to the mains battery charger, the battery charger with lighter plug, the loud- speaker battery charger with cigarette lighter plug or the ear- phone.
- Page 10 Installation and Precautions the unit in the best position as far as the LCD visibility is concerned. When mounting the unit, make sure it is heading to the vehicle’s moving direction, so as to allow the compass and the inclinometer to show correct course and inclination of the vehicle.
- Page 11 turned free of charge. To return your used device, please use the country-specific return and collection systems available to you. Electrical (electronic) devices which are marked with one of the symbols shown may not be disposed of with household refuse in accordance with the EU directive.
-
Page 12: Connections
Battery pack The rechargeable battery pack allows using the GEONAV as a portable unit. The unit can be powered by the batteries only or connected to an external power supply. - Page 13 When the unit is powered by the power supply cable, the inner batteries are fully recharged, then the inner battery charger is automatically disabled and the batteries discon- nected in order to keep their charge. The full charge cycle of a battery set totally discharged re- quires about 2½...
-
Page 14: Cartridge Installation
Cartridge Installation CARTRIDGE INSTALLATION Installing the SD Card Make sure that the unit is perfectly dry, switched off and not connected to the battery charger. Open the cartridge slot cover (D) located on the unit’s right side. Insert the SD card (A) into the appropriate slot (B) with the golden contacts turning to the unit’s front side and push it down with the help of the projecting part (C) on the cradle or a coin, until the coupling mechanism is released. - Page 15 WARNING: Always use SD Cards certified by Navionics. The use of non-certified cartridges may result in improper operation of the unit. Insert and extract the cartridges when the unit is completely switched off and disconnected from the battery charger or external power supply. Make sure that the golden contacts turn to the unit’s front side.
-
Page 16: Keyboard
Enters a waypoint or a an electronic chart is dis- marker, or confirms a selec- played. tion from the menu. PAGE/EXIT • Navigation mode: • Switches the GEONAV Turns navigation data on/off. pages. • Allows adjusting the • Cursor mode: screen backlight. -
Page 17: Diagnostic
WARNING: The unit’s internal memory can be cleared by holding the PAGE/EXIT key pressed when switching the unit on. This operation will delete all the settings stored in the GEONAV and restore factory settings. Moreover, the routes, tracks and markers not saved on the SD Card will be deleted. - Page 18 English...
-
Page 19: Marine Navigation
Marine Navigation MARINE NAVIGATION English... - Page 20 ONLY OFFICIAL GOVERNMENT CHARTS AND NOTICES TO MARINERS CONTAIN ALL INFORMATION NEEDED FOR THE SAFETY OF NAVIGATION AND, AS ALWAYS, THE CAPTAIN IS RESPONSIBLE FOR THEIR PROPER USE. The use of the GEONAV implies knowledge and accep- tance of this warning by the user. English...
-
Page 21: Navionics Electronic Charts
NAVIONICS Electronic Charts NAVIONICS ELECTRONIC CHARTS The GEONAV includes a built-in world map. Additional car- tography details relative to a specific area of navigation are available from the SD Cards storing NAVIONICS Platinum™ or Gold™ electronic charts. To display chart boundaries, press the GOTO key to display the menu, select SETUP, SET CHART DETAIL and then, by the joystick, select the USER or ALL mode. - Page 22 NAVIONICS Electronic Charts The GEONAV will convert all the depth values in the unit se- lected, making them appear like those reported in the official nautical charts (see the figure). Displaying abbreviated navaid charac- teristics Position the manual cursor on the navaid symbol.
- Page 23 eral any symbol present on the chart. By querying the lights and navaids, the X-Plain™ function will give the description of the object in natural language, thus avoiding the use of abbreviations and symbols that are difficult to understand. By querying the symbols for wrecks or obstructions, NAVIONICS Platinum™...
- Page 24 NAVIONICS Electronic Charts Select PHOTOS, choose one item from the list to display one of the photographs available for the marina, then use the ZOOM key to enlarge or reduce the image, and the joystick to pan it. Select PILOTS to gain access to the main information on the marina.
- Page 25 Displaying Tides and Currents data NOTE: This function is available only with the NAVIONICS cartridges containing Tides and Currents data. If the zoom level is adequate and the GPS device has a valid fix, the Tide and Current station icons will show the present tide or current value, as well as the trend in the subsequent hours.
- Page 26 NAVIONICS Electronic Charts Displaying aerial / satellite charts NOTE: This function is available only with the NAVIONICS Platinum™ cartridges stor- ing aerial and satellite photographs. The Photo Overlay function suspends the Chart Rota- tion function. Press GOTO to display the menu, select SETUP, PHOTO OVER- LAY and then LAND or FULL.
-
Page 27: Graphic Items
Graphic Items GRAPHIC ITEMS Besides chart data, the GEONAV displays some graphic items use- ful during navigation. The figure below shows some of these items. 1 - Marker Indicates a point of interest associated with a symbol and a name. - Page 28 Graphic Items To delete this band, press the PAGE/EXIT key and switch to Navigation mode. 5 - Route leg Part of route between two waypoints. 6 - Waypoint Waypoints are identified by a circle and a number. The route start- ing point is marked by the “X”...
-
Page 29: Functional Characteristics
Functional Characteristics FUNCTIONAL CHARACTERISTICS This chapter describes some of the most important functions of the GEONAV, as well as the terms most commonly used in this document. Switching on/Switching off the unit To switch the GEONAV on, keep the PWR key pressed until the unit switches on. - Page 30 Functional Characteristics For example, when traveling south- wards, the chart shows, on the right side of the boat, what is actually located on the left side, and vice versa. The Chart Rotation function allows ro- tating the electronic chart displayed ac- cording to the plotted route (COG - Course Over Ground) as detected by the GPS receiver.
- Page 31 “AUTOZOOM ? ENTER = YES” message is displayed, then press ENTER to confirm the operation. To deactivate the Autozoom function, press the ZOOM key once. When the GEONAV is turned on, and if at least one waypoint has been previously entered, the Autozoom function is auto- matically activated.
- Page 32 2/ 3rds of the screen ahead of the boat, provided that the boat’s speed is greater than 3 knots. Without screen amplifier This function will be activated only if no waypoint has been previously inserted.
- Page 33 To carry out the calibration, press GOTO to display the menu bar and then, by the joystick, select SETUP, CALIBRATION and then ON. A message will prompt the user to move the cursor to the boat’s true position, appropriately enlarged by the ZOOM+ key.
- Page 34 Press the PWR key to display the LIGHT window. To adjust the brightness level, move the joystick. Press PAGE/EXIT to exit. Easy View mode The GEONAV allows doubling the visibility of the electronic chart. Once the Easy View mode has been enabled, the chart will be magnified.
- Page 35 Battery management When the unit is powered by the batteries, a battery- shaped icon shown in the upper left corner of the screen displays their charge status. If the battery- shaped icon is empty, the unit will display the “Discharged battery”...
- Page 36 Functional Characteristics warns the user when the ship moves farther than the se- lected distance from its anchoring position, that is the ship’s position when the alarm is enabled. The reference distance value for the alarm can also be set. After the alarm is issued, press any key to reset it by using the current ship’s position as the new anchor position.
-
Page 37: Getting Started
The window situated in the lower part of the screen will display the boat’s speed, route and current time. The GEONAV is in Navigation mode; by moving the joystick, it is possible to switch to Cursor mode (editing mode). The cursor geographical position is shown by two windows. - Page 38 Getting Started The info windows show the dis- tance, bearing and time to reach the cursor’s position at the cur- rent speed. To plot a route start- ing from the boat’s position, move the cursor to the position desired, and press ENTER to insert a waypoint at the cursor’s position.
- Page 39 The time to reach the last waypoint in the route is calculated by adding the time to reach the target waypoint to the time to cover the distance to the other waypoints at the current speed. As new waypoints are added, the numbering will increase progressively.
-
Page 40: Operating Modes
Navigation, each giving access to different functions. CURSOR MODE When the GEONAV is in Cursor mode, the crosshair cursor is displayed. The joystick allows browsing through the electronic chart, as well as editing or creating the route. See the Route Section for more details. -
Page 41: Range Window
Range Window RANGE WINDOW This window, situated in the top left-hand corner of the screen, shows the chart range (4096 NM to 1/8 NM). English... -
Page 42: Navigation Window
Navigation Window NAVIGATION WINDOW This window is activated automatically as soon as the GPS receiver has obtained the boat’s position (FIX OK). If no route is present, speed, course and time (local time or GMT, according to the option selected in the Setup menu) are displayed at the bottom of the screen. -
Page 43: Trip Window
Trip Window TRIP WINDOW The trip window shows the data relating to the route followed and, in particular: • Partial distance covered • Time elapsed from departure • Average speed • Maximum speed • Total distance covered To reset partial counters before starting a new journey, press ENTER. -
Page 44: Satellite Window
Additional information: • Day, month, year, local or Greenwich time (at the first start-up the GEONAV is initialized to Greenwich Time). • Boat’s position (lat/lon) (or the latest valid fix if the GPS receiver is still searching for satellites). - Page 45 The altitude value is available only if four satellites are tracked and a 3D fix is obtained. As soon as a valid fix is available, the GEONAV will automati- cally switch to Navigation mode and display the boat’s posi- tion at the best chart range available; the window at the bot- tom of the screen will indicate the boat’s course and speed.
-
Page 46: Info Window
Info Window INFO WINDOW This window displays the following information on the boat’s current position: • Geographical coordinates (latitude/longitude) • The position correction ap- plied to the latitude and lon- gitude (option SETUP, CALI- BRATION) • Magnetic variation value re- ceived by the GPS •... -
Page 47: Tide Info Window
Tide Info Window TIDE INFO WINDOW When a NAVIONICS cartridge featuring Tides and Currents data is present, this window displays further information, besides the forecast data sup- plied by selecting the Tides and Currents station. The following data are displayed: •... -
Page 48: Runway Window
Runway Window RUNWAY WINDOW This window displays the following information on the target waypoint: • Name of the target waypoint • Distance from the target waypoint • Estimated time of arrival to the target waypoint • Bearing • Course • Steering angle •... -
Page 49: Window
3D Window 3D WINDOW NOTE: This function is available only with the NAVIONICS Platinum™ cartridges. This window allows displaying a 3D chart image of the area sur- rounding the current boat’s po- sition. The image simulates the view according to the direction you are moving to. -
Page 50: Compass Window
Compass Window COMPASS WINDOW This window shows the follow- ing data: • On the analog dial, the mag- netic North direction: the data is provided by the built- in magnetic compass. • Speed provided by the GPS device. • Bearing, that is the angle between the North and the direction the unit is point- ing at;... - Page 51 Since the built-in magnetic compass is a 3D device, it works correctly also when the unit is not perfectly horizontal. Nevertheless, the compass provides correct values provided that its inclination does not exceed 45° with respect to the horizon. The magnetic compass is already set, yet to improve its accu- racy it is recommended to set it every time that the geographi- cal position changes.
-
Page 52: Barometer Window
Barometer Window BAROMETER WINDOW This window shows the following data: • Historical graph showing the barometric pressure mea- sured during the latest 48 hours • Atmospheric pressure cur- rent value • Weather forecast In order that pressure graph, and consequently weather fore- cast data are significant, the unit must be maintained in the same position and, above all, at... - Page 53 exhausted the graph is not shown. In this case, recharge the battery and wait for new data to be collected. NOTE: As barometric forecast is based on long-term variations of the atmospheric pressure, in case of barometric forecast, the unit must NOT be moved from the starting acquisition point.
-
Page 54: Main Menu
Main Menu MAIN MENU The menu bar, displayed at the top of the screen, allows selecting from the following options: TRACK: To activate/deactivate the track function and to save, recall and delete the track saved. ROUTE: To delete, reverse, store, recall a route and display route information. -
Page 55: Route
Route ROUTE EDITING A ROUTE (CURSOR MODE) Creating a waypoint Using the joystick, move the cursor on the position desired and press ENTER to insert a waypoint. To enter further waypoints, move the cursor and press ENTER. The new waypoint will be appended to the existing route. Up to 20 waypoints per route can be entered by using the GOTO function as well (see the Route to a waypoint Section). - Page 56 Route Changing the target waypoint Use the “Route to a waypoint” function. WARNING: The route will be modified and the new target waypoint selected will be the first waypoint in the route. FUNCTIONS IN THE ROUTE MENU Route info Route information is displayed in two pages;...
- Page 57 Use the joystick to switch to the next page showing the geo- graphical coordinates of each waypoint: WP NO.: Waypoint ID POSITION: Waypoint latitude and longitude Use the joystick to go back to the previous page or press the PAGE/EXIT key to exit. To access the waypoint data, move the manual cursor on the waypoint of interest, press the GOTO key and select the INFO option.
- Page 58 Press ENTER and select the target waypoint by the joy- stick. Press ENTER to confirm the selection, or PAGE/EXIT to exit. As the GEONAV plots a new route, the waypoint selected be- comes the first waypoint in the route, whereas previous waypoints are deleted.
-
Page 59: Track
Track TRACK The Track function allows re- cording the track actually fol- lowed by the boat. The Track function can be enabled and dis- abled several times during navi- gation. Starting a track To enable the Track function, press the GOTO key to display the menu bar, select TRACK, START and press ENTER to confirm. - Page 60 Track Recalling a track from the SD Card Press the GOTO key to display the menu bar, select TRACK, OLD and press ENTER to open the track catalog. Select the track desired, then press ENTER to confirm the op- eration or PAGE/EXIT to exit. Deleting a track To delete the track displayed, press the GOTO key to show the main menu, select TRACK, CURRENT, DELETE and press EN-...
-
Page 61: Marker
Marker MARKER Markers are used to identify points of interest to which names and symbols can be assigned. NOTE: Marker names are displayed starting from the 32 NM chart range. CURSOR MODE Inserting a marker Move the cursor to the position desired and hold the ENTER key pressed for more than 2 seconds. - Page 62 ENTER, select GOTO MARKER, then press ENTER again to confirm the operation. Once the desired marker has been selected, the GEONAV will insert a waypoint at the marker position and append the new leg to the existing route (if no route is available, the new waypoint will be connected to the boat’s position).
- Page 63 Press the PAGE/EXIT key to go back to Navigation mode and enable automatically the Autozoom func- tion. NOTE: To delete a single marker, select it from the GOTO Marker list, press ENTER, choose the DELETE MARKER option, then enable it by pressing ENTER. FUNCTIONS IN THE MARKER MENU Storing a set of markers in the SD Card Press the GOTO key to display the...
- Page 64 Marker Deleting markers To delete the set of markers displayed, press the GOTO key to show the menu, select MARKER, CURRENT, DELETE ALL and press ENTER to confirm. To delete one of the markers displayed, press the GOTO key to show the menu, select MARKER, CURRENT and GOTO MARKER.
-
Page 65: Goto Port
ENTER. Once the desired port has been selected, the GEONAV will in- sert a waypoint in the port posi- tion and append the new leg to the existing route (if no route is available, the new waypoint will be connected to the boat’s posi-... -
Page 66: Goto Nearest
(estimated on the boat’s current speed). Press ENTER to confirm the selection. The GEONAV will insert a waypoint in the port selected, de- lete automatically the existing route (if in Navigation mode), or append the waypoint to the existing route (if in Cursor mode), then go back to Navigation mode and enable automatically the Autozoom function. - Page 67 Press GOTO, select NEAREST by the joystick, choose the Tides or Currents service, then press ENTER to confirm. The GEONAV will allow selecting one of the three nearest Tides and Cur- rents stations. Use the joystick to choose the station desired and press ENTER to confirm.
- Page 68 Goto Nearest Tidal current station • Name of the station • Forecast reference date • Time, speed and direction with respect to the cursor’s position in the graph • Time, speed, direction and slack time of daily flood and ebb streams •...
-
Page 69: Setup
Setup SETUP The Setup menu allows setting the available options. To access the Setup menu, press GOTO to display the main menu, then select SETUP by using the joystick. The menu items are grouped in seven sets. When selecting a set by the joystick, the list of the available options will be displayed. - Page 70 Setup NOTE: The Chart Rotation function is automatically suspended as the Photo Overlay function is enabled. • Set Chart Detail (STD/USER/ALL) Selects the chart details to display. It is possible to select one of the two settings available (STD - equivalent to the standard display setting, as defined by ECS regulations - and ALL, that enables the display of all the items on the chart).
- Page 71 • Anchor Alarm (OFF/15m/ 30m/50m) Enables/disables the alarm and sets the distance range for the anchor alarm. • Compass Calibration (ON/ OFF) Sets the compass to obtain a current position as accurate as possible. • Set altitude (ON/OFF) Sets the altitude value used by the barometer. COMPASS CALIBRATION To set the compass, proceed as follows: •...
- Page 72 Setup ALTITUDE SETTING The altitude setting window allows editing the altitude value, when well-known, used by the barometer so as to make the weather forecast more accurate. NOTE: The altitude value editing does not affect the altitude data transmitted by the GPS device.
- Page 73 NOTE: The Compass Window and Barom- eter Window are available with the GEONAV 3S only. OTHER • Battery Saving (ON/OFF) Sets the automatic switching off time for the backlight and screen, in order to reduce the battery consumption. • Chart Info...
-
Page 74: Goto Lat/Lon
Press the GOTO key and select L/L by the joystick. Enter the geographical coordinates desired by using the joystick and confirm the insertion. The GEONAV will move the manual cursor to the position selected, allowing the insertion of a waypoint or a marker. English... -
Page 75: Road Navigation
Road Navigation ROAD NAVIGATION English... - Page 76 TIONS, NOT AS DRIVING INDICATIONS WHICH COULD RESULT INCORRECT DUE TO INACCURATE MAP DATA OR CHANGES TO ROAD PRACTICABILITY. The use of the GEONAV implies knowledge and accep- tance, by the user, of this warning and the warnings re- ported in the manual.
-
Page 77: Road Maps
Road Maps ROAD MAPS During navigation, the unit displays the map of the area sur- rounding the vehicle, highlighting the way to follow to reach the destination set. The map also shows the surrounding roads, as well as all the point of interest available in the area. The position of the vehicle is indicated by the red symbol showing the vehicle’s heading, whereas the direction to fol- low is highlighted by an arrow overlapping the road suggested. - Page 78 Road Maps Embassy Place of Worship Entertainment Police Station Ferry Connection Post Office Ferry Terminal Railway Station Golf Course Rent-a-Car Facility Government Office Rent-a-Car Parking Hospital/Polyclinic Rest Area Hotel or Motel Restaurant Important Tourist Attraction Restaurant Area Institutions Scenic/Panoramic view Library Shop Monument...
-
Page 79: Functional Characteristics
Functional Characteristics FUNCTIONAL CHARACTERISTICS This chapter describes some of the most important functions of the GEONAV, as well as the terms most commonly used in this document. Switching on/Switching off the unit Press and hold pressed the PWR key until the unit switches on. - Page 80 Functional Characteristics • Automatic recalculation of the route in case of diversion from the planned route. • Confirmation of arrival at destination. To repeat the message concerning the following manoeuvre, press the ENTER key. Voice messages are enabled also in Simu- lation mode.
-
Page 81: Getting Started
Getting Started GETTING STARTED At start-up, the unit displays a welcome message and warn- ing. The warning message reminds the user that the instruc- tions provided by the car navigator should be considered as suggestions, and not as real indications, which could not take into account, for example, changes to road practicability. -
Page 82: Navigation Window
Navigation Window NAVIGATION WINDOW The navigation window is enabled from the Setup menu by means of the joystick. This window is available provided that a position is present and looks differently, depending on whether a destination has been previously set. Without destination With destination North direction... - Page 83 Chart range If the cursor is enabled through the joy- stick, the upper right-hand side of the screen will display the chart range win- dow. To go back to Navigation mode, press PAGE/EXIT. Battery-shaped icon Refer to the Battery Management paragraph in the Marine Navi- gation Section.
-
Page 84: Trip Window
Trip Window TRIP WINDOW The trip window shows the data relating to the distance covered, time elapsed from departure, av- erage speed and maximum speed achieved from the latest reset op- eration or from the latest desti- nation set. English... -
Page 85: Satellite Window
Satellite Window SATELLITE WINDOW The satellite window displays the current configuration of the sat- ellites tracked. As soon as the unit has tracked at least three satellites, the data relative to position, current date and time are available. English... -
Page 86: Route Info Window
Route Info Window ROUTE INFO WINDOW The route info window displays the data relative to departure and arrival, route type, distance and traveling time, as defined ac- cording to the speed set in the Setup menu. English... -
Page 87: Main Menu
Main Menu MAIN MENU The menu bar, displayed at the top of the screen, allows ac- cessing the following options: MARKER: To insert, select, define and delete markers. ADDRESSES: To insert, select, define and delete addresses. NEAR: To display the list of the services available, search for the nearest service, select and define the service. -
Page 88: Marker
Marker MARKER Markers allow identifying points of interest and are stored in the unit’s memory. Inserting a marker Move the cursor to the position desired, then press the ENTER key. By the joystick, select MARKER from the dialog box and confirm the choice by ENTER. - Page 89 Deleting or editing a marker on the screen Position the joystick on the marker to delete or edit, press ENTER, select the EDIT or CLEAR option from the menu, then press ENTER again. To edit the icon symbol and de- scription, use the joystick.
-
Page 90: Addresses
Addresses ADDRESSES To display the list of the addresses available, press the GOTO key. A window will show the addresses already saved or will give the opportunity of entering a new address. Once con- firmed, the addresses will be displayed in the list. Entering a new address (without virtual keyboard) To enter a new address with-... - Page 91 NOTE: If a Starting point and Destination are present, the route will be calculated and high- lighted in green on the map. Entering a new address (with virtual key- board) To enter a new address by means of the virtual keyboard, select SETUP, KEYBOARD and then enable the keyboard by se- lecting ABC or QWERTY, accord-...
- Page 92 Addresses NAME, the list of the possible choices will be shown. To con- firm a selection, press ENTER. After entering the address, define it as Destination, Marker or Starting point in the dialog box. Confirm the operation by EN- TER. NOTE: If a Starting point and Destination are present, the route will be calculated and highlighted in green on the map.
-
Page 93: Near
Near NEAR To display the list of the services available and to search for the service nearest your position or cursor’s position, select NEAR and press the GOTO key. Selecting/defining a service By means of the joystick, scroll the list of the services available, select the service and press EN- TER to confirm the operation. -
Page 94: Cursor
Cursor CURSOR An route can also be defined only by means of the cursor. In the absence of a valid Fix (GPS position not detected), both the starting point and destination shall be set, as described below. Starting point and destination By means of the joystick, posi- tion the cursor on a point on the screen and press ENTER. - Page 95 Via point, yet leaving the start- ing and the destination points unchanged. No more than 3 Via points can be added to a route. Changing the starting/destination point In order to change the starting and/or destination point, move the cursor to the new starting/destination point and press ENTER.
-
Page 96: Setup
Setup SETUP The Setup menu allows setting the available options. To ac- cess the Setup menu, press GOTO to display the main menu, then select SETUP by using the joystick. The menu items are grouped in seven sets. When selecting a set by the joystick, the list of the available options will be displayed. - Page 97 • Roads (ALL/NO TOLL ROADS) Enables all the roads or ex- cludes toll roads. In Walk mode, only the No toll roads option is available. • Road Speeds Sets the speed limits accord- ing to the road followed (in Car mode only). UNITS AND LANGUAGE •...
- Page 98 Setup • Chart Info Displays the title of the map currently loaded. English...
- Page 99 English...
-
Page 100: Table Of Contents
Table of Contents TABLE OF CONTENTS INTRODUCTION ..................3 CHARACTERISTICS ..................5 INSTALLATION AND PRECAUTIONS ............8 CONNECTIONS ..................12 CARTRIDGE INSTALLATION ..............14 KEYBOARD ....................16 DIAGNOSTIC ....................17 MARINE NAVIGATION ................19 NAVIONICS ELECTRONIC CHARTS ............21 GRAPHIC ITEMS ..................27 FUNCTIONAL CHARACTERISTICS ............ - Page 101 MAIN MENU ....................54 ROUTE ......................55 TRACK ......................59 MARKER ..................... 61 GOTO PORT ....................65 GOTO NEAREST ..................66 SETUP ......................69 GOTO LAT/LON ................... 74 ROAD NAVIGATION ................... 75 ROAD MAPS ....................77 FUNCTIONAL CHARACTERISTICS ............79 GETTING STARTED ..................
- Page 102 Geonav S.r.l. Via Vespucci 289 • 55049 Viareggio • Italy Tel: +39 0584 439611 Fax: +39 0584 961309 Numero Verde: 800-861215 http://www.geonav.it Copyright © 2007 Geonav S.r.l. Rev. 1.1 - Sep 2007 N1019620...
Need help?
Do you have a question about the 3 and is the answer not in the manual?
Questions and answers