Geonav 6 PLUS User And Installation Manual
Hide thumbs
Also See for 6 PLUS:
- User and installation manual (168 pages) ,
- User and installation manual (85 pages)
Table of Contents
Advertisement
Advertisement
Table of Contents

Related Manuals for Geonav 6 PLUS


Summary of Contents for Geonav 6 PLUS
- Page 1 PLUS ELITE User and Installation Guide...
- Page 2 USE. The use of the GEONAV implies knowledge and accep- tance of this warning by the user. NOTE: This guide applies to the GEONAV 6 Plus and GEONAV 6 Elite . The functions peculiar to each model are highlighted in the text. Unless otherwise specified, functions are intended as common to all models.
-
Page 3: Introduction
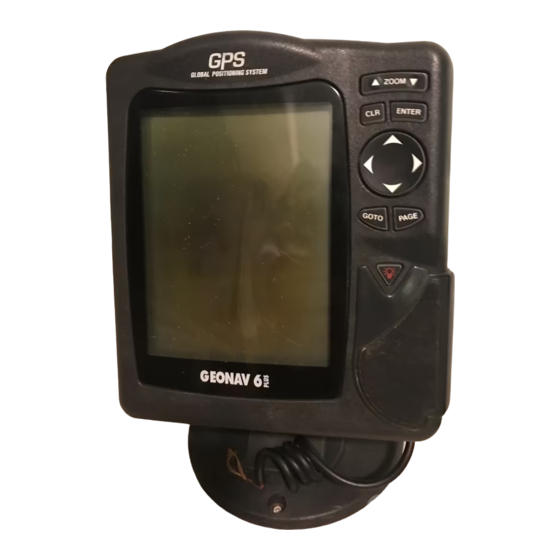
Characteristics Introduction Plus CHARACTERISTICS INTRODUCTION The GEONAV is a graphic GPS plotter that displays your boat’s GEONAV 6 PLUS current position with respect to an electronic chart. General characteristics Plus The Plus model is equipped with a built-in GPS receiver. - Page 4 Characteristics Plus • Pixel resolution: 240 x 320 Elite GEONAV 6 ELITE • 32-bit RISC processor General characteristics Memory characteristics • Self-contained GPS plotter system • 2 routes (1 active and 1 stored) (Plotter + GPS receiver + Antenna) •...
-
Page 5: Installation And Precautions
When using the built-in GPS receiver, the GEONAV can be interfaced with a DGPS (RTCM). ATTENTION: The GEONAV can be connected to several DGPS whose function modes are the following: a) automatic frequency selection, or... - Page 6 2A fuse between the power source and the plotter to protect the instrument against overvoltage and/or overcurrent. When the plotter is taken away from the bracket, we recommend that you use the cap supplied with the GEONAV to protect the electrical contacts against water.
-
Page 7: Connections
GGA - RMC - ZDA Power supply cable The GEONAV will add the following messages: APA - APB - XTE - The car lighter adapter has a little lamp (LED) RMB - BWC - GLL - VTG that goes on if the car is correctly providing power to the bracket. -
Page 8: Cartridge Installation
GOTO adjusting the screen Allows plotting a route to- contrast. ward a manual cursor position, desired marker, port, nearest port service • Switches the GEONAV on / off. or specified position (lat/ • Allows adjusting the lon). screen backlight. •... -
Page 9: Diagnostic
Press ENTER to exit the diagnostic program..navaids depth contours ATTENTION: It is possible to clear the contents of the GEONAV internal memory (not the Navchart™) and to reset the plotter to the starting point. To perform a memory reset, spot soundings shipwrecks switch the unit on by pressing simultaneously the PWR and CLR keys. - Page 10 Displaying port services The GEONAV will convert all the depth values in the unit selected, NOTE: This function is available only with the NAVIONICS cartridges containing the Port making them appear like those re- Services feature.
-
Page 11: Graphic Items
NAVIONICS Electronic Charts Port services are identified by the following icons: GRAPHIC ITEMS Tourist services and Besides chart data, the GEONAV displays some graphic items use- Health services shops ful during navigation. The figure below shows some of these items. -
Page 12: Functional Characteristics
This chapter summarizes the most commonly used functions of 5 - Route leg the GEONAV and gives also a brief description of the terms that Part of route between two waypoints. will appear in the following pages. 6 - Waypoint... - Page 13 Elite Chart rotation Charts are traditionally displayed in north- When the GEONAV is turned on, and if at least one waypoint has up mode. This, however, does not corre- been previously entered, the Autozoom function is automatically spond to reality. For example, when trav- activated.
- Page 14 ON/OFF. Color Elite Position calibration The GEONAV is equipped with a 4-color screen that offers perfect Most position sensors have intrin- visibility under sunlight. Green, white, blue and red are the colors sic errors that make the boat’s po- available and cannot be modified.
-
Page 15: Operation
SATELLITE WINDOW OPERATION At start-up the satellite window dis- At start-up the GEONAV displays a message warning the user that plays how many and which satel- the electronic chart is a navigation aid designed to facilitate the lites are tracked by the GPS re- use of authorized government charts, not to replace them. -
Page 16: Navigation Window
Mediterranean Sea the GEONAV should get the first fix in less the bottom of the screen. than 12 minutes, whereas in other parts of the world it can take By using the ZOOM key, the chart up to 30 minutes. -
Page 17: Menu
A depth sensor can be interfaced The menu bar, displayed at the top of the screen, allows selecting with the GEONAV via NMEA. from the following options: In this case, the GEONAV auto- matically enables the depth sounder function, displaying a graph of sea depth. -
Page 18: Navigation To Waypoint Window
Trip Window Navigation to Waypoint Window TRIP WINDOW Plus NAVIGATION TO WAYPOINT WINDOW The trip window shows the data When the navigation to waypoint relating to the route followed and, window is activated, the active in particular: route leg is temporarily deleted and replaced with a line constantly con- •... -
Page 19: Route
The GEONAV will insert a waypoint in the port position and will route; if no waypoint had been pre- append the new leg to the existing route; if no route is available, viously entered, the leg will be con- the new waypoint will be connected to the boat’s position. - Page 20 It is often necessary to change the position of a waypoint or to delete a single waypoint; the GEONAV allows carrying out these The GEONAV will insert a waypoint in the port position and will operations in a very simple way and with few keys.
- Page 21 • Recalling the route • Deleting the route NOTE: Both the route stored and the route displayed are saved as the GEONAV is switched off. Route information To display the navigation data of the plotted route, press PAGE Deleting the route...
-
Page 22: Track
MARKER The Track function allows recording the boat’s actual track. The GEONAV allows entering and storing small symbols (markers) It is possible to activate and deactivate the track function several to mark points of interest (e.g., submerged wrecks, fishing spots, times during navigation;... -
Page 23: Setup
Setup Marker SETUP NAVIGATION MODE Inserting a marker To enter a new marker, press EN- The SETUP menu allows setting the available options. TER; select the desired shape and To access the SETUP menu, press PAGE repeatedly until the main name of the marker by the CURSOR menu shows up, select the SETUP item, then use the CURSOR key key and then press ENTER to con-... -
Page 24: Autopilot
Allows entering local time. • Bearings (TRUE/MAGNETIC) The GEONAV will display the “END OF TRIP” message to warn the Allows setting the magnetic mode for all bearings. user that the boat is about to reach the last waypoint in the route. -
Page 25: Table Of Contents
KEYBOARD ..................15 acting as a shield for the GEONAV antenna. If, after 15 minutes, DIAGNOSTIC ................... 16 the GEONAV has not got any valid fix yet, turn the unit off and on again. NAVIONICS ELECTRONIC CHARTS ..........17 GRAPHIC ITEMS ................21 The GEONAV does not turn off FUNCTIONAL CHARACTERISTICS ..........
Need help?
Do you have a question about the 6 PLUS and is the answer not in the manual?
Questions and answers