Table of Contents
Advertisement
Advertisement
Table of Contents

Subscribe to Our Youtube Channel
Related Manuals for Geonav 11C


Summary of Contents for Geonav 11C
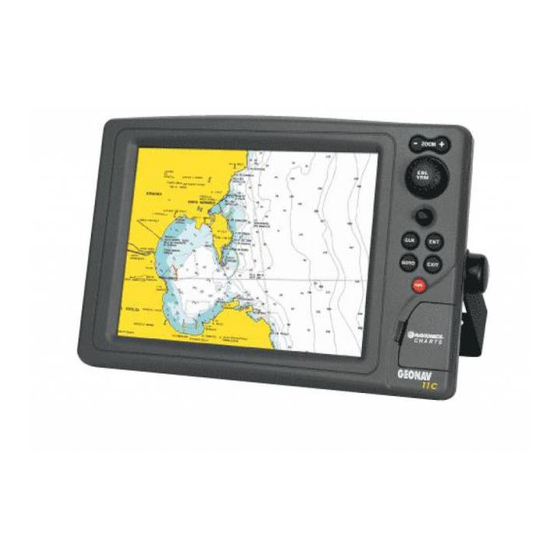
- Page 1 User and Installation Guide...
- Page 3 THE SAFETY OF NAVIGATION AND, AS ALWAYS, THE CAPTAIN IS RESPONSIBLE FOR THEIR PROPER USE. The use of the GEONAV implies knowledge and accep- tance of this warning by the user. NOTE: Technical characteristics and functions described in this manual are subject to change as a result of improvements or changes to the product.
-
Page 4: Introduction
Introduction INTRODUCTION The GEONAV is a chart plotter that can be interfaced with a GPS receiver, autopilot and other onboard instruments, and allows displaying the boat’s geographical position with respect to an electronic chart. Thanks to the GEONAV and a NAVIONICS Platinum™... -
Page 5: Characteristics
Characteristics CHARACTERISTICS General characteristics • Easy Pilot™ function for easy and direct control of autopi- • Possibility to transfer routes from one plotter station to another through network connection • EBL and VRM functions • Multiple display of tracks • Storage of track data including significant additional in- formation such as date, time, latitude/longitude, depth, temperature, wind data, etc. - Page 6 Characteristics • Water resistant (IPX6) Electrical characteristics • Power supply: 9 to 36 Vd.c. • Power consumption: Max. 13 W (G10C model) • Power consumption: Max. 21 W (G11C model) • Auxiliary voltage output: 10 to 36 Vd.c. (same as input voltage) - Max. 250 mA •...
- Page 7 Accessories • Bracket for detachable installation • Gasket and drilling template for panel mounting • Plastic frame and drilling template for flush mounting • Power supply cable • Auxiliary power supply cable • User and Installation Guide • Protection cap •...
-
Page 8: Installation And Precautions
Panel mounting Locate the area where the GEONAV is to be installed, then use the drilling template supplied with the plotter to properly cut holes and sockets out of the instrument’s panel. - Page 9 Flush mounting Locate the area where the GEONAV is to be installed, then use the cutting template supplied with the plotter to cut the panel. Apply a layer of silicone glue (the use of black colored glue is recommended, in order to prevent the area from going yellow when exposed to sunlight) to the plastic frame rear part;...
- Page 10 Installation and Precautions Bracket mounting Fix the bracket to the boat’s dashboard with screws 6mm in diameter. Returning used electrical and electronic devices in EU countries Users of electrical and electronic devices are obligated to collect used devices separately. Electrical (electronic) used devices may not be disposed of together with unsorted household refuse.
-
Page 11: Connections
Vaux+, 250mA * SHIELD * Vaux voltage is the same as the plotter’s input voltage. Auxiliary connector (7 pins) Allows connecting the GEONAV to an auxiliary instrument equipped with NMEA 0183 interface (e.g., echosounder and masthead transducer). 1. NMEA 0183 auxiliary data input... - Page 12 Connections I AN GND 2 TX + TX - English...
-
Page 13: Cartridge Installation
Cartridge Installation CARTRIDGE INSTALLATION Installing the CompactFlash™ Open the cartridge slot cover located on the plotter’s front side. Insert the cartridge into the appropriate slot, with the label side towards the right, and push it down. Close the cover exercising light pressure and check that it is perfectly closed, in order to avoid any water infiltration. - Page 14 Windows Explorer not to erase the content of the \NAVIONIC and \GEONAV folders. Damaging the files stored in such directories may result in loss of data or improper operation of the unit.
-
Page 15: Keyboard
Keyboard KEYBOARD ZOOM-/ZOOM+ • I n c r e a s e s / d e c r e a s e s the chart scale • Enables/disables the Autozoom function JOYSTICK (right/left - up/down) • Moves the cursor across the screen •... - Page 16 Keyboard Menu: • Confirms a selection GOTO • Accesses the main menu and enables the MOB function (if held pressed longer) • Cancels the setting of data in the windows • Cancels the option selection from the menu Cursor mode: •...
- Page 17 • Switches the GEONAV • Opens the brightness w i n d o w • Switches the GEONAV off (if held pressed for more than 3 seconds) English...
-
Page 18: Diagnostic
WARNING: The unit’s internal memory can be cleared by holding the CLR key pressed when switching the unit on. This operation will delete all the settings stored in the GEONAV and restore factory settings. Moreover, the routes, tracks and mark- ers not saved on the CompactFlash™ cartridge will be deleted. -
Page 19: Navionics Electronic Charts
NAVIONICS Electronic Charts NAVIONICS ELECTRONIC CHARTS The GEONAV includes a built-in world map. Additional car- tography details relative to a specific area of navigation are available from the CompactFlash™ cartridges storing NAVIONICS Platinum™ or Gold™ electronic charts. NAVIONICS electronic charts contain a detailed set... - Page 20 Press GOTO to display the menu, select SETUP, DEPTH UNITS and then set the unit desired in meters, feet or fathoms. The GEONAV will convert all the depth values in the unit selected, making them appear like those re- ported in the official nautical charts (see the figure).
- Page 21 The objects that can be queried include depth contours, depth areas, point objects (lights, navaids, landmarks, etc.), land ar- eas, spot soundings, coastlines, rocks, wrecks and, in gen- eral, any symbol present on the chart. By querying the lights and navaids, the X-Plain™ function will give the description of the object in natural language, thus avoiding the use of abbreviations and symbols that are difficult to understand.
- Page 22 NAVIONICS Electronic Charts Depth contours This function allows the user to select the display of depth contours; the options available are: display of contours only with depths up to 5 meters 10m: display of contours only with depths up to 10 meters 20m: display of contours only with depths up to 20 meters ALL:...
- Page 23 Displaying port services NOTE: This function is available only with the NAVIONICS Platinum™ cartridges containing the Port Services feature. If the NAVIONICS Gold™ cartridges are used, the supported functions will be those provided by the chart plotters employing only the Gold™ charts. Position the cursor on the port icon and press ENTER.
- Page 24 NAVIONICS Electronic Charts Select INFO to display the list of the services available; a win- dow will show the list of the port services available in the port selected. Choose the service desired by the joystick. The num- ber and the type of icon differ from one port to another. Port services are identified by the following icons: Info marina Fuel...
- Page 25 Displaying Tides and Currents data NOTE: This function is available only with the NAVIONICS cartridges containing Tides and Currents data. Position the cursor on the icon of a Tide or Cur- rent station. If the zoom level is adequate, the present tide or current value will show in the vicinity of the cursor position, together with the curve estimated in the subsequent hours.
- Page 26 NAVIONICS Electronic Charts Displaying aerial / satellite charts NOTE: This function is available only with the NAVIONICS Platinum™ cartridges storing aerial and satellite photographs. Press GOTO to display the menu, select SETUP, PHOTO OVER- LAY and then LAND or FULL. From a given zoom level onwards, where available, aerial or satellite photographs will overlay the traditional chart items, only in land areas (LAND) or both in land and sea areas (FULL).
- Page 27 English...
-
Page 28: Graphic Items
Graphic Items GRAPHIC ITEMS Besides chart data, the GEONAV displays some graphic items useful during navigation. The figure below shows some of these items. 1 - Marker Indicates a point of interest as- sociated with a symbol, a name and a color. - Page 29 7 - Cursor Indicates the position expressed in geographical coordinates (latitude and longitude). It is displayed when the plotter is in Cursor mode. 8 - Heading vector Indicates graphically the boat’s current route. 9 – North indicator Indicates the north direction when the Chart rotation func- tion is enabled.
-
Page 30: Functional Characteristics
Functional Characteristics FUNCTIONAL CHARACTERISTICS This chapter describes some of the most important functions of the GEONAV, as well as the terms most commonly used in this document. Switching on/Switching off the unit To switch the GEONAV on, press the PWR key. To switch it off, keep the PWR key pressed for more than 3 seconds. - Page 31 This mode is also called automatic because the unit automati- cally updates the boat’s position on the screen. Cursor mode (manual) When in Cursor mode, the manual cursor is displayed. It is possible to insert, delete and move waypoints, insert and delete markers, display navaid information, etc., but it is not possible to gain access to the depth sounder window.
- Page 32 “AUTOZOOM ? ENTER = YES” message is displayed, then confirm by pressing ENTER. To disable the Autozoom function, press ZOOM. When the GEONAV is turned on, and if at least one waypoint has been previously entered, the Autozoom function will be automatically enabled.
- Page 33 of the boat, provided that the boat’s speed is greater than 3 knots. This function will be enabled provided that no waypoint has been previously entered. EBL/VRM functions The EBL (Electronic Bearing Line) and VRM (Variable Range Marker) functions allow entering markers and waypoints as range and bearing coordinates with respect to the current po- sition.
- Page 34 Functional Characteristics to enable the VRM ring and adjust its size by rotating the knob so as to reach the range desired. To edit the values set, press the knob to switch from the VRM function to the EBL func- tion.
- Page 35 Overzoom The Overzoom function allows expanding the chart range. The Overzoom does not provide any additional chart detail, only improves the readability of the available information, act- ing as a magnifying glass. When the Overzoom is enabled, the unit will add OVZ to the scale displayed in the Navigation window.
- Page 36 Press the PWR key to display the LIGHT window. Use the joystick to adjust the brightness level. Press ENTER to exit. Color Besides displaying color nautical charts, the GEONAV allows selecting the track and marker colors. Press the GOTO key to access the menu, select TRACK or MARKER, then COLORS and confirm by pressing ENTER;...
- Page 37 To set this function, press GOTO, select SETUP and then ANCHOR ALARM. ARPA Your GEONAV allows displaying the position of targets tracked by any radar featuring the ARPA (Automatic Radar Plotting Aid) or MARPA (Mini-ARPA) function.
- Page 38 Functional Characteristics 4 - Thicker mark The last mark - thicker than the others - shows the forecasted position of the target - based on its own current speed and direction - after six minutes. 5 - Target shape The target shape provides information on the target tracking status.
- Page 39 - CPA/TCPA warning: target falls within the CPA/TCPA lim- - Target lost NOTE: When the ARPA function is active, the own ship vector shows the six marks - like the target vectors - providing the forecasted position of the own ship every minute for the following six minutes.
- Page 40 Functional Characteristics CPA/TCPA limits Press the GOTO key, select SETUP, then the SET CPA/TCPA LIM. option to set the CPA (Closest Point of Approach) and TCPA (Time to Closest Point of Approach) limits. As soon as the CPA or TCPA parameters of a target become lower than the selected limits, a warning message is issued.
-
Page 41: Quick Tour
Windows will display the boat’s speed, route, chart scale and local time. The GEONAV is in Navigation mode; by the joystick, it is pos- sible to switch to Cursor mode (editing mode). The cursor posi- tion is shown by two windows. The joystick allows moving in all directions. - Page 42 CLR key (Cursor mode), starting from the last en- tered. To go back to Navigation mode, press EXIT. If an autopilot is connected to the GEONAV, the plotted route is automatically followed as soon as the Navigation mode is enabled.
- Page 43 By using the joystick, position the cursor on the chart item desired (symbol for light, buoy, depth area, etc.) and then press the joystick; the relative information of the object will be shown. Use the joystick to scroll the information list, then press EXIT to exit and select another item.
-
Page 44: Operating Modes
Operating Modes OPERATING MODES When switching on the GEONAV, the user can select one of the two main operating modes available. Press the PWR key and wait for the message on official nauti- cal charts to show (if required, select one chart among those contained in the cartridge), then press GOTO to enable the ECS mode, or ENTER to enable the standard GEONAV mode. - Page 45 • Distance from the last waypoint to the cursor • Chart scale To edit the existing route, move the cursor by using the joy- stick. The GEONAV will display the following data: • Distance from the boat’s position to the cursor • Time to arrive to the cursor •...
- Page 46 Operating Modes NAVIGATION MODE By pressing the EXIT key repeatedly, it will be possible to ac- cess the several windows available, provided that they have been previously enabled by the appropriate option of the Setup menu. When the fix is valid, the window sequence will be the fol- lowing: SAILING >...
-
Page 47: Range Window
Range Window RANGE WINDOW This window, always present, shows the following information: • Zoom status (top left corner): - Z+ means the chart can be further enlarged by pressing ZOOM+; - no indication means the chart is shown at the best pos- sible level;... -
Page 48: Sailing Windows
Sailing Windows SAILING WINDOWS These windows are enabled automatically as soon as the GPS receiver has obtained a valid fix (FIX OK), data is received from the wind instruments, a route is present and provided that they have been enabled via the Setup menu. They display the following information: •... - Page 49 • Water temperature (if available) • True wind speed • True wind direction (magnetic) If more waypoints are present, besides the target waypoint, a window will show the apparent wind data on the next leg. The apparent wind speed is indicated by the digits in the center of the window.
-
Page 50: Navigation Windows
Navigation Windows NAVIGATION WINDOWS These windows are automatically enabled as soon as the GPS receiver has obtained a valid fix (FIX OK). If no route has been entered, the following data will be shown: • Boat’s speed • Chart scale •... - Page 51 Time to arrive to the target waypoint • Estimated time to the route end • Sea depth (if available) • Water temperature (if available) NOTE: To display sea depth and temperature values, the GEONAV must be inter- faced with a depth sounder. English...
-
Page 52: Depth Sounder Window
Depth Sounder Window DEPTH SOUNDER WINDOW This window, displayed if the GEONAV is interfaced with a depth sounder, replaces the number indicating the sea depth in the Motor Boating windows with a graph showing the sea bed. If received, the graph shows the water temperature as w e l l . -
Page 53: 2D Split Windows
2D/2D Split Windows 2D/2D SPLIT WINDOWS The 2D/2D split windows allow displaying, at the same time, two different areas on the chart. For instance you can see your ship’s position at two different zoom levels in the two windows. Or, while you insert a route in one window, you can keep under control your ship’s position in the other one. - Page 54 2D/2D Split Windows To change the active window from left to right or vice versa, hold EXIT pressed for a short time. Note that if a window is in Cursor mode, because the cursor has been moved, pressing EXIT returns in Navigation mode, without changing the active window.
-
Page 55: 3D Split Windows
2D/3D Split Windows 2D/3D SPLIT WINDOWS NOTE: This function is available only with the NAVIONICS Platinum™ cartridges. The 2D/3D split windows allow displaying, at the same time, standard cartography (2D) and three-dimensional cartogra- phy (3D); this requires a Navionics Platinum™ chart. To activate the 2D/3D split windows press GOTO to display the menu, select SETUP, 2D/3D SPLIT WINDOWS and edit the option as desired. - Page 56 2D/3D Split Windows To change the active window from 2D to 3D or vice versa, hold EXIT pressed for a short time. When the 3D window is active, use the joystick to displace the view point, the ZOOM key to enlarge or reduce the image and the knob to rotate the view.
-
Page 57: Trip Window
Trip Window TRIP WINDOW The Trip window shows general data relating to the route followed: • Average speed from departure • Maximum speed from departure • Time elapsed from departure • Partial distance covered from departure • Overall distance covered To reset all counters (except for the overall distance) before starting a new journey, press the CLR key. -
Page 58: Satellite Window
Satellite Window SATELLITE WINDOW At start-up the satellite window displays how many and which satellites are tracked by the GPS receiver. The outer circle represents the horizon, the inner one identi- fies a 45° elevation with respect to the horizon, and the cen- tral circle points to the zenith. - Page 59 The altitude value is available only if four satellites are tracked and a 3D fix is obtained. As soon as a valid fix is available, the GEONAV will automati- cally switch to Navigation mode and display the boat’s posi- tion at the best chart range available; the window at the bot- tom of the screen will indicate the boat’s course and speed.
-
Page 60: General Info Window
General Info Window GENERAL INFO WINDOW This window displays the following information on the boat’s current position: • Geographical coordinates (latitude/longitude) • The position correction applied to the latitude and longi- tude (SETUP, CALIBRATION) • Magnetic variation value received by the GPS •... -
Page 61: Tide Info Window
Tide Info Window TIDE INFO WINDOW When a NAVIONICS cartridge featuring Tides and Currents data is present, this window displays further information, besides the forecast data supplied by selecting the Tides and Currents station. The following data is displayed: • Latitude and longitude at the current boat’s position •... -
Page 62: Runway Window
Runway Window RUNWAY WINDOW This window displays the fol- lowing information on the tar- get waypoint: • Name of the target waypoint • Distance from the target waypoint • Estimated time of arrival to the target waypoint • Bearing • Course •... -
Page 63: Main Menu
Main Menu MAIN MENU The main menu bar, that appears when pressing the GOTO key, allows accessing the following options: ROUTE: To display route information, reverse and delete the route, set the consumption data and save or read data from the cartridge. -
Page 64: Route
Route ROUTE EDITING A ROUTE (CURSOR MODE) Creating a waypoint Using the joystick, move the cursor on the position desired and press ENTER to insert a waypoint. To enter further waypoints, move the cursor and press ENTER. The new waypoint will be appended to the existing route. Up to 99 waypoints per route can be entered, also by using the GOTO functions available from the main menu. - Page 65 EDITING A ROUTE (NAVIGATION MODE) If the manual cursor is displayed, press the EXIT key to enter Navigation mode. Changing the target waypoint Use the “Route to a waypoint” function (see the Functions in the Route Menu Section). WARNING: The route will be modified and the new target waypoint selected will be the first waypoint in the route.
- Page 66 Route The arrival time at the waypoint and the fuel consumption will be displayed provided that estimated speed and fuel con- sumption values have been inserted previously (see the Enter- ing speed and fuel consumption data Section). To move within the page and scroll the adjacent pages, use the joystick.
- Page 67 Press ENTER and select the target waypoint by the joy- stick. Press ENTER to confirm the selection, or EXIT to exit. As the GEONAV plots a new route, the waypoint selected be- comes the first waypoint in the route, whereas previous waypoints are deleted.
-
Page 68: Track
Track TRACK The Track function allows recording the track actually fol- lowed by the boat. The Track function can be enabled and disabled several times during navigation; in this case, sepa- rate track segments will be drawn. Starting a track To enable the Track function, press the GOTO key to display the main menu, select TRACK, START and press ENTER to confirm. - Page 69 CURRENT, SAVE ALL and press ENTER to confirm. To change the default file name, use the joystick. To confirm the opera- tion, press ENTER. A message will confirm that the track has been stored cor- rectly. Once stored, the track will disappear from the screen. Each time a track is stored in the CompactFlash™, the plotter’s memory is cleared and the indicator of memory used in the TRACK menu is reset to 0%.
- Page 70 Track Displaying and changing track segment data Position the manual cursor on a point in the track segment. A window will show the navigation data recorded in that po- sition. • Recording date • Recording time • Sea depth • Water temperature •...
- Page 71 The GEONAV will position the manual cursor at the begin- ning of the track segment selected; insert a waypoint by press- ing ENTER, or a marker by holding ENTER pressed. Setting the track density Press the GOTO key and select TRACK, CURRENT, TRACK DENSITY by the joystick.
-
Page 72: Markers
Markers MARKERS Markers are used to identify points of interest to which names and symbols can be assigned. When a marker is entered, the plotter records also date, time and sea depth and temperature (if available). This data is stored together with the marker name, symbol and color and can be displayed in the window shown by the GOTO MARKER menu. - Page 73 NAVIGATION MODE Inserting a marker Hold the ENTER key pressed to insert a marker at the boat’s position. A window will display the symbol and the name automatically assigned to the marker; to change the marker symbol, name and color according to the type of marker to store (e.g., fishing spots, submerged wrecks, rocks, etc.), use the joystick and the -ZOOM+ key.
- Page 74 ENTER to confirm. Once the desired marker has been selected, the GEONAV will insert a waypoint at the marker position and append the new leg to the existing route (if no route is available, the new waypoint will be connected to the boat’s position).
- Page 75 To delete a single marker among those displayed, press the GOTO key to show the menu, select MARKER, CURRENT and GOTO MARKER. Select the marker desired from the list shown, then press CLR to delete it and ENTER to confirm the operation. To delete a set of markers stored in the CompactFlash™, press the GOTO key to show the menu, then select MARKER and OLD.
-
Page 76: Goto Port
ENTER. Once the desired port has been selected, the GEONAV will insert a waypoint in the port position and append the new leg to the existing route (if no route is available, the new waypoint will be connected to the boat’s position). - Page 77 English...
-
Page 78: Goto Nearest
ENTER to confirm, or EXIT to can- cel the operation. The GEONAV will show the three destinations closest to the boat’s position (if in Navigation mode), or to the cursor’s posi- tion (if in Cursor mode), and position automatically on the closest destination (flashing). - Page 79 The GEONAV will insert a waypoint in the port selected, de- lete automatically the existing route (if in Navigation mode), or append the waypoint to the existing route (if in Cursor mode), then go back to Navigation mode and enable automatically the Autozoom function.
- Page 80 Goto Nearest • Dawn and sunset time • Moonrise and moonset time • Moon phase • Tide level graph (24 hours) Tidal current station • Name of the station • Forecast reference date • Time, speed and direction with respect to the cursor’s po- sition in the graph •...
- Page 81 In both cases above, the default date is today. A different date can be set by pressing ENTER or -ZOOM+. NOTE: The same information can be accessed by positioning the manual cursor on the icon of a Tides or Currents station, and pressing ENTER to confirm. English...
-
Page 82: Setup
Setup SETUP The Setup menu allows setting the available options. To ac- cess the Setup menu, press GOTO to display the main menu, then select SETUP by using the joystick. The menu items are grouped in seven sets. When selecting a set by the joystick, the list of the available options will be displayed. - Page 83 • Easy View (ON/OFF) Enables/disables the Chart Magnification function. • Overzoom (ON/OFF) Enables/disables the Overzoom function. • Presentation (INTER./U.S.) Selects the symbols and colors of chart presentation. • Own Ship Icon Selects the icon that will identify the ship’s position on the screen.
- Page 84 Setup • Depth Units (M/FT/FA) Selects depth units. • Bearings (TRUE/MAG) Sets the magnetic mode for all bearings. • Language (EN/FR/ES/DE/DK/IT/SV/NL/SU/NO/GR) Selects the language. WINDOWS • Selects the auxiliary windows to dis- play. For every window, a preview image - whose display can be en- abled/disabled (ON/OFF) - is avail- able.
- Page 85 English...
-
Page 86: Goto Lat/Lon
Press the GOTO key and select LAT/LONG by the joystick. En- ter the geographical coordinates desired and confirm. The GEONAV will move the manual cursor to the position selected; insert a waypoint by pressing ENTER, or a marker by pressing ENTER longer. -
Page 87: Goto Range/Bearing
Press the GOTO key and select R&B by the joystick. Enter the range and bearing values relative to the position desired and confirm. The GEONAV will move the manual cursor to the position selected; insert a waypoint by pressing ENTER, or a marker by holding ENTER pressed... -
Page 88: Mob Function
To enable the MOB function, hold the GOTO key pressed longer. The GEONAV will place a special marker on the current posi- tion and show a window with the following data: •... -
Page 89: Ethernet Connection
Another innovative feature is the sharing of the electronic chart among several instruments, without having to purchase more than one original chart to be used on one GEONAV; all the other instruments connected to the network can use cop- ies of the original chart (see Chart sharing). - Page 90 Ethernet Connection to be assigned network addresses different from those assigned to any external device (PC, printer, server, etc.) connected to the same network. The setting of network parameters is automatic. To solve pos- sible conflicts that cannot be handled automatically, this op- eration can also be carried out manually.
- Page 91 The route edited will be transferred to all the instruments connected to the network, thus overwriting the local route data (if any). To cancel the route transfer operation, press CLR. NOTE: After canceling the transfer of the edited route, it is still possible to save the changes to the cartridge inside the instrument;...
-
Page 92: Autopilot
Autopilot AUTOPILOT The GEONAV allows a boat equipped with an autopilot to fol- low automatically the entered route, compensating for any di- version caused by external conditions (wind, currents, etc.). The GEONAV will display the “PROXIMITY TO WAYPOINT” message to warn the user that the boat is about to reach the target waypoint. -
Page 93: Table Of Contents
Table of Contents TABLE OF CONTENTS INTRODUCTION .................... 4 CHARACTERISTICS ..................5 INSTALLATION AND PRECAUTIONS ............8 CONNECTIONS ..................11 CARTRIDGE INSTALLATION ............... 13 KEYBOARD ....................15 DIAGNOSTIC ....................18 NAVIONICS ELECTRONIC CHARTS ............19 GRAPHIC ITEMS ..................28 FUNCTIONAL CHARACTERISTICS ............30 QUICK TOUR ....................
Need help?
Do you have a question about the 11C and is the answer not in the manual?
Questions and answers