Advertisement
Quick Links
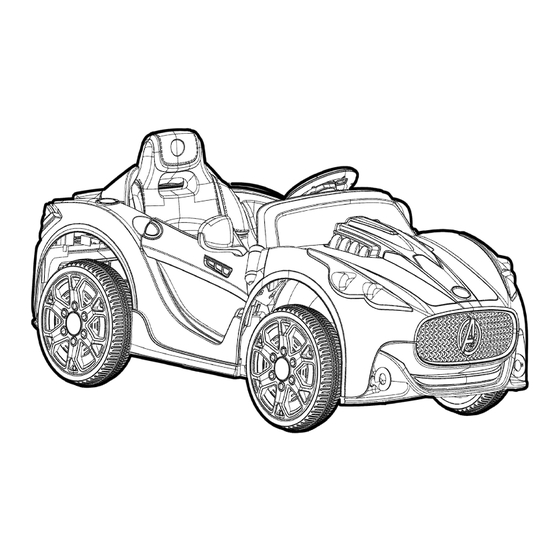
OWNER'S MANUAL
6 VOLT SUPERCAR
THIS MANUAL CONTAINS IMPORTANT SAFETY,
PERFORMANCE AND
MAINTENANCE INFORMATION . READ THE MANUAL BEFORE TAKING YOUR
FIRST RIDE OR ALLOWING YOUR CHILD TO RIDE YOUR NEW ELECTRIC
RIDE- ON TOY. KEEP THE MANUAL HANDY FOR FUTURE REFERENCE.
DO NOT RETURN TO STORE!
QUESTIONS OR COMMENTS?
STOP
1-800-288-1560
FOR AGES 3 +
MAXIMUM WEIGHT: 65 lbs. (29.5 kgs)
NOTE: Illustrations in this Manual are for reference purposes only and may not reflect the exact
appearance of the actual product. Specifications are subject to change without notice.
Advertisement

Subscribe to Our Youtube Channel
Related Manuals for Dynacraft Avengers


Summary of Contents for Dynacraft Avengers
- Page 1 OWNER’S MANUAL 6 VOLT SUPERCAR THIS MANUAL CONTAINS IMPORTANT SAFETY, PERFORMANCE AND MAINTENANCE INFORMATION . READ THE MANUAL BEFORE TAKING YOUR FIRST RIDE OR ALLOWING YOUR CHILD TO RIDE YOUR NEW ELECTRIC RIDE- ON TOY. KEEP THE MANUAL HANDY FOR FUTURE REFERENCE. DO NOT RETURN TO STORE! QUESTIONS OR COMMENTS? STOP...
- Page 2 TABLE OF CONTENTS A Introduction, Safety and Warnings B Before You Begin Assembly C Parts Diagram D Assembly E How to Use Your Vehicle F Detailed Maintenance and Repair G Troubleshooting Guide H Warranty ELECTRIC CAR SPECIFICATIONS SUITABLE AGE CAPACITY up to 65lbs (29.5kgs) SPEED 2.5 mph...
- Page 3 INTRODUCTION, SAFETY, AND WARNINGS ABOUT THIS MANUAL: This Manual was written to help you and your child get the most performance, comfort, enjoyment and safety when riding your new electric ride- on toy. It is important for you to understand your new electric ride-on toy. By reading this manual before you let your child go out on his/her first ride, you will know how to get the most from your new electric ride-on toy.
- Page 4 Always wear appropriate clothing and shoes, including lace-up or similar shoes with rubber soles. Never ride barefoot or in sandals and make sure that shoelaces or other fasteners are tied and kept away from the wheels and drive system of the ride-on toy. RIDER USE AND REQUIRED PARENTAL SUPERVISION RIDERS MUST NOT EXCEED THE WEIGHT LIMIT OF 65 pounds (29.5kg) and MUST BE OVER 3 years old.
- Page 5 SAFE RIDING PRACTICES AND WARNINGS • Check and obey all local laws or regulations which may be in effect in the locations where the electric ride-on toy may be used. • Always wear a helmet and other safety equipment and appropriate clothing and shoes.
- Page 6 • Do not to allow hands, feet, hair, body parts, clothing, or similar articles to come in contact with wheels or other moving parts. • Before each cycle of operation, you must perform the preoperation checks specified in this manual or by the manufacturer, including: •...
- Page 7 BEFORE YOU BEGIN ASSEMBLY WARNING Remove all packing and items from the display box. Make sure that the power switch is turned “OFF” before assembling the electric ride-on toy. ESTIMATED ASSEMBLY TIME You should allow approximately 35 minutes for assembly, not including initial charging time.
- Page 8 PARTS DIAGRAM Box Wrench(included) Plastic Body Assembly x1 Steering Column x1 Tool Box x1 Rear Axle x1 Seat x1 M5 X40 Machine Screw x1 M5 Nut x1 12 Bushing x3 View Mirror x2 Charger x1 Windshield x1 Motorhood x1 4x12 Round Head Screws x6 Steering Wheel x1 Axle Cap x4 Gear Box x1...
- Page 9 ASSEMBLY Your new vehicle requires adult assembly. Please set aside around 35 minutes for assembly. Please identify all parts before assembly and save all packaging material until assembly is complete to ensure that no parts are discarded. Tools Required: Standard slip joint pliers 17mm Box Wrench Phillips Screwdriver (included)
- Page 10 2. Rear Axle Assembly Remove all parts from the rear axle. Insert the longer end of the rear axle through the hole in the vehicle body as shown, and keep the rear axle well inside the vehicle body. 3. Driving Wheel Assembly .
- Page 11 4. Steering Column Assembly Turn the vehicle on its side as shown in pi ct ure below . Ø Slide a 10 washer then insert the straight end of steering shaft through the hole in the vehicle body until it sticks out of the hole on the top of the ve hicle bo dy. <P icture 1> Insert the bent end of steering column through the hole in the front axle linkage.
- Page 12 9. Tool Box Assembly . Fit the tabs at back of the tool box to the holes in the vehicle body. . Tighten two 4x12 round head screws with a screwdriver. 10. Seat Assembly . Insert the tabs at the back of the seat into the slots in the vehicle body.
- Page 13 Steering Wheel Battery Safety Information: Batteries may leak fluids that can cause chemical burn injury or ruin your product. To avoid battery leakage: Install batteries correctly, observing the polarity (+,-) signs to avoid leakage. ● Do not mix old and new batteries. ●...
-
Page 14: Battery Charging
BATTERY CHARGING IMPORTANT! Before first time use, charge the battery for at least 18 hours. Charge the battery for at least 12 hours after each use of the vehicle. Never charge the battery longer than 30 hours. Over charging or undercharging the battery may shorten battery life and decrease vehicle running time. - Page 15 · Do not charge the battery on a surface (such as a kitchen counter top) which could be damaged by the acid contained inside the battery. Take precautions to protect the surface on which you charge your battery. · Use only an original charger (AC 120V 60Hz) with an output of DC 6V (1A) to charge your vehicle battery.
- Page 16 HOW TO USE YOUR VEHICLE POWER SWITCH: Turn the vehicle on and off. FORWARD-BACKWARD SHIFT LEVER: . To move the car forward, shift the lever up. . To move the car backward, shift the lever down. . Position the lever in the middle to stop the car. FOOT PEDAL: .
- Page 17 AUDIO INPUT JACK: Use the audio input cable (included) to connect your MP3 player or other compatible audio device with this vehicle to listen to music. 1. Plug one end of the audio input cable (included) into the audio input jack 2.
-
Page 18: Safety Precautions
SAFETY PRECAUTIONS • Your new battery must be charged for at least 18 hours before you use it in your vehicle for the first time. • The child must have adult supervision at all times. • Do not ride on the road, footpaths, near pools, or bodies of water. •... - Page 19 DETAILED MAINTENANCE AND REPAIR Turn power “OFF” before conducting any maintenance procedures. Tools Required: Flat head Screwdriver (not included) (included) HOW TO REPLACE FRONT WHEELS & REAR LEFT WHEEL Remove the Axle Cap with a flat head screwdriver. Remove the M10 locknut with a 17mm socket wrench. Remove the Ø12 washer.
- Page 20 HOW TO REPLACE DRIVING WHEEL AND GEAR BOX Remove the Axle Cap with a flat head screwdriver. Remove the M10 locknut with a 17mm socket wrench. Remove the Ø12 washer. Remove the driving wheel, and replace with new wheel. If you do not need to replace the gear box, please proceed to step 9. Unscrew the screws on the seat with a screwdriver and remove the seat.
- Page 21 HOW TO REPLACE THE POWER SWITCH Remove the power switch with a flat head screwdriver (not included). Unplug the main connector from the power switch socket as shown. Plug in the new power switch for replacement. HOW TO REPLACE THE FOOT PEDAL Turn the vehicle body on its side.
-
Page 22: Battery Care And Disposal
BATTERY CARE AND DISPOSAL Do not store the battery in temperatures above 75° F (23.5° C) or below 32° F (0°C). THIS PRODUCT CONTAINS SEALED LEAD ACID BATTERIES WHICH MUST BE RECYCLED IN ACCORDANCE TO YOUR LOCAL AND STATE LAWS. PLEASE CAREFULLY READ AND UNDERSTAND THE FOLLOWING DISPOSAL INSTRUCTIONS: Disposal: This product contains sealed lead acid batteries which must be disposed of... - Page 23 MAINTAINING YOUR VEHICLE Occasionally use a lightweight oil to lubricate moving parts such as wheels and the steering linkages. Park the vehicle indoors or cover it with a tarp to protect it from wet weather. Keep the vehicle away from sources of heat, such as stoves and heaters. Plastic parts may melt.
-
Page 24: Troubleshooting Guide
“Replace only with an original 6 Volt (7.0 Amp/Hr.) battery with built-in thermal fuse. Do not use non- original substitute parts. Visit the Dynacraft website and replace with Motor damage a new motor. Check all wires and connectors. Make sure... - Page 25 Problem Possible Cause Solution Tripped thermal fuse The built-in thermal fuse may “trip” and shut down operation of the vehicle if the vehicle is overloaded or the driving conditions too r t “ ” d power switch to the "OFF" position, release the foot pedal, and wait approximately 2 minutes before operating the vehicle again.
- Page 26 Problem Possible Cause Solution Vehicle runs sluggishly Undercharged battery Charge the battery. A new battery should have been charged for at least 18 hours before using the vehicle for the first time. After first- time use, recharge the battery for at least 12 hours after each use.
-
Page 27: Limited Warranty
Parents that allow their children to ride taking such actions will assume their own risk and the risk of injury to their children, and Dynacraft will not be responsible. THE PURCHASE OF THIS ELECTRIC RIDE-ON TOY WILL CONFIRM THE BUYER’S AGREEMENT THAT DYNACRAFT’S LIABILITY UNDER THIS WARRANTY SHALL BE NO... - Page 28 (sample: 03TD5899988) Having this information is required and helps us handle your call more effectively. DO NOT return this item to the store. STOP Please call Dynacraft for assistance. © MARVEL Dynacraft BSC, Inc. 2015 Printed in China 89 S. Kelly Rd., American Canyon, CA 94503 Call Toll Free 1.800.288-1560...
Need help?
Do you have a question about the Avengers and is the answer not in the manual?
Questions and answers