Advertisement
Available languages
Available languages
Table of Contents
- 1 Caratteristiche Tecniche
- 2 Installazione
- 3 Scheda Elettronica
- 4 Manutenzione
- 5 Possibili Inconvenienti E Loro Rimedi
- 6 Installation
- 7 Technical Characteristics
- 8 Operational Tips
- 9 Safety Pressure Switch
- 10 Routine Maintenance
- 11 Maintenance (to be Carried out by Qualified Service Personnel Only)
- 12 Compressor Burn-Out
- Download this manual
See also:
Operator's Manual
Advertisement
Table of Contents

Related Manuals for Ugolini MT GL


Summary of Contents for Ugolini MT GL
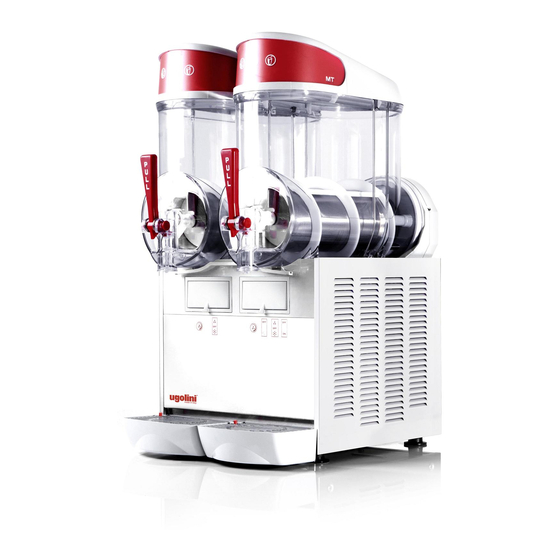
- Page 1 MT GL/GLS/UL MANUALE DI SERVIZIO SERVICE MANUAL...
- Page 2 MT GL/GLS/UL...
- Page 3 Questo apparecchio è coperto da uno o più dei seguenti brevetti e/o altre domande di brevetto depositate: This dispenser is manufactured under one or more of the following U.S.patents and/or other pending patents: Cet appareil est couvert par un ou plusieurs des brevets suivants et/ou autres demandes de brevet déposées: Dieses Gerät ist durch eines oder mehrere der folgenden Patente und/oder andere eingetragene Patentanmeldungen geschützt: Este aparato está...
-
Page 4: Caratteristiche Tecniche
MT GL/GLS/UL 1 CARATTERISTICHE TECNICHE ostacolare il flusso d’aria necessario al raffreddamento. Controllare la stabilità dell’apparecchio e regolare eventual- mente i piedini in altezza. Nel caso in cui con il distributore MT 1 MT 1P MT 2 MT 3 venga fornita una serie di piedini alti (100 mm circa), questa deve essere sostituita a quella originale. - Page 5 3 SUGGERIMENTI eccessivo. Riduttore di flusso: quando il distributore è usato in modalità bibita, è consigliabile installare il riduttore di flusso sul rubinetto Quanto segue, derivato dal libretto di Installazione uso e manu- per ridurre l’efflusso della bibita (vedere figure 2). tenzione per l’operatore, è...
- Page 6 MT GL/GLS/UL 4 CONTROLLI te girare la vite di regolazione A: 1 - Verso destra (senso orario) per ottenere una granita più densa (l’indice si abbasserà nella finestrella del Coperchio Posteriore F). 4. 1 CONTROLLO DENSITÀ PRODOTTO (POSI- Verso sinistra (senso antiorario) per ottenere una granita meno densa (l’indice si alzerà...
-
Page 7: Scheda Elettronica
ta, e ciò si può verificare solo se almeno una elettrovalvola è stato (modo Bibita) vengono attivati proprio per permettere in aperta e mette in comunicazione le due sezioni. Pertanto la par- questo lasso di tempo la bilanciatura delle pressioni. tenza del compressore rispetto all’apertura dell’elettrovalvola che si apre per prima (qualunque essa sia) è... - Page 8 MT GL/GLS/UL mano le viti di fissaggio ricoperte in plastica (vedere figure 4). cante o con altro grasso compatibile con policarbonato. IMPORTANTE Lo schema elettrico del distributore è riportato sulla parte interna del pannello lato rubinetto. 5. 2 MANUTENZIONE DEL CIRCUITO FRIGORI- FERO 5.
- Page 9 5. 2. 2 COME SCARICARE IL CIRCUITO Il circuito frigorifero delle nostre macchine è costruito in modo che la carica del gas può essere effettuata solo attraverso il tubo di carica del compressore (zona di “Bassa Pressione”): per que- sto il bocchettone “HI” non viene mai menzionato né usato nella Togliere tutti i pannelli della macchina.
-
Page 10: Possibili Inconvenienti E Loro Rimedi
MT GL/GLS/UL 6 POSSIBILI INCONVENIENTI E LORO RIMEDI PROBLEMA CAUSA RIMEDIO Coperchi non illuminati Interruttore della luce spento Azionare l’interruttore Coperchio non correttamente posizionato Posizionare il coperchio in modo corretto sul contenitore Lampadina bruciata Sostituire la lampadina Contatti elettrici dei contenitori non cor-... - Page 11 PROBLEMA CAUSA RIMEDIO Poco gas nel circuito frigorifero Verificare l’eventuale presenza di una fuga di gas. Una volta trovata, sigillare il punto di fuga e rifare la carica del gas (ve- di capitolo 3.2.3. e 3.2.4.) La macchina non raffredda Motore ventilatore non funzionante C o n t r o l l a r e c h e l a v e n t o l a g i r i liberamente.
- Page 12 MT GL/GLS/UL 7 SCHEMI ELETTRICI (PER MACCHINE PRODOTTE FINO A MARZO 2002) 7. 1 VERSIONE GLS 7. 2 VERSIONE GL/UL...
- Page 13 8 SCHEMI ELETTRICI (PER MACCHINE PRODOTTE DOPO APRILE 2002) 8. 1 VERSIONE GLS 8. 2 VERSIONE GL/UL...
-
Page 14: Installation
MT GL/GLS/UL 9 TECHNICAL CHARACTERISTICS machine. Replace the standard legs originally installed with the 100 mm (4”) legs whenever they are provided with the unit. Before plugging the unit in, check if the voltage is the same MT 1 MT 1P... - Page 15 refractometer toward direct lighting. The brix reading (as read The length of time for freeze down of Granita is governed by many variables, such as ambient temperature, mix initial through the window of the refractometer) should register at temperature, sugar content (Brix level) and viscosity setting. 13.5 ±...
- Page 16 MT GL/GLS/UL and counterclockwise to raise it. Compressor is on. When knob is set at the coldest position, the shut off temperature is around 2-3°C. When knob is set at the warmest position, the shut off temperature is around 11-12°C.
-
Page 17: Safety Pressure Switch
of solenoid valves re-opening are unpredictable and could take two plastic coated screws (see figure 11). place any time, even before high pressure and low pressure sections of the circuit are balanced, what would overload the compressor. In order to prevent such an event, the compressor re-starting is delayed and allowed only after approx 60 seconds from the moment that whichever solenoid valve is energized. - Page 18 MT GL/GLS/UL 13. 2. 2 DISCHARGING polycarbonate. Remove the dispenser panels. Remove the screw cap from the compressor process tube. IMPORTANT Connect the process tube to the LOW part of the gauge set. Connect the VAC port of the gauge set to an adequate The electric diagram of the dispenser is located in the approved gas recovery system.
-
Page 19: Compressor Burn-Out
following procedure and therefore the HI valve must be kept closed. Determine how many ounces/grams should be filled by the charging unit. This information can be found on the dispenser data plate. Remove bowls and mixers from the dispenser. Plug in the dispenser and turn on the power switch. Set to I position all the Mixer/Refrigeration switches and wait until solenoid valves are activated (in multiple bowl machine only) and compressor starts. - Page 20 MT GL/GLS/UL 14 GENERAL TROUBLESHOOTING GUIDE PROBLEM CAUSE REMEDY Top cover not illuminated Light switch turned off Turn switch on Top cover wrongly fitted onto bowl Fit top cover properly Burned out bulb Replace bulb Bowl light wire wrongly fitted...
- Page 21 PROBLEM CAUSE REMEDY Unit not cooling at all Inoperative fan motor Check for fan free rotation and remove possible obstacles. Replace fan motor if faulty Intervention of the compressor overload Check for fan free rotation and remove protector possible obstacles. Replace fan motor if faulty Failure of any of compressor electrical Replace faulty electrical component...
- Page 22 MT GL/GLS/UL 15 WIRING DIAGRAMS (MACHINES MANUFACTURED UNTIL DECEMBER 2001) 15. 1 GLS VERSION 15. 2 GL/UL VERSION...
- Page 23 16 WIRING DIAGRAMS (MACHINES MANUFACTURED AFTER JANUARY 2002) 16. 1 GLS VERSION 16. 2 GL/UL...
- Page 24 Ugolini spa Via dei Pioppi, 33 - 20090 Opera - (MI) Tel. 02.530059.1 - Fax. 02.530059260 www.ugolinispa.com E-Mail: sales@ugolinispa.com 2429_29 R2.4 06G19...
Need help?
Do you have a question about the MT GL and is the answer not in the manual?
Questions and answers