Table of Contents
Advertisement
Advertisement
Table of Contents

Related Manuals for First Degree Fitness TRIDENTChallenge AR


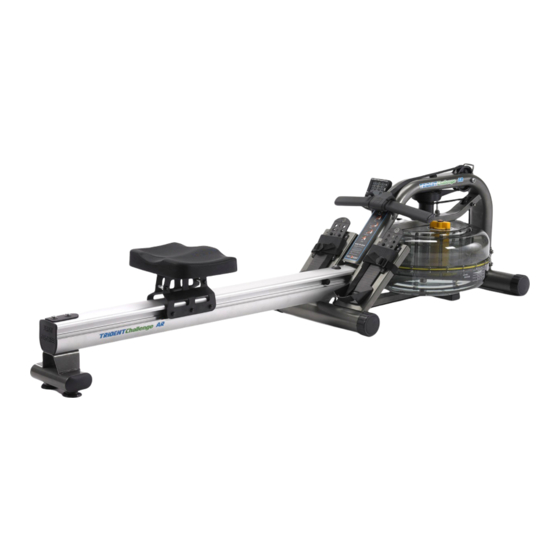
Summary of Contents for First Degree Fitness TRIDENTChallenge AR
- Page 1 Owners Manual...
- Page 2 Training with the Trident Challenge AR 1. As with any piece of fitness equipment, consult a physician before beginning your Trident Challenge AR Exercise Program. 2. Follow instructions provided in this manual for correct foot position and basic rowing techniques. 3.
-
Page 3: Table Of Contents
Removing/Changing Tank Water Slider Footplate How to Row? How Often? Trident Challenge AR Computer Computer Instructions Using the First Degree Fitness USB Interface Detaching the Rower Belt Reattaching the Rower Belt Removing the Bungee Shock Cord Replacing the Bungee Shock Cord Troubleshooting... -
Page 4: Trident Challenge Ar Box Contents
Trident Challenge AR Box Contents... - Page 5 Item Description Item Description Main Frame Seat Rail Bracket M10x120mm Rear Leg Bolts Seat Rail (boxed separately) (Dome) Rower Seat AA batteries (x2) M10x120mm Horizontal Seat Multi-tool Rail bolt M10 Washer 8mm Allen Key M10 Nylock Nut 6mm Allen Key M10x150mm Vertical Seat Rail Owners Manual bolt...
-
Page 6: Installing The Seat And Rear Leg To Seat Rail
Installing the Seat and Rear Leg to Seat Rail Install the Rower Seat[3] onto the Seat Rail [2] as shown, with seat indentation facing rearward. Indentation Seat Rail Rear Leg[11] M10x120mm Bolts[13]/Washer[5] Rear End Cap[10] Internal Seat Rail Bracket[22] Seat Rail Bracket[12] Bumpstops[9] First insert the Internal Seat Rail bolt Brack- et[22] into the rear of the Seat Rail[2] and... - Page 7 1.Install Rubber End Cap[10] 2.Hold the End Cap in place, thread the Rear Rubber Bumpstops[9] onto the end . 3.Tighten both bolts to complete Rear Leg as- sembly. Use care when tightening bolts to avoid scratches. M10x120mm Bolt[4], 2x M10 Washers[5] and Nylock Nut[6].
- Page 8 Install and secure the two bolts and two wash- ers with the nylock nuts Install the Vertical Seat Rail Tensioning Bolt through the Seat Rail as shown, then fit the Vertical Seat Rail bolt Dampener onto the bolt between the bottom of the Seat Rail and the lower frame (not shown) before securing bolt into lower frame.
-
Page 9: Fine Tuning The Trident Challenge Ar
Fine Tuning the Trident Challenge AR The Vertical Seat Rail Tensioning Bolt is designed to hold the mid leg 3-5mm off the ground when the rower is unweighted, and just lightly touch the ground during a rowing stroke. Tighten the assembly until the Mid Leg begins to lift off of the ground as shown be- low. -
Page 10: Getting Started
Getting Started To achieve minimum resistance, select "MIN" on the tank adjuster. It takes 10 strokes to fill the central (storage) tank, leaving a minimal amount of water in the outer (active) tank. This process is always required if minimum resistance is de- sired. - Page 11 Tank Filling and Water Treatment 1.Remove Rubber Fill Plug from the top of the tank. 2.Place a large bucket of water next to the rower and position siphon with the rigid hose in the bucket and the flexible hose into the tank as shown. Note: Make sure small breather valve on the top of the siphon is closed before filling.
-
Page 12: Removing/Changing Tank Water
Removing/Changing Tank Water To Change Tank Water Rigid end of Siphon in tank Set Adjuster handle to “MIN” Row a minimum of ten complete strokes before com- mencing tank draining. Remove tank plug, insert rigid end of siphon into tank and begin draining. NOTE: Approximately 40% of tank water will remain. -
Page 13: Slider Footplate
Slider Footplate To adjust, lift and slide Mounting pegs Footstrap The Slider Footplate is designed to fit a wide range of foot sizes, and is very simple to use. To adjust, lift the top of the sliding portion of the footplate and slide up or down. The numbers 1-6 represent a guideline from which the proper length can be deter- mined. -
Page 14: How To Row
How to Row? 1. Begin the stroke comfortably forward and push strongly back with your legs while keeping your arms and back straight. 2. Begin to pull your arms back as they pass over your knees and continue the stroke through to completion rocking slightly back over your pelvis. 3. -
Page 15: Trident Challenge Ar Computer
Trident Challenge AR Computer Options: Auto Start: Commence rowing to activate. Reset all values: Hold button down for 3 second first to RESET. Distance: Add 100m distance, up to 1000m then add 500m, each button push to ac- cumulate required distance then begin rowing to initiate distance count down Auto-Pause: A temporary halt in exercise will result in the following: For over 5 seconds and under 5 minutes:... -
Page 16: Using The First Degree Fitness Usb Interface
Using the First Degree Fitness USB Interface Description: The USB connectivity now built in to all new models of FDF Console and IPM allow you to enhance your exercise experience by connecting to your home PC or Laptop. Using FDF's own sample applications you can exercise while enjoying your favorite movies. -
Page 17: Detaching The Rower Belt
Detaching the Rower Belt 1.To detach belt, simply pull beyond the range of the normal rowing stroke un- til the belt detaches from the Belt Bungee Pulley. Tip:You’ll hear the Velcro separating just before the belt detaches. 2.Cut plastic tie holding bungee at the Bungee Attachment Point, pull the Bungee Shock Cord Cord through all three pulleys and... -
Page 18: Removing The Bungee Shock Cord
4.Rethread the Bungee Shock Cord (on Bungee Pulley opposite side of the Idle Wheel) back through the Bungee Pulleys and tie off at the Attachment Point. Bungee Shock Cord Hint If Bungee Shock Cords previous tension seemed correct (a good way to judge is if the Rower Han- dle can make it to the furthest point forward on the top of the Mainframe under bungee tension alone) then simply tie off at previous position. -
Page 19: Replacing The Bungee Shock Cord
Replacing the Bungee Shock Cord Reinstall the Shock Cord through the Upper Frame, along the opposite side of Idle Wheel, through the Mid Frame and Lower Bungee Pulleys and then tie off with plas- tic tie wrap to correct tension. Replace Frame Plug Pull Bungee through until seated securely... -
Page 20: Troubleshooting
Troubleshooting Fault Probable Cause Solution Water changes color or Rower is in direct Change rower location to reduce becomes cloudy. sunlight or has not had direct exposure to sunlight. Add water treatment. water treatment or change tank water as directed in the water treatment section of this manual. -
Page 21: Warranty
Metal Frame – 10 Year Limited Warranty First Degree Fitness will repair or replace the metal Main Frame of the Rower should it fail due to any defect in ma- terials or workmanship within 10 years of the original purchase. Warranty does not apply to frame coating.
Need help?
Do you have a question about the TRIDENTChallenge AR and is the answer not in the manual?
Questions and answers