Table of Contents
Advertisement
Quick Links
Advertisement
Table of Contents

Related Manuals for First Degree Fitness NEPTUNE AR


Summary of Contents for First Degree Fitness NEPTUNE AR
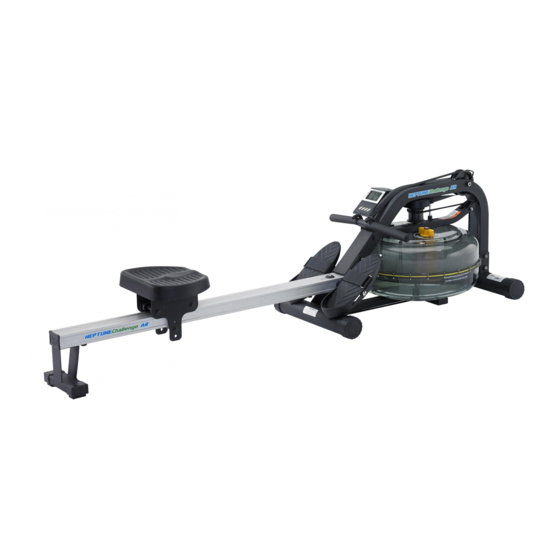
- Page 1 USER GUIDE NEPTUNE AR TITAN AR...
- Page 2 Introduction Congratulations on your purchase of Rower. FIRST DEGREE FITNESS is proud to present the Rower as a home use product featuring patented Adjustable Fluid Resistance. Follow all instructions carefully for correct assembly, tank filling, water treatment, service and safety.
-
Page 3: Table Of Contents
Contents Safety ..................4 Assembly ................6 Fluid Rower Box 1 & 2 Contents ..........7 Assembly Instructions .............. 8 Operation Instructions ..............12 Computer Operation ..............15 Detaching the Rower Belt ............16 Reattaching the Rower Belt ............17 Removing the Bungee Shock Cord .......... -
Page 4: Safety
Safety Safety Information • Before using this product, it is essential to read this ENTIRE operation manual and ALL instructions. The Rower is intended for use solely in the manner described in this manual. • UNDERSTANDING EACH AND EVERY WARNING TO THE FULLEST IS IMPORTANT •... - Page 5 Inspection • DO NOT use or permit use of any equipment that is damaged and/or has worn or broken parts. For all FIRST DEGREE FITNESS equipment use only replacement parts supplied by FIRST DEGREE FITNESS. • Cables and belts pose an extreme liability if used when frayed. Always replace any cable or belt at first sign of wear (consult FIRST DEGREE FITNESS if uncertain).
-
Page 6: Assembly
Assembly Product Specifications Product Class: HC Braking System: Speed Independent Product Net Weight: 27.6kg (60.85lbs) Product Gross Weight: 34kg (74.96lbs) Minimum Safe Operating Surface Area: 319cm (125.59.”) x 172cm (67.71”) Dimensions: 1990mm (78.35”) Length x 520mm (20.47”) Width x 520mm (20.47”) Height Maximum User Weight: 150kg (330lbs) Compact Footprint: 1990mm x 520mm or upright 520mm x 520mm Product Highlights... -
Page 7: Fluid Rower Box 1 & 2 Contents
Fluid Rower Box 1 & 2 Contents Box 2 Contents Box 1 Contents Item Qty. Description Item Qty. Description Main Frame M10 Washer Seat Rail (boxed separately) M10 Nyloc Nut Rower Seat M10x95mm Bolt Footplate Assembly M10 Springs Washer Rear Leg Multi-Tool Internal Mounting Plate 6mm Allen Key... -
Page 8: Assembly Instructions
Assembly Instructions STEP 1 Installing the Seat and Rear Leg to Seat Rail REQUIRED Install Rower Seat[3] onto Seat Rail[2], with widest part of seat rearward. Seat Rail [2] Rower Seat [3] WARNING Installing the Seat incorrectly will result in lack of data pickup during rowing. - Page 9 Assembly Instructions STEP 3 Installing the Rear Leg REQUIRED Using the 2x M8x15mm Bolts[10], 2x M8 Washers[11] , Rear Leg [5] Internal Mounting Plate[6] and Rear Leg[5], install as Internal Mounting Plate [6] shown. Once Rear Leg is tightened, install the Rear Rubber End Cap[7].
-
Page 10: Installing The Seat Rail To Mainframe
Assembly Instructions STEP 5 Installing the Seat Rail to Mainframe REQUIRED Install the M10x180mm Bolt[12] with the Plastic M10 x180mm Bolt [12] Dome Cap[13] through the top of the Seat Rail and secure from underneath with M10 Washer[14] and Plastic Dome Cap [13] Nyloc Nut[15]. - Page 11 Assembly Instructions STEP 7 Fine Tuning the Rower The Vertical Seat Rail Tensioning Bolt is designed to hold the mid leg 3-5mm off the ground when the Fluid Rower is unweighted, and just slightly touch the ground during a rowing stroke. Tighten the assembly until the Mid Leg begins to lift off of the ground as shown below.
-
Page 12: Operation Instructions
Operation Instructions Adjustable Resistance (AR) Tank The Adjustable Resistance (AR) Tank, developed and patented by FIRST DEGREE FITNESS. offers a true multi-level experience. Water is moved between the "storage" and "active" chambers of the AR Tank. Your new Rowing Ergometer can adapt - at the turn of a dial - to the resistance preferred by each user in the home environment. -
Page 13: Long Term Water Treatment And Basic Operation
Long Term Water Treatment and Basic Operation Do not use any water treatment other than the tablets supplied with this unit. For replacement tablets, contact your local FIRST DEGREE FITNESS distributor. Water treatment schedules for the FLUID ROWER will vary according to the fluid tanks exposure to sunlight, but expect 8-12 months near a bright, sunlit window and 2 years or more for a darker location. - Page 14 Operation Instructions Start Rowing There are six phases to completing a rowing stroke 1. Sit with straight legs and back, leaning forward slightly at the hips with arms out straight and hands level with the lower ribs. Swing back. 2. Legs and back straight, leaning slightly forward from the hips, arms out in front. Lean and slide forward.
-
Page 15: Computer Operation
Computer Operation Options: Install the batteries, and the LCD panel will display with an audible buzz. Mode: Allows access to various settings: Set: Press when digits are flashing to set values upward. Can be applied for all settings with the exception of “Total Count” and “SPM”. Once values are set, press “Enter”... -
Page 16: Detaching The Rower Belt
Detaching the Rower Belt Bungee Shock Cord Bungee Attachment Point 1.To detach belt, simply pull beyond the range of the normal rowing stroke until the belt detaches from the Belt Bungee Pulley. Tip: You’ll hear the Velcro separating just before the belt detaches. 2.Cut plastic tie holding bungee at the Bungee Attachment Point, pull the Cord through all three pulleys and leave excess on top of the tank for now. -
Page 17: Reattaching The Rower Belt
Reattaching the Rower Belt Begin reattaching the Rower Belt by Velcro facing threading around the Rower Belt Pulley upward with the Velcro side facing upward as illustrated. Next, thread the Belt around the Idle Wheel as shown. Once around the Idle Wheel, attach the Rower Belt to the Belt/Bungee Pulley. -
Page 18: Removing The Bungee Shock Cord
Removing the Bungee Shock Cord Upper Frame Plug Move the Rowing Handle to it’s farthest forward point on the Mainframe, then cut the plastic end tie and follow the drawing above for bungee removal. Next, remove the Upper Frame Plug to allow the Bungee Shock Cord to be threaded through the top of the frame. -
Page 19: Maintenance
FIRST DEGREE FITNESS is not responsible for performing regular inspection and maintenance actions for your machines. Instruct all personnel in equipment inspection and maintenance actions and also in accident reporting and recording. FIRST DEGREE FITNESS representatives are available to answer any questions that you may have. Item... -
Page 20: Troubleshooting
Troubleshooting Fault Probable Cause Solution Water changes color or Fluid Rower is in direct Change Fluid Rower location to becomes cloudy. sunlight or has not had reduce direct exposure to water treatment. sunlight. Add water treatment or change tank water as directed in the water treatment section of this manual. -
Page 21: Optional Fixture Installation
Optional Fixture Kit Installation A fixture kit for upright storage can be purchased separately. Install the Z bracket onto the Storage Base. Install the bracket onto the rower as shown. Note: Do not tighten the Knob and the Bolt. Tighten the Z Bracket knob to fix to the rower. Stand the rower up vertically with the main frame on the floor. -
Page 22: International Warranty
Metal Frame – 5 Year Limited Warranty FIRST DEGREE FITNESS will repair or replace the metal Main Frame of the Rower should it fail due to any defect in materials or workmanship within 5 years of the original purchase. Warranty does not apply to frame coating. - Page 23 CONTACT US For customer support please visit firstdegreefitness.com/support TAIWAN T: +886 3 478 3306 764 Chung Shan South Rd Yangmei Taoyuan Taiwan R.O.C.
Need help?
Do you have a question about the NEPTUNE AR and is the answer not in the manual?
Questions and answers