Table of Contents
Advertisement
CONTENTS
CW-C180ES
CW-C240ES
CW-A180ES
CW-A240ES
CW-SC180ES
Page
2
3
4
6
7
7
9
© 2000 Matsushita Industrial Corp. Sdn. Bhd.
(11969-T). All rights reserved. Unauthorized copying
and distribution is a violation of law.
Order No. MAC0011061C3
Room Air Conditioner
Page
13
17
19
20
21
22
Advertisement
Table of Contents

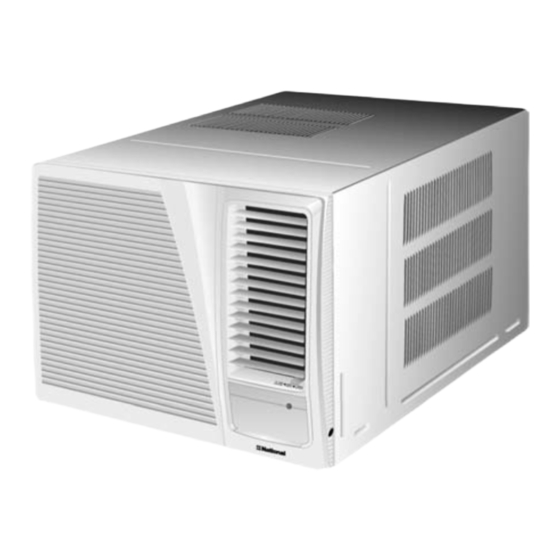
Related Manuals for Panasonic CW-C180ES


Summary of Contents for Panasonic CW-C180ES
-
Page 1: Table Of Contents
Order No. MAC0011061C3 Room Air Conditioner CW-C180ES CW-C240ES CW-A180ES CW-A240ES CW-SC180ES CONTENTS Page Page 1 Product Specifications 8 How to Install 2 Dimensions 9 Technical Data 3 Wiring Diagram 10 Care and Maintenance 4 Refrigeration Cycle Diagram 11 Service Information... -
Page 2: Product Specifications
CW-C180ES / CW-C240ES / CW-A180ES / CW-A240ES / CW-SC180ES 1 Product Specifications 1.1. CW-C180ES, CW-C240ES & CW-SC180ES. Model CW-C180ES CW-C240ES CW-SC180ES Phase Single Single Voltage 220 V 220 V Frequency 60 Hz 60 Hz Capacity 5.42 kW 7.03 kW 18,500 Btu/h... -
Page 3: Dimensions
CW-C180ES / CW-C240ES / CW-A180ES / CW-A240ES / CW-SC180ES 2 Dimensions 2.1. Top View, Front View & Side View. 2.2. Unit. Item CW-C180ES CW-C240ES CW-A180ES CW-A240ES CW-SC180ES A - Width 26” (660) B - Height 16-7/8” (428) C - Depth 27-9/16”... -
Page 4: Wiring Diagram
CW-C180ES / CW-C240ES / CW-A180ES / CW-A240ES / CW-SC180ES 3 Wiring Diagram 3.1. CW-C180ES, CW-C240ES & CW-SC180ES. 3.1.1. Resistance of Fan Motor windings 3.1.2. Resistance of Compressor and the rated Capacitor. windings and the rated Capacitor. CW-C180ES CW-C240ES CW-C180ES CW-C240ES... - Page 5 CW-C180ES / CW-C240ES / CW-A180ES / CW-A240ES / CW-SC180ES 3.2. CW-A180ES & CW-A240ES. 3.2.1. Resistance of Fan Motor windings 3.2.2. Resistance of Compressor and the rated Capacitor. windings and the rated Capacitor. CW-A180ES CW-A240ES CW-A180ES CW-A240ES Connection CWA951059 CWA951073 Connection...
-
Page 6: Refrigeration Cycle Diagram
CW-C180ES / CW-C240ES / CW-A180ES / CW-A240ES / CW-SC180ES 4 Refrigeration Cycle Diagram 4.1. CW-C180ES, CW-C240ES & CW-SC180ES. 4.1.1. Cooling. CW-C180ES & CW-SC180ES CW-C240ES Item Pressure Temperature Pressure Temperature (MPa) (°C) (MPa) (°C) 2.65 ~ 2.85 81 ~ 91 2.77 ~ 2.97 78 ~ 88 2.55 ~ 2.75... -
Page 7: Air Conditioner Performance Evaluation
CW-C180ES / CW-C240ES / CW-A180ES / CW-A240ES / CW-SC180ES 5 Air Conditioner Performance Evaluation 5.1. Cooling. Intake & Discharge Air Current Drain Determination Remedy Temperature Difference • 8°C and over (14.4°F) • As specified. • Nothing wrong. • None. • 8°C and over (14.4°F) •... - Page 8 CW-C180ES / CW-C240ES / CW-A180ES / CW-A240ES / CW-SC180ES Trouble Check Result Cause Remedy • Thermostat setting. • Higher than room • Winding Coil touched to the • Set it lower. Compressor won’t run (Fan run). temp. compressor shell. • RESISTANCE •...
-
Page 9: Operating Instructions
CW-C180ES / CW-C240ES / CW-A180ES / CW-A240ES / CW-SC180ES 7 Operating Instructions 7.1. CW-C180ES, CW-C240ES & CW-SC180ES (Cooling only). 7.1.1. Parts Identification. 7.1.1.1. Vertical Airflow Direction Vane. 7.1.1.3. Neon Lamp Indicator. Airflow direction adjustment Up-and-Down. Neon Lamp Indicator. • The vertical airflow direction vane is •... -
Page 10: How To Operate
CW-C180ES / CW-C240ES / CW-A180ES / CW-A240ES / CW-SC180ES 7.1.2. How to Operate. Open the Control Panel Cover. Fig. 1 Power Supply Switch off the breaker and set the Main Control Knob to the OFF position before connecting the power plug cord to an independent power supply. - Page 11 CW-C180ES / CW-C240ES / CW-A180ES / CW-A240ES / CW-SC180ES 7.2. CW-A180ES & CW-A240ES (Cooling and Heating). 7.2.1. Parts Identification. 7.2.1.1. Vertical Airflow Direction Vane. 7.2.1.3. Neon Lamp Indicator. Airflow direction adjustment Up-and-Down. Neon Lamp Indicator. • The vertical airflow direction vane is •...
- Page 12 CW-C180ES / CW-C240ES / CW-A180ES / CW-A240ES / CW-SC180ES 7.2.2. How to Operate. Open the Control Panel Cover. Fig. 1 Power Supply Switch off the breaker and set the Main Control Knob to the OFF position before connecting the power plug cord to an independent power supply.
-
Page 13: How To Install
• Power supply point shall be the place where there is ease for the power disconnection in case of emergency. • Some installation locations may require installation of a short-circuit breaker. • Time delay fuse or circuit breaker rating is 16 Amp. for CW-C180ES/CW-A180ES/CW-SC180ES and 25 Amp. for CW- C240ES/CW-A240ES. -
Page 14: Installation Procedure
CW-C180ES / CW-C240ES / CW-A180ES / CW-A240ES / CW-SC180ES 8.3. Installation Procedure. 8.3.1. Remove the Chassis Locking 8.3.4. Slide the Chassis back into the Bracket and screws. Cabinet. • Unscrew and remove the Chassis Locking Bracket from the front of the Cabinet. Remove the two screws from the rear of the Cabinet (For transportation purpose only). -
Page 15: Removal Of The Front Grille
CW-C180ES / CW-C240ES / CW-A180ES / CW-A240ES / CW-SC180ES 8.3.7. Insert the Air Filter. 8.3.8. Attach the Front Intake Grille. • Slide the Front Intake Grille slightly to the right to attach it, then push down to secure it. 8.4. - Page 16 CW-C180ES / CW-C240ES / CW-A180ES / CW-A240ES / CW-SC180ES 8.5. Condensed Water Drainage. This air conditioner employs a “Slinger-Up System” which is designed to splash the condensed water on the condenser coil for maximum cooling efficiency, thus producing a splashing sound.
-
Page 17: Technical Data
CW-C180ES / CW-C240ES / CW-A180ES / CW-A240ES / CW-SC180ES 9 Technical Data 9.1. Thermostat Characteristics. 9.1.1. CW-A180ES & CW-A240ES. 9.1.1.1. Mechanical Thermostat (Cooling). 9.1.1.2. Mechanical Thermostat (Heating). 9.1.2. CW-C180ES, CW-C240ES & CW-SC180ES. 9.1.2.1. Mechanical Thermostat (Cooling). - Page 18 CW-C180ES / CW-C240ES / CW-A180ES / CW-A240ES / CW-SC180ES 9.2. Operation Characteristics. 9.2.1. CW-A180ES. 9.2.1.1. Cooling Characteristics Vs. 9.2.1.2. Heating Characteristics Vs. Outdoor Temperature. Outdoor Temperature. 9.2.2. CW-A240ES. 9.2.2.1. Cooling Characteristics Vs. 9.2.2.2. Heating Characteristics Vs. Outdoor Temperature. Outdoor Temperature.
-
Page 19: Care And Maintenance
CW-C180ES / CW-C240ES / CW-A180ES / CW-A240ES / CW-SC180ES 9.2.3. CW-C180ES & CW-SC180ES. 9.2.4. CW-C240ES. 9.2.3.1. Cooling Characteristics Vs. 9.2.4.1. Cooling Characteristics Vs. Outdoor Temperature. Outdoor Temperature. 10 Care and Maintenance Caution: Always turn off the air conditioner and the main power supply before unplugging the power cord to clean the unit. -
Page 20: Service Information
CW-C180ES / CW-C240ES / CW-A180ES / CW-A240ES / CW-SC180ES 11 Service Information 11.1. Removal of the Control Board 1. Remove the Front Intake Grille (refer to page 15). 2. Remove the Air Filter (refer to page 15). 3. Remove the Front Grille (refer to page 15). -
Page 21: Exploded View
CW-C180ES / CW-C240ES / CW-A180ES / CW-A240ES / CW-SC180ES 12 Exploded View (Note) • The above exploded view is for the purpose of parts disassembly and replacement. • The non-numbered parts are not kept as standard service parts. -
Page 22: Replacement Part List
CW-C180ES / CW-C240ES / CW-A180ES / CW-A240ES / CW-SC180ES 13 Replacement Part List Ref. No. Part Name & Description Qty. CW-C180ES CW-SC180ES CW-A180ES CW-C240ES CW-A240ES Base Pan Complete CWD52K1018A <---- CWD52K1030A CWD52K1024A CWD52K1031A Bulkhead Complete CWD531007 <---- <---- CWD53K1007 <----... - Page 23 CW-C180ES / CW-C240ES / CW-A180ES / CW-A240ES / CW-SC180ES • All parts are supplied from MAICO, Malaysia (Vendor Code: 061). • E+Filter & Frame (716) and E+Filter (717) is an optional part. Supplied through sales route. [MAICO] Printed in Malaysia...
Need help?
Do you have a question about the CW-C180ES and is the answer not in the manual?
Questions and answers