Sign In
Upload
Manuals
Brands
Ricoh Manuals
All in One Printer
C4540
Ricoh C4540 Manuals
Manuals and User Guides for Ricoh C4540. We have
6
Ricoh C4540 manuals available for free PDF download: Operating Instructions Manual, How To Do
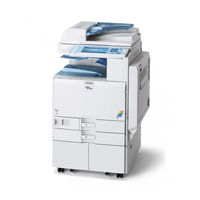
Ricoh C4540 Operating Instructions Manual (1932 pages)
Brand:
Ricoh
| Category:
All in One Printer
| Size: 55.53 MB
Table of Contents
Operating Instructions
1
About this Machine
1
Manuals for this Machine
3
What You Can Do with this Machine
5
Copier, Facsimile, Printer, and Scanner Functions
5
Utilizing Stored Documents
6
Paperless Fax Transmission and Reception
7
Fax Transmission and Reception through the Internet
8
Using the Scanner in a Network Environment
9
Administrating the Machine/Protecting Documents (Security Functions)
10
Monitoring the Machine Via Computer
11
Preventing an Unauthorized Copy
12
Table of Contents
13
Notice
15
Notice to Wireless LAN Interface (Optional) Users
15
How to Read this Manual
17
Symbols
17
Safety Information
18
Safety During Operation
18
Positions of RWARNING and RCAUTION Labels
21
ENERGY STAR Program
24
Recycled Paper
25
Machine Types
26
Getting Started
27
Guide to Components
27
Options
28
Control Panel
31
Display
33
Simplified Display
34
When the Authentication Screen Is Displayed
35
User Code Authentication (Using the Control Panel)
35
User Code Authentication (Using a Printer Driver)
36
Login (Using the Control Panel)
36
Log off (Using the Control Panel)
37
Login (Using a Printer Driver)
37
Login (Using Web Image Monitor)
38
Log off (Using Web Image Monitor)
38
Changing Modes
39
System Reset
40
Turning on the Power
41
Turning on the Main Power
41
Turning on the Power
42
Turning off the Power
42
Turning off the Main Power
43
Saving Energy
44
Entering Text
45
Available Characters
45
Keys
45
How to Enter Text
46
Appendix
49
Dos and Don'ts
49
Saving Color Copies
50
Software and Utilities Included on the CD-ROM
51
Viewing the Contents of the CD-ROM
52
Printer Drivers for this Printer
52
TWAIN Driver
53
LAN-Fax Driver
54
Desktopbinder Lite
55
Smartdevicemonitor for Admin
56
Desktopbinder-Smartdevicemonitor for Client
57
Installing the Operating Instructions
58
PDF Manuals
59
Opening the Installed Operating Instructions
60
Opening from the Icon
60
Opening from the [Start] Menu
60
Opening from the CD-ROM
61
Copy Paper
62
Recommended Paper Sizes and Types
62
Unusable Paper
66
Paper Storage
67
Index
68
How to Read this Manual
81
Symbols
81
Display Panel
82
Accessing User Tools
83
Changing Default Settings
83
Quitting User Tools
84
Menu Protect
84
Connecting the Machine
85
Connecting to the Interfaces
85
Connecting to the Ethernet Interface
86
Connecting to the USB Interface
88
Connecting to the IEEE 1394 Interface
89
Connecting to the IEEE 1284 Interface
90
Connecting to the IEEE 802.11B (Wireless LAN) Interface
91
Network Settings
94
Settings Required to Use the Printer/Lan-Fax
94
Settings Required to Use Internet Fax
97
Settings Required to Use E-Mail Function
101
Settings Required to Use Scan to Folder Function
105
Settings Required to Use the Network Delivery Scanner
108
Settings Required to Use Network TWAIN Scanner
111
Settings Required to Use Document Server
113
Using Utilities to Make Network Settings
116
Connecting the Machine to a Telephone Line and Telephone
125
Connecting the Telephone Line
125
Selecting the Line Type
125
System Settings
127
General Features
127
Output Tray Settings
130
Tray Paper Settings
131
Timer Settings
137
Interface Settings
139
Network
139
Parallel Interface
143
Ieee 1394
144
IEEE 802.11B
146
Print List
147
File Transfer
149
Administrator Tools
156
Program / Change / Delete LDAP Server
164
Programming the LDAP Server
165
Copier / Document Server Features
171
General Features
171
Reproduction Ratio
176
Edit
180
Stamp
186
Background Numbering
186
Preset Stamp
187
User Stamp
190
Date Stamp
191
Page Numbering
193
Input/Output
196
Adjust Color Image
199
Settings for the Document Server
200
Facsimile Features
201
General Features
201
Scan Settings
204
Send Settings
205
Reception Settings
208
Initial Settings
214
Reception File Setting
219
Reception Report E-Mail
220
Program / Change / Delete Scan Size
221
Deleting a Scan Size
223
Registering Fax Information
224
Changing Fax Information
227
Deleting Fax Information
227
Forwarding
228
Programming an End Receiver
229
Quitting the Forwarding Function
231
Forwarding Mark
231
Parameter Settings
232
Changing the User Parameters
238
Special Senders to Treat Differently
239
Authorized Reception
240
Reception File Print Quantity
241
Forwarding
241
Print 2 Sided
241
Memory Lock
242
Paper Tray
242
Programming/Changing Special Senders
243
Authorized RX (Authorized Reception)
245
Reception File Print Qty
245
Forwarding
246
Print 2 Sided
247
Memory Lock
247
Paper Tray Per Sender
247
Programming Initial Set up of a Special Sender
248
Deleting a Special Sender
251
Box Settings
252
Programming/Changing Personal Boxes
252
Deleting Personal Boxes
255
Programming/Changing Information Boxes
256
Deleting Information Boxes
259
Programming/Changing Transfer Boxes
260
Deleting Transfer Boxes
263
Printing the Box List
264
Printer Features
265
Test Print
265
Printing the Configuration Page
266
Maintenance
268
System
269
Host Interface
273
PCL Menu
274
PS Menu
276
PDF Menu
277
Scanner Features
279
General Settings
279
Scan Settings
281
Send Settings
283
Registering Addresses and Users for Facsimile/Scanner Functions
285
Address Book
285
Managing Names in the Address Book
288
Sending Fax by Quick Dial
288
Sending E-Mail by Quick Dial
288
Sending Scanned Files to a Shared Folder Directly
289
Preventing Unauthorized User Access to Shared Folders from the Machine
289
Managing Users and Machine Usage
289
Registering Names
290
Changing a Registered Name
292
Deleting a Registered Name
293
Authentication Information
294
Registering a User Code
295
Changing a User Code
296
Deleting a User Code
298
Displaying the Counter for each User
299
Printing the Counter for each User
299
Printing the Counter for All Users
301
Clearing the Number of Prints
302
Fax Destination
303
IP-Fax Destination
311
E-Mail Destination
316
Registering an E-Mail Destination
316
Changing an E-Mail Destination
318
Deleting an E-Mail Destination
319
Registering Folders
320
Using SMB to Connect
320
Using FTP to Connect
326
Using NCP to Connect
331
Registering Names to a Group
337
Registering a Group
337
Registering Names to a Group
338
Adding a Group to Another Group
340
Displaying Names Registered in a Group
341
Removing a Name from a Group
342
Deleting a Group Within Another Group
343
Changing a Group Name
345
Deleting a Group
346
Registering a Protection Code
347
Registering a Protection Code to a Single User
347
Registering a Protection Code to a Group User
349
Registering SMTP and LDAP Authentication
350
SMTP Authentication
350
LDAP Authentication
352
Other User Tools
355
Maintenance
355
Changing the Display Language
356
Inquiry
357
Counter
359
Displaying the Total Counter
359
Appendix
361
Specifications for the Main Unit
361
Specifications for Options
366
Information about Installed Software
372
Expat
372
Netbsd
372
Sablotron
374
Jpeg Library
375
Sasl
375
Md4
376
Md5
376
Samba(Ver 3.0.4)
377
Rsa Bsafe
377
Open SSL
378
Open SSH
383
Open LDAP
388
Index
390
How to Read this Manual
407
Symbols
407
Names of Major Options
408
Indicators
409
When the Machine Does Not Operate as Wanted
409
Panel Tone
410
Checking Machine Status and Settings
411
When an Indicator to the Right of a Function Key Is Lit
414
When You Have Problems Operating the Machine
415
Document Server
418
When a Job Is Not Performed
420
Troubleshooting When Using the Copy Function
425
When a Message Appears
425
When You Cannot Make Clear Copies
429
When You Cannot Make Copies as Wanted
431
When Memory Is Full
435
Troubleshooting When Using the Facsimile Function
437
Adjusting the Volume
437
When a Message Appears
439
When You Cannot Send or Receive Fax Messages as Wanted
446
When Memory Is Full
449
If an Error Report Is Printed
450
Turning off the Main Power / in the Event of Power Failure
451
When an Error Occurs Using Internet Fax
452
Error Mail Notification
452
Error Report (E-Mail)
452
Server-Generated Error E-Mail
452
Troubleshooting When Using the Printer Function
453
When a Message Appears During Installation of the Printer Driver
453
Windows 95/98/Me
453
Windows 2000
454
Windows XP, Windows Server 2003
454
Windows NT 4.0
455
If USB Connection Fails
456
When a Message Appears
457
Status Messages
457
Alert Messages
458
Checking the Error Log
459
When You Cannot Print
460
Other Printing Problems
463
When Pictbridge Printing Does Not Work
469
Troubleshooting When Using the Scanner Function
471
When Scanning Is Not Done as Expected
471
When You Cannot Send Scanned Files
472
When Stored Files Cannot be Accessed
472
When You Cannot Browse the Network to Send a Scan File
472
When the TWAIN Driver Cannot be Started
472
When Stored Files Cannot be Edited
473
When the Network Delivery Function Cannot be Used
473
Operations Are Not Possible When Messages Appear
473
When a Message Is Displayed
474
When a Message Is Displayed on the Control Panel
474
When a Message Is Displayed on the Client Computer
481
Adding Paper, Toner and Staples
485
Loading Paper
485
Loading Paper into the Paper Trays
486
Loading Paper into the Large Capacity Tray (LCT)
487
Changing the Paper Size
489
Changing the Paper Size in the Paper Tray
490
Adding Toner
495
Inserting Toner
496
When Toner Remains
497
Sending Faxes or Scanned Documents When Toner Has Run out
497
Used Toner
497
Maintenance
498
Adjusting the Color Registration
498
Auto Color Calibration
500
Adding Staples
504
Sr790
504
Finisher SR3030 and Booklet Finisher SR3020
505
Booklet Finisher SR3020 (Saddle Stitch)
506
Replacing the Stamp Cartridge
507
Clearing Misfeeds
509
Removing Jammed Paper
509
Locating Jammed Paper
510
Removing Jammed Paper
511
Removing Jammed Staples
517
Sr790
517
Finisher SR3030 and Booklet Finisher SR3020
518
Booklet Finisher SR3020 (Saddle Stitch)
519
Removing Punch Waste
520
Finisher SR3030 and Booklet Finisher SR3020
520
Remarks
523
Where to Put Your Machine
523
Machine Environment
523
Moving
525
Power Connection
526
Access to the Machine
527
Maintaining Your Machine
528
Cleaning the Exposure Glass
528
Cleaning the Exposure Glass Cover
529
Cleaning the Auto Document Feeder
529
Cleaning the Dustproof Glass
530
Index
531
How to Read this Manual
543
Symbols
543
Getting Started
545
Enhanced Security
545
Glossary
546
Setting up the Machine
547
Security Measures Provided by this Machine
549
Using Authentication and Managing Users
549
Preventing Information Leaks
549
Limiting and Controlling Access
551
Enhanced Network Security
552
Authentication and Its Application
553
Administrators and Users
553
Administrators
553
User
554
The Management Function
555
About Administrator Authentication
556
About User Authentication
557
Enabling Authentication
558
Authentication Setting Procedure
558
Administrator Authentication
559
Specifying Administrator Privileges
559
Registering the Administrator
562
Logging on Using Administrator Authentication
565
Logging off Using Administrator Authentication
568
Changing the Administrator
569
User Authentication
571
User Code Authentication
571
Basic Authentication
575
Windows Authentication
584
Creating the Server Certificate
591
LDAP Authentication
592
If the Fax Number Cannot be Obtained
592
Integration Server Authentication
600
If User Authentication Is Specified
608
User Code Authentication (Using the Control Panel)
608
User Code Authentication (Using a Printer Driver)
608
Login (Using the Control Panel)
609
Log off (Using the Control Panel)
610
Login (Using a Printer Driver)
611
Login (Using Web Image Monitor)
611
Log off (Using Web Image Monitor)
611
Auto Logout
612
Authentication Using an External Device
613
Preventing Information Leaks
615
Guarding against Unauthorized Copying
615
Unauthorized Copy Prevention
616
Data Security for Copying
617
Printing Limitations
618
Notice
619
Printing with Unauthorized Copy Prevention and Data Security for Copying
619
Printing a Confidential Document
622
Choosing a Locked Print File
622
Printing a Locked Print File
623
Deleting Locked Print Files
625
Changing Passwords of Locked Print Files
626
Unlocking Locked Print Files
628
Specifying Access Permission for Stored Files
629
Assigning Users and Access Permission for Stored Files
630
Specifying Access Privileges for Files Stored Using the Scanner and Fax Functions
633
Assigning the User and the Access Permission for the User's Stored Files
636
Specifying Passwords for the Stored Files
639
Unlocking Files
641
Preventing Data Leaks Due to Unauthorized Transmission
643
Restrictions on Destinations
643
Protecting the Address Book
646
Address Book Access Permission
646
Encrypting the Data in the Address Book
649
Deleting Data on the Hard Disk
652
Overwriting the Data on the Hard Disk
652
Managing Access to the Machine
661
Preventing Modification of Machine Settings
661
Menu Protect
662
Limiting Available Functions
666
Specifying Which Functions Are Available
666
Managing Log Files
668
Specifying Delete All Logs
668
Transfer Log Setting
669
Enhanced Network Security
671
Preventing Unauthorized Access
671
Enabling/Disabling Protocols
671
Access Control
672
Specifying Network Security Level
673
Encrypting Transmitted Passwords
677
Driver Encryption Key
678
Group Password for PDF Files
680
IPP Authentication Password
681
Protection Using Encryption
682
SSL (Secure Sockets Layer) Encryption
683
User Settings for SSL (Secure Sockets Layer)
686
Setting the SSL / TLS Encryption Mode
687
Snmpv3 Encryption
689
Specifying the Extended Security Functions
693
Changing the Extended Security Functions
693
Settings
695
Other Security Functions
700
Fax Function
700
Scanner Function
701
Limiting Machine Operation to Customers Only
702
Settings
702
Troubleshooting
707
Authentication Does Not Work Properly
707
A Message Appears
707
Machine Cannot be Operated
709
Appendix
711
Operations by the Supervisor
711
Logging on as the Supervisor
712
Logging off as the Supervisor
713
Changing the Supervisor
713
Resetting an Administrator's Password
715
Machine Administrator Settings
716
System Settings
716
Maintenance
718
Copier / Document Server Features
718
Facsimile Features
719
Printer Features
720
Scanner Features
721
Settings Via Web Image Monitor
721
Settings Via Smartdevicemonitor for Admin
723
Network Administrator Settings
724
System Settings
724
Facsimile Features
725
Scanner Features
725
Settings Via Web Image Monitor
725
Settings Via Smartdevicemonitor for Admin
727
File Administrator Settings
728
System Settings
728
Facsimile Features
728
Printer Features
728
Settings Via Web Image Monitor
729
User Administrator Settings
730
System Settings
730
Settings Via Web Image Monitor
731
Settings Via Smartdevicemonitor for Admin
731
Document Server File Permissions
732
The Privilege for User Account Settings in the Address Book
733
User Settings
736
Copier / Document Server Features
736
Printer Functions
740
Scanner Features
742
Facsimile Features
743
System Settings
745
Web Image Monitor Setting
751
Functions that Require Options
764
Index
765
Copying Book Originals
782
Combining Multiple Pages Onto a Single Page
785
Copying Originals such as Books
787
Copying Onto Thick Paper
788
Symbols
794
Functions Requiring Optional Configurations
795
Display
796
Simplified Display
797
User Tools Menu (Copier / Document Server Features)
798
Input / Output
801
Placing Originals
803
Originals
803
Sizes and Weights of Recommended Originals
803
Sizes Detectable by the Auto Paper Select
805
Missing Image Area
806
Placing Originals
807
Original Orientation
808
Placing Originals on the Exposure Glass
809
Placing Originals in the Auto Document Feeder
810
Batch Mode
812
SADF Mode
813
Mixed Size Mode
814
Original Size
815
Copying
817
Basic Procedure
817
Interrupt Copy
818
Left Original Beeper
819
Job Preset
819
Job List
820
Job List Screen
821
Checking Jobs in the Print Queue
822
Changing the Order of Jobs
822
Holding Print Jobs
823
Deleting Jobs
823
Checking Job History
824
Copying from the Bypass Tray
825
When Copying Onto Regular Size Paper
827
When Copying Onto Custom Size Paper
828
When Copying Onto OHP Transparencies or Thin Paper
829
When Copying Onto Thick Paper
830
When Copying Onto Envelopes
831
Color Functions
832
Selecting a Color Mode
832
Convert Colors
833
Erase Color
834
Color Background
835
Color Balance
836
Color Balance Program
837
Color Adjustment
839
Image Adjustment
840
User Color
845
Copier Functions
849
Adjusting Copy Image Density
849
Selecting the Original Type Setting
851
Selecting Copy Paper
852
Preset Reduce/Enlarge
855
Zoom
857
Auto Reduce/Enlarge
859
Size Magnification
860
Directional Magnification (%)
861
Directional Size Magnification (Inch)
863
Sort
864
Stack
868
Staple
870
Punch
873
Duplex
875
One-Sided Combine
879
Two-Sided Combine
881
Series Copies
884
Booklet/Magazine
886
Margin Adjustment
892
Erase
893
Background Numbering
899
Preset Stamp
900
User Stamp
903
Date Stamp
908
Page Numbering
911
Image Repeat
918
Double Copies
921
Centering
922
Positive/Negative
924
Mirror
925
Covers
926
Designate
928
Chapters
929
Slip Sheets
930
Storing Data in the Document Server
932
Programs
934
Storing a Program
935
Changing a Stored Program
936
Deleting a Program
937
Recalling a Program
937
Programming Defaults in Initial Display
938
Document Server
939
Relationship between Document Server and Other Functions
939
Document Server Display
940
Simplified Display
942
Preview Display
943
Using the Document Server
944
Storing Data
944
Changing User Name, File Name or Password of a Stored Document
949
Checking the Details of a Stored Document
950
Searching for a Stored Document
951
Printing a Stored Document
954
Deleting a Document
960
Displaying a Document in Document Server with Web Image Monitor
961
Downloading Stored Documents
962
Appendix
963
Function Compatibility
963
Supplementary Information
965
Notice
991
Important Safety Instructions
993
Caution
993
How to Read this Manual
994
Symbols
994
Names of Major Functions
994
Reading the Display
995
Reading the Display Panel and Using Keys
996
Simplified Display
998
Function List
999
Transmission
1003
Transmission Modes
1003
Selecting Type of Transmission
1004
Memory Transmission
1005
Sending Multiple Originals Using the Exposure Glass
1008
Parallel Memory Transmission
1009
Automatic Redial
1010
Dual Access
1010
Simultaneous Broadcast
1010
Immediate Transmission
1011
Sending Multiple Originals Using the Exposure Glass
1013
Displaying Confirmation of Transmission
1014
IP-Fax Functions
1015
Terminology
1017
Notes on Using IP-Fax
1018
Functions Not Available for IP-Fax Transmission
1018
Internet Fax Functions
1019
Notes on Using Internet Fax
1020
Functions Not Available by E-Mail Transmission
1021
Functions Not Available by E-Mail Reception
1022
E-Mail Subject
1022
T.37 Full Mode
1023
Placing Originals
1024
Setting the Original Orientation
1026
Scanning Two-Sided Originals
1027
Acceptable Original Sizes
1030
Paper Size and Scanned Area
1031
Original Sizes Difficult to Detect
1033
Transmission with Image Rotation
1034
Stamp
1035
Scan Settings
1037
Scan Type
1037
JBIG Transmission
1039
Resolution
1039
Scan Size
1041
Auto Detect
1042
Regular
1043
Area
1044
Mixed Original Sizes
1046
Density (Contrast)
1048
Mixing Scan Settings for a Multiple Page Original
1050
Changing the Line Port
1051
Simultaneous Broadcast Using Multiple Line Ports
1053
Specifying a Destination
1054
Sending over a Fax Line
1054
Entering a Pause
1055
Entering a Tone
1056
Sending by IP-Fax
1057
Regarding IP-Fax Destinations
1059
Sending to an E-Mail Address
1060
Bypassing the SMTP Server
1063
Using the Address Book to Specify Destinations
1066
Switching the Titles in the Address Book
1067
Specifying Group Destinations
1068
Selecting Destinations from Recent Destinations
1069
Programming Destinations in the Address Book
1071
Registering Entered Destinations to the Address Book
1073
Searching for a Destination in the Address Book
1074
Search by Destination Name
1075
Search by Fax Number/Ip-Fax Destination
1077
Search by E-Mail Address
1080
Search Using Advanced Search
1082
Search by Registration Number
1085
On Hook Dial
1087
Manual Dial
1089
Sender Settings
1091
PIN Code Transmission
1094
Advanced Features
1096
Setting SUB Codes for Transmission
1096
Setting a Password
1099
Setting SEP Codes for Reception
1099
Entering a Password
1102
SEP Code RX Reserve Report
1102
SEP Code RX Result Report
1103
Canceling a Transmission
1104
Before the Original Is Scanned
1104
While the Original Is Being Scanned
1104
While the Original Is Being Transmitted
1105
Before the Transmission Is Started
1107
Confirming a Transmission
1110
Checking the Storage Result (Memory Storage Report)
1112
Other Transmission Features
1113
Sending at a Specific Time (Send Later)
1113
Requesting a Reception Notice
1115
Setting an E-Mail Destination as a BCC
1117
Confirming Transmission Results by E-Mail
1118
Entering the Subject
1120
Entering the Text
1123
Transmission Options
1125
Standard Message Stamp
1125
Auto Reduce
1126
Advertisement
Ricoh C4540 Operating Instructions Manual (172 pages)
Scanner Reference
Brand:
Ricoh
| Category:
All in One Printer
| Size: 5.62 MB
Table of Contents
Operating Instructions
1
Manuals for this Machine
3
Table of Contents
5
How to Read this Manual
9
Symbols
9
About the Scanner Functions
10
Display Panel
11
Simplified Display
12
Confirmation Displays
13
Scanner Features
17
1 Sending Scan Files by E-Mail
19
Before Sending Scan Files by E-Mail
19
Outline of Sending Scan Files by E-Mail
19
Preparation for Sending by E-Mail
20
Registering E-Mail Addresses in the Address Book
20
E-Mail Screen
21
Basic Operation for Sending Scan Files by E-Mail
22
Switching to the E-Mail Screen
25
Specifying E-Mail Destinations
26
Selecting the Destination from the Machine's Address Book
26
Entering an E-Mail Address Manually
30
Selecting Destinations by Searching an LDAP Server
31
Registering a Directly-Entered Destination in the Address Book
34
Specifying the E-Mail Sender
35
Selecting a Sender from the List
35
Using a Registration Number to Specify a Sender Name
36
Selecting the Sender by Searching the Machine's Address Book
37
Specifying the E-Mail Subject
39
Specifying the E-Mail Message
40
Selecting a Message from the List
40
Manual Entry of a Message
41
Simultaneous Storage and Sending by E-Mail
42
Sending the URL by E-Mail
43
2 Sending Scan Files to Folders
45
Before Sending Files by Scan to Folder
45
Outline of Sending Scan Files by Scan to Folder
45
Preparation for Sending by Scan to Folder
48
Registering Destination Folders in the Address Book
49
Scan to Folder Screen
50
Basic Operations When Using Scan to Folder
51
Switching to the Scan to Folder Screen
53
Specifying Scan to Folder Destinations
54
Selecting the Destination from the Machine's Address Book
54
Sending Files to a Shared Network Folder
58
Sending Files to an FTP Server
61
Sending Files to an NDS Tree or Netware Server
63
Registering the Path to the Selected Destination in the Address Book
67
Simultaneous Storage and Sending by Scan to Folder
68
3 Storing Files Using the Scanner Function
69
Before Storing Files
70
Outline of File Storage under the Scanner Function
70
Basic Operation for Storing Scan Files
72
Specifying File Information for a Stored File
74
Specifying a User Name
74
Specifying a File Name
75
Specifying a Password
76
Displaying the List of Stored Files
77
List of Stored Files
77
Searching the List of Stored Files
78
Checking Stored Files
80
Checking a Stored File Selected from the List
80
Checking Stored Files from a Client Computer
82
Ricoh C4540 Operating Instructions Manual (203 pages)
Copy/Document Server Reference
Brand:
Ricoh
| Category:
All in One Printer
| Size: 2.74 MB
Table of Contents
Operating Instructions
1
Manuals for this Machine
5
Copying Book Originals
15
Copying Originals such as Books
19
Copying Onto Thick Paper
20
Notice
25
How to Read this Manual
26
Functions Requiring Optional Configurations
27
Display
28
Simplified Display
29
User Tools Menu (Copier / Document Server Features)
31
Administrator Tools
34
Originals
37
Sizes Detectable by the Auto Paper Select
38
Missing Image Area
40
Placing Originals
41
Placing Originals on the Exposure Glass
42
Placing Originals in the Auto Document Feeder
43
Batch Mode
44
SADF Mode
45
Mixed Size Mode
46
Original Size
47
Basic Procedure
51
Interrupt Copy
52
Left Original Beeper
53
Job List
54
Checking Jobs in the Print Queue
55
Holding Print Jobs
56
Checking Job History
57
Copying from the Bypass Tray
58
When Copying Onto Regular Size Paper
60
When Copying Onto OHP Transparencies or Thin Paper
61
When Copying Onto Thick Paper
62
When Copying Onto Envelopes
63
Color Functions
65
Convert Colors
66
Erase Color
67
Color Background
68
Color Balance
69
Color Balance Program
70
Color Adjustment
72
Image Adjustment
73
User Color
77
Copier Functions
81
Selecting the Original Type Setting
82
Selecting Copy Paper
83
Preset Reduce/Enlarge
86
Zoom
88
Auto Reduce/Enlarge
90
Size Magnification
91
Directional Magnification (%)
92
Advertisement
Ricoh C4540 Operating Instructions Manual (136 pages)
Troubleshooting
Brand:
Ricoh
| Category:
All in One Printer
| Size: 5.89 MB
Table of Contents
Operating Instructions
1
Troubleshooting
1
Manuals for this Machine
3
Table of Contents
5
How to Read this Manual
9
Symbols
9
Names of Major Options
10
1 When the Machine Does Not Operate as Wanted
11
Indicators
11
Panel Tone
12
Checking Machine Status and Settings
13
When an Indicator to the Right of a Function Key Is Lit
16
When You Have Problems Operating the Machine
17
Document Server
20
When a Job Is Not Performed
22
2 Troubleshooting When Using the Copy Function
27
When a Message Appears
27
When You Cannot Make Clear Copies
31
When You Cannot Make Copies as Wanted
33
When Memory Is Full
37
3 Troubleshooting When Using the Facsimile Function
39
Adjusting the Volume
39
When a Message Appears
41
When You Cannot Send or Receive Fax Messages as Wanted
48
When Memory Is Full
51
If an Error Report Is Printed
52
Turning off the Main Power / in the Event of Power Failure
53
When an Error Occurs Using Internet Fax
54
Error Mail Notification
54
Error Report (E-Mail)
54
Server-Generated Error E-Mail
54
4 Troubleshooting When Using the Printer Function
55
When a Message Appears During Installation of the Printer Driver
55
Windows 95/98/Me
55
Windows 2000
56
Windows XP, Windows Server 2003
56
Windows NT 4.0
57
If USB Connection Fails
58
When a Message Appears
59
Status Messages
59
Alert Messages
60
Checking the Error Log
61
When You Cannot Print
62
Other Printing Problems
65
When Pictbridge Printing Does Not Work
71
5 Troubleshooting When Using the Scanner Function
73
When Scanning Is Not Done as Expected
73
When You Cannot Send Scanned Files
74
When Stored Files Cannot be Accessed
74
When You Cannot Browse the Network to Send a Scan File
74
When the TWAIN Driver Cannot be Started
74
When Stored Files Cannot be Edited
75
When the Network Delivery Function Cannot be Used
75
Operations Are Not Possible When Messages Appear
75
Ricoh C4540 Operating Instructions Manual (72 pages)
Brand:
Ricoh
| Category:
All in One Printer
| Size: 9.62 MB
Table of Contents
About this Machine
1
Manuals for this Machine
3
Operating Instructions
1
What You Can Do with this Machine
5
Copier, Facsimile, Printer, and Scanner Functions
5
Utilizing Stored Documents
6
Paperless Fax Transmission and Reception
7
Fax Transmission and Reception through the Internet
8
Using the Scanner in a Network Environment
9
Administrating the Machine/Protecting Documents (Security Functions)
10
Monitoring the Machine Via Computer
11
Preventing an Unauthorized Copy
12
Table of Contents
13
Notice
15
Notice to Wireless LAN Interface (Optional) Users
15
How to Read this Manual
17
Symbols
17
Safety Information
18
Safety During Operation
18
Positions of RWARNING and RCAUTION Labels
21
ENERGY STAR Program
24
Recycled Paper
25
Machine Types
26
1 Getting Started
27
Guide to Components
27
Options
28
Internal Tray
29
Booklet Finisher Sr
29
Control Panel
31
Display Panel
31
Display
33
Simplified Display
34
When the Authentication Screen Is Displayed
35
User Code Authentication (Using the Control Panel)
35
User Code Authentication (Using a Printer Driver)
36
Login (Using the Control Panel)
36
Log off (Using the Control Panel)
37
Login (Using a Printer Driver)
37
Login (Using Web Image Monitor)
38
Log off (Using Web Image Monitor)
38
Changing Modes
39
System Reset
40
Turning on the Power
41
Turning on the Main Power
41
Turning on the Power
42
Turning off the Power
42
Turning off the Main Power
43
Saving Energy
44
2 Entering Text
45
Available Characters
45
Keys
45
How to Enter Text
46
Ricoh C4540 How To Do (2 pages)
Change Default File Type When Scanning
Brand:
Ricoh
| Category:
All in One Printer
| Size: 0.12 MB
Advertisement
Related Products
Ricoh C4535
Ricoh C4540g
Ricoh C4500
Ricoh Aficio MP C4500SP
Ricoh Aficio MP C4503SPG
Ricoh C224
Ricoh PRO C7200SX
Ricoh C9135
Ricoh Nashuatec CP450
Ricoh SP C260SFNw
Ricoh Categories
All in One Printer
Printer
Digital Camera
Copier
Printer Accessories
More Ricoh Manuals
Login
Sign In
OR
Sign in with Facebook
Sign in with Google
Upload manual
Upload from disk
Upload from URL