Sign In
Upload
Manuals
Brands
Lexmark Manuals
Printer
T522n
Lexmark T522n Manuals
Manuals and User Guides for Lexmark T522n. We have
5
Lexmark T522n manuals available for free PDF download: Service Manual, User Reference Manual, Setup Manual, Specification Sheet
Lexmark T522n Service Manual (334 pages)
Service Manual
Brand:
Lexmark
| Category:
Printer
| Size: 8.25 MB
Table of Contents
Table of Contents
3
Notices and Safety Information
9
Laser Notices
9
Laser Notice
11
Safety Information
18
Ozone Information
22
Preface
23
General Information
25
Options
26
Maintenance Approach
27
Tools Required for Service
27
Acronyms
28
Diagnostic Information
29
Start
29
Service Error Codes
30
User Status Messages
50
User Error Messages
53
Power-On Self Test (POST)
63
Symptom Tables
64
Service Checks
67
Charge Roll Service Check
68
Cover Open Switch/Cable Service Check
70
Dead Machine Service Check
71
Duplex Unit Service Check
73
Envelope Feeder Service Check
76
Fuser Service Check
84
Fuser Solenoid Service Check
88
Input Sensor Service Check
89
Input Tray(S) Service Check
90
High-Capacity Feeder Input Tray Service Check
94
Main Drive Service Check
105
Operator Panel Service Check
107
Options Service Check
109
Output bin Sensor Standard Tray Service Check
111
Paper Feed Service Check
112
Parallel Port Service Check
114
Printhead Service Check
115
Print Quality Service Check
116
Smart Contact Assembly Service Check
128
Serial Port Service Check
129
Toner Sensor Service Check
130
4520 XXX
131
Transfer Roll Service Check
131
Diagnostic Aids
133
Diagnostic Mode
133
Device Tests
134
Quick Disk Test
134
Disk Test/Clean
135
Flash Test
136
Disabling Download Emulations
137
Duplex Tests
138
Duplex Quick Test
138
Duplex Sensor Test
139
Duplex Motor Test
140
Duplex Feed 1 Test
141
Duplex Feed 2 Test
141
Error Log
142
Viewing the Error Log
142
Clearing the Error Log
142
Hardware Tests
143
LCD Test
143
Button Test
143
SDRAM Memory Test
144
ROM Memory Test
145
Parallel Wrap Test
145
Serial Wrap Test
145
Input Tray Tests
147
Input Tray Feed Test
147
Input Tray Sensor Test
147
Output bin Test - Standard bin
148
Base Sensor Test
148
Print Registration
149
Printer Setup
150
Setting the Page Count
150
Viewing the Permanent Page Count
150
Maintenance Page Count
151
Setting Configuration ID
152
Restore EP Factory Defaults
153
Print Tests
154
Print Quality Test Pages
155
Print Test with RIP (Controller Board) Removed
156
Printing Menu Settings Page
156
Autocompensator Operation
157
Autoconnect System, Paper Tray Options, Envelope Feeder
158
4520 XXX
159
Fuser Operation
159
Hot Roll Fuser
159
Paper Feed Jams
160
Repair Information
163
Handling ESD-Sensitive Parts
163
Adjustment Procedures
164
Duplex Motor Drive Belts
164
Fuser Solenoid Adjustment
165
Gap Adjustment
165
Printhead Assembly Adjustment
166
Paper Alignment Assembly Adjustment
167
Screw Identification Table
169
Removal Procedures
174
Covers Removals
174
Center Pan Assembly Removal
178
Controller Board Removal
179
Developer Drive Assembly Removal
180
Duplex Board Removal
181
Duplex Front Cover Assembly Removal
181
Duplex Front Cover Door Removal
181
Duplex Motor Removal
182
EMC Shields Removals
183
Engine Board Removal
185
Main Fan Removal
186
Frames Removals
187
Fuser Removal
190
Fuser Board Removal
191
Fuser Cover Removal
192
Fuser Detack Housing Assembly Removal
194
Fuser Transfer Plate Removal
194
Fuser Envelope Conditioner Solenoid Removal
195
Fuser Narrow Media Sensor/Flag Assembly Removal
196
Fuser Exit Sensor Flag Assembly Removal
196
Fuser Lamp Removal
197
Fuser Lower Exit Guide Assembly Removal
197
High Voltage Power Supply Removal
198
Integrated Tray Compensator Assembly Removal
199
Interconnect Board Assembly Removal
201
Low Voltage Power Supply Removal
202
Main Drive Assembly Removal
205
Main Drive Motor Removal
206
Multipurpose Tray/Lower Deflector Assembly Removal
207
4520 XXX
209
Operator Panel Assembly Removal
209
Operator Panel Cable/Cover Switch Removal
210
Optional 250/500 Paper Tray Assembly Removal
211
Paper Alignment Assembly Removal
212
Paper Deflectors Removals
214
Paper Input Sensor Removal
215
Paper Size Sensing Board Removal
215
Pick Roll Removal
215
Printhead Removal
216
Redrive Assembly Removal
217
Smart Contact Assembly Removal
218
Toner Sensor Removal
219
Transfer Roll Assembly Removal
220
Upper Paper Deflector Assembly Removal
220
Upper Front Cover Hinge Assembly Removal
221
Upper Front Cover Interlock Switch Assembly Removal
222
Connector Locations
223
Low Voltage Power Supply
223
High Voltage Power Supply
225
Engine Board
226
Engine Board
231
Controller Board - Non Network
232
Controller Board - Network
233
Fuser Board
234
Interconnect Board
236
Envelope Feeder Board
238
Duplex Unit Board
240
Preventive Maintenance
243
Safety Inspection Guide
243
Lubrication Specifications
243
Scheduled Maintenance
244
Parts Catalog
245
How to Use this Parts Catalog
245
Assembly 1: Covers
246
Assembly 2: Frame
248
Assembly 3: Printhead
252
Assembly 4: Paper Feed (Autocompensator)
254
Assembly 5: Paper Feed - Multipurpose Unit
256
Assembly 6: Paper Feed - Alignment
258
Assembly 7: Paper Feed - Output
260
Assembly 8: Integrated Paper Tray - 500 Sheet
262
4520 XXX
264
Assembly 9: Main Drive
264
Assembly 10: Developer Drive
266
Assembly 11: Hot Roll Fuser
268
Assembly 12: Transfer
270
Assembly 13: Charging
272
Assembly 14: Electronics 1
274
Assembly 15: Electronics II
276
Assembly 16: Electronics III
278
Assembly 17: Electronics IV
280
Assembly 18: Electronics V
282
Assembly 19: Electronics VI
284
Assembly 19: Electronics VI
286
Assembly 20: 250-Sheet Tray
288
Assembly 21: Integrated Paper Tray - 250 Sheet
292
Assembly 22: 500-Sheet Tray
294
Assembly 23: Duplex Unit
298
Assembly 24: Envelope Feeder
304
Assembly 25: High-Capacity Feeder
306
Assembly 26: Kiosk - Vertical Paper Adapter
316
Assembly 27: Kiosk - Horizontal Paper Adapter
318
Assembly 28: Options
320
Assembly 29: Miscellaneous
322
Index
329
Advertisement
Lexmark T522n Service Manual (333 pages)
Up to 25 ppm
Brand:
Lexmark
| Category:
Printer
| Size: 6.55 MB
Table of Contents
Infoprint 1120 and
1
Table of Contents
2
Notices and Safety Information
8
Laser Notices
8
Laser Notice
10
Safety Information
17
Ozone Information
21
Preface
22
General Information
24
Options
25
Maintenance Approach
26
Tools Required for Service
26
Acronyms
27
Diagnostic Information
28
Start
28
Service Error Codes
29
User Status Messages
49
User Error Messages
52
Power-On Self Test (POST)
62
Symptom Tables
63
Service Checks
66
Charge Roll Service Check
67
Cover Open Switch/Cable Service Check
69
Dead Machine Service Check
70
Duplex Unit Service Check
72
Envelope Feeder Service Check
75
Fuser Service Check
83
Fuser Solenoid Service Check
87
Input Sensor Service Check
88
Input Tray(S) Service Check
89
High-Capacity Feeder Input Tray Service Check
93
Main Drive Service Check
104
Operator Panel Service Check
106
Options Service Check
108
Output bin Sensor Standard Tray Service Check
110
Paper Feed Service Check
111
Parallel Port Service Check
113
Printhead Service Check
114
Print Quality Service Check
115
Smart Contact Assembly Service Check
127
Serial Port Service Check
128
Toner Sensor Service Check
129
Infoprint 1120 and 1125
130
Transfer Roll Service Check
130
Diagnostic Aids
132
Diagnostic Mode
132
Device Tests
133
Quick Disk Test
133
Disk Test/Clean
134
Flash Test
135
Disabling Download Emulations
136
Duplex Tests
137
Duplex Quick Test
137
Duplex Sensor Test
138
Duplex Motor Test
139
Duplex Feed 1 Test
140
Duplex Feed 2 Test
140
Error Log
141
Viewing the Error Log
141
Clearing the Error Log
141
Hardware Tests
142
LCD Test
142
Button Test
142
SDRAM Memory Test
143
ROM Memory Test
144
Parallel Wrap Test
144
Serial Wrap Test
144
Input Tray Tests
146
Input Tray Feed Test
146
Input Tray Sensor Test
146
Output bin Test - Standard bin
147
Base Sensor Test
147
Print Registration
148
Printer Setup
149
Setting the Page Count
149
Viewing the Permanent Page Count
149
Maintenance Page Count
150
Setting Configuration ID
151
Restore EP Factory Defaults
152
Print Tests
153
Print Quality Test Pages
154
Print Test with RIP (Controller Board) Removed
155
Printing Menu Settings Page
155
Autocompensator Operation
156
Autoconnect System, Paper Tray Options, Envelope Feeder
157
Infoprint 1120 and 1125
158
Fuser Operation
158
Paper Feed Jams
159
Repair Information
162
Handling ESD-Sensitive Parts
162
Adjustment Procedures
163
Duplex Motor Drive Belts
163
Fuser Solenoid Adjustment
164
Gap Adjustment
164
Printhead Assembly Adjustment
165
Paper Alignment Assembly Adjustment
166
Screw Identification Table
168
Removal Procedures
173
Covers Removals
173
Center Pan Assembly Removal
177
Controller Board Removal
178
Developer Drive Assembly Removal
179
Duplex Board Removal
180
Duplex Front Cover Assembly Removal
180
Duplex Front Cover Door Removal
180
Duplex Motor Removal
181
EMC Shields Removals
182
Engine Board Removal
184
Main Fan Removal
185
Frames Removals
186
Fuser Removal
189
Fuser Board Removal
190
Fuser Cover Removal
191
Fuser Detack Housing Assembly Removal
193
Fuser Transfer Plate Removal
193
Fuser Envelope Conditioner Solenoid Removal
194
Fuser Narrow Media Sensor/Flag Assembly Removal
195
Fuser Exit Sensor Flag Assembly Removal
195
Fuser Lamp Removal
196
Fuser Lower Exit Guide Assembly Removal
196
High Voltage Power Supply Removal
197
Integrated Tray Compensator Assembly Removal
198
Integrated Tray Compensator Pick Roll Assembly Removal
199
Interconnect Board Assembly Removal
200
Low Voltage Power Supply Removal
201
Main Drive Assembly Removal
204
Main Drive Motor Removal
205
Infoprint 1120 and 1125
206
Multipurpose Tray/Lower Deflector Assembly Removal
206
Operator Panel Assembly Removal
208
Operator Panel Cable/Cover Switch Removal
209
Optional 250/500 Paper Tray Assembly Removal
210
Paper Alignment Assembly Removal
211
Paper Deflectors Removals
213
Paper Input Sensor Removal
214
Paper Size Sensing Board Removal
214
Pick Roll Removal
214
Printhead Removal
215
Redrive Assembly Removal
216
Smart Contact Assembly Removal
217
Toner Sensor Removal
218
Transfer Roll Assembly Removal
219
Upper Paper Deflector Assembly Removal
219
Upper Front Cover Hinge Assembly Removal
220
Upper Front Cover Interlock Switch Assembly Removal
221
Connector Locations
222
Low Voltage Power Supply
222
High Voltage Power Supply
224
Engine Board
225
Engine Board
230
Controller Board - Non Network
231
Controller Board - Network
232
Fuser Board
233
Interconnect Board
235
Envelope Feeder Board
237
Duplex Unit Board
239
Preventive Maintenance
242
Safety Inspection Guide
242
Lubrication Specifications
242
Scheduled Maintenance
243
Parts Catalog
244
How to Use this Parts Catalog
244
Assembly 1: Covers
245
Assembly 2: Frame
247
Assembly 3: Printhead
251
Assembly 4: Paper Feed (Autocompensator)
253
Assembly 5: Paper Feed - Multipurpose Unit
255
Assembly 6: Paper Feed - Alignment
257
Assembly 7: Paper Feed - Output
259
Infoprint 1120 and 1125
261
Assembly 8: Integrated Paper Tray - 500 Sheet
261
Assembly 9: Main Drive
263
Assembly 10: Developer Drive
265
Assembly 11: Hot Roll Fuser
267
Assembly 12: Transfer
269
Assembly 13: Charging
271
Assembly 14: Electronics 1
273
Assembly 15: Electronics II
275
Assembly 16: Electronics III
277
Assembly 17: Electronics IV
279
Assembly 18: Electronics V
281
Assembly 19: Electronics VI
283
Assembly 19: Electronics VI
285
Assembly 20: 250-Sheet Tray
287
Assembly 21: Integrated Paper Tray - 250 Sheet
291
Assembly 22: 500-Sheet Tray
293
Assembly 23: Duplex Unit
297
Assembly 24: Envelope Feeder
303
Assembly 25: High-Capacity Feeder
305
Assembly 26: Kiosk - Vertical Paper Adapter
315
Assembly 27: Kiosk - Horizontal Paper Adapter
317
Assembly 28: Options
319
Assembly 29: Miscellaneous
321
Index
328
Lexmark T522n User Reference Manual (215 pages)
Lexmark International User's Reference Printer T522
Brand:
Lexmark
| Category:
Printer
| Size: 3.19 MB
Table of Contents
Table of Contents
3
Chapter 1: Printer Overview
9
Chapter 2: Using the Operator Panel
10
Understanding the Operator Panel
10
Using the Operator Panel Buttons
11
Using the Operator Panel to Change Printer Settings
12
Printing the Menu Settings Page
13
Chapter 3: Using the Print and Hold Function
14
Printing and Deleting Held Jobs
14
Accessing Held Jobs from the Operator Panel
15
Recognizing When Format Errors Occur
15
Repeat Print
16
Reserve Print
16
Verify Print
16
Confidential Jobs
16
Chapter 4: Canceling a Print Job
18
Chapter 5: Printing Folio and Statement Size Paper
19
Chapter 6: Choosing Print Material
20
Paper Characteristics
20
Weight
20
Choosing Preprinted Forms
20
Curl
21
Smoothness
21
Moisture Content
21
Grain Direction
21
Fiber Content
21
Recommended Paper
21
Unacceptable Paper
22
Choosing Preprinted Forms and Letterhead
22
Choosing Prepunched Paper
22
Choosing Paper
23
Choosing Envelopes
24
Choosing Labels
24
Choosing Card Stock
25
Choosing Transparencies
26
Chapter 7: Print Material Specifications
27
Chapter 8: Loading Print Material
31
Chapter 9: Loading a Paper Tray
32
Loading Letterhead
33
Chapter 10: Loading the Multipurpose Feeder
34
Capacity
34
Paper Dimensions
34
Trouble-Free Printing
34
Loading Paper and Transparencies
38
Loading Envelopes
38
Loading Letterhead
39
Closing the Multipurpose Feeder
41
Chapter 11: Loading the Envelope Feeder
42
Chapter 12: Loading the 2000-Sheet Drawer
46
Chapter 13: Storing Paper
47
Chapter 14: Tray Linking
48
Chapter 15: Tips for Avoiding Paper Jams
49
Chapter 16: Replacing the Print Cartridge
50
Chapter 17: Replacing the Charge Roll
51
Chapter 18: Replacing the Transfer Roll
52
Chapter 19: Replacing the Fuser Assembly
53
Chapter 20: Resetting the Maintenance Counter
54
Chapter 21: Ordering Supplies
55
Maintenance Kit
55
Print Cartridges
55
Label Fuser Cleaner
55
Charge Roll
55
Transfer Roll
56
Fuser Assembly
56
Chapter 22: Storing Supplies
57
Chapter 23: Checking an Unresponsive Printer
58
Chapter 24: Clearing Paper Jams
59
Identifying Paper Jam Areas
59
Accessing Paper Jam Areas
61
200 And 201 Paper Jam
61
Remove Cartridge
61
202 Paper Jam
62
Open Rear Door
62
Before Reaching the Output bin
63
While Exiting to the Output bin
64
Paper Jam Check Duplex
65
Paper Jam Check Tray X
68
On the Incline Surface of a Tray or between Two Trays
68
Between Three Trays
69
Between a Tray, the Duplex Unit, and the Integrated Tray
70
In the 2000-Sheet Drawer
72
Paper Jam Check MP Feeder
73
250 Paper Jam
73
Check Env Feeder
73
At Entry into the Envelope Feeder
73
Between the Envelope Feeder and the Printer
74
Chapter 25: Solving Display Problems
76
Chapter 26: Solving Printing Problems
77
Chapter 27: Solving Print Quality Problems
79
Chapter 28: Solving Option Problems
82
Chapter 29: Solving Network Printing Problems
84
Chapter 30: Resolving Other Problems and Questions
85
Chapter 31: Understanding Printer Messages
86
Check <Device> Connection
90
Clearing Job Accounting Stat
90
Deleting Jobs
91
Disabling Menus
92
Disk Recovery
93
Enabling Menus
93
Enter Pin
93
Held Jobs May be Lost
95
Insert Tray <X
95
Load Manual
97
Load Tray <X
97
Localtalk <X
97
Network <X
98
Network Card Busy
98
Queuing Jobs
103
Ready Hex
103
Reattach <Device
104
Res Reduced
104
Resetting the Printer
104
Defective Print Cartridge
107
Usb <X
107
Short Paper
108
Unsupported Print Cartridge
108
Insufficient Collation Area
109
Insufficient Defrag Memory
109
Insufficient Memory
110
Memory Full
110
Complex Page
111
Defective Flash
111
Flash Full
111
Serial Option <X> Error
112
Unformatted Flash
112
Serial Port <X> Disabled
114
Too Many Disks Installed
114
Too Many Flash Options
114
Defective Disk
115
Disk Full
115
Incompatible <Device
115
Too Many Trays Attached
115
Scheduled Maintenance
116
Unformatted Disk
116
Engine Code Crc Failure
117
Chapter 32: Using Printer Menus
118
Chapter 33: Finishing Menu
121
Duplex Bind
123
Separator Sheets
125
Separator Source
126
Chapter 34: Infrared Menu
127
Job Buffering
128
Npa Mode
129
Chapter 35: Job Menu
132
Confidential Job
133
Held Jobs
133
Reset Printer
134
Chapter 36: Localtalk Menu
135
Localtalk Addr
136
Localtalk Buffer
136
Localtalk Zone
137
Npa Hosts
137
Chapter 37: Network Menu
139
Network Buffer
140
Chapter 38: Paper Menu
143
Custom Types
144
Envelope Enhance
144
Paper Loading
145
Paper Size
146
Paper Texture
147
Paper Type
148
Paper Weight
149
Substitute Size
149
Universal Setup
150
Chapter 39: PCL Emul Menu
151
Auto Cr after Lf
152
Auto Lf after Cr
152
Font Name
152
Font Source
153
Point Size
154
Symbol Set
155
Chapter 40: Parallel Menu
156
Advanced Status
156
Honor Init
157
Parallel Buffer
158
Parallel Mode 1
158
Parallel Mode 2
158
Chapter 41: Postscript Menu
161
Chapter 42: Quality Menu
162
Print Resolution
163
Toner Darkness
163
Chapter 43: Serial Menu
164
Data Bits
165
Robust Xon
168
Serial Protocol
169
Chapter 44: Setup Menu
170
Auto Continue
170
Download Target
170
Display Language
171
Jam Recovery
172
Job Accounting
172
Page Protect
172
Power Saver
173
Print Timeout
173
Printer Language
174
Resource Save
174
Wait Timeout
175
Chapter 45: Utilities Menu
176
Defragment Flash
176
Factory Defaults
177
Format Disk
177
Format Flash
177
Hex Trace
178
Print Directory
178
Print Fonts
178
Job Acct Stat
178
Print Menus
179
Chapter 46: USB Menu
180
Usb Buffer
182
Chapter 47: Disabling Operator Panel Menus
183
Chapter 48: Removing Options
184
Chapter 49: Removing the Envelope Feeder
185
Chapter 50: Removing a Paper Tray or Duplex Unit
187
Chapter 51: Removing Printer or Flash Memory
189
Chapter 52: Removing an Option Card
190
Chapter 53: Understanding Fonts
191
Typefaces and Fonts
191
Weight and Style
191
Pitch and Point Size
191
Bitmapped and Scalable Fonts
193
Resident Fonts
194
Symbol Sets
199
Symbol Sets for PCL 6 Emulation
199
Downloadable Fonts
200
Printing a Font Sample List
200
Chapter 54: Printer Specifications
201
Dimensions
201
Duty Cycle
201
Notices
202
Edition Notice
203
Trademarks
203
Licensing Notice
204
Safety Information
205
Cautions and Warnings
205
Electronic Emission Notices
205
With a Network Cable Attached
205
Without a Network Cable Attached
206
The United Kingdom Telecommunications Act 1984
207
Energy Star
207
Laser Notices
208
Laser Advisory Label
208
Laser Notice
208
Index
209
Advertisement
Lexmark T522n Setup Manual (33 pages)
Lexmark Optra T522: Setup Guide
Brand:
Lexmark
| Category:
Printer
| Size: 1.16 MB
Table of Contents
Fcc Emissions Information
2
Safety Information
2
Getting Started
3
Turn off the Printer
3
Troubleshooting
3
Installing a Duplex Unit
7
Setting up the Printer
8
Installing the Envelope Feeder
11
Step 2: Install Memory and Option Cards
12
Installing an Optional Firmware Card
15
Installing an Option Card
16
Reattaching the Shield and Closing the Doors
18
Step 3: Load Print Material
19
Step 4: Attach Cables
20
Network Printing
20
Local Printing
21
Turning on the Printer
23
Printing a Network Setup Page
23
Step 5: Verify Printer Setup
23
Printing a Menu Settings Page
24
Setting the Printer IP Address
25
Step 6: Configure for TCP/IP
25
Verifying the Ip Settings
26
Step 7: Install Printer Drivers
27
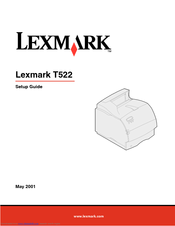
Lexmark T522n Specification Sheet (1 page)
Lexmark Laser Printer Specification Sheet
Brand:
Lexmark
| Category:
Printer
| Size: 0.62 MB
Advertisement
Related Products
Lexmark T520 - 20ppm 8MB Par USB Pcl6 Ps3 Ppds
Lexmark T520n
Lexmark T52x
Lexmark Optra T522
Lexmark T52 Series
Lexmark T430d
Lexmark T652dn
Lexmark T656DNE
Lexmark Optra T620n
Lexmark Optra T 612
Lexmark Categories
Printer
All in One Printer
Printer Accessories
Software
Print Server
More Lexmark Manuals
Login
Sign In
OR
Sign in with Facebook
Sign in with Google
Upload manual
Upload from disk
Upload from URL