Sign In
Upload
Manuals
Brands
Brother Manuals
All in One Printer
MFC-T4500DW
Brother MFC-T4500DW Manuals
Manuals and User Guides for Brother MFC-T4500DW. We have
3
Brother MFC-T4500DW manuals available for free PDF download: Online User's Manual, Service Manual, Quick Setup Manual
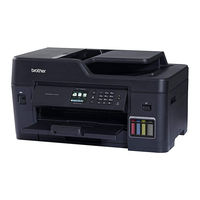
Brother MFC-T4500DW Online User's Manual (629 pages)
Brand:
Brother
| Category:
Printer
| Size: 18.61 MB
Table of Contents
Table of Contents
2
Before You Use Your Brother Machine
8
Definitions of Notes
9
Trademarks
10
Important Note
11
Introduction to Your Brother Machine
12
Before Using Your Machine
13
Control Panel Overview
14
Touchscreen LCD Overview
15
Settings Screen Overview
18
Navigate the Touchscreen
20
Set Default Function Screens
21
Access Brother Utilities (Windows)
22
Uninstall the Brother Software and Drivers (Windows)
23
USB / Ethernet Port Locations on Your Brother Machine
24
Paper Handling
26
Load Paper
27
Load Paper in the Paper Tray
28
Load Paper in the Multi-Purpose Tray (MP Tray)
44
Unprintable Area
49
Paper Settings
50
Acceptable Paper and Other Print Media
55
Load Documents
62
Load Documents in the Automatic Document Feeder (ADF)
63
Load Documents on the Scanner Glass
65
Unscannable Area
66
Print
67
Print from Your Computer (Windows)
68
Print a Photo (Windows)
69
Print a Document (Windows)
70
Cancel a Print Job (Windows)
71
Print more than One Page on a Single Sheet of Paper (N in 1) (Windows)
72
Print as a Poster (Windows)
73
Print on both Sides of the Paper Automatically (Automatic 2-Sided Printing) (Windows)
74
Print as a Booklet Automatically (Windows)
77
Print a Colour Document in Greyscale (Windows)
79
Prevent Smudged Printouts and Paper Jams (Windows)
80
Use a Preset Print Profile (Windows)
81
Change the Default Print Settings (Windows)
84
Print Settings (Windows)
85
Print from Your Computer (Mac)
90
Print a Photo (Mac)
91
Print a Document (Mac)
92
Print on both Sides of the Paper Automatically (Automatic 2-Sided Printing) (Mac)
93
Print more than One Page on a Single Sheet of Paper (N in 1) (Mac)
94
Print a Colour Document in Greyscale (Mac)
95
Prevent Smudged Printouts and Paper Jams (Mac)
96
Print Options (Mac)
97
Print Data Directly from a USB Flash Drive
103
Compatible USB Flash Drives
104
Print Photos Directly from a USB Flash Drive
105
Scan
115
Scan Using the Scan Button on Your Brother Machine
116
Scan Multi-Page Letter or A4 Size Documents
117
Scan Photos and Graphics
118
Save Scanned Data to a Folder as a PDF File
120
Save Scanned Data to a USB Flash Drive
122
Scan Multiple Business Cards and Photos (Auto Crop)
125
Scan to an Editable Text File Using OCR
126
Scan to Email Attachment
128
Scan to FTP
130
Scan to SSH FTP (SFTP)
134
Scan to Network (Windows)
141
Scan to Sharepoint
146
Web Services for Scanning on Your Network (Windows 7, Windows 8 and Windows 10)
150
Change Scan Button Settings from Controlcenter4 (Windows)
154
Change Scan Button Settings from Brother Iprint&Scan (Mac)
158
Scan from Your Computer (Windows)
159
Scan Using Controlcenter4 Home Mode (Windows)
160
Scan Using Controlcenter4 Advanced Mode (Windows)
175
Scan Using Nuance ™ Paperport ™ 14SE or Other Windows Applications
191
Scan Using Windows Fax and Scan
196
Install Bookscan Enhancer and Whiteboard Enhancer (Windows)
200
Scan from Your Computer (Mac)
201
Scan Using Brother Iprint&Scan (Mac)
202
Scan Using TWAIN-Compliant Applications (Mac)
203
Configure Scan Settings Using Web Based Management
206
Set the Scan Job Email Report Using Web Based Management
207
Copy
208
Copy a Document
209
Enlarge or Reduce Copied Images
211
Sort Copies
212
Make Page Layout Copies ( N in 1 or Poster)
213
Copy on both Sides of the Paper (2-Sided Copy)
216
Copy an ID Card
218
Use the A3 Copy Shortcuts
220
Copy in Ink Save Mode
222
Copy Options
223
Fax
226
Send a Fax
227
Send a Fax from Your Brother Machine
228
Send a Fax Manually
230
Send a Fax at the End of a Conversation
231
Send the same Fax to more than One Recipient (Broadcasting)
233
Send a Fax in Real Time
235
Send a Fax at a Specified Time (Delayed Fax)
236
Change the Fax Auto Redial Setting
237
Cancel a Fax in Progress
238
Check and Cancel a Pending Fax
239
Fax Options
240
Receive a Fax
241
Receive Mode Settings
242
Set Fax Detect
246
Fax Preview
247
Shrink Page Size of an Oversized Incoming Fax
251
Set the Fax Receive Stamp
252
Receive a Fax at the End of a Telephone Conversation
253
Memory Receive Options
255
Remote Fax Retrieval
262
Voice Operations and Fax Numbers
268
Voice Operations
269
Store Fax Numbers
272
Set up Groups for Broadcasting
277
Telephone Services and External Devices
281
Phone Line Services
282
Caller ID
283
Voice over Internet Protocol (Voip/Telephone Line Interference)
286
External TAD (Telephone Answering Device)
287
External and Extension Telephones
291
Fax Reports
296
Set the Transmission Verification Report's Style
297
Set the Fax Journal's Interval Period
298
Pc-Fax
299
PC-FAX for Windows
300
PC-FAX for Mac(Sending Only)
320
Network
323
Configure Network Details Using the Control Panel
324
Supported Basic Network Features
325
Network Management Software and Utilities
326
Learn about Network Management Software and Utilities
327
Additional Methods of Configuring Your Brother Machine for a Wireless Network
328
Before Configuring Your Brother Machine for a Wireless Network
329
Configure Your Machine for a Wireless Network Using the One Push Method of Wi-Fi Protected Setup ™ (WPS)
330
Configure Your Machine for a Wireless Network Using the PIN Method of Wi-Fi Protected Setup ™ (WPS)
331
Configure Your Machine for a Wireless Network When the SSID Is Not Broadcast
333
Configure Your Machine for an Enterprise Wireless Network
335
Use Wi-Fi Direct
337
Advanced Network Features
346
Print the Network Configuration Report
347
Synchronize Time with the SNTP Server Using Web Based Management
348
Technical Information for Advanced Users
351
Reset the Network Settings to Factory Default
352
Print the WLAN Report
353
Security
356
Before Using Network Security Features
357
Secure Function Lock 3.0
358
Before Using Secure Function Lock 3.0
359
Configure Secure Function Lock 3.0 Using Web Based Management
360
Scan Using Secure Function Lock 3.0
361
Configure Public Mode for Secure Function Lock 3.0
362
Additional Secure Function Lock 3.0 Features
363
Register an External IC Card Reader
364
Use Active Directory Authentication
365
Introduction to Active Directory Authentication
366
Configure Active Directory Authentication Using Web Based Management
367
Log on to Change the Machine Settings Using the Machine's Control Panel (Active Directory Authentication)
368
Use LDAP Authentication
369
Introduction to LDAP Authentication
370
Configure LDAP Authentication Using Web Based Management
371
Log on to Change the Machine Settings Using the Machine's Control Panel (LDAP Authentication)
372
Manage Your Network Machine Securely Using SSL/TLS
373
Certificates and Web Based Management
374
Manage Your Network Machine Securely Using Ipsec
396
Introduction to Ipsec
397
Configure Ipsec Using Web Based Management
398
Configure an Ipsec Address Template Using Web Based Management
399
Configure an Ipsec Template Using Web Based Management
401
Send an Email Securely
410
Configure Email Sending Using Web Based Management
411
Send an Email with User Authentication
412
Send an Email Securely Using SSL/TLS
413
Use IEEE 802.1X Authentication for a Wired or a Wireless Network
414
What Is IEEE 802.1X Authentication
415
Configure IEEE 802.1X Authentication for a Wired or a Wireless Network Using Web Based Management (Web Browser)
416
IEEE 802.1X Authentication Methods
418
Mobile/Web Connect
419
Brother Web Connect
420
Brother Web Connect Overview
421
Online Services Used with Brother Web Connect
422
Conditions for Using Brother Web Connect
423
Set up Brother Web Connect
427
Scan and Upload Documents Using Brother Web Connect
434
Upload a Document from an External Memory Device Using Brother Web Connect
435
Download and Print Documents Using Brother Web Connect
436
Download and Save a Document to an External Memory Device Using Brother Web Connect
438
Faxforward to Cloud or E-Mail
439
Airprint
442
Airprint Overview
443
Before Using Airprint (Macos)
444
Print Using Airprint
445
Scan Using Airprint (Macos)
448
Send a Fax Using Airprint (Macos)
449
Mobile Printing for Windows
450
Mopria ® Print Service
451
Brother Iprint&Scan for Mobile Devices
452
Controlcenter
453
Controlcenter4 (Windows)
454
Change the Operation Mode in Controlcenter4 (Windows)
455
Scan Using Controlcenter4 Home Mode (Windows)
457
Scan Using Controlcenter4 Advanced Mode (Windows)
458
Set up the Brother Machine Using Controlcenter4 (Windows)
459
Create a Custom Tab Using Controlcenter4 Advanced Mode (Windows)
461
Brother Iprint&Scan for Windows and Mac
463
Brother Iprint&Scan Overview
464
Troubleshooting
465
Error and Maintenance Messages
466
Transfer Your Faxes or Fax Journal Report
473
Error Messages When Using the Brother Web Connect Feature
477
Document Jams
479
Document Is Jammed in the Top of the ADF Unit
480
Document Is Jammed in the Bottom of the ADF Unit
481
Document Is Jammed Inside the ADF Unit
482
Remove Paper Scraps Jammed in the ADF
483
Printer Jam or Paper Jam
484
Paper Is Jammed in the Front of the Machine
485
Paper Is Jammed in the Back of the Machine
490
Remove Paper Scraps
494
If You Are Having Difficulty with Your Machine
495
Paper Handling and Printing Problems
496
Telephone and Fax Problems
502
Other Problems
508
Network Problems
510
Airprint Problems
520
Check the Machine Information
521
Reset Your Brother Machine
522
Reset Functions Overview
523
Routine Maintenance
524
Refill the Ink Tanks
525
Clean Your Brother Machine
530
Clean the Scanner
531
Clean the Print Head from Your Brother Machine
533
Clean the Print Head from Your Computer (Windows)
534
Clean the Print Head from Your Computer (Mac)
536
Clean the Machine's LCD
537
Clean the Outside of the Machine
538
Clean the Machine's Printer Platen
539
Clean the Paper Feed Rollers
540
Clean the Base Pad
542
Clean the Paper Pick-Up Rollers
543
Check Your Brother Machine
545
Check the Print Quality
546
Check the Print Alignment from Your Brother Machine
548
Check the Print Alignment from Your Computer (Windows)
549
Check the Print Alignment from Your Computer (Mac)
550
Monitor Machine Status from Your Computer (Windows)
551
Monitor Machine Status from Your Computer (Mac)
555
Correct the Paper Feed to Clear Vertical Lines
556
Change the Print Setting Options When Having Printing Problems
557
Pack and Ship Your Brother Machine
558
Machine Settings
560
Change Machine Settings from the Control Panel
561
In the Event of Power Failure (Memory Storage)
562
General Settings
563
Save Your Favourite Settings as a Shortcut
578
Print Reports
583
Settings and Features Tables
586
Change Machine Settings from Your Computer
602
Change Machine Settings Using Web Based Management
603
Change the Machine Settings Using Remote Setup
608
Appendix
620
Specifications
621
Enter Text on Your Brother Machine
627
Brother Numbers
628
Advertisement
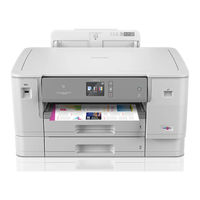
Brother MFC-T4500DW Service Manual (402 pages)
Inkjet MFC
Brand:
Brother
| Category:
Printer
| Size: 27.82 MB
Table of Contents
Section 1
4
Table of Contents
4
Safety Information
12
Chapter 1 Specifications
23
General
23
Media Specification
23
Paper Handling
29
LCD Panel
30
Memory
30
Interface
31
Others
31
Fax
33
Printer
33
Copy
34
Scanner
34
Software
35
Network
35
Wired
35
Wireless
35
Supplies/Options
36
Service Information
36
Paper
37
Unprintable Area
40
Chapter 2 Troubleshooting
41
Introduction
41
Initial Check
41
Precautions
41
Overview
43
Cross-Section Drawings
43
Document Scanning
43
Printer Part
44
Document Feeding Path
45
Document Feeding Path/Recording Paper Feeding Path
45
Recording Paper Feeding Path
45
Parts Names and Functions
46
Block Diagram
48
Components
49
Error Indication
50
Error Code
50
Section 2
51
Error Messages
57
Communications Error
61
Troubleshooting
65
Error Cause and Solutions
65
2200 Black Ink Cartridge Side IC Chip Relation Defective
68
2201 Yellow Ink Cartridge Side IC Chip Relation Defective
68
2202 Cyan Ink Cartridge Side IC Chip Relation Defective
68
2203 Magenta Ink Cartridge Side IC Chip Relation Defective
68
It Is Judged as Incompatible Ink Cartridge Is Loaded
69
Identification no Match
70
Identification no Match - Judging as Incompatible Ink Cartridge
70
2500 Cannot Communicate with Black Ink Cartridge IC Chip (Ink Cartridge Side.)
70
2501 Cannot Communicate with Yellow Ink Cartridge IC Chip (Ink Cartridge Side.)
70
2502 Cannot Communicate with Cyan Ink Cartridge IC Chip (Ink Cartridge Side.)
70
2503 Cannot Communicate with Magenta Ink Cartridge IC Chip (Ink Cartridge Side.)
70
2600 Black Ink Cartridge Reaches Its Replacement Period
71
Black Ink Reaches Its Refill Period
71
Yellow Ink Cartridge Reaches Its Replacement Period
71
2B00 Black Ink Cartridge Ink Remaining Counter Error
72
2B01 Yellow Ink Cartridge Ink Remaining Counter Error
72
2B02 Cyan Ink Cartridge Ink Remaining Counter Error
72
2B03 Magenta Ink Cartridge Ink Remaining Counter Error
72
No Magenta Ink Cartridge Loaded
72
2E00 Cannot Communicate with Ink Cartridge IC Chip (Machine Body Side.)
73
Carriage Does Not Move
73
Detected by the CR Encoder Sensor
73
Carriage Cannot Detect Origin
74
Detected by the CR Encoder Sensor
74
Head Capping Is Unable
74
Caused by Paper Jam When Ink Is Not Discharging
75
Causes Other than Paper Jam When Ink Is Discharging
75
Causes Other than Paper Jam When Ink Is Not Discharging
75
Caused by Paper Jam When Ink Is Discharging
76
3E00 Defective Occurs in the ASF Motor, Carriage Motor or Paper Feed Motor
76
Carriage Motor Cannot Stop
77
4000 Casing Internal Thermistor Defective
77
Head Voltage Does Not Turn off
77
When Power Is on
77
4400 Head Driver IC Detects Abnormal Temperature During Operation or Stand-By
78
Head Flat Cable Detected to be Not Correctly Inserted
78
Head Voltage Does Not Raise
79
4C01 Compound IC Thermistor Error
79
The Compound IC Thermistor Detected a Temperature of -21 Degree-C or
79
ASIC Thermistor Error
79
5A00 Abnormal Stop of Purge Cam Being Driven
80
5B00 Pump of Maintenance Unit Stopped Abnormally During Exhaustion/Suction
80
6700 T1 Detection Sensor Detects no Paper Tray #1 State
81
T2 Detection Sensor Detects no Paper Tray #2 State
81
T3 Detection Sensor Detects no Paper Tray #3 State
81
Head Voltage Drops too Quick
80
5000 The Purge Cam Switch Is Not Switching ON/OFF
80
5200 Failed to Detect the Origin of the Purge Cam
80
7A00 Purge Cam Rotation Error (Capping CW)
82
7D00 Current Protection Activated for the Cap Driver IC
82
ASF Encoder Sensor Cannot Detect Rotation of the ASF Motor
82
Cap Cam Cannot Shift to Head Capping Position
82
Cap Cam Cannot Shift to Head Uncapping Position
82
Failed to Detect ON/OFF of the Purge Cam
82
Failed to Detect the Origin of the Purge Cam
82
ASF Motor Cannot Stop
82
Head Property Information Not Input
82
The Paper Size and Paper Type of each Tray Set During Print Setting Are Different from before Printing. this Error Occurs When the Paper Tray #1
86
The Paper Size and Paper Type of each Tray Set During Print Setting Are Different from before Printing. this Error Occurs When the Paper Tray #2
86
8200 Paper Jam
87
Registration Sensor Stays in Paper Feeding State Even after Completion
87
8700 Paper Jam
88
Switchback Sensor Cannot Detect Paper Feeding State Even Papers Are
88
8F00 Paper Feed Motor Cannot Stop
89
8F01 PF Encoder Sensor Cannot Detect Rotation of the Paper Feed Motor
89
3Rd Tray Paper Feed Motor Cannot Stop
90
Level of CIS Scan Result Is Detected as Abnormal During the Second Side
93
Sending. (after Retrying)
93
The Required Number of Pixels of the Scanning Data Is Not Output, and It
93
CIS Positioning Abnormal (Home Position Cannot be Found)
94
Document Scanning Position Sensor Detects that the Document's Length
94
Modem PCB Initialization Failed
94
D800 Touch Panel Initialization Failed
95
E300 Wireless LAN Connection Error
95
E600 Main PCB EEPROM Write Error
95
E900 NFC PCB Initialization Failed
95
Wired LAN MAC Address Not Registered
95
A USB Device out of the Specifications Is Inserted to the USB Terminal
96
F000 Flash File System Error
96
F001 Flash ROM Read Problem
96
Firmware Verification During the Self Test Fails
96
ROM Data Acquisition Error
96
System Resource Error
96
Paper Is Not Fed from Paper Tray
97
Recording Paper Feeding Problems
97
Paper Is Not Fed from Manual Feed Slot
99
Paper Is Not Fed from MP Tray
99
Two or more Sheets of Paper Are Fed from the MP Tray
100
Two or more Sheets of Paper Are Fed from the Paper Tray
100
Paper Feeding at an Angle
101
Recording Paper Jam
101
No Paper Fed" Is Displayed
105
Prints Only Single Side of the Paper When Duplex-Printing
105
Defective Images
106
Print-Image Problems
106
Cannot Make a Print through Network Connection
117
Cannot Print Data
117
Network Problems
117
Software-Related Problems
117
Control Panel Problems
118
No Display on Lcd/Incorrect Display on LCD
118
No Display on LED
118
The Control Panel Does Not Work
118
Touch Panel Inoperative
119
Document Can Not be Fed
120
Document Double Feeding
120
Document Feeding Problems
120
Document Jam
121
Document Size Not Correctly Detected
123
Wrinkles on Documents
123
Defective Images
124
Scanned-Image Problems
124
Troubleshooting from Image Defect
124
A Communications Error Occurs
129
Fax Problems
129
No Faxes Can be Received
129
No Faxes Can be Sent
129
Data of USB Flash Memory Does Not Read
130
Other Problems
130
The Machine Cannot be Powered on
130
USB Flash Memory Does Not Function
130
Ink Cartridge Related Problems
131
Internal Memory Errors
131
Security Function Lock Related Problems
131
Noise Comes from Machine
132
Unusable Device" Is Displayed
132
Chapter 3 Disassembly and Assembly
133
Precautions before Proceeding
133
Packing
134
Screw Catalogue
135
Screw Torque List
136
Lubrication
139
Overview of Gears
148
Routing of Harnesses and Ink Supply Tubes
149
Disassembly Flow
160
Disassembly Procedure
162
Preparation
162
Head Joint Rubber/Head/Carriage Unit/Cr Timing Belt/< India Model Only > Edge Cover Dust Foam
166
MP Side Cover L
177
MP Side Cover R
178
MP Tray ASSY/MP Paper Detection Sensor PCB/< India Model Only > MP Dust Foam
179
Jam Clear Cover
182
Top Cover ASSY (Printer Model)
183
Document Scanner Side Cover L (MFC Model)
186
Document Scanner Side Cover R/< India Model Only > Document Scanner Dust Foam
191
ADF Unit/Document Scanner Unit
192
Adf
193
ADF Side Cover
193
ADF Rear Cover
194
ADF Cover
194
Document Separation Roller ASSY
195
ADF Separation Pad Holder ASSY
196
ADF Document Support
197
ADF Hinge
199
ADF Document Detection Sensor/Adf Document Width Sensor PCB
201
Document Scanning Position Sensor PCB
202
Second Side CIS Flat Cable/Second Side CIS Unit
203
First Side CIS Unit/First Side CIS Flat Cable
207
Document Cover Sensor
211
Front Cover L
211
Ink Cartridge Cover
212
Upper Cover/< India Model Only > Upper Cover Dust Foam
212
Control Panel ASSY
215
Panel Flat Cable
218
Nfc Pcb
220
Panel PCB
220
Lcd Pcb
221
Lcd
222
Touch Panel
225
Wireless LAN PCB
227
Main PCB
228
Modem PCB
230
Maintenance Unit
231
Ink Absorber Felt (for Maintenance Unit)
239
Carriage PCB ASSY
240
Tank Case ASSY (Ink Tank Model Only)
242
Ink Refill ASSY
243
Ink Absorber Felt (for Ink Refill ASSY)
244
Ink Cartridge Cover Sensor
246
Ink Absorber Box
247
Switchback Sensor PCB
248
CR Encoder Strip
249
Carriage Motor
250
Flushing Base
253
Frame ASSY (T2 Paper Pull-In Roller L/R)
254
T2 Bank ASSY
258
Power Supply PCB ASSY
259
Switchback Roller
261
PF Encoder Disk
262
PF Encoder Sensor PCB
263
Paper Feed Motor
267
Paper Feed Roller
267
Platen/Paper Ejection Roller
268
Registration Sensor PCB
271
Flushing Box
274
Paper Feed Arm Frame ASSY (T1 Paper Pull-In Roller L/R)
274
T1 Bank ASSY
276
T1 Base Pad / T2 Base Pad / T3 Base Pad
278
3Rd Tray Relay PCB
279
3Rd Tray Paper Pull-In Sensor PCB
280
3Rd Tray Paper Feed Motor
281
Intermediate Roller
281
T3 Bank ASSY
285
T3 Paper Pull-In Roller L/R
287
Chapter 4 Adjustments and Updating of Settings, Required after Parts Replacement
288
If You Replace the Main Pcb
288
Customize Destinations (Maintenance Mode 74)
290
Except for Printer Model > Set the CIS Type (Maintenance Mode 59)
290
Install the Firmware (Maintenance Mode 28)
290
Initialize the EEPROM Parameters (Maintenance Mode 01)
292
Restore the Head Calibration Data (Maintenance Mode 68)
292
Set the Serial Number (Maintenance Mode 80)
292
Restore Machine Information (Maintenance Mode 46)
293
Updating of Head Property Information (Maintenance Mode 68)
293
Adjust the Touch Panel (Maintenance Mode 78)
294
Adjustment of Margins in Borderless Printing (Maintenance Mode 66)
294
Adjustment of Software Correction for Inclination/Corrugation/Ruled Lines (Maintenance Mode 65 / User Menu)
294
Except for Printer Model > Acquire White/Black Level Data (Maintenance Mode 55)
294
Reset Purge and Flushing Counts
294
Updating of Paper Feeding Correction Values (Maintenance Mode 58 / User Menu)
294
Check Scanning and Printing
295
Paper Remaining Sensor Model Only > Disable Inter-Machine Variation Calibration for Paper Remaining Sensor (Maintenance Mode 88 <Selector 1 on AMS04>)
295
Write Head Calibration Data (Maintenance Mode 02)
295
If You Replace the Head/Carriage Unit
296
Update the Head Property Information (Maintenance Mode 68)
297
Adjust Head Inclination
298
Check Head Nozzles (Maintenance Mode 09)
298
Perform Ink Supply Purge (Maintenance Mode 76)
298
(Maintenance Mode 65 / User Menu)
299
Adjustment of Software Correction for Inclination/Corrugation/Ruled Lines
299
Adjustment of Margins in Borderless Printing (Maintenance Mode 66)
300
Check Printing
300
Obtain Machine Information at the User Site (Instruction to the End User)
300
Updating of Paper Feeding Correction Values (Maintenance Mode 58 / User Menu)
300
Write Head Calibration Data (Maintenance Mode 02)
300
If You Replace the Document Scanner Unit, Adf Unit or Cis Unit
301
Acquire White/Black Level Data (Maintenance Mode 55) (Not Required after Replacement of the ADF Unit on Simplex Scanning Models)
301
Check Scanning
301
Set the CIS Type (Maintenance Mode 59) (Not Required after Replacement of the ADF Unit on Simplex Scanning Models)
301
If You Replace the Control Panel Assy
302
Adjust the Touch Panel (Maintenance Mode 78)
302
Check LCD Operation (Maintenance Mode 12)
302
Check the Operation of the Control Panel Keys (Maintenance Mode 13)
302
If You Replace the Ink Absorber Box or Flushing Box
302
Reset Purge or Flushing Counts
302
If You Replace the Paper Feeding Related Parts and Maintenance Unit
303
Check Head Nozzles (Maintenance Mode 09)
303
(Maintenance Mode 65 / User Menu)
304
Adjustment of Margins in Borderless Printing (Maintenance Mode 66)
304
Adjustment of Software Correction for Inclination/Corrugation/Ruled Lines
304
Check Printing
304
Only When Replacing the Paper Feed Arm Frame ASSY or LT Frame ASSY of the
304
Remaining Sensor(Maintenance Mode 88 <Selector 1 on AMS04>)
304
Updating of Paper Feeding Correction Values (Maintenance Mode 58 / User Menu)
304
Chapter 5 Service Functions
305
Maintenance Mode
305
Entry to the Maintenance Mode
305
How to Enter the Maintenance Mode for Service Personnel
305
How to Enter the End User-Accessible Maintenance Mode
307
List of Maintenance-Mode Functions
308
Detailed Description of Maintenance-Mode Functions
309
EEPROM Parameter Initialization (Maintenance Mode 01, 91)
309
Creating of Head Calibration Data and Writing It into Flash ROM (Maintenance Mode 02)
310
ADF Performance Test (Maintenance Mode 08)
315
Printout of Test Pattern (Maintenance Mode 09)
316
Worker Switch Setting and Printout (Maintenance Modes 10 and 11)
317
Operational Check of LCD (Maintenance Mode 12)
319
Operational Check of Keys on Control Panel (Maintenance Mode 13)
321
Updating of Firmware Using a USB Flash Memory (Maintenance Mode 28)
322
Sensor Operational Check (Maintenance Mode 32)
323
Printout of Dial Log (Maintenance Mode 37)
325
PCL/PS Function Setting (Maintenance Mode 45)
326
Backup of Machine Information (Maintenance Mode 46)
327
Transfer of Received FAX Data And/Or Equipment's Log (Maintenance Mode 53)
329
Fine Adjustment of Scanning Position (Maintenance Mode 54)
331
Acquisition of White/Black Level Data (Maintenance Mode 55)
332
Periodic Purge Time Setting (Ink Tank Model/Simple Ink Cartridge Model Only)(Maintenance Mode 56)
332
Cartridge IC Communication Check (Maintenance Mode 57)
333
Updating of Paper Feeding Correction Values (Maintenance Mode 58)
334
Checking of CIS Travel and Specifying of CIS Type (Maintenance Mode 59)
338
Printout of PRN/JPEG Files in USB Flash Memory (Maintenance Mode 61)
339
Move of the Head/Carriage Unit to the Adjustment Position (Maintenance Mode 63)
340
Adjustment of Software Correction for Inclination/Corrugation/Ruled Lines (Maintenance Mode 65)
341
Adjustment of Margins in Borderless Printing (Maintenance Mode 66)
343
Updating of Head Property Information and Backup/Restoration of Head Calibration Data (Maintenance Mode 68)
345
Customizing Destinations (Maintenance Mode 74)
347
Traveling Speed Check of Head/Carriage Unit (Maintenance Mode 69)
347
Move of the Head/Carriage Unit to the Center (Maintenance Mode 75)
350
Purge Operation (Maintenance Mode 76)
351
Print of the Maintenance Information (Maintenance Mode 77)
355
Adjustment of Touch Panel (Maintenance Mode 78)
362
Display of the Equipment's Log (Maintenance Mode 80)
363
Equipment Error Code Indication (Maintenance Mode 82)
376
Output of Transmission Log to the Telephone Line (Maintenance Mode 87)
376
Assurance Mode Switch Setting (Maintenance Mode 88)
377
Printout of Block Pattern (Ink Tank Model / Simple Ink Cartridge Model Only) (Maintenance Mode 89)
386
Other Service Functions
387
Displaying the Firmware Version
387
Moving the Head/Carriage Unit
387
Retrieving the Equipment Log Information
388
Special Purge (SPP) < Ink Tank Model Only
389
Chapter 6 Circuit Diagrams and Wiring Diagrams
390
Chapter 7 Periodical Maintenance
397
Periodical Replacement Parts
397
Appendix 1 Serial Numbering System
398
Appendix 2 Deletion of User Setting Information
400
Appendix 3 Installing the Maintenance Printer Driver
401
Brother MFC-T4500DW Quick Setup Manual (2 pages)
Brand:
Brother
| Category:
All in One Printer
| Size: 2.59 MB
Advertisement
Advertisement
Related Products
Brother MFC-T800W
Brother mfc-t800
Brother MFC-T810W
Brother MFC-T910DW
Brother MFC-8510DN
Brother Laser MFC-4800
Brother MFC-4550 PLUS
Brother MFC-250C
Brother MFC-8881DNHY
Brother MFC-L2751DW
Brother Categories
Sewing Machine
All in One Printer
Printer
Label Maker
Fax Machine
More Brother Manuals
Login
Sign In
OR
Sign in with Facebook
Sign in with Google
Upload manual
Upload from disk
Upload from URL