Sign In
Upload
Manuals
Brands
Amx Manuals
Software
Modero NXD-700Vi
Amx Modero NXD-700Vi Manuals
Manuals and User Guides for Amx Modero NXD-700Vi. We have
4
Amx Modero NXD-700Vi manuals available for free PDF download: Operation/Reference Manual, Datasheet, Quick Start Manual
Amx Modero NXD-700Vi Operation/Reference Manual (274 pages)
Touch Panel Design Program (v2.10 or higher)
Brand:
Amx
| Category:
Software
| Size: 4.14 MB
Table of Contents
Table of Contents
3
Tpdesign4 Program
21
Overview
21
What's New in Version 2.10
21
Supported Operating Systems
21
Supported Operating System Languages
21
PC Requirements
22
Supported Panel Types
22
Intercom Capabilities for Modero Panels
23
Supported Screen Resolutions
23
Tpdesign4 Work Area
23
Toolbars
25
Show/Hide Toolbars
25
Design View Windows
26
Using the Zoom Controls
27
Workspace Navigator
28
Properties Control Window
29
Properties Control Window - General Tab
29
Properties Control Window - Programming Tab
29
Properties Control Window - States Tab
29
State Manager Window
30
Transfer Status Window
30
Button Preview Window
31
Button Preview Context Menu
31
Magnifier Window
32
Working with Dockable Windows
32
Moving, Docking and Resizing Dockable Windows
32
Toggling the Windows
32
Status Bar
32
Default View
33
Secondary View
33
Print Preview Window
34
Workspace Context Menu
35
Webupdate
35
G4 Panelbuilder
35
G4 Panelpreview
36
Tpdesign4 Project Files
37
Overview
37
Inappropriate File Name Characters
37
Creating a New Project
37
Using the New Project Wizard
38
System-Generated File Names
40
Edit Focus
41
Setting Project Properties
42
Project Properties Dialog - Project Information Tab
42
Applying Password Protection to Your Project File
43
Project Properties Dialog - Panel Setup Information Tab
44
Setting a Power up Page
45
Setting Power up Popup Pages
45
Setting an Inactive Page Flip
46
Project Properties Dialog - Sensors Tab
47
Project Properties Dialog - IR Emitters and Receivers Tab
48
Working with R-4 Remote Controllers
49
Creating a TPD4 Project for R-4 Remote Controllers
49
R-4 Remote Devices - Unsupported Button Types
50
Using Quick Input
50
Undo/Redo Support
51
Using the Workspace Navigator
51
Workspace Navigator - Pages Tab
51
Opening Pages/Popup Pages Via the Workspace Navigator
52
Renaming Pages Via the Workspace Navigator
52
Workspace Navigator - Edit Focus
52
Workspace Navigator - Function Maps Tab
52
Cutting, Copying and Pasting
53
Copying States to the Clipboard
53
Pasting States from the Clipboard
53
Cutting Objects
54
Saving the Active Project as a Different Panel Type
54
Working with Multiple Projects
54
Opening Multiple Projects Simultaneously
54
Copying/Pasting Across Projects
54
Copying/Pasting Pages, Popup Pages and Buttons Across Projects
55
Project Migration (from Previous Versions of Tpdesign4)
55
Converting TPD3 Files to TPD4
55
Using the TPD Conversion Wizard
55
Errors and Warnings Report Dialog
56
Working with Pages
57
Overview
57
Creating a Page
57
Page General Properties
58
Creating a Page Flip
58
Drag & Drop to Set Page Flips
58
Page Flip Actions
59
Page Programming Properties
59
Page State Properties
60
Adding a Fill Color to a Page
61
Adding Text to a Page
61
Adding a Bitmap to a Page
61
Adding an Icon to a Page
62
Working with Transparent Backgrounds
62
Supported Image File Types
63
Displaying a Video Source on a Page
63
Copying Pages
64
Pasting Pages
64
Copying / Pasting a State from a Page
64
Opening Pages/Popup Pages Via the Workspace Navigator
64
Renaming a Page
64
Renaming Pages Via the Workspace Navigator
64
Deleting Pages from a Project
65
Exporting Pages as Image Files
65
Printing Pages
66
Working with Popup Pages
67
Overview
67
Creating a Popup Page
67
Using the Popup Draw Tool
68
Drawing Assist Support for Popup Pages
69
Popup Page General Properties
70
Popup Page Programming Properties
71
Popup Page State Properties
71
Adding a Fill Color to a Popup Page
73
Adding a Bitmap to a Popup Page
73
Adding an Icon to a Popup Page
73
Adding Text to a Popup Page
74
Displaying a Video Source on a Popup Page
74
Copying Popup Pages
74
Pasting Popup Pages
74
Copying / Pasting a State from a Popup Page
75
Popup Page Groups
75
Show/Hide Popup Pages
75
Deleting Popup Pages from a Project
76
Printing Popup Pages
76
Working with Buttons
77
Overview
77
Selection Tool
77
Setting Default Parameters for New Buttons
78
Drawing Tools Toolbar
78
Creating New Buttons
79
Drawing a Button
79
Using the Drawing Assist Features
80
Alignment & Sizing Tool
82
Generated Button Names
84
Setting General Button Properties
85
Setting Button Programming Properties
86
Level Control Types
86
Setting State Properties
87
Editing Button Properties
88
Editing Multiple Selections
88
Apply to All
88
General Buttons
89
Multi-State General Buttons
89
Bargraph Buttons
89
Multi-State Bargraph Buttons
89
Custom Sliders on Multi-State Bargraph Buttons
89
Formatting Codes (Bargraph and Multi-Bargraph Buttons Only)
90
Using Touch Maps for Multi-State Bargraphs Buttons
90
Joystick Buttons
91
Text Input Buttons
91
Input Mask Characters (Text Input Button Only)
91
Input Mask Ranges (Text Input Button Only)
91
Input Mask Operators (Text Input Button Only)
91
Input Mask Next Field Characters (Text Input Button Only)
92
List Box Buttons
92
Adding Text to a Button
92
Additional Foreign Language Support
93
Pre-Rendered Graphics
93
True Type Font Support
93
Computer Control Buttons
92
Takenote Buttons
92
Changing Button Text Color
93
Adding a Bitmap to a Button
94
Adding an Icon to a Button
94
Changing the Button Fill Color
94
Border Styles
95
Creating a Time Button
95
Creating a Date Button
95
Working with Touch Styles and Active Touch
96
Displaying a Video Source on a Button
96
Copying/Pasting Buttons
96
Paste Controls Dialog
97
Searching and Replacing Button Properties
97
Using Quick Input
98
Button Preview Window
99
External Controls (Pushbuttons/Leds)
100
Setting Global General Properties for External Pushbuttons And/Or Leds
101
Setting Global Programming Properties for External Pushbuttons And/Or Leds
101
Setting Page-Specific General Properties for External Pushbuttons And/Or Leds
102
Setting Page-Specific Programming Properties for External Pushbuttons And/Or Leds
102
Copy/Convert External Controls between Panels
102
List Box Buttons
103
Overview
103
G4 Devices that Support List Box Buttons
104
List Box Buttons: Managed Mode
105
List Box Buttons - Container
105
List Box Toolbar
105
Creating List Box Buttons (Managed Mode)
106
Using the Drawing Tools Toolbar with List Box Buttons
107
Setting List Box Container Button Properties
107
List Box Container Properties Vs. Column Properties (Managed Mode)
107
Setting General Properties: List Box Container Buttons
108
Setting Programming Properties: List Box Container Buttons
109
Setting State Properties: List Box Container Buttons
109
List Box Buttons - Columns
110
List Box Buttons - Subordinate Buttons
110
Setting List Box Button Column Properties
111
Setting General Properties: List Box Button Columns
111
Setting State Properties: List Box Button Columns
112
Adding Rows and Columns to a List Box (Managed Mode)
112
Adding Rows
112
Adding Columns
113
Deleting Rows and Columns from a List Box (Managed Mode)
113
Deleting Columns
113
Deleting Rows
113
Cutting, Copying and Pasting a List Box (Managed Mode)
113
Subordinate Button Placement
114
Subordinate Buttons - Drag and Drop Capability
114
List Box Buttons - Resizing Capability
114
List Box Buttons - Navigation Buttons
115
Creating Navigation Buttons
115
Navigation Buttons - Channel Code Values
116
List Box Buttons: Unmanaged Mode
116
Rules for Unmanaged List Box Buttons
117
List Box Buttons - Z-Order
117
Creating List Box Buttons (Unmanaged Mode)
117
Editable Button Properties of an Unmanaged List Box Container Button
118
Editable Button Properties of an Unmanaged List Box Subordinate Button
118
List Data Table
119
Edit List Tables Dialog
119
Creating a Static List Data Table
120
List Data Table Column Types
121
Attaching a Static List Data Table to a List Box Button
121
Editing Cell Data
121
Changing the Port and Address Assignments for a Data List Table
122
Deleting a List Data Table
122
Working with Dynamic List Box Data
123
Dynamic List Box Data
123
Creating a Dynamic List Data Table
123
List Box Commands
123
Data List Commands
123
Ldn
123
Lda
124
Ldr
124
Ldc
124
Ldd
124
Data List Commands - Rules
125
Ldt
125
Ldl
125
Command Structure List View Commands
126
Lvo
126
Lvl
126
Lvp
126
Lvs
127
Lvc
127
Lvf
127
Attaching a Dynamic List Data Table to a List Box Button
128
Example Netlinx Code with List Data
128
Working with Properties
131
Properties Control Window
131
Using the Apply to All Option
132
Using the Prev and Next Buttons
132
General Properties
133
Above Popups
133
Animate Time down
133
Animate Time up
133
Auto-Repeat
133
Border Style
133
Color Depth
133
Column Display Order
133
Column Sort Order
134
Compression
134
Cursor Color
134
Cursor Name
134
Description
134
Disabled
134
Display Type
134
Group
134
Height
134
Hidden
134
Hide Effect
135
Input Mask
135
Left
135
List Column
135
List Column Padding
135
List Display
136
List Table Port
136
List Table Address
136
List Table Wrap
136
List Filter Column
136
List Managed
136
List Offset Enabled
137
List Preferred Row
137
List Preferred Row Height
137
List Row
137
List Row Height
137
List Row Padding
137
List Selectable
137
Lock Button Name
138
Max Text Length
138
Modal
138
Name
138
Page Flip
138
Password
138
Password Character
138
Password Protection
138
Remote Host
138
Remote Port
138
Scale to Fit
139
Show Effect
139
Slider Color
139
Slider Name
139
State Count
139
Takenote Enabled
139
Takenote Host
139
Takenote Port
139
Top
139
Touch Map
139
Touch Style
140
Type
140
Value Direction
140
Width/Height
140
Address Code
141
Address Port
141
Channel Code
141
Channel Port
141
Command Output
141
Command Port
141
Feedback
141
Level Aux
141
Level Code
141
Level Control Repeat
141
Level Control Parameters
142
Level Code
142
Level Control Repeat
142
Level Control Value
142
Level Port
142
Range High
142
Range Low
142
Range Time down
142
Range Time up
142
Range Inverted
142
Level Functions
143
Display Only
143
Active
143
Active Centering
143
Drag
143
Drag Centering
143
Address Codes
143
Basic Address Codes: Date Display
143
Basic Address Codes: Time Display
144
Channel Codes
144
Navigation Buttons - Channel Code Values
144
Basic Channel Codes: Page Flip
145
NXP-PLV Reserved Channel Codes (1-7)
145
Level Codes
145
NXP-PLV Reserved Level Codes (1-11)
145
State Properties
146
Bitmap
146
Bitmap Justification
146
Bitmap X and y Offsets
146
Border Color
146
Border Name
146
Chameleon Image
147
Draw Order
147
Fill Color
147
Font
147
Icon Justification
147
Icon Slot
147
Icon X and y Offsets
147
Marquee Direction
148
Marquee Repeat
148
Overall Opacity
148
Scale Bitmap to Fit
148
Sound
148
Streaming Source
148
Text
148
Text Color
148
Text Effect
149
Text Effect Color
149
Text Justification
149
Text X and y Offsets
149
Video Cropping
149
Video Fill
149
Video Pass-Thru
149
Word Wrap
149
Working with the Property Painter
150
Property Painter Dialog
151
Saving a Properties Set
152
All States Option
150
Workspace Navigator Context Menu
150
Working with States
153
Overview
153
Setting State Properties
154
State Manager Context Menu
154
Adding States to a Multi-State Button
155
Duplicating an Existing State on the Button
155
Adding States from the Clipboard
155
Adding States through Drag-And-Drop
156
State Manager Drag-And-Drop Menu
156
Removing States from a Multi-State Button
157
Deleting States
157
Cutting States to the Clipboard
157
Changing the Order of States
157
Reordering States through the Clipboard
157
Reordering States through Drag-And-Drop
157
Choose Display State Dialog
158
Replacing States on a Page, Popup Page or Button
158
Replacing States from the Clipboard
158
Replacing States through Drag-And-Drop
158
Draw Order (Z-Order)
159
Changing the Draw Order for Selected States
159
Working with Function Codes
161
Overview
161
Function Maps Tab
161
Display Function Codes
162
Function Codes - Limitations
163
0-Setup Port
163
Power Assign
163
The Power Assign Dialog
163
Using Power Assign: 1) Clear Channels
164
Using Power Assign: 2) Assign Codes
164
Begin Assignment at
164
Ensure Contiguous Code Assignment
165
Wrap Within Port ID
165
Colors and Palettes
167
Working with Colors
167
Working with Multiple Color Palettes
168
Creating New Palette Entries
168
Creating Custom Palettes
169
Renaming Palettes
169
Changing the Active Palette
169
Importing Palette Files
169
Exporting Palette Files
170
Copying Palettes
170
Copying Palette Entries
170
Using Custom Palettes to Enable Color Schemes in G4 Panelbuilder
170
Using the Grab and Paint Properties Tools
171
Using the Property Painter
172
Animations and Tweening
175
Using the Animation Wizard
175
Animation Wizard - Select Type (Step 1 of 6)
176
Animation Wizard - Create Sequence (Step 2 of 6)
176
Animation Wizard - Size & Position (Step 3 of 6)
176
Animation Wizard - Assign Frames (Step 4 of 6)
177
Animation Wizard - Appearance (Step 5 of 6)
177
Animation Wizard - Finish (Step 6 of 6)
177
Tweening
178
Creating Color Transition Effects
179
Creating Animated Bitmap Effects
180
Creating Animated Text Effects
181
Tweeners Sub-Menu
181
Chameleon Images
182
Requirements for Chameleon Images
182
Working with Chameleon Images
183
Chameleon Images, Custom Palettes and G4 Panelbuilder
184
Working with Templates
187
Importing Template (*.VAT or *.TPT) Files
187
Working with the System Page Template
187
Copying/Pasting Entire System Pages into a Project
188
Copying/Pasting System Page Elements into a Project Page
188
Working with System Page Keyboards and Keypads
189
System Page Template Reference
189
Exporting Your Project as a G4 Panelbuilder Template
191
Creating a New Project Using G4 Panelbuilder
193
Importing G4 Panelbuilder Templates
194
Creating G4 Panelbuilder Templates
194
Template Requirements
195
Required Template Elements
195
Optional Template Elements
197
Element Specific Conventions
197
Rules for Navigating a Template
198
Template Wide Conventions
198
Creating Navigation Elements
198
Creating Placeholder Elements
199
Placeholder Element Conventions
201
Creating Preview Images
201
Alternate Screen Names for Template Elements
202
Element Specific Conventions
202
Navigation Element Conventions
203
Sub-Navigation Element Conventions
204
Splash Element Conventions
204
Device Element Conventions
205
Feature Element Conventions
205
Sub-Feature Element Conventions
205
Exporting Your Project as a Visualarchitect Template
206
VA Templates - Navigations as Pages
206
VA Templates - Logical Page Scroll Bar Elements
206
VA Templates - Logical Page Info Element
206
VA Templates - Logical Page up and down Elements
207
VA Templates - List Box Page up and down Elements
207
Working with the Resource Manager
209
Resource Manager Dialog - Images Tab
210
Resource Manager Dialog - Dynamic Images Tab
210
Resource Manager Dialog - Slots Tab
210
Resource Manager Dialog - Sounds Tab
211
Editing Image and Sound Files Using External Programs
212
To Edit Image Files
212
To Edit Sound Files
212
Adding an External Editing Program for Image Files
212
Adding an External Editing Program for Sound Files
212
Changing the Default External Image or Sound Editor Program
213
Working with Images
213
Supported Image File Types
213
Importing Image Files to Your Project
214
Assigning Images to Slot Positions
214
Working with Dynamic Images
215
Adding Dynamic Image Files to Your Project
215
Assigning Dynamic Images to Slot Positions
215
Preserve Dynamic Images (Refresh Only at Panel Startup)
215
Working with Dynamo Video
216
Setting up a Dynamo Video Image
216
Motion JPEG Cameras and Servers that Provide Motion JPEG Streaming Output
218
Network Path Information
218
Working with Trendnet IP Cameras
220
Bitmaps Vs. Icons
221
Working with Icons
221
Working with Slot Assignments
221
Assigning Image and Sound Files to Slot Positions
222
State Draw Order (Z-Order)
222
Working with Sound Files
223
Importing Sound Files to Your Project
223
Assigning Sound Files to Slot Positions
223
Exporting Image and Sound Files from Your Project to a Specified Directory
224
Working with Video Fills
224
Streaming Video Fill
224
File Transfer Operations
225
Working with Communications Configurations
225
Saving and Recalling Communication Configurations
225
Editing the Settings on an Existing Communication Configuration
225
Connecting to a Netlinx Master
225
Connecting to a Netlinx Master Via TCP/IP
226
Connecting to a Netlinx Master Via Serial Port
226
Connecting to a Netlinx Master Via Modem
226
Secure Netlinx Connections
227
Transferring Touch Panel Files To/From a Netlinx Master
227
Panel File Transfers Via TCP/IP
227
Panel File Transfers Via Serial Port
228
Panel File Transfers Via Modem
230
Virtual Netlinx Master TCP/IP Transfers
231
Configuring Tpdesign4 for Virtual Netlinx Master TCP/IP Transfers
231
Powering up and Connecting the Panel
232
Configuring the Touch Panel for Virtual Netlinx Master TCP/IP Transfers
232
Transferring Files Using a Virtual Netlinx Master TCP/IP Connection
232
Sending Files to the Panel
232
Receiving Files from the Panel
233
Virtual Netlinx Master USB Transfers
233
Configuring the Touch Panel for Virtual Netlinx Master USB Transfers
233
Configuring Tpdesign4 for Virtual Netlinx Master USB Transfers
233
Transferring Files Using a Virtual Netlinx Master USB Connection
234
Sending Files to the Panel
234
Receiving Files from the Panel
234
Sending a Project Without Opening the File
234
Transfer Status Window
234
Transfer Status Context Menu
234
Program Preferences
237
Preferences Dialog
237
Preferences Dialog - Application Tab
237
Preferences Dialog - Appearance Tab
238
Preferences Dialog - Directories Tab
239
Preferences Dialog - Editor Selection Tab
240
Customizing the Menus and Toolbars
240
Adding or Removing Command Shortcuts from the Toolbars/Menus
240
Customize Dialog
240
Customize Dialog - Commands Tab
240
Customize Dialog - Toolbars Tab
241
Customize Dialog - Tools Tab
241
Customize Dialog - Keyboard Tab
242
Customize Dialog - Menu Tab
242
Customize Dialog - Options Tab
243
Command Context Menu
243
Adding Buttons to Existing Toolbars
243
Removing Buttons from Existing Toolbars
244
Creating a New Custom Toolbar
244
Renaming Custom Toolbars
244
Deleting Custom Toolbars
244
Adding a Shortcut to an Application in the Tools Menu
244
Creating a New Custom Menu
245
Adding Commands to Existing Menus
245
Associating an Icon with a New Command
245
Removing Commands from Existing Menus
246
Hotkey Shortcuts
246
Help Keyboard Dialog
246
Setting Custom Hotkeys
246
Visual Style Options
247
Appendix A: G4 Computer Control
249
System Requirements for G4CC
249
Supported Operating Systems
249
System Requirements
249
Setting up G4CC
249
1 : TPD4 Touch Panel File
249
2 : Source Code
249
3 : G4CC (Computer Control) Configuration
250
Using Configcc.exe to Configure G4CC
250
Setting Programming Properties: Computer Control Buttons
251
Running the G4CC Application
252
Appendix B: G4 Panelbuilder
253
Creating a New Project Using G4 Panelbuilder
253
Importing G4 Panelbuilder Templates
253
Creating G4 Panelbuilder Templates
254
Template Requirements
254
Optional Template Elements
254
Rules for Navigating a Template
255
Template Wide Conventions
256
Creating Navigation Elements
256
Creating Placeholder Elements
258
Placeholder Element Conventions
259
Creating Preview Images
259
Alternate Screen Names for Template Elements
260
Element Specific Conventions
261
Navigation Element Conventions
261
Sub-Navigation Element Conventions
263
Splash Element Conventions
263
Device Element Conventions
263
Feature Element Conventions
265
Sub-Feature Element Conventions
265
Appendix C: Takenote
267
Introduction
267
USB Stick Specifications
267
Pre-Configuration Procedures
268
Updating AMX Hardware and Software
268
Developing a TPD4 Project with G4CC and Takenote Support
268
Modifying the Source Code on Your Master
269
Configuring Computer Control
270
Running the Computer Control Application
271
Running the Takenote Application
271
Advertisement
Amx Modero NXD-700Vi Operation/Reference Manual (234 pages)
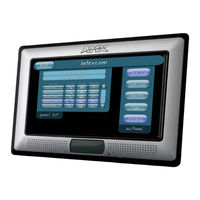
G4 Touch Panels 7” Modero Widescreen Video Touch Panels with Full Duplex Intercom
Brand:
Amx
| Category:
Touch Panel
| Size: 5.99 MB
Table of Contents
Table of Contents
5
Introduction
11
NXD-700Vi Specifications
13
NXD-700Vi Panels - Connector Layout
16
NXA-AVB/ETHERNET Breakout Box
17
Product Specifications
18
Installing the NXA-AVB/ETHERNET
18
Wiring the NXA-AVB/ETHERNET Connectors and Cables
19
Wiring the NXA-AVB/ETHERNET for Unbalanced Audio
21
Wiring the NXA-AVB/ETHERNET for Balanced Audio
23
NXD-700Vi Touch Panel Accessories
23
NXA-WC80211B/CF 802.11B Wireless Card (FG2255-03)
23
NXA-WC80211GCF 802.11G Wireless Card (FG2255-07)
24
NXA-CFSP Compact Flash (FG2116-7X)
29
Installation and Upgrade of the Internal NXD Components
31
Step 1: Remove the Existing NXD Outer Housing
31
Step 2: Install the New Compact Flash Memory Card
32
Step 3: Close and Resecure the NXD Panel Enclosure
33
Installation
35
Installing the No-Button Trim Ring
39
Installation of an NXD Touch Panel
39
Installing the Button Trim Ring
39
Pre-Wall Installation of the Conduit Box
39
Installing the NXD Panel Within a Conduit Box
39
Installing the NXD into Drywall Using Expansion Clips
40
Installing the NXD into a Flat Surface Using #4 Screws
43
Installing an NXD-700Vi into an (Optional) Rack Mount Kit (NXA-RK7)
45
Wiring Guidelines for the NXD-700Vi Panels
46
Preparing Captive Wires
46
Wiring a Power Connection
46
Audio/Video Port: Connections and Wiring
47
Ethernet/Rj-45 Port: Connections and Wiring
47
Calibrating the Modero Panel
50
Panel Calibration
50
Testing Your Calibration
50
If Calibration Is Not Working
51
Configuring Communication
53
Wireless Settings Page - Wireless Access Overview
54
Modero Setup and System Settings
54
Setting the Panel's Device Number
54
Hot Swapping
54
Configuring a Wireless Network Access
55
Step 1: Configure the Panel's Wireless IP Settings
55
Wireless Communication Using a DHCP Address
55
Using the Site Survey Tool
56
Step 2: Configure the Card's Wireless Security Settings
56
Configuring the Modero's Wireless Card for Unsecured Access to a WAP200G
59
Configuring the Modero's Wireless Card for Secured Access to a WAP200G
65
Step 3: Choose a Master Connection Mode
66
Usb
66
Configure a Virtual Netlinx Master Using Netlinx Studio
67
Ethernet
71
Using Your Netlinx Master to Control the G4 Panel
77
Upgrading Modero Firmware
77
Upgrading the Modero Firmware Via the USB Port
77
Step 1: Configure the Panel for a USB Connection Type
77
Step 3: Confirm and Upgrade the Firmware Via the USB Port
79
Firmware Pages and Descriptions
85
Setup Page
85
Information
85
Setup Navigation Buttons
85
Protected Setup
85
Project Information Page
88
Panel Information Page
89
Time & Date Setup Page
91
Volume
92
Volume Page
93
Supported Sampling Rates for WAV
94
Video Adjustment Page
94
Protected Setup Navigation Buttons
96
Protected Setup
97
System Settings Page
100
Wireless Settings Page
102
Secondary Connection Page
104
Wireless Security Page
104
Open (Clear Text) Settings
105
Static WEP Settings
107
WPA-PSK Settings
108
EAP-LEAP Settings
110
EAP-FAST Settings
113
EAP-PEAP Settings
115
EAP-TTLS Settings
116
EAP-TLS Settings
118
Client Certificate Configuration
119
Calibration Page
121
G4 Web Control Page
122
Sensor Setup
124
Other Settings
127
Image Caching
128
Password Setup
130
SIP Settings
131
Tools
133
Panel Logs
133
Panel Statistics
134
Connection Utility
136
EAP Security & Server Certificates
139
Overview
139
Panel Intercom Configuration
141
Setup
141
Advanced Setup
143
Naming a Panel
145
Sample Intercom Page
145
Creating Intercom
145
Programming
149
Overview
149
Button Assignments
149
Page Commands
149
Programming Numbers
155
RGB Triplets and Names for Basic 88 Colors
155
Font Styles and ID Numbers
157
Border Styles and Programming Numbers
158
Button Commands
160
Text Effects Names
179
Button Query Commands
180
Input Commands
201
Panel Runtime Operations
201
Embedded Codes
201
Dynamic Image Commands
202
Panel Setup Commands
202
Panel Intercom Commands
202
SIP Commands
203
Appendix A: Text Formatting
209
Text Formatting Codes for Bargraphs/Joysticks
209
Text Area Input Masking
210
Input Mask Character Types
210
Input Mask Ranges
211
Input Mask Operations
211
URL Resources
213
Special Escape Sequences
213
Appendix B - Wireless Technology
215
Overview of Wireless Technology
215
Terminology
220
EAP Authentication
220
Configuring Your G4 Touch Panel for USB Communication
223
AMX Certificate Upload Utility
223
Step 1: Setup the Panel and PC for USB Communication
223
Step 2: Confirm the Installation of the USB Driver on the PC
223
Amx Modero NXD-700Vi Quick Start Manual (2 pages)
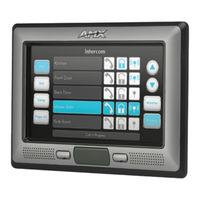
7” Modero Widescreen Touch Panel w/Full Duplex Intercom
Brand:
Amx
| Category:
Touch Panel
| Size: 0.21 MB
Advertisement
Amx Modero NXD-700Vi Datasheet (2 pages)
7” Modero Wall/Flush Mount Widescreen Touch Panel
Brand:
Amx
| Category:
Touch Panel
| Size: 0.57 MB
Advertisement
Related Products
Amx Modero NXD-CV5
Amx Modero NXT-CV10/PB
Amx Modero NXD-1200VG
Amx NetLinx NI-2000
Amx NetLinx NI-3000
Amx NetLinx NI-4000
AMX NETLINX PROGRAMMING LANGUAGE
AMX NSS-VOTE
Amx NetLinx Studio
AMX NetLinx Studio 2
Amx Categories
Touch Panel
Matrix Switcher
Controller
Switch
Keypad
More Amx Manuals
Login
Sign In
OR
Sign in with Facebook
Sign in with Google
Upload manual
Upload from disk
Upload from URL