
Related Manuals for NCR RealScan 7872


Summary of Contents for NCR RealScan 7872
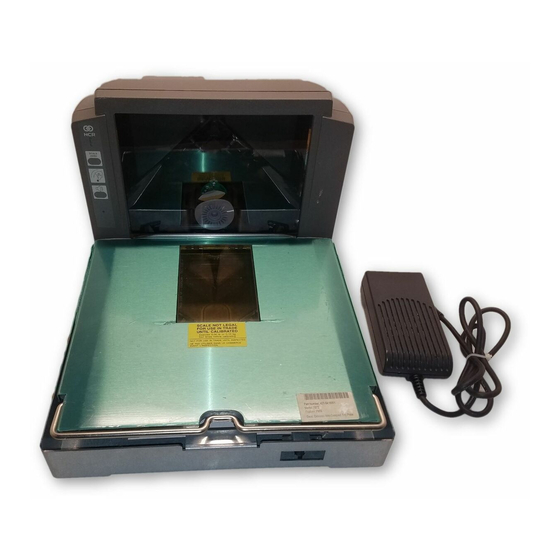
- Page 1 RealScan 7872 Installation/Owner Guide 497-0415291 Release F August 30, 2004 Information Products RSD-Atlanta...
- Page 2 The product described in this book is a licensed product of NCR Corporation. NCR is a registered trademark of NCR Corporation. It is the policy of NCR Corporation (NCR) to improve products as new technology, components, software, and firmware become available. NCR, therefore, reserves the right to change specifications without prior notice.
-
Page 3: Preface
NCR RealScan 7872 Installation/Owner Guide Preface Audience This book is written for hardware installer/service personnel, system integrators, and field engineers. References NCR RealScan 7872 User Guide • (B005-0000-1179) NCR RealScan 7872 Repair Guide • (B005-0000-1180) 497-0415291 Release F 08/04 3 of 44... -
Page 4: Table Of Contents
Installing the RealScan 7872....................... 6 Step 1 Verify Checkstand Preparation................7 Step 2 Connect the Cables ....................14 Step 3 Install RealScan 7872 in Checkstand ..............17 Step 4 Calibrate the Scale....................19 Step 5 Check the Scanner Operation................. 24 Operating the Scanner ...................... -
Page 5: Revision Record
NCR RealScan 7872 Installation/Owner Guide Revision Record Issue Date Remarks June 2000 First Issue Aug 2000 Update to diagrams and worksheets 05/08/01 Updated checkstand cutout dimensions 02/06/03 Added USB Connection and other miscellaneous information. 03/22/04 Updated to Super ASIC configuration... -
Page 6: Installing The Realscan 7872
NCR RealScan 7872 Installation/Owner Guide Installing the RealScan 7872 Installing the RealScan 7872 consists of five main steps. Depending on the installation, other information is sometimes needed. It is recommended that you follow the installation steps in the following diagram. -
Page 7: Step 1 Verify Checkstand Preparation
NCR RealScan 7872 Installation/Owner Guide Step 1 Verify Checkstand Preparation Checkstand Cutout: RealScan 7872 ñ 12xx/22xx Shelf is recommended to catch RealScan 7872 if dropped during installation. It may also include a drip pan for spilled liquids. The RealScan 7872 must NOT be supported by this shelf. - Page 8 NCR RealScan 7872 Installation/Owner Guide Checkstand Cutout: RealScan 7872 ñ 53xx/52xx 2.5 cm (1.0 in.) side supports are optional instead of shelf 18151 Scanner Unit Actual Dimensions MODEL 53xx 29.21 cm 39.88 cm 16.15 cm 8.89 cm 11 1/2 in.
- Page 9 NCR RealScan 7872 Installation/Owner Guide Checkstand Cutout: RealScan 7872 ñ 03xx/05xx 2.5 cm (1.0 in.) side supports are optional instead of shelf Standard Size RealScan 7870-3000 & PSC 381 Size Note: The RealScan 7872-03xx/05xx is supported by side supports or a shelf.
- Page 10 NCR RealScan 7872 Installation/Owner Guide Drip Pan Installation When the RealScan 7872 is used in a sit down environment, install a drip pan below the scanner/scale to divert any spilled liquids or debris away from the operator. Service Clearance Mounting surface for...
- Page 11 18085 Ventilation Requirements The RealScan 7872 is designed to operate without an exhaust fan in the checkstand; however, there must be adequate convection airflow. The ambient temperature inside the checkstand cannot be higher than 40∞ C (104∞ F). Also, the ambient temperature inside the checkstand cannot be higher than 7∞...
- Page 12 220Vac European double-pole. R0121 The RealScan 7872 outlet in the checkstand must be connected to a circuit breaker switch. This switch must be located close to the operator and is used as the On/Off switch for the RealScan 7872. 12 of 44...
- Page 13 The holes must be large enough for the connector on one end of the cable to pass through. You must also ensure that there are no sharp edges to cut the cable. The following table gives the minimum hole size for each of the RealScan 7872 cables.
-
Page 14: Step 2 Connect The Cables
POWER SCANNER 21476 Note: If you are using a USB cable to connect the RealScan 7872 to the host terminal, connect the USB cable to the USB connector rather than the Scanner connector on the back of the RealScan 7872. - Page 15 NCR RealScan 7872 Installation/Owner Guide Dual Cable Installations When the RealScan 7872 is installed in a dual-cable system, a Communication Adapter box must be used. Use the following procedure to install this box. Cut the included Velcro tape into two strips and attach it to the Communication Adapter box.
- Page 16 Power Cable to reach the RealScan 7872. However, do not place the Power Supply where spilled liquids can run down onto it. It is recommended that a drip pan be installed below the RealScan 7872 to collect any spilled liquids.
-
Page 17: Step 3 Install Realscan 7872 In Checkstand
NCR RealScan 7872 Installation/Owner Guide Step 3 Install RealScan 7872 in Checkstand Verify the top of the RealScan 7872 supports are set to the initial distance from the top of the checkstand. Grasp the front and back of the unit, as shown below, and slowly lower it into the checkstand cutout. - Page 18 NCR RealScan 7872 Installation/Owner Guide 17545 Note: It is critical that the RealScan 7872 does not rock on its supports to ensure scale accuracy. Make sure that all supports are securely fastened and that the RealScan 7872 is sitting on all supports.
-
Page 19: Step 4 Calibrate The Scale
Top Plate. If you are installing a RealScan 7872-53xx with a Bizerba scale do not attempt to calibrate the scale, but continue to Step 5 ñ Check the Scanner Operation. - Page 20 Note: The pound and kilogram weights used for calibration are not equivalent values. They are the actual weights the firmware needs to perform the calibration. Install the Top Plate. Apply power to the RealScan 7872. Press and hold the Scale Zero button to display the Cal and Par values. Record these values.
- Page 21 Increasing Load Test This test checks the scaleís accuracy when incrementally adding weight to the center of the top plate. Use weights that correspond to the RealScan 7872 weight feature. Step Weight Feature Add Weight...
- Page 22 Place additional weight on the center of the top plate as shown in the following chart. Use the weight that corresponds to the RealScan 7872 weight feature. The display shows a series of dashes to indicate an over-capacity condition.
- Page 23 Secure the Calibration Switch When you perform a scale calibration, someone must seal the Calibration Switch Cover. This may be done with a Lead/Wire Seal (NCR part number 603-8001097) using a Lead/Wire Seal Press (NCR part number 603-9000157) or a Film/Paper seal (obtained locally).
-
Page 24: Step 5 Check The Scanner Operation
Verify Bar Code Reading To verify the bar code reading operation of the RealScan 7872, attempt to read a good tag on an item. The Status indicator should be red when ready to scan a bar code. A good read is indicated when the Status indicator turns green and a tone sounds (if enabled). - Page 25 NCR RealScan 7872 Installation/Owner Guide Setting the Program Parameters Caution: Some host terminals can corrupt the RealScan 7872 program if they are running and are connected to the RealScan 7872 while you are making program changes. Either turn off the host terminal or disconnect the interface cable before scanning any programming tags.
-
Page 26: Scan Sample Tags
NCR RealScan 7872 Installation/Owner Guide Scan Sample Tags Now you should scan some sample tags to verify that the RealScan 7872 is communicating with the host terminal. The following are four good tags that you can use; however, the 7872 must be programmed to read these tags. The default settings are UPC-A enabled and the others disabled. -
Page 27: Operating The Scanner
Be sure this switch is in the On position. The Status Indicator on the Operator Display Panel is Red when the RealScan 7872 is ready. The correct way to scan is to slide an item from the checkstand, across the scanner, and back onto the checkstand. -
Page 28: Operating The Scale
NCR RealScan 7872 Installation/Owner Guide Operating the Scale The RealScan 7872 typically takes up to one second to weigh an item, depending on the itemís weight. The heavier the item, the longer it takes. Before weighing an item, it is a government regulatory requirement that the scale display is displaying all zeros. -
Page 29: Cleaning The Realscan 7872
On the RealScan 7872 Scanner that includes the Operator Convenience option, the Please Clean Window indicator flashes when the scan windows need cleaning. The window can be cleaned anytime it appears dirty or performance seems to be degrading. -
Page 30: Correcting Scanner Problems
NCR RealScan 7872 Installation/Owner Guide Correcting Scanner Problems Status Problem Indicator Tone Possible Cause Corrective Action Scanner does Red Off No power to the Check electrical outlet for proper not operate Green Off unit power. Scanner does Sleep mode Pass anything in front of the... -
Page 31: Correcting Scale Problems
NCR RealScan 7872 Installation/Owner Guide Correcting Scale Problems Problem Possible Cause Corrective Action - - - - - Over Weight 1. Remove some of the items from the Top Plate. 2. Remove any obstructions to Top Plate movement. 1 - - - - Out of range calibration 1. -
Page 32: Isolating Bizerba Scale Problems
NCR RealScan 7872 Installation/Owner Guide Isolating Bizerba Scale Problems Note: If you suspect a scale problem with an NCR RealScan 7872-53xx with a Bizerba computing scale, replace the entire scale unit, including the Bizerba display. Problem Possible Cause Corrective Action... -
Page 33: Setting The Communication Protocol
Hardware changes are made to strapping on the system board inside the RealScan 7872. Software changes are performed using the programming tags. To change the communications protocol strapping, refer to RealScan 7872 Repair Guide (B005-0000-1180). Determine the communications protocol with the following procedure. -
Page 34: Good Read Tone
This permits each operator to distinguish their good read tone from that of nearby scanners operating at the same time. Please see the RealScan 7872 User Guide (B005-0000-1179) for more detailed information. 34 of 44 08/04... -
Page 35: Programming Worksheets
NCR RealScan 7872 Installation/Owner Guide Programming Worksheets 10 Communications Protocol Protocol RS-232 Slot Scanner Hand-Held Bar Code Reader IBM 1520 IBM USB Bar Code (RS-232) Reader 20552 11 Good Read Tone Tone On/Off Tone When entering Tone Frequency, the adjustment can be incremented upward by scanning the Hex B tag. -
Page 36: Timers
1500 Restart Lockout Timer Active Time (Minutes) NOTE: NCR suggests that you do not set the Active Time parameter to 0. Leaving the laser light on all the time reduces its life expectancy. R0136 13 Bar Codes - 1 UPC/EAN... -
Page 37: Bar Codes Ñ 2
NCR RealScan 7872 Installation/Owner Guide 14 Bar Codes ñ 2 Code 39 Disable Enable Minimum Default: 2 - F Characters Allowed Full ASCII Disable Enable Check Digit Present Disable Enable Transmit Check Digit Disable Enable Allow One- or Two-Character Disable... -
Page 38: Bar Codes - 3
NCR RealScan 7872 Installation/Owner Guide 15 Bar Codes - 3 Interleaved 2 of 5 Disable Enable Bar Code Length Range Specific Check Check Characters Value 1 0 - 3 0 - 9 Minimum Character 1 Character 2 Default: Characters Value 2... -
Page 39: Bar Codes Ñ 5
NCR RealScan 7872 Installation/Owner Guide 18 Bar Codes ñ 5 RSS Enable Disable Enable Enable Enable RSS 14 Only RSS E Only RSS 14 & RSS E Scans Required On RSS 14 1 Scan 2 Scans 3 Scans 4 Scans... -
Page 40: Rs-232 Parameters Ñ 1
NCR RealScan 7872 Installation/Owner Guide 20 RS-232 Parameters ñ 1 Baud Rate 1200 2400 4800 9600 19200 Parity Note: Parity must be Odd or Even on a scale unit. Odd is used if Even None None is selected. Stop Bits And... -
Page 41: Rs-232 Prefix Byte
NCR RealScan 7872 Installation/Owner Guide 22 RS-232 Prefix Byte Prefix Byte Disable Enable ASCII Code Default 0 - 7 0 - F Hex Character Hex Character (ASCII Code Chart) (ASCII Code Chart) R0035 23 RS-232 Terminator Byte Terminator Byte NOTE: A Terminator Byte is required on a scale unit. -
Page 42: Scale Parameters
NCR RealScan 7872 Installation/Owner Guide 30 Scale Parameters Model Number Scanner/Scale Scanner Only IBM Address Address 6A Address 6B Address 6E 11812 32 Miscellaneous Parameters IBM Tone Control (Good Read Tone Control) Disable Enable IBM Rexmit Control 3 Times Forever... - Page 43 NCR RealScan 7872 Installation/Owner Guide 497-0415291 Release F 08/04 43 of 44...
- Page 44 NCR RealScan 7872 Installation/Owner Guide Copyright © 2000 ñ 2004 by NCR Corporation 44 of 44 08/04 497-0415291 Release F...