Table of Contents
Advertisement
Quick Links
Download this manual
See also:
User Manual
Advertisement
Table of Contents

Related Manuals for Sharp ER-A411


Summary of Contents for Sharp ER-A411
- Page 1 ELECTRONIC CASH REGISTER MODEL ER-A411 ER-A421 FULL DETAILED INSTRUCTION MANUAL...
- Page 2 CAUTION: The cash register is should be securely fitted to the supporting platform to avoid instability when the drawer is open. CAUTION: The socket-outlet shall be installed near the equipment and shall be easily accessible. VORSICHT: Die Netzsteckdose muß nahe dem Gerät angebracht und leicht zugänglich sein. ATTENTION: La prise de courant murale devra être installée à...
-
Page 3: Introduction
• The register plugs into any standard wall outlet (offi cial (nominal) voltage). Other electrical devices on the same electrical circuit could cause the register to malfunction. • If the register malfunctions, call your authorized SHARP dealer for service - do not try to repair the register yourself. -
Page 4: Table Of Contents
1 Part Names and Functions ........................9 External View .............................9 Front view ............................9 Rear view ............................9 Printer ..............................10 Keyboard (ER-A411) ..........................11 Standard keyboard layout ....................... 11 Function key list ..........................11 Optional key list ..........................12 Keyboard (ER-A421) ..........................13 Standard keyboard layout .......................13 Function key list ..........................13... - Page 5 Price level shift ..........................46 Condiment entries (for PLU) ......................48 Display of Subtotals ..........................50 Subtotal ............................50 Difference subtotal (Differ ST) ......................50 Finalization of Transaction ........................51 Cash tendering ..........................51 Cash sale that does not need any tender entry ................51 Check tendering ..........................52 Check sale that does not need any tender entry ................52 Mixed tendering (check + cash) ......................53 Credit sale ............................53...
- Page 6 Programming Keyboard Layout ......................116 ER-A411 ............................116 ER-A421 ............................116 How to Program Alphanumeric Characters ................... 118 Mobile phone method (ER-A411)/Text keyboard method (ER-A421) ........... 118 Entering character codes ......................119 11 Programming ............................120 Basic Instructions...........................120 Programming screen ........................120 Programming example .........................121...
- Page 7 Set PLU table ..........................129 Link PLU table (for PLU/EAN link) ....................129 PLU condiment table ........................130 Promotion table ..........................132 EAN Non-PLU code format ......................134 Press code (for EAN) ........................135 PLU/EAN stock ..........................136 EAN delete ...........................136 PLU group text ..........................136 Direct Key Programming........................137 Direct key ............................137 Functional Programming........................139 Discount key (...
- Page 8 Remote printer (KP#1 and KP#2) ....................179 Scanner ............................180 Online ............................180 Clerk key ............................180 EFT ...............................180 GLU Code Programming ........................181 Tax Programming...........................182 Tax 1 through 6 ..........................182 On-line Confi guration Programming ......................183 VMP Confi guration Programming ......................184 Automatic Sequencing Key Programming .....................185 Basic Preset ..........................185 Key Sequence ..........................186 Function key list ..........................187...
-
Page 9: Part Names And Functions
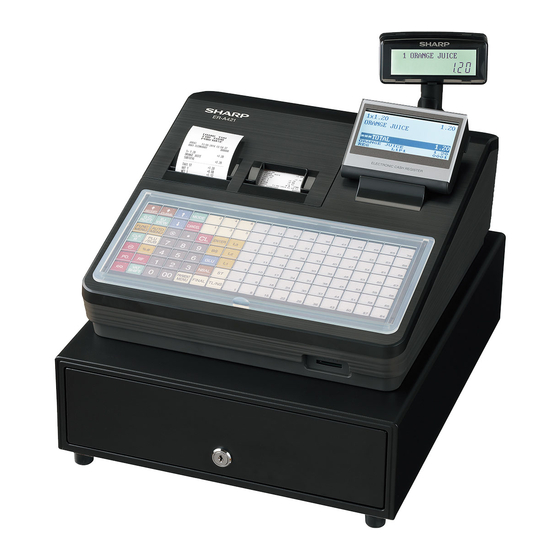
Part Names and Functions External View ■ Front view ER-A421 ER-A411 Printer cover Keyboard (flat type) Keyboard (normal type) Operator display Drawer Drawer lock SD card slot ■ Rear view Customer display RS232... -
Page 10: Printer
Printer The printer is a receipt/journal dual station type thermal printer, and therefore it does not require any type of ink ribbon or cartridge. The average life of the printer is approximately 6 million lines. When removing the printer cover, lift up its rear. When installing the printer cover, hook it on the pawls on the cabinet and shut it. -
Page 11: Keyboard (Er-A411)
Keyboard (ER-A411) ■ Standard keyboard layout ■ Function key list Receipt paper feed key Numeric keys Journal paper feed key Non-add code key Receipt print key Dept. number key Function menu key Manager number key Automatic sequencing 1 and 2... -
Page 12: Optional Key List
Entertainment bill key Automatic sequencing keys Cash tip key Cash keys Non-cash tip key Check keys Tip paid key Credit keys Receipt switch key Exchange keys Bank console key To use optional keys on your register, consult your authorized SHARP dealer. NOTE... -
Page 13: Keyboard (Er-A421)
Keyboard (ER-A421) ■ Standard keyboard layout ■ Function key list Receipt paper feed key Cancel key Journal paper feed key Department keys* Guest check receipt key Multiplication key Electronic journal view key Decimal point key Function menu key Clear key Auto menu key Numeric keys Clerk number key... -
Page 14: Optional Key List
Cash tip key No-sale key Non-cash tip key Guest check copy key Tip paid key Receipt print key Receipt switch key Value-added tax key Bank console key To use optional keys on your register, consult your authorized SHARP dealer. NOTE... -
Page 15: Inserting The Keyboard Sheet
• Replace the keyboard sheet with a new one if by chance it gets wet. Use of a wet keyboard sheet may cause problems. • Be sure to use only SHARP-supplied keyboard sheets. Thick or hard sheets make key operations diffi cult. -
Page 16: Rs232 Connector/Sd Card Slot
RS232 Connector/SD Card Slot ■ RS232 connector RS232 ■ SD card slot Refer to the “SD CARD Mode” section. -
Page 17: Displays
Displays ■ Operator display • Screen example 1 (REG mode) Sales information area: When a transaction information occupies more than 3 lines, you can scroll to the direction by using the keys. Sales information you have just entered such as items and prices will appear between 1st line and 3rd line. -
Page 18: Customer Display
To go back to the normal mode, press any key. The backlight in display is a consumable part. When the LCD display may no longer be adjusted and become darker, you should replace the LCD unit. Consult your authorized SHARP dealer for further details. -
Page 19: Selecting An Operating Mode
Selecting an Operating Mode When you turn the register on and press the key, the mode selection window will appear on the display. For example, when a clerk is signed on, the following window will appear. Mode selection window Operating Modes You can select any mode other than REG from the list in the mode selection window. -
Page 20: Mode Selection
Mode Selection Procedure Press the key. The following mode screen is displayed when a clerk is signed on. Use one of the following ways: • Move the cursor to the desired option by using the key, and press the key. •... -
Page 21: Prior To Making Entries
To sign off: Your register can provide the clerk + cashier system instead of current system (clerk only NOTE system). If you want to change the system, please consult your authorized SHARP dealer. Cashier assignment (Clerk + cashier system) To sign on:... -
Page 22: Error Warning
Error Warning In the following examples, your register will go into an error state accompanied with a warning beep and the error message on the display. Clear the error state by pressing the key and then take the proper action to remedy the problem. -
Page 23: Item Selection From The Menu
Item Selection from the Menu Your register allows you to select functions from a menu. For example, if you want to enter an item for check 1 sale, select the option “CHECK” from the check menu instead of pressing the key. -
Page 24: Starting Cash Memory Entry
Starting Cash Memory Entry If you enter the amount of currency for the starting amount in the drawer before entry operations, you can separate that amount from the sales amount when reports are generated. Your register can be programmed to enforce the entry of starting cash into memory. Procedure Press the key. -
Page 25: Entries
(1-99) You can directly enter the code no. of the department using the numeric key. NOTE For the code no. exceeding the fi gure on the keyboard (21 and above for ER-A411, 7 and above for ER-A421), use this function. - Page 26 PLU/Subdepartment (open PLU) entries (direct PLU entries) Use direct PLU keys such as for PLU/subdepartment entries. • On ER-A411, the direct key programming enables the use of direct PLU keys (see page 137 for NOTE details), and the normal method is available as default.
- Page 27 • When a direct PLU key is pressed after a numeric entry (without pressing the key), the NOTE numeric entry is registered as q’ty for the PLU. • To use the FF method on ER-A411, consult your authorized SHARP dealer. Key operation Print Example...
-
Page 28: Repeat Entries
■ Repeat entries You can use this function for entering a sale of two or more the same items. NOTE You can use the key (optional) to repeat entry instead of department, , direct PLU or key. Key operation Print Example Repeated department... -
Page 29: Multiplication Entries
■ Multiplication entries Use this feature when you need to enter two or more the same items. This feature helps you when you sell a large quantity of items or need to enter quantities that contain decimals. Procedure Normal method •... - Page 30 • After an EAN entry, you may be requested to enter a unit price with the display “UNDEFINED NOTE CODE” and beep sound. In this case, enter the unit price and press the key, enter the department code and press the key, and select the delete type with the key (EAN learning function).
-
Page 31: Split-Pricing Entries
■ Split-pricing entries You will use this function when your customer wants to purchase more or less than the base quantity of a loose item. To use this function on ER-A411, consult your authorized SHARP dealer. NOTE Procedure Normal method •... - Page 32 • After an EAN entry, you may be requested to enter a unit price with the display “UNDEFINED NOTE CODE” and beep sound. In this case, enter the unit price and press the key, enter the department code and press the key, and select the delete type with the key (EAN learning function).
-
Page 33: Successive Multiplication Entries
■ Successive multiplication entries This function is practical for example when you enter a sale of items sold by area (square meter). To use this function on your register, consult your authorized SHARP dealer. NOTE Procedure • In case of dept. entry... - Page 34 Example Key operation Print 5045678912304...
-
Page 35: Single Item Cash Sale (Sics)/Single Item Fi Nalize (Sif) Entries
■ Single item cash sale (SICS)/single item fi nalize (SIF) entries SICS entries • This function is useful when a sale is for only one item and is for cash; such as a pack of cigarettes. This function is applicable only to those departments that have been set for SICS or to their associated PLUs, subdepartments or EANs. -
Page 36: Special Entries For Plu/Ean
Special Entries for PLU/EAN ■ Promotion function You have a choice of either global or individual type for promotion entry. You also need to select a promotion type from the following: Amount discount: discounts the programmed amount. Percent discount: discounts the amount at the programmed percent rate. Give free item: offers the programmed objected item for free. - Page 37 Individual type This function is convenient for matching several PLU/EAN items and selling them in a lump (e.g. value meal etc.). Operation is the same as for normal PLU/EAN. The promotion table consists of the text for the table, a maximum of 10 objected items (selected from PLU/EAN), trip levels (the number of entries to be satisfi ed) for each item, promotion type and promotion detail.
- Page 38 Free product item When the promotion way is programmed as “FREE ITEM”, the programmed free item will be entered automatically. Objected items of table no. 3: Item-A (*3.00), Item-B (*2.50), Item-C (*2.10) Trip levels for each item: Item-A (1), Item-B (1), Item-C (2) Promotion way: Free item Free item:...
-
Page 39: Plu/Ean Link Entries
■ PLU/EAN link entries In case that you register a PLU or EAN that has any PLU linked with the PLU or EAN, the linked PLU(s) are automatically registered together with the leading link PLU or EAN when it is registered. The print format on the receipt depends on the programming (PRINT SELECT in OPTIONAL menu in PGM2 mode) as described below. -
Page 40: Ean Learning Function
■ EAN learning function When you enter or scan an undefi ned code, you are required to enter its unit price and the associated department. The code, associated department and unit price entered are stored in the EAN fi le and used for future EAN sales entries. -
Page 41: Plu/Ean Information Inquiry (View) Function
■ PLU/EAN information inquiry (view) function This function displays the information data such as the unit price and food ingredients of a PLU/EAN item (view mode). To use this function on ER-A421, consult your authorized SHARP dealer. NOTE Procedure Numeric entry... -
Page 42: Ean Price Change Function
■ EAN price change function To use this function, consult your authorized SHARP dealer. NOTE You can use this function when you need to change the unit price or associated department of an EAN item in REG/MGR mode. There are two methods for change: •... -
Page 43: Set Plu/Ean Entries
Price change mode Example Key operation Print 5087654321106 Changing a price during a transaction Example Key operation Print 5087654321106 • When an undefi ned code is entered in the price change mode, the register goes to an error NOTE status. •... -
Page 44: Plu Level Shift (For Direct Plus)
■ PLU level shift (for direct PLUs) To use this function on ER-A411, consult your authorized SHARP dealer. NOTE This shift can double or triple the number of direct PLUs on your register without adding additional direct PLU keys. You can use direct PLUs in three levels by utilizing the... - Page 45 Level 1 : PLU code 1, PLU code 2 Example Level 2 : PLU code 70, PLU code 65 • When your register has been programmed for the automatic return mode (by one item): Example Key operation Print • When your register has been programmed for the lock shift mode: Key operation Print...
-
Page 46: Price Level Shift
fi nalize one transaction (either can be selected in the PGM2 mode). ** The lock shift mode holds the current PLU price level until pressing the price level shift key. To use this function on ER-A411, consult your authorized SHARP dealer. NOTE... - Page 47 PLU price level 1: PLU code 1 (*1.91), PLU code 2 (*0.79) Example PLU price level 2: PLU code 1 (*2.00), PLU code 2 (*0.99) • When your register has been programmed for the automatic return mode (by one item): Key operation Print •...
-
Page 48: Condiment Entries (For Plu)
■ Condiment entries (for PLU) Your register may be programmed for prompting condiment and preparatory instructions for a menu-item PLU. To use this function on ER-A411, consult your authorized SHARP dealer. NOTE Example: When you enter a menu-item PLU, a prompting message such as “HOW COOK?” appears with the “Following PLUs”... - Page 49 • When the condiment entry is programmed to be compulsory, your register will continue to NOTE operate for the condiment entry until you fi nish the entire condiment entry programmed for the PLU. During the condiment entry, if you enter a normal PLU, which is not in the condiment table, an error message will appear.
-
Page 50: Display Of Subtotals
The sales subtotal including tax will appear in the display. ■ Difference subtotal (Differ ST) To use this function, consult your authorized SHARP dealer. NOTE key at any point during a transaction. When you press it fi rst, the subtotal of all entries which Press the have been made is displayed and printed. -
Page 51: Finalization Of Transaction
Finalization of Transaction ■ Cash tendering Press the key to get an including-tax subtotal, enter the amount tendered by your customer, then press key or a cash key ( through ) if it is a cash tender. When the amount tendered is greater than the amount of the sale, your register will show the change due amount and the symbol “CHANGE”. -
Page 52: Check Tendering
■ Check tendering Press the key to get an including-tax subtotal, enter the amount tendered by your customer, then press a check key ( through ) if it is a check tender. When the amount tendered is greater than the amount of the sale, your register will show the change due amount and the symbol “CHANGE”. -
Page 53: Mixed Tendering (Check + Cash)
■ Mixed tendering (check + cash) Key operation Print Example 1000 Press a check key ( through ) or a credit key ( through ) in place of the NOTE key when your customer makes payment by checks or by credit account. ■... -
Page 54: Mixed-Tender Sale (Cash Or Check Tendering + Credit Tendering)
■ Mixed-tender sale (cash or check tendering + credit tendering) Key operation Print Example Ó NOTE Press a check key ( through ) or a credit key ( through ) in place of the when your customer makes payment by checks or by credit account. -
Page 55: Computation Of Vat (Value Added Tax)/Tax
Computation of VAT (Value Added Tax)/Tax ■ VAT/tax system The register may be programmed for the following six tax systems by your authorized SHARP dealer. Automatic VAT 1 through 6 system (Automatic operation method using programmed percentages) This system, at settlement, calculates VAT for taxable 1, taxable 2, taxable 3, taxable 4, taxable 5, and taxable 6 subtotals by using the corresponding programmed percentages. - Page 56 To print the VAT/tax assignment on the receipt and bill, consult your authorized SHARP dealer. NOTE VAT/tax assignment is printed at the fi xed right position of the amount on the receipt and bill as follows: VAT1/tax1 VAT2/tax2 VAT3/tax3 VAT4/tax4...
-
Page 57: Vat Shift Entries
(When the automatic VAT 1 through 6 system is selected) • If you want to achieve the VAT shift at the end of transaction, contact your authorized SHARP NOTE dealer. • You can also perform this function by assigning the clerk to operate in the VAT shift status (PERSONNEL-CLERK programming). -
Page 58: Guest Check (Glu)
Guest Check (GLU) To use the functions related to GLU system on ER-A411, consult your authorized SHARP dealer. NOTE ■ Guest look up (GLU) system New guest Procedure For automatic GLU Only when the guest no. entry is compulsory, code generation the window is displayed. - Page 59 Key operation Print Example 1001 Additional ordering Procedure In case of no additional orders [Item entries] GLU code Partial tendered amount [Payment operation] (Cash, Check, Credit, Exchange) Select “RA” Partial tendered or “RA2” amount When paid in full. (settlement) * When the key is pressed for the second time, the guest check will be issued again.
-
Page 60: Deposit Entries
■ Deposit entries To use this function, consult your authorized SHARP dealer. NOTE Deposit refers to a prepayment on a guest check. It can be received in cash, by check or credit. You can make a deposit entry only when entering a guest check. It cannot be done during handling of a tendered amount. -
Page 61: Bill Printing
• This function is available immediately after the fi nalization of transaction. NOTE • If the copy function is allowed, you can print the bill copy on receipt only once. If you want to disable the bill copy, contact your authorized SHARP dealer. Key operation Print Example ■... -
Page 62: Intermediate Glu Reading
Transferring guest checks in When the second clerk is assigned to be responsible for guest checks that have been transferred out: When all guest checks which are transferred Procedure out from a clerk are transferred. Clerk code GLU code For the next guest check Key operation Print Example... -
Page 63: Bill Totalizing/Bill Transfer
■ Bill totalizing/bill transfer To use this function, consult your authorized SHARP dealer. NOTE Bill totalizing The bill totalizing function is used to totalize multiple bills when, for example, a particular guest pays not only his or her bill, but also the bills of other guests. -
Page 64: Bill Separating
NOTE Bill separating by amount and person is optional functions. To use these functions, consult your authorized SHARP dealer. This function is used when each guest of a group pays his or her own order. With this function, you can select some items from a guest check and make an entry for the payment. - Page 65 Bill separating by amount Procedure The amount entry box is displayed. (To cancel the BS operation) To end GLU code Amount entry Payment operation (Original GLU code) (To pay the remaining The amount entry amount or part of it) box is displayed. Key operation Display Example...
- Page 66 Bill separating by person Procedure (To cancel the BS operation) GLU code No. of guest entry Payment operation (Original GLU code) The number of guests entry box is displayed. (Payment by the remaining guests) Key operation Display Example Print • The items which are refunded or discounted can not be separated. NOTE •...
-
Page 67: Tip-In Entries
■ Tip-in entries To use this function, consult your authorized SHARP dealer. NOTE Your register allows the entry of tips that your guests give to clerks in cash or other media (check or credit). The tip in entry assumes that it is carried out in the following system: •... -
Page 68: Auxiliary Entries
Auxiliary Entries ■ Percent calculations (premium or discount) • Your register provides percent calculations for a subtotal or each item entry depending on the programming. • Percentage: 0.01 to 100.00% Percent calculation for a subtotal Example Key operation Print (When a discount of 10% is programmed for key.) -
Page 69: Discount Entries
■ Discount entries Your register allows you to deduct a certain amount less than a programmed upper limit after the entry of an item or the computation of a subtotal depending on the programming. Discount for a subtotal Example Key operation Print Discount for item entries Example... -
Page 70: Refund Entries
Key operation Print ■ Printing of non-add code numbers To use this function on ER-A421, consult your authorized SHARP dealer. NOTE Enter a non-add code number such as a guest code number within a maximum of 16 digits and press the key at any point during the entry of a sale. -
Page 71: Payment Treatment
Payment Treatment ■ Currency exchange Your register allows payment entries in foreign currency. Press the exchange key ( through ) to create a subtotal in foreign currency. Procedure For exact amount payment through Amount through After an entry tendered is completed Preset rate * (max. -
Page 72: Received-On-Account Entries
Select the cash only system when you receive RA by cash only. In the mixed tendering system, you can receive RA by cash, check or credit. In either system, you cannot receive RA in foreign currency. When you want to use the cash only system, contact with your authorized SHARP dealer. Mixed tendering system... -
Page 73: Paid-Out Entries
In the mixed tendering system, you can make a payment by cash, check or credit. In either system, you must a PO entry only in a transaction. When you want to use the cash only system, contact with your authorized SHARP dealer. Mixed tendering system... -
Page 74: No-Sale (Exchange)
Cash only system Procedure Direct key entries Amount (max. 8 digits) Menu-based entries Select Amount (max. 8 digits) “PO” or “PO2” Key operation Print Example 6789 3000 ■ No-sale (exchange) Simply press the key or the key (optional) without any entry. The drawer will open and the printer will print “NO SALE”... -
Page 75: Cash Payment Transfer
■ Cash payment transfer This function is used to change cash sales amount for credit or check sales amount. For example, you can use this function when your guest asks you to credit the payment or to receive payment with check after entering the payment as cash. -
Page 76: Cashing A Check
■ Cashing a check To use this function, please consult your authorized SHARP dealer, while you cannot use this NOTE function together with the cash transferring function. Procedure Direct key entries Check through amount Menu-based entries Select from “CA/CHK 1”... -
Page 77: Age Verifi Cation
Age Verifi cation The age verifi cation function is used for prohibiting the selling of goods (departments, PLUs, or EANs) for certain aged persons. When a department/PLU/EAN for which the age verifi cation has been programmed as “Yes” is entered, the following confi... -
Page 78: Training Mode
TRAINING Mode The training mode is used when the operator or the manager practices register operations. In case “clerk and cashier system” is applied to your register, cashiers can enter to the training NOTE mode. When a clerk/cashier set in training is selected, the register automatically enters the training mode, while a clerk/cashier not set in training is selected, the register automatically enters the ordinary REG mode. -
Page 79: Overlapped Clerk Entry
Interrupt handling is possible only in the overlapped clerk entry. For actual use of this function, contact your authorized SHARP dealer. • The overlapped clerk entry is not effective while the tendering sale is going on. -
Page 80: Correction
Correction Correction of the Last Entry (Direct Void) If you make an incorrect entry relating to a department, PLU/subdepartment, EAN, percentage ( through ), discount ( through ), or item refund, you can void this entry by pressing the key immediately. Key operation Display Example... -
Page 81: Correction Of The Next-To-Last Or Earlier Entries (Indirect Void)
Correction of the Next-to-Last or Earlier Entries (Indirect Void) If you fi nd an incorrect entry before fi nalizing the transaction (e.g. before pressing the key), you can void the entry by the cursor operation or the key sequence operation. Indirect void by cursor operation You can void department, PLU/subdepartment, EAN, item refund, amount discount/premium and percent entries. -
Page 82: Subtotal Void
Subtotal Void You can void an entire transaction. Once subtotal void is executed, the transaction is aborted and the register issues a receipt. Key operation Display Example Subtotal void Correction after Finalizing a Transaction When you need to void incorrect entries that are found after fi nalizing a transaction or cannot be corrected by direct, indirect or subtotal void, follow this procedure. -
Page 83: Special Printing Function
Special Printing Function Some functions described in the following sections require optional keys. When you need optional keys for these functions, consult your authorized SHARP dealer. After Transaction Receipt / Copy Receipt Printing If your customer wants a receipt after you have fi nalized a transaction with the receipt ON-OFF function in the OFF status (no receipting), press the key to issue an after transaction receipt. -
Page 84: Guest Check Copy
Guest Check Copy You can use this function when you want to take a bill for guest check. Press the key and make a desired entry. Procedure When the receipt “ON” status Item entries Finalization • The guest check copy has nothing to do with the memory. NOTE •... -
Page 85: Receipt For Remote Printers (Kp#1 And Kp#2)
Receipt for Remote Printers (KP#1 and KP#2) ■ Type of receipts You can select one of the following three types of receipts for each remote printer. These types of receipts are available in the REG or MGR mode. By default, the addition receipt type is selected. You can program the receipt type in the PGM2 mode. -
Page 86: Sorted Receipt Function
• Addition + single receipt type When you select this type: • An addition receipt and each single receipt are issued in series after you fi nalize the transaction. • The information on multiplication entry will be printed on a single receipt. Addition receipt Perforation Single receipt... -
Page 87: Addition Receipt Type
• Addition receipt type Printed on KP In case of single receipt In case of double receipt This is printed when the transaction is finalized. Perforation They are printed immediately after entering the PLU of group 00 or department. Printed on the built-in printer This is printed when you press the key after the transaction. - Page 88 • Addition + single receipt type Printed on KP Double receipt This is printed immediately after entering the PLU of group 00 or department. Printed on the built-in printer Single receipt This is printed when you press the after the transaction. They are printed when the transaction is finalized.
-
Page 89: Manager Mode
NOTE Some entries described in the following sections require optional keys. When you need optional keys for these entries, consult your authorized SHARP dealer. Entering the Manager Mode To enter the manager mode, use the following procedure in the REG mode: Procedure When “0”... -
Page 90: Reading (X) And Resetting (Z) Of Sales Totals
Reading (X) and Resetting (Z) of Sales Totals • Use the reading function (X) when you need to take the reading of sales information entered after the last resetting. You can take this reading any number of times. It does not affect the register’s memory. - Page 91 Operating modes Report type Description Data to be entered OP X/Z X1/Z1 X2/Z2 GENERAL General report X1, Z1 X2, Z2 <DEPARTMENT MENU> Department code (The range can be DEPT. /GROUP Department by group report specifi ed by entering start and end codes.) DEPT.
- Page 92 Operating modes Report type Description Data to be entered OP X/Z X1/Z1 X2/Z2 <OTHERS MENU> Hourly report (by specifi ed For an individual time range) range HOURLY Hourly report (all) DAILY NET Daily net report X2, Z2 GLU code (The range can be GLU report X1, Z1 specifi...
-
Page 93: Daily Sales Totals
* Bottle return “+” dept. sales q’ty and total * Bottle return “-” dept. sales q’ty and total * * To use this function on your register or to print this item on reports, consult your authorized SHARP dealer. - Page 94 Void mode item counter and total Subtotal void counter and total Hash item void counter and total * Hash item refund counter and total * * To use this function on your register or to print this item on reports, consult your authorized SHARP dealer.
- Page 95 Bill print counter No-sale (exchange) counter Previous balance counter Guest check copy print counter Transaction counter Order total Paid total Paid total average per transaction counter Difference (Order total - Paid total) Transfer-out counter and total Transfer-in counter and total Bill balance (Transfer-out - Transfer-in) Starting cash memory (+) Starting cash memory (–)
-
Page 96: Department Report
* Bottle return “-” dept. sales q’ty and total * Set PLU discount amount Set EAN discount amount * To use this function on your register or to print this item on reports, consult your authorized SHARP dealer. -
Page 97: Individual Group Total Report On Departments
* Bottle return “+” dept. sales q’ty and total * Bottle return “-” dept. sales q’ty and total * * To use this function on your register or to print this item on reports, consult your authorized SHARP dealer. -
Page 98: Plu/Ean Report (By Specifi Ed Range/Pickup)
■ PLU/EAN report (by specifi ed range/pickup) (In case of a report by specifi ed range) EAN code Description, sales q’ty and sales PLU/EAN range * amount (level 1 through 3) PLU code/ description, sales q’ty and sales amount (level 1 through 3) Total sales q’ty and... -
Page 99: Plu/Ean Report By Associated Department
■ PLU/EAN report by associated department EAN code Description, Associated sales q’ty dept.code and and sales description amount (level 1 through 3)` PLU code/ description, sales q’ty and sales amount (level 1 through 3) Total sales q’ty and amount for EANs Total sales q’ty and amount for... -
Page 100: Individual Plu/Ean Group Report
■ Individual PLU/EAN group report Sales q’ty and sales amount PLU code (level 1 through 3) Description Sales q’ty and Set EAN sales amount discount amount (level 1 through 3) Set EAN sales Total sales q’ty and amount for PLUs Total for set EAN sales Set PLU... -
Page 101: Plu/Ean Group Total Report
■ PLU/EAN group total report PLU group text PLU group sales q’ty and total “+” dept. counter and total ■ PLU/EAN stock report (by specifi ed range/pickup) (In case of a report by specifi ed range) PLU/EAN range * PLU code Description Stock counter EAN code... -
Page 102: Plu Top 20 Sales Report (By Sales Amount/By Sales Quantity)
■ PLU top 20 sales report (by sales amount/by sales quantity) (In case of a report by sales amount) Ranking PLU code/ description, sales q’ty and sales amount (level 1 through 3) Total sales q’ty and amount for top 20 PLUs * When you take a PLU top 20 sales report by sales quantity, "QUANTITY"... -
Page 103: Plu/Ean Zero Sales Report (Full)
■ PLU/EAN zero sales report (full) PLU code Description EAN code Description ■ PLU/EAN zero sales report (by dept.) Description of dept. Associated dept. code... -
Page 104: Plu/Ean Category Report
■ PLU/EAN category report EAN code Description Price range Sales q’ty and PLU code sales amount Description (level 1 through 3) Sales q’ty and sales amount (level 1 through 3) Total sales q’ty and amount for Total sales q’ty and EANs amount for PLUs Set EAN... -
Page 105: Transaction Report
■ Transaction report ■ Total in drawer report Exchange 1 counter Plus dept. total Currency exchange 1 total Minus dept. total Domestic currency for currency Plus hash exchange 1 total dept. total Minus hash dept. total Plus bottle return dept. total Minus bottle return dept. -
Page 106: Individual Clerk Report
■ Individual clerk report Clerk code Clerk name Order total Commission sales No-commission sales Paid total Paid total average per transaction counter Order total-paid total Transfer-out counter and total Transfer-in counter and total Bill balance (Transfer-out - Transfer-in) Refund counter and total Item void counter and total... - Page 107 GLU code * *1 When you take a Z report, “Z1” is printed instead of “X1.” *2 To use this function on your register or to print this item on reports, consult your authorized SHARP dealer. *3 The report prints the GLU codes assigned to the guests whose payment is not fi nished.
-
Page 108: Individual Cashier Report
■ Individual cashier report Cashier code Cashier name Paid total Paid total average per transaction counter Order total-paid total Refund counter and total Item void counter and total Void-mode transaction counter and total Void mode item counter and total Subtotal void counter and total Previous balance counter Guest check copy print... - Page 109 Cash counter and total Check sale and tendering counter and total Credit sale and tendering counter and total Exchange 1 cash counter and total Cash in drawer Check in drawer Cash+check in drawer Change total for check tendering...
-
Page 110: All Clerk Report
■ All clerk report ■ Hourly report NOTE The hourly report format can be selected between 30-minute and 60-minute intervals in the programming. (In case of a report in 30-minute interval format) The subsequent printout occurs in the same format as in the individual clerk report from the clerk #1. -
Page 111: Glu Report By Specifi Ed Range
■ GLU report by specifi ed range GLU code GLU code range Clerk code Previous balance Deposit amount Deposit refund amount Total previous balance Total deposit amount Total deposit refund amount ■ GLU report by clerk Clerk code and name GLU code Previous balance Deposit amount... -
Page 112: Periodic Report Sample
Periodic Report Sample Your register allows you to take consolidation X and Z reports of a chosen period (the period is usually one week or month). ■ General information The periodic reading or resetting reports are the same in format as those in the X1/Z1 report for daily sales information except mode indication (“X2”... -
Page 113: Compulsory Cash/Check Declaration
2 NO Enter the q’ty and amount of “CA/CHK” and “EXCH 1” through “EXCH 3”. Full clerk Z report X1/Z1 mode 2 RESETTING 3 PERSONNEL MENU 1 ALL CLERK To use this function, please consult your authorized SHARP dealer. NOTE... -
Page 114: Display Sample
■ Display sample < CCD data menu window > < CA/CHK data entry window > < Exchange data entry window > (QUANTITY) x (AMOUNT) = Total for “CA/CHK” or “EXCH1” NOTE ■ Report sample (1) Cash/check in drawer to be obtained (2) Declared cash/check in drawer Difference... -
Page 115: Non-Accessed Ean Deletion
Non-accessed EAN Deletion Yon can delete EANs that had not been accessed for a certain period. You can program a period in the PGM2 mode. Follow the procedure shown below. Non-accessed EAN deletion Select the X1/Z1 mode from the mode selection screen. Select "4 EAN DELETE". -
Page 116: Prior To Programming
Prior to Programming When you are in the PGM1 or PGM2 mode, the keyboard layout will be set to one of the programming layouts as shown below. Programming Keyboard Layout ■ ER-A411 ■ ER-A421... - Page 117 : Used to list those options which you can toggle by the key. Numeric keys : Used for entering fi gures. * The keys in brackets are those on the ER-A421 keyboard. In the following sections, the procedure and key operation will be described using the keys on the ER-A411 keyboard.
-
Page 118: How To Program Alphanumeric Characters
How to Program Alphanumeric Characters This section discusses how to program alphanumeric characters for various texts. ■ Mobile phone method (ER-A411)/Text keyboard method (ER-A421) Entering alphanumeric characters ER-A411 : To enter a character, use the numeric keys as shown below. -
Page 119: Entering Character Codes
■ Entering character codes Numerals, letters and symbols are programmable by entering the key and character codes. Use the following procedure with the cursor placed at the position where you want to enter characters: To enter a digit, simply press a corresponding numeric key. º... -
Page 120: Programming
Programming This chapter explains how to program various items. Before you start programming, press the key and select PGM1, PGM2, AUTO KEY, SD CARD or iSDC mode from the mode selection screen depending on the item you are going to program. Basic Instructions This section illustrates the basic programming by using an example of programming for departments. -
Page 121: Programming Example
■ Programming example The following example shows how to program 2.00 for the unit price, “ABCDE” for the description, and “non- taxable 1” for department 1. Procedure In the PGM2 MODE screen, select “2 SETTING” by using the key and press the key. - Page 122 Press the key to move the cursor to “TAXABLE 1”, then program the machine to set “non-taxable 1” as follows: • Press the key to select “NO”. Selective entry NOTE key toggles between two options as follows: ..Pressing the key displays all pertinent options.
-
Page 123: Article Programming
Article Programming Use the following procedure to select any option included in the article programming group: Procedure In the SETTING window, select “1 ARTICLE”. • The ARTICLE window will appear. ▼ Select any option from the following options list. Departments 1 DEPARTMENT PLUs/EANs 2 PLU/EAN... -
Page 124: Department
■ Department The register ER-A411 is equipped with 20 standard departments and the register ER-A421 is equipped with 6 standard departments. They can be equipped with a maximum of 99 departments. Use the following procedure to program for departments. To delete a department item in the “DEPARTMENT” window, select the item and press the NOTE key. - Page 125 1 - 6, manual VAT1 - 6, manual VAT1, manual tax 1 - 6, and the combination of the automatic VAT 1 - 3 and the automatic tax 4 - 6, contact your authorized SHARP dealer. • When the combination of the automatic VAT1 - 3 and automatic tax 4 - 6 system is selected, one of the taxable 1 - 3 can be selected in combination with taxable 4 - 6.
-
Page 126: Plu/Ean
■ PLU/EAN • In this manual, the word “EAN” represents EAN (European Article Number) and UPC (Universal NOTE Product Code). • With regard to the EAN codes applicable to this register, please refer to the chapter 13. • To delete a PLU/EAN item in the “ PLU/EAN ” window, select the item and press the key. - Page 127 ■ PLU/EAN (continued) • SET#/LINK# (Use the numeric entry) Table number for set PLU/EANs/ link PLUs (1 through 99) If the number “00” is entered, no table number for set PLU/EANs/link PLUs will be assigned to a PLU. • COND. TBL# (Use the numeric entry) You can assign a PLU to a condiment table (01 through 99).
-
Page 128: Plu Range
1 - 6, manual VAT1 - 6, manual VAT1, manual tax 1 - 6, and the combination of the automatic VAT1 - 3 and the automatic tax 4 - 6, contact your authorized SHARP dealer. • When the combination of the automatic VAT1 - 3 and automatic tax 4 - 6 system is selected, one of the taxable 1 - 3 can be selected in combination with taxable 4 - 6. -
Page 129: Set Plu Table
■ Set PLU table When you want to make some deduction for set sellings, set PLU should be specifi ed, a PLU (set PLU) can have a maximum of 5 tied PLUs. Procedure Program each item as follows: Select a pertinent set PLU table. •... -
Page 130: Plu Condiment Table
■ PLU condiment table The “condiment entry” is intended to guide the operator in making menu entries which require special cooking instructions. For example, a clerk can make such entries as “garnishing potato”, “with salad”, and “grilling steak rare”. When a clerk enters a menu-item PLU to which PLUs for the condiment entry have been assigned, these orders (such as “garnishing potato”) will be printed on the receipt. - Page 131 ■ PLU condiment table (continued) The condiment PLU programmed in a condiment table can be linked with condiment table (Item NOTE link method). For example, if PLU 44 (SALAD) in a table of the above is linked with condiment table 10 (SAUCE), when the condiment PLU 44 (SALAD) is registered, items of the condiment table 10 (SAUCE) will appear.
-
Page 132: Promotion Table
■ Promotion table There are two types of promotion tables: a global type and a individual type. If you want to change the type, select the type in the “BASIC PRESET” window. < Global type/Individual type selection > Procedure Program each item as follows: Select a pertinent promotion table. - Page 133 ■ Promotion table (continued) < Detail data programming > Procedure Select “PROMOTION WAY” in the job selection window, and press the key. < GLOBAL type > • WAY (Use the selective entry) Select the promotion way. AMOUNT DISC.: Amount discount % DISCOUNT: % discount FREE ITEM:...
-
Page 134: Ean Non-Plu Code Format
■ EAN Non-PLU code format EAN-13 type EAN-8 type Flag Free format Free format (02 or 20-29) Flag Price check digit Field 1 Field 2 Free format area Procedure Program each item as follows: Select a arbitrary number, or a To delete a code format in the “EAN NON-PLU”... -
Page 135: Press Code (For Ean)
■ Press code (for EAN) Your register allows to program the press code format. Procedure Program each item as follows: • TABLE NUMBER (1 to 5) (Use the selective entry) 1: GERMAN TYPE1 (prefi x code: 434/439) 2: U.K. (prefi x code: 988/989) 3: FRENCH (prefi... -
Page 136: Plu/Ean Stock
■ PLU/EAN stock You can assign a stock quantity to each PLU/EAN code. Shown below is an example of selecting “1 OVERWRITE”. Procedure • After selecting “1 OVERWRITE,” select a pertinent PLU/EAN code. Then the next screen will appear to show the following items: •... -
Page 137: Direct Key Programming
Direct Key Programming Use the following procedure to select direct-key programming. ■ Direct key You can assign departments and PLUs directly to the keyboard. In the case of PLUs, you may assign up to 3 levels to be accessed directly on the keyboard. For key no. positions, refer to the illustration shown on the next page. - Page 138 • You cannot assign a department or a PLU to the position to which a function key has been assigned. • For a double size key, the key number on the right will be assigned. • To change the key size between single size and double size, consult your authorized SHARP dealer.
-
Page 139: Functional Programming
Functional Programming Use the following procedure to select any option included in the functional programming group: Procedure In the SETTING window, select “3 FUNCTIONS”. • The FUNCTIONS window will appear. ▼ Select any option from the following options list. Discount key 1 (-) Percent key Commission... -
Page 140: Discount Key ( And Through )
■ Discount key ( through Procedure Program each item as follows: Select a pertinent discount key • AMOUNT (Use the numeric entry) from the list. Discount amount (max. 8 digits) ▼ • TEXT (Use the character entry) Description for the discount key. Up to 12 characters can be entered. -
Page 141: Commission
■ Commission Program each item as follows: Procedure Select a pertinent commission no. • RATE (Use the numeric entry) from the list. Percent rate (0.000 to 99.999) ▼ • TEXT (Use the character entry) Description for the commission. Up to 12 characters can be entered. -
Page 142: Ra/Ra2
■ RA/RA2 You can program an upper limit amount and description for each received-on-account key. Procedure Program each item as follows: • HALO (High Amount Lockout) (Use the numeric entry) This function is intended for prevention of accidentally entered unreasonably amounts. Limit amount: 0.00 to 999999.99 •... -
Page 143: Cash In Drawer
■ Cash in drawer You can program the description and the upper limit amounts for cash in drawer (sentinel). Procedure Program each item as follows: • TEXT (Use the character entry) Description for the cash in drawer. Up to 12 characters can be entered. -
Page 144: Media Key Programming
Media Key Programming Use the following procedure to select any option included in the media group: Procedure In the SETTING window, select “4 MEDIA”. • The MEDIA window will appear. ▼ Select any option from the following options list. Cash key 1 CASH Check key 2 CHECK... -
Page 145: Cash Key (Cash And Cash2 Through 5)
■ Cash key (Cash and Cash2 through 5) Procedure Program each item as follows: Select a pertinent cash key from the • TEXT (Use the character entry) cash keys list. Description for the cash key. Up to 12 characters can be entered. -
Page 146: Check Key (Check And Check2 Through Check5)
• CHANGE DUE (Use the selective entry) Either change enable or disable can be selected for each check key. DISABLE: Disables change calculation. ENABLE: Enables change calculation. * For details on the use of this device, consult your authorized SHARP dealer. -
Page 147: Credit Key (Credit1 Through Credit9)
• DRAWER OPEN (Use the selective entry) YES: Opens the drawer. Disables the drawer opening. • CHANGE DUE (Use the selective entry) DISABLE: Disables change calculation. ENABLE: Enables change calculation. * For details on the use of this device, consult your authorized SHARP dealer. -
Page 148: Check Cashing (Check1 Through Check5)
■ Check cashing (Check1 through Check5) You can program the description and the upper limit amounts for check cashing. Procedure Program each item as follows: Select a pertinent check cashing • TEXT (Use the character entry) no. from the check cashing Description for check cashing. -
Page 149: Training Clerk/Cashier Programming
Training Clerk/Cashier Programming Select “TRAINING CLK/CSR” in the SETTING window. You can set the text for the training mode title and clerks/cashiers in training. Procedure In the SETTING window, select “5 TRAINING CLK/CSR”. • The TRAINING CLK/CSR window will appear. ▼... -
Page 150: Function Text Programming
Function Text Programming You can program a maximum of 12 characters for each function by using the following table: Procedure In the SETTING window, select “6 FUNCTION TEXT”. • The FUNCTION TEXT window will appear. ▼ Program the item as follows: •... - Page 151 Function Default text Function Default text Credit payment for exchange EX1 CR CCD difference CCD DIF. Domestic currency 1 DOM.CUR1 CCD difference total DIF. TL Domestic currency 2 DOM.CUR2 Total ***TOTAL Domestic currency 3 DOM.CUR3 Subtotal SUBTOTAL Domestic currency 4 DOM.CUR4 Old balance OLD BAL.
-
Page 152: Personnel Programming
Function Default text Function Default text Overlapped clerk remain OVCS VAT ID prefi x text VAT ID PRE REMAIN Partial payment PARTIAL VAT ID postfi x text VAT ID POST Personnel Programming Use the following procedure to select any option included in the personnel group: Procedure In the SETTING window, select “7 PERSONNEL”. -
Page 153: Clerk
■ Clerk Procedure Program each item as follows: Select a pertinent clerk from the • SECRET CODE (Use the numeric entry) clerks list. Secret code (max. 4 digits: 0001 to 9999/0000) ▼ • NAME (Use the character entry) Description for the clerk name. Up to 16 characters can be entered. - Page 154 ■ Clerk (continued) • X2Z2 (Use the selective entry) DISABLE: Disables operation in the X2/Z2 mode. ENABLE: Enables operation in the X2/Z2 mode. • FLASH (Use the selective entry) DISABLE: Disables operation in the FLASH mode. ENABLE: Enables operation in the FLASH mode. •...
-
Page 155: Cashier
■ Cashier In case that “cashier only system” is applied to your register, use Clerk programming settings NOTE instead of this Cashier programming setting. Procedure Program each item as follows: Select a pertinent cashier from the • SECRET CODE (Use the numeric entry) cashiers list. -
Page 156: Manager
■ Cashier (continued) • Z1 IN OPX/Z (Use the selective entry) DISABLE: Disables resetting operation in OPX/Z mode. ENABLE: Enables resetting operation in OPX/Z mode. • iSDC (Use the selective entry) DISABLE: Disables operation in the iSDC mode. ENABLE: Enables operation in the iSDC mode. •... -
Page 157: Contactless Key
■ Contactless key You can program a clerk code for each contactless clerk key, and confi rm the clerk name. When you confi rm this programming, the corresponding contactless key must be set to the clerk switch. Procedure Set a contactless clerk key. ▼... -
Page 158: Prohibition Of The Contactless Key
■ Prohibition of the contactless key You can prohibit a disused contactless key, entering the clerk code for the contactless key. You can perform this programming without the corresponding contactless key. Program the item as follows: Procedure • CLERK CODE (Use the numeric entry) Clerk code (max. -
Page 159: Terminal Programming
Terminal Programming Use the following procedure to select any option included in the terminal group: Procedure In the SETTING window, select “8 TERMINAL”. • The TERMINAL window will appear. ▼ Select any option from the following options list: • MACHINE# (Use the numeric entry) Machine number (max. -
Page 160: Date/Time Setting
Date/Time Setting You can set the date and time for the register. Procedure In the SETTING window, select “9 DATE/TIME”. • The DATE/TIME window will appear. ▼ Set each item as follows: • DATE (Use the numeric entry) Enter the day (2 digits), month (2 digits), and year (2 digits) in this sequence. -
Page 161: Optional Feature Selection
Optional Feature Selection Use the following procedure to select any option included in the optional group: Procedure In the SETTING window, select “10 OPTIONAL”. • The OPTIONAL window will appear. ▼ Select any option from the following options list. Function prohibition 1 FUNC.PROHIBIT Function selection 2 FUNCTION SELECT... -
Page 162: Function Prohibition
■ Function prohibition Your register allows you to select whether to enable or disable various functions. Procedure Program each item as follows: • OPX/Z REPORT (Use the selective entry) DISABLE: Disables clerk report printing in the OP X/Z mode. ENABLE: Enables clerk report printing in the OP X/Z mode. •... - Page 163 ■ Function prohibition (continued) • PRT/DSP EDIT (Use the selective entry) All of display and print data is not edited. YES: Display and print data is edited. • DRAWER X1Z1 (Use the selective entry) NOT OPEN: Disables drawer opening in the X1/X2 mode. OPEN: Enables drawer opening in the X1/X2 mode.
-
Page 164: Function Selection
■ Function selection Your register enables you to select various functional selections. Procedure Program each item as follows: • VAT SHIFT (Use the selective entry) BY SHIFT: Allows VAT shift to be accomplished by the shift key. BY CLERK: Allows VAT shift to be accomplished by a clerk. •... - Page 165 ■ Function selection (continued) • CR IN RA/PO (Use the selective entry) UPDATE: Updates a credit totalizer when fi nalizing a received-on-account or a paid-out entry by a credit key. NON: Does not update a credit totalizer when fi nalizing a received-on-account or a paid-out entry by a credit key.
-
Page 166: Print Selection
■ Print selection You can program various printing functions. Procedure Program each item as follows: • PURCHASE NO. (Use the selective entry) Does not print the number of purchases. YES: Prints the number of purchases. • TIME PRINT (Use the selective entry) Does not print the time on the receipt and journal. - Page 167 ■ Print selection (continued) • LINK PLU (Use the selective entry) PARENT+TTL: Prints parent PLU text of linked PLUs with totalizer. EACH PLU: Prints each PLU text of linked PLUs. • TOTAL&CHANGE (Use the selective entry) Exchange1 amount print for total and change DOMESTIC: Displays in domestic currency only.
-
Page 168: Euro Change
■ EURO change You can program optional functions for EURO change. For the details, refer to EURO Migration Function section. Procedure Program each item as follows: • DATE (Use the numeric entry) Preset the date to execute the automatic EURO modifi cation operation. -
Page 169: Report Programming
Report Programming Use the following procedure to select any option included in the report group: Procedure In the SETTING window, select “11 REPORT”. • The REPORT window will appear. ▼ Select any option from the following options list: Zero skip 1 0 SKIP Hourly report 2 HOURLY REPORT... -
Page 170: Zero Skip
■ Zero skip You can program whether or not to skip “0” in each report. Procedure Program each item as follows: • CLERK (Use the selective entry) SKIP: Skips those data that are “0” in the clerk report. NOT SKIP: Does not skip those data that are “0”... -
Page 171: Z1 General Report
■ Z1 General report Procedure • SAVE ALL RAM (Use the selective entry) YES: Saves the all RAM data in the SD card. Does not save the all RAM data in the SD card. • 0 SKIP SALE DATA (Use the selective entry) YES: Skip those data that are “0”... - Page 172 ■ Z1 General report (continued) • SAVE DAILY NET (Use the selective entry) YES: Saves the daily net report in the SD card. Does not save the daily net report in the SD card. • SAVE & CLEAR EJ (Use the selective entry) YES: Saves the EJ data in the SD card and clears the data from the register.
-
Page 173: Stacked Report
■ Stacked report Your register is equipped with the stacked report printing function that enables multiple X/Z reports to be printed in sequence with a single request. Procedure Select a stacked report no. from You can select a maximum of twenty reports from the stacked the list. - Page 174 ■ Stacked report (continued) • 15 DAILY NET Daily net report • 16 GLU (Use the numeric entry) GLU report Parameter: Starting GLU code/ending GLU code (1 through 9999) • 17 BALANCE Balance report • 18 EAN DELETE EAN delete report (reading)
-
Page 175: Message Programming
Pattern 5: Image logo header + 3 line text header Pattern 6: 3 line text header + 3 line text footer To change the receipt logo pattern, consult your authorized SHARP dealer. Some programmed text may not be printed depending on the pattern. -
Page 176: Entertainment Bill Message
■ Entertainment bill message Your register can print programmed entertainment bill messages on the receipt. Procedure Program each item as follows: • E.BILL MESSAGE (Use the character entry) Text for the message (max. 30 characters) ■ Scrolling message for customer display Your register can display programmed scrolling messages on the customer display. -
Page 177: Device Confi Guration Programming
5 ONLINE See “Online” on page 180. 6 CONTROL UNIT* 7 CLERK KEY See “Clerk key” on page 180. 8 EFT* See “EFT” on page 180. * For details on the use of these devices, consult your authorized SHARP dealer. -
Page 178: Built-In Printer
■ Built-in printer Procedure Program each item as follows: • AUTO CUTTER (Use the selective entry) YES: Enables the auto cutter function. Disables the auto cutter function. • LIGHT&SHADE (Use the numeric entry) Select a light and shade level. (00 to 99) 00: 75% for standard 50: 100% <standard>... -
Page 179: Remote Printer (Kp#1 And Kp#2)
■ Remote printer (KP#1 and KP#2) Procedure Program each item as follows: • CHANNEL# (Use the numeric entry) Channel number (0 through 4) When you program as “0”, no RS-232 channel is assigned. • PRINTER (Use the selective entry) Select the printer to be used from the following: TM-T90 The screen continues. -
Page 180: Scanner
■ Scanner Procedure Program each item as follows: • CHANNEL# (Use the numeric entry) Channel number (0 through 4) When you program as “0”, no RS-232 channel is assigned. • BAUD RATE (Use the selective entry) Transmission speed (baud rate) 19200 bps/9600 bps/4800 bps •... -
Page 181: Glu Code Programming
GLU Code Programming You can program the range of GLU code: Procedure In the SETTING window, select “14 AUTO GENE. GLU”. • The AUTO GENE. GLU window will appear. ▼ Program each item as follows: • START CODE (Use the numeric entry) Start GLU code (1 through 9999) •... -
Page 182: Tax Programming
Tax Programming Use the following procedure to select any option included in the tax group: Procedure In the SETTING window, select “15 TAX”. • The TAX window will appear. ▼ Select any option from the following options list: Tax1 1 TAX1 Tax2 2 TAX2 Tax3... -
Page 183: On-Line Confi Guration Programming
On-line Confi guration Programming Use the following procedure to select the on-line confi guration programming. Please consult your dealer for more details. Procedure In the SETTING window, select “16 ONLINE CONFIG”. • The ONLINE CONFIG window will appear. ▼ Program each item as follows: •... -
Page 184: Vmp Confi Guration Programming
VMP Confi guration Programming Procedure In the SETTING window, select “17 VMP CONFIG”. • The VMP CONFIG window will appear. ▼ Program each item as follows: • PASSWORD (Use the numeric entry) Normal password (0 through 9999)/“0”: No password • VMP1 PASSWORD (Use the numeric entry) VMP1 password (0 through 9999)/“0”: No password •... -
Page 185: Automatic Sequencing Key Programming
Automatic Sequencing Key Programming If you program frequently performed key operations for the AUTO keys, you can enter those key operations simply by pressing the corresponding AUTO keys in key operations. ■ Basic Preset Procedure Select “7 AUTO KEY MODE” from In the mode selection window, select “7 AUTO KEY MODE”. -
Page 186: Key Sequence
■ Key Sequence Procedure Select “7 AUTO KEY MODE” from In the mode selection window, select “7 AUTO KEY MODE”. the mode selection window. • The AUTO KEY window will appear. ▼ Select the pertinent AUTO key from the key list. ▼... -
Page 187: Function Key List
■ Function key list Key code Function key Key code Function key PRICE CHANGE AMOUNT CONDIMENT NEXT REPEAT [ + ] VOID [ - ] REFUND (-)1 (-)2 . (decimal point) (-)3 (-)4 CANCEL RA 2 MODE ↑ PO 2 ↓... - Page 188 Key code Function key Key code Function key EXCHANGE 3 FINAL EXCHANGE 4 GUEST# VAT SHIFT ITEM DEPO (+) VAT SHIFT TRANS. DEPO (-) DIFFER ST B.T. CSR# B.S. ITEM CLK# B.S. AMOUNT CLERK 1 B.S. PERSON CLERK 2 TRANS OUT CLERK 3 TRANS IN CLERK 4...
-
Page 189: Reading Of Stored Programs
Reading of Stored Programs You can read programs stored in the PGM1 or PGM2 mode. ■ Program reading sequence To read those programs stored in the PGM1 or PGM2 mode, use the following procedure: 1. Select “5 PGM1 MODE” or “6 PGM2 MODE” from the mode selection window. 2. -
Page 190: Sample Printouts
■ Sample printouts • Departments (PGM1 or PGM2 mode) Operating mode * Report title Tax status Dept. code Unit price Description Group no. Print on the kitchen printers (1: Yes, 0: No) K P10 Print on the second kitchen printer Print on the fi... - Page 191 • PLU/EAN (PGM1 or PGM2 mode) Associated dept. code Report title Commission group Base q’ty PLU code PLU group no. Print on the first/second kitchen printer (0: No, 1: Yes) Sign and price 1 through 3 Tax status Stock Menu type (blank: normal PLU, Description L: link PLU and link PLU table no., S: set PLU and set PLU table no.)
- Page 192 • Set PLU table (PGM2 mode) • Condiment table (PGM2 mode) Report title Report title Condiment Set PLU table table no. Assigned PLU codes Assigned PLU codes Next condiment table no. Description • Link PLU/EAN table (PGM2 mode) • Promotion table (PGM2 mode) Report title Report title Promotion table...
- Page 193 • EAN functions (PGM2 mode) • PLU group text (PGM2 mode) Report title Report title Default text Preset text Delete period • Functions (PGM1 or PGM2 mode) Report title System code 1 digit: EAN-8 Function text 2 digits: EAN-13 Sign and Non-PLU format setting amount 5 4 0 0 1 2...
- Page 194 • Media (PGM2 mode) • Training clerk/cashier (PGM2 mode) Report title Function text HALO limit Function programming for cash 0 0 0 0 0 Entry of amount tendered (0: Non-compulsory, 1: Compulsory) Drawer opening (0: Yes, 1: No) Non-add code entry (0: Non-compulsory, 1: Compulsory) Footer print on receipt (0: No, 1: Yes) Bill print (0: Non-compulsory, 1: Compulsory)
- Page 195 • Clerk (PGM1 or PGM2 mode) Report title Clerk name Clerk code GLU start code - end code Operation mode (0: Enable, 1: Disable) 1 0 0 0 1 0 0 1 SD CARD mode AUTO KEY mode FLASH mode (Flash report) X2/Z2 mode Z1 mode AUTO menu key...
- Page 196 • Cashier (PGM1 or PGM2 mode) Report title Cashier name Cashier code Secret code Operation mode (0: Enable, 1: Disable) 0 0 0 0 0 0 0 0 SD CARD mode AUTO KEY mode FLASH mode (Flash report) X2/Z2 mode AUTO menu key Z1 mode operation 1 through 10...
- Page 197 • Optional features (PGM2 mode) Report title Item Setting...
- Page 198 • Report (PGM2 mode) Report title Item Setting...
- Page 199 • Function text (PGM2 mode) Report title Function text (default) Text...
- Page 200 • Message (PGM2 mode) • AUTO key (PGM2 mode) Report title AUTO key no. Report title Secret code Description Key operation Receipt logo text Entertainment bill message Customer display scrolling message • Tax rate (PGM2 mode) • GLU code (PGM2 mode) Report title Report title Tax no.
- Page 201 • Device confi guration (PGM2 mode) • Direct key (PGM2 mode) Report title Report title Item Setting Channel no. Key no. Dept. code PLU code (Level 1 through 3)
- Page 202 • On-line confi guration (PGM2 mode) • VMP confi guration (PGM2 mode) Report title Report title • ROM version (PGM2 mode) Report title...
-
Page 203: Sd Card Mode
To cancel the operation, select CANCEL and press the key. ■ Folder creating The master folder can be created for the data fi le. (/SHARP/ECRXXX16/nnnnnnnn/:nnnnnnnn /folder name) Procedure (1) Select “3 FOLDER CONTROL” in the SD CARD mode and press the key. -
Page 204: Folder Name Selecting
■ Folder name selecting Procedure (1) Select “3 FOLDER CONTROL” in the SD CARD mode and press the key, the FOLDER CONTROL window is displayed. (2) Select “2 SELECT FOLDER”, the folder name list window is displayed. (3) Select the required folder name from the list, and press the key. -
Page 205: Data Loading
■ Data loading The programming data can be loaded from the SD card. Procedure (1) Select “2 LOADING” in the SD CARD mode and press the key. The following selection window is displayed. Text Data list Select the individual programming data: DEPARTMENT, PLU/EAN IND. -
Page 206: Isdc Mode
This section describes the items that can be programmed for the iSDC mode, and how to terminate the communication in the iSDC mode. For details on the specifi cation of WiFi SD card and the use of iSDC mode, consult your authorized SHARP dealer. ■ Host preset Procedure In the mode selection window, select “9 iSDC MODE”. -
Page 207: Send Item
■ Host preset (continued) • AUTH (Use the character entry) Resource path for authentication. Up to 30 characters can be entered. • UPLOAD (Use the character entry) Resource path for uploading sales data. Up to 30 characters can be entered. •... -
Page 208: Report
■ Send item (continued) • STOCK (Use the selective entry) YES: Sends the PLU/EAN stock report. NO: Does not send the PLU/EAN stock report. • CLERK Z1 (Use the selective entry) YES: Sends the clerk Z1 report. NO: Does not send the clerk Z1 report. •... -
Page 209: Terminating The Communication
■ Terminating the communication When the communication in the iSDC mode is completed, be sure to terminate the communication in the following procedure before removing the SD card or turning off the register. Procedure In the mode selection window, select “9 iSDC MODE”. Select “4 DISCONNECT”. -
Page 210: Electronic Journal
Electronic Journal ■ Electronic journal This function is intended to record the journal data in the electronic journal fi le (memory) instead of journal paper. • Recording data The register records the printing output to the journal printer in all modes into the electronic journal fi le. •... -
Page 211: European Article Number (Ean) Or Universal Product Code (Upc)
European Article Number (EAN) or Universal Product Code (UPC) ■ EAN or UPC code Your machine can transact the following codes: • UPC-A (Number system character: 0, 2, 3, 4) • UPC-E • EAN-8 • EAN-13 • Internal code EAN-8/EAN-13 •... -
Page 212: Add-On Code
EAN-8 • Ordinary EAN-8 code (fl ag: neither 0 nor 2) <used in the source marking> Maker code Nation code Item code For entry, a full 8 digits number must be entered. • Internal code (fl ag 2) <in-store marking non-PLU short type> Program the format in “EAN NON-PLU”... -
Page 213: Euro Migration Function
EURO Migration Function Basically your register can be automatically modifi ed to correspond to the introduction of EURO by executing the operation “EURO STATUS” in X2/Z2 mode. However, there are several options you must set depending on your need. Carefully conduct necessary settings. EURO status: You can select status from following 4 types ((A), (B), (C), or (D)). - Page 214 Setting the date and time when the automatic EURO modifi cation operation should be executed To certainly execute the automatic modifi cation operation, you can program the scheduled date and time to execute the automatic EURO modifi cation operation. From two days before the preset date, the remaining days are printed at the bottom of the daily full resetting report.
-
Page 215: Operator Maintenance
• Never touch the surface of the print head and print roller. ■ Cautions in handling the recording paper (thermal paper) • Use only the paper specifi ed by SHARP. • Do not unpack the thermal paper until you are ready to use it. -
Page 216: Replacing The Paper Rolls
Replacing the Paper Rolls ■ Recording paper specifi cations Be sure to use paper rolls specifi ed by SHARP. The use of any other paper rolls than specifi ed could cause paper jamming, resulting in register malfunction. Paper specifi cation Paper width: 57.5 ±... -
Page 217: Installing The Paper Rolls
■ Installing the paper rolls <Receipt side> Remove the printer cover and open the print roller arm of the receipt side by following the steps in “Removing the paper rolls”. Set a paper roll in the paper roll cradle of the receipt side as per the diagram. -
Page 218: Removing A Paper Jam
Mount the paper holding plate onto the take-up spool. Set the spool on the bearing, and press the journal paper feed key to take up excess slack in the paper. Replace the printer cover. Press the key to make sure the paper end comes out of the printer cover and clean paper appears.0 If the paper end does not come out, open the printer NOTE... -
Page 219: Cleaning The Printer (Printer Head/Sensor/Roller)
Cleaning the Printer (Printer Head/Sensor/Roller) When the printed text is getting dark or faint, paper dust may be stuck to the printer head, sensor and/or roller. Clean them as follows: CAUTION: Never touch the printer head with a tool or anything hard as it may damage the head. The paper cutter is mounted on the printer cover. -
Page 220: Removing The Till And The Drawer
Removing the Till and the Drawer The till in the register is detachable. After closing your business for the day, remove the till from the drawer and keep the drawer open. The coin case is also detachable from the till. To detach the drawer, pull it forward fully with the till removed, and remove it by lifting it up. -
Page 221: Installing The Fixing Angle Bracket
Installing the Fixing Angle Bracket To prevent the register from moving when the drawer opens, the fi xing angle bracket is supplied with the register. By attaching the bracket to the table where the register is installed, you can hock the register on this bracket and secure the register to its position. -
Page 222: Before Calling For Service
Before Calling for Service If you encounter any of the following problems, please read below before calling for service. Fault Checking • The display does not illuminate. • Is power supplied to the electric outlet? • Is the power cord plug out or loosely connected to the electric outlet? •... -
Page 223: Specifi Cations
Specifi cations Model: ER-A411/ER-A421 Dimensions: 360(W) × 425(D) × 365(H)* mm * With the customer display popped up. When it is completely lowered, the height is 330 mm. Weight: Approx. 12.0 kg Power Source: Offi cial (nominal) voltage and frequency... - Page 225 FOR CUSTOMERS IN U.K. IMPORTANT The wires in this mains lead are coloured in accordance with the following code: BLUE: Neutral BROWN: Live As the colours of the wires in the mains lead of this apparatus may not correspond with the coloured markings identifying the terminals in your plug proceed as follows.
- Page 226 14G A411A421VIME1...