
Related Manuals for Janome S-3023


Summary of Contents for Janome S-3023
-
Page 1: Instruction Manual
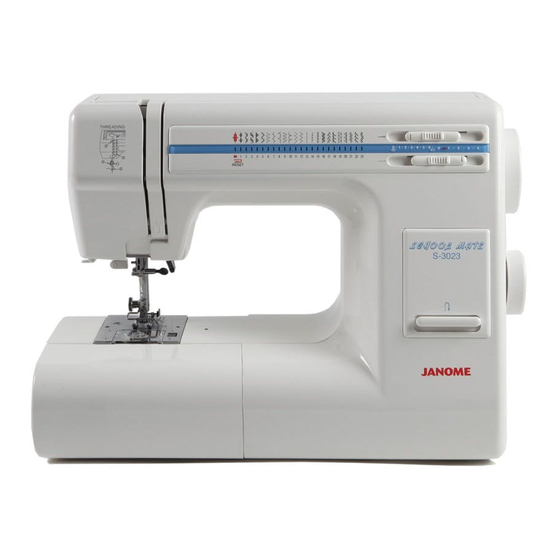
Janome S-3023 Instruction Manual Janome sewing machine Janome S-3023 Instruction Manual www.aaasewing.com S-3023 Owners Manual/ User Guide... - Page 2 Janome S-3023 Instruction Manual Janome sewing machine www.aaasewing.com S-3023 Owners Manual/ User Guide...
- Page 3 National legislation relating to electrical/electronic products. If in doubt please contact your The design and specifications are subject to change without a prior notice. retailer for guidance. (European Union only) www.aaasewing.com S-3023 Owners Manual/ User Guide...
- Page 4 6. When using your sewing machine for the first time, place a piece of waste fabric under the presser foot and run the machine without thread for a few minutes. Wipe away any oil which may have appeared. www.aaasewing.com S-3023 Owners Manual/ User Guide...
-
Page 5: Table Of Contents
Inserting the Bobbin Holde r ................4 8 Straight Stitching on Heavy Fabric s ............. . 2 4 Tr ouble S hoo t in g ..................49 ~ 50 Zigzag Stitc h ....................2 5 www.aaasewing.com S-3023 Owners Manual/ User Guide... -
Page 6: Section I Essential Parts
Spool holder (large) Spool pin Top cover Thread tension dial Pressure dial Face plate Buttonhole lever Thread cutter Needle plate Hook cover plate Hook cover plate release button Extension table (Accessory storage box) Reverse stitch button www.aaasewing.com S-3023 Owners Manual/ User Guide... - Page 7 @3 Clutch knob @4 Pattern selector dial @5 Feed balance dial @6 Power switch @7 Machine socket @8 Needle clamp screw @9 Drop feed lever #0 Free arm #1 Presser foot #2 Presser foot lifter www.aaasewing.com S-3023 Owners Manual/ User Guide...
- Page 8 G. Blind stitch hem foot D. Hemmer foot C. Overedge foot E. Zipper foot B. Transparent buttonhole foot A. Zigzag foot R. Automatic buttonhole foot * The automatic buttonhole foot can be stored in the extension table. www.aaasewing.com S-3023 Owners Manual/ User Guide...
-
Page 9: Extension Table(Accessory Storage Box )
For free arm sewing For attaching the table Lift out the extension table, as Position the two pins of the illustrated . storage box on the base slit and push down gently. www.aaasewing.com S-3023 Owners Manual/ User Guide... -
Page 10: Section Ii Getting Ready To Sew
If it does not fit fully in the outlet, reverse the plug. If it still does not fit, contact a qualified electrician to install the proper outlet. Do not modify the plug in any way. The foot controller Model YC-482J or TJC-150 is used with this sewing machine (USA market only). www.aaasewing.com S-3023 Owners Manual/ User Guide... -
Page 11: Foot Control
To remove..Turn to the left. • To replace..Turn to the right. • To remove..Push and twist to the left. • To replace..Push and twist to the right. NOTE: When replacing the bulb, unplug the machine. www.aaasewing.com S-3023 Owners Manual/ User Guide... -
Page 12: Pressure Dia
Velours and knits with a lot of stretch may also the lever to the require a “ ” setting. direction of arrow as illustrated. * Feed dogs must always be up for normal sewing. www.aaasewing.com S-3023 Owners Manual/ User Guide... -
Page 13: T O Snap O N And Snap Off T He P Re S Er F Oo
The presser foot will drop off. at position “ ”. Place the presser foot so the pin on the foot lies just under the groove of the foot holder. Lower the foot holder to lock the foot in place. www.aaasewing.com S-3023 Owners Manual/ User Guide... -
Page 14: To Detach And Attach The Foot Holde
Raise the foot. by turning it clockwise. the foot. Loosen the foot holder setscrew and remove the finger guard. Push the finger guard down to the Tighten the setscrew. needle plate and tighten the setscrew firmly. www.aaasewing.com S-3023 Owners Manual/ User Guide... -
Page 15: Reverse Stitch Button
The numbers in the front indicate in millimeters. The numbers in the back indicate in inches. www.aaasewing.com S-3023 Owners Manual/ User Guide... -
Page 16: Changing Needle
Snags and runs in knits, fine silks and silk-like fabrics are permanet and are almost always caused by a damaged needle. Raise the needle by turning the handwheel toward you and lower the presser foot. Turn off the power switch. www.aaasewing.com S-3023 Owners Manual/ User Guide... -
Page 17: Thread And Needle Chart
When sewing stretch, very fine fabrics and synthetics, use a BLUE TIPPED needle. The blue tipped needle effectively prevents skipped stitches. • When sewing very fine fabrics, sew over a piece of paper to prevent yarn distortion. www.aaasewing.com S-3023 Owners Manual/ User Guide... -
Page 18: Winding The Bobbin
To use, insert the additional Lift out the bobbin. * The small spool holder is used with narrow or small thread spools. spool pin in the hole. Place the felt and the spool on the pin. www.aaasewing.com S-3023 Owners Manual/ User Guide... - Page 19 Guide the thread around the bobbin winder * The machine will not sew untill the clutch knob is pushed in. thread guide. Insert the thread through the hole the bobbin, threading from the inside to the outside. www.aaasewing.com S-3023 Owners Manual/ User Guide...
- Page 20 B. and attach the hook cover plate. counter-clockwise. holder. Draw the thread to the left sliding it between the tension spring blades. www.aaasewing.com S-3023 Owners Manual/ User Guide...
-
Page 21: Threading The Machine
Firmly draw the thread from right to left over the take-up lever and down into the take-up lever eye. Then guide it down along the left slot. Slide the thread from the left behind the needle bar therad guide. Thread the needle. www.aaasewing.com S-3023 Owners Manual/ User Guide... -
Page 22: Drawing Up Bobbin Thread
Lightly draw up the needle therad forming a loop of bobbin thread. www.aaasewing.com S-3023 Owners Manual/ User Guide... -
Page 23: B Alan C Ing Needle T H R Ead T En S Io
The straight seams. at setting mark. number. number. needle thread should appear slightly on the reverse side of the fabric. www.aaasewing.com S-3023 Owners Manual/ User Guide... -
Page 24: P A Tt E R N S Ele Ct O R Dia
Note: Stitch length is automatically you turn the pattern selector set for stretch stitch pattern * Raise the needle above the dial. on pattern number 14 to 18. fabrics when you set the stitch width. www.aaasewing.com S-3023 Owners Manual/ User Guide... -
Page 25: Straight Stitch Sewin
Lower the presser foot and the fabric, drawing the threads to smooth the threads toward the the back. back. Depress the foot control. Gently guide the fabric along the guide line letting the fabric feed naturally. www.aaasewing.com S-3023 Owners Manual/ User Guide... -
Page 26: Changing T He Sewing Direc T Ion
Lower the presser foot with your right hand, keeping pressure Pivot the fabric around the needle to on the black button with your left hand. change sewing direction as desired. Lower the presser foot. Release the black button and start sewing. www.aaasewing.com S-3023 Owners Manual/ User Guide... -
Page 27: Zigzag Stitc
It can be used to finish a hem edge. Place the edge of the fabric next to the black prong of foot C . www.aaasewing.com S-3023 Owners Manual/ User Guide... -
Page 28: Overedge Stitc
Guide the work so the right hand guides your sewing so the needle stitches fall at the edge of the falls off the fabric wrapping the fabric. threads around the edge to stop raveling. www.aaasewing.com S-3023 Owners Manual/ User Guide... -
Page 29: Tr Iple Str Eng T H St I T I C
Use it to reinforce areas such as Garments should be basted for set the pressure dial at “1” or “2”. crotch and armhole seams. fitting before seaming. Also use when constructing items such as backpacks for extra strength. www.aaasewing.com S-3023 Owners Manual/ User Guide... -
Page 30: Sewing Button
* When button sewing is finished, return the drop feed lever. from a shank. Before lowering the foot, test the needle swing making sure the needle drops in each hole. Adjust the stitch width if necessary. Lower the foot. www.aaasewing.com S-3023 Owners Manual/ User Guide... -
Page 31: Automatic Buttonhol
* Use the interfacing on the stretch Attach the automatic buttonhole foot (R). fabrics. NOTE: There should be no gap between the slider and spring holder of the foot as shown above. www.aaasewing.com S-3023 Owners Manual/ User Guide... - Page 32 Insert the garment under the foot, and lower the needle at the starting point. Then lower the automatic buttonhole foot. www.aaasewing.com S-3023 Owners Manual/ User Guide...
- Page 33 “BH” by turning the dial in the direction of arrow 2 to Then, knot the threads. reset for sewing the next buttonhole. Insert a pin inside the bartack. Then cut the opening with a seam ripper. Take care not to cut the stitches. www.aaasewing.com S-3023 Owners Manual/ User Guide...
-
Page 34: M Anual B U Tt Onhol
Set the pattern indicator at “BH” by the buttonhole is to start, and lower the more than 2.5 cm (1˝), a turning the pattern selector dial. foot. buttonhole must be made Attach the buttonhole foot (B). manually as follows: www.aaasewing.com S-3023 Owners Manual/ User Guide... - Page 35 * To cut the opening and to reset for desired total length of buttonhole. Pull the buttonhole lever toward you. sewing the next buttonhole, refer to the instructions on page 31. www.aaasewing.com S-3023 Owners Manual/ User Guide...
-
Page 36: Corded Buttonhol
Pull the left end of the filler cord to tighten it . for sewing the next buttonhole , refer to the instructions on pag e Thread the end through a darning needle, draw to the bottom side of the fabric and cut . www.aaasewing.com S-3023 Owners Manual/ User Guide... -
Page 37: Zipper Applicatio
To sew the right side of the zipper, attach the zipper foot opening. to the pin on the left hand side. Reverse stitch to knot the stitches. Sew the zipper opening with a basting stitch. www.aaasewing.com S-3023 Owners Manual/ User Guide... - Page 38 Raise the zipper foot and open the zipper. Lower the foot and Place the zipper teeth next to the fold and sitich the remainder of the seam. pin in place. www.aaasewing.com S-3023 Owners Manual/ User Guide...
- Page 39 Then lower the foot and stitch Stop about 5 cm (2˝) from the top of the the remainder of the seam making sure the zipper. fold is even. www.aaasewing.com S-3023 Owners Manual/ User Guide...
-
Page 40: Rolled He
Insert the begin, then lower the hemmer folded portion of the fabric into the foot. curl of the hemmer foot. Sew 3 or 4 stitches while pulling the needle and bobbin threads. www.aaasewing.com S-3023 Owners Manual/ User Guide... - Page 41 0.7 cm (1/4˝) Lower the hemmer foot, then sew Trim about 0.7 cm(1/4˝) from by lifting up the edge of the fabric corners as illustrated, to reduce to keep it feeding smoothly and bulk. evenly. www.aaasewing.com S-3023 Owners Manual/ User Guide...
-
Page 42: Blind Stitch Hemming
On lightweight fabrics the raw edge can be turned under and pressed. On heavy weight fabrics that ravel, the raw edge should be overcast first. Fold up the hem the desired amount and pin in place. Then fold the hem under the fabric as illustrated. www.aaasewing.com S-3023 Owners Manual/ User Guide... -
Page 43: De C O R A T I V E S A T In St I Tc H P A Tt E R N
Stitch length of the automatic patterns (No.14 to 23) are preset, so you do not should appear on the reverse side of the fabric. need to select the stitch length for these patterns. Test the stitch on the actual fabric for the best results. www.aaasewing.com S-3023 Owners Manual/ User Guide... -
Page 44: A Dju St Ing Str E Tc H St I T C H Ba Lan C
“ – ”. adjust them with the feed balance stitches between the straight seams. Pull out the gathering stitches. dial. * After sewing with an altered dial setting, you must reset the dial to “ ”. www.aaasewing.com S-3023 Owners Manual/ User Guide... -
Page 45: Q Uil T In
The quiliting guide will help to keep Sew guiding the quilter over the the stitchintg lines straight. previous row of stitching. Insert the quilter in the opening, and slide it at the desired width. www.aaasewing.com S-3023 Owners Manual/ User Guide... -
Page 46: Pin Tuckin
Press the pin tucks to one side. lower the presser foot. Turn the guide screw and move Fold the fabric with wrong sides the sliding guide next to the folded together on the foldline. edge. www.aaasewing.com S-3023 Owners Manual/ User Guide... -
Page 47: Shell Tuc
The needle should fall edge on each side. off the edge of the fabric on the Peel off the paper from the wrong right forming a tuck. side of the fabric. www.aaasewing.com S-3023 Owners Manual/ User Guide... -
Page 48: Appliqu
When sewing corners, lower the needle down into the fabric. Raise the presser foot and pivot the fabric to the right or left. * When applique sewing is finished, return the pressure dial to 3. www.aaasewing.com S-3023 Owners Manual/ User Guide... -
Page 49: Cleaning The Bobbin Holde
Brush out dust and lint or you may Attach the hook cover plate. use a vacuum cleaner. Remove the cover plate by sliding the hook cover plate release button to the right. www.aaasewing.com S-3023 Owners Manual/ User Guide... -
Page 50: Cleaning The Hook Rac
Remove the screw on the left brush and a soft dry cloth. notch fits next to the stopper in the hand side of the needle plate with hook race. the screwdriver. Remove the needle plate. www.aaasewing.com S-3023 Owners Manual/ User Guide... -
Page 51: Trouble Shootin G
4 . A B LU E TIPPE D needle i s no t being u s ed f o r s ewing str e tc h , v e ry f ine f ab r i cs and sy n t he t i cs . See Page 1 5 5. The needle thread is not threaded properly . See Page 1 9 6. The presser foot pressure is not strong enough . See Page 1 0 www.aaasewing.com S-3023 Owners Manual/ User Guide... - Page 52 2. The work is being pulled or held back . Do not force the fabri c balanced . for guiding . 3. Interfacing is not used with stretch fine fabrics . See Page 2 9 www.aaasewing.com S-3023 Owners Manual/ User Guide...
- Page 53 Janome S-3023 Instruction Manual Janome sewing machine www.aaasewing.com S-3023 Owners Manual/ User Guide...
- Page 54 Janome S-3023 Instruction Manual Janome sewing machine www.aaasewing.com S-3023 Owners Manual/ User Guide...
- Page 55 Janome S-3023 Instruction Manual Janome sewing machine www.aaasewing.com S-3023 Owners Manual/ User Guide...
- Page 56 Janome S-3023 Instruction Manual Janome sewing machine 753-800-173 (EN) www.aaasewing.com S-3023 Owners Manual/ User Guide...