Table of Contents
Advertisement
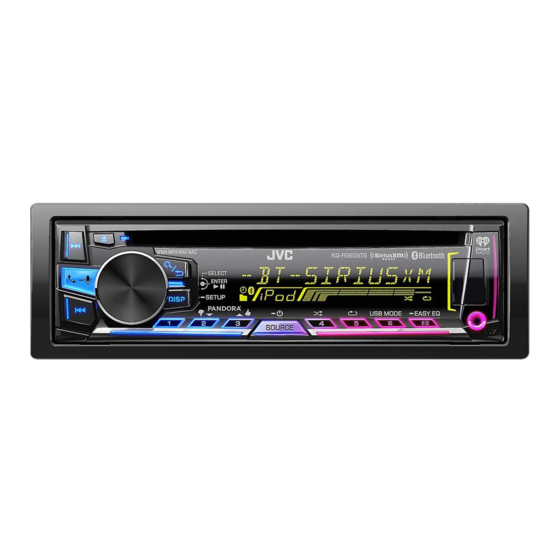
KD-R960BTS / KD-AR865BTS / KD-R860BT
CD RECEIVER
INSTRUCTION MANUAL
RÉCEPTEUR CD
MANUEL D'INSTRUCTIONS
RECEPTOR CON CD
MANUAL DE INSTRUCCIONES
JS_JVC_KD_R960BTS_J_C.indd 1
Please read all instructions carefully before
operation to obtain the best possible performance
from the unit.
Veuillez lires les instructions attentivement avant
d'utiliser l'appareil afin d'obtenir les meilleures
performances possibles de l'appareil.
Por favor lea detenidamente este manual para
comprender a fondo todas las instrucciones y
obtener un máximo disfrute de esta unidad.
For customer Use:
Enter below the Model No. and Serial No. which are
located on the top or bottom of the cabinet. Retain this
information for future reference.
Model No.
Serial No.
ENGLISH
FRANÇAIS
ESPAÑOL
B5A-0110-00 [J]
7/7/2014 2:17:37 PM
Advertisement
Table of Contents

Related Manuals for JVC KD-R960BTS


Summary of Contents for JVC KD-R960BTS
-
Page 1: Manual De Instrucciones
ENGLISH FRANÇAIS ESPAÑOL KD-R960BTS / KD-AR865BTS / KD-R860BT CD RECEIVER Please read all instructions carefully before INSTRUCTION MANUAL operation to obtain the best possible performance from the unit. RÉCEPTEUR CD Veuillez lires les instructions attentivement avant MANUEL D’INSTRUCTIONS d’utiliser l’appareil afin d’obtenir les meilleures RECEPTOR CON CD performances possibles de l’appareil. - Page 2 FCC NOTE JVC KENWOOD Corporation This equipment has been tested and found to comply with the limits for a Class B digital 2967-3, ISHIKAWA-MACHI, device, pursuant to Part 15 of the FCC Rules.
- Page 3 Para cumplimiento de la COFETEL: CAUTION “La operación de este equipo está sujeta a las siguientes dos condiciones: This equipment complies with FCC/IC radiation exposure limits set forth for an uncontrolled (1) es posible que este equipo o dispositivo no cause interferencia perjudicial y environment and meets the FCC radio frequency (RF) Exposure Guidelines in Supplement C (2) este equipo o dispositivo debe aceptar cualquier interferencia, incluyendo la que pueda to OET65 and RSS-102 of the IC radio frequency (RF) Exposure rules.
-
Page 4: Table Of Contents
• Never put or leave any metallic objects (such as coins or metal tools) inside the unit, to prevent a short SiriusXM® Radio circuit. (for KD-R960BTS / KD-AR865BTS) • If a disc error occurs due to condensation on the laser lens, eject the disc and wait for the moisture to evaporate. -
Page 5: Basics
BASICS Faceplate Remote control (RM-RK52) Attach Remote sensor (Do not expose Display window to bright sunlight.) KD-R960BTS Detach Volume knob (turn/press) Loading slot Pull out the insulation sheet when using for the first time. How to reset How to replace the battery... -
Page 6: Getting Started
Press and hold For details on how to update the firmware, see: Turn the volume knob to select [CLOCK], then press the knob. <http://www.jvc.net/cs/car/>. Turn the volume knob to select [CLOCK SET], then press the knob. CLOCK Turn the volume knob to make the settings, then press the knob. -
Page 7: Cd / Usb / Ipod / Android
: iPod or ANDROID Do not leave the cable inside the car when not using. When connecting an Android device, “Press [VIEW] to install JVC MUSIC PLAY APP” is shown. Follow the instructions to install the ANDROID application. You can also install the latest version of JVC MUSIC PLAY application on your Android device before connecting. - Page 8 Quick Search repeatedly. If you have many files, you can search through them quickly. AUTO MODE: Control from the unit (using JVC MUSIC For MP3/WMA /AAC/WAV or JPC / JMC file: PLAY application). Turn the volume knob quickly. AUDIO MODE: Control other media player applications...
-
Page 9: Radio
• [OFF] is selected for [AM] in [SRC SELECT] after Radio Timer for AM is The preset number flashes and “MEMORY” appears. selected. ( 4) For KD-R960BTS / KD-AR865BTS: Selectable only when SiriusXM Vehicle Tuner is connected. ( 11) Selectable only when [ONCE] or [WEEKLY] is selected in step ENGLISH JS_JVC_KD_R960BTS_J_EN_2.indd 7... - Page 10 RADIO Default: XX Use a portable audio player SSM 01 – 06 / SSM 07 – 12 / SSM 13 – 18: Automatically presets up Connect a portable audio player (commercially available). to 18 stations for FM. “SSM” stops flashing when the first 6 stations are 3.5 mm (1/8") stereo mini plug with “L” shaped connector stored.
-
Page 11: Pandora
Pandora® Preparation: Create and save a new station Install the latest version of the Pandora application on your device Press (iPhone/ iPod touch), then create an account and log in to Pandora. Turn the volume knob to select [NEW STATION], then press the knob. •... -
Page 12: Iheartradio
Preparation: Search for a station Install the latest version of iHeart Link for JVC application on your device (iPhone/ iPod Press touch), then create an account and log in to iHeartRadio. Turn the volume knob to select a category, then •... -
Page 13: Siriusxm Radio
SiriusXM® Radio (for KD-R960BTS / KD-AR865BTS) Only SiriusXM® brings you more of what you love Start listening to listen to, all in one place. Get over 140 channels, Press repeatedly to select SIRIUS XM. including commercial-free music plus the best sports, Press news, talk, comedy and entertainment. - Page 14 SiriusXM® Radio When you select a SmartFavorites channel, you can rewind and replay up SiriusXM Replay™ to 30 minutes of any of the missed news, talk, sports or music content. Press the volume knob. • Playback starts from the beginning of the song if [TUNE START] is set to “...
- Page 15 SiriusXM® Radio SiriusXM settings TUNE START * ON: Selected SmartFavorite channel starts playback from the beginning of the song. ; OFF: Cancels. Press and hold Turn the volume knob to select [SIRIUS XM], then press the knob. SIGNAL LVL NO SIGNAL/ WEAK/ GOOD/ STRONG: Shows the strength Turn the volume knob to make a selection (see the following table), then of the current received signal.
-
Page 16: Connect The Microphone
– Bluetooth function of the connected devcie is turned on. microphone input terminal. ( 31) – [AUTO CNNT] is set to [ON]. ( 18) – JVC MUSIC PLAY application is installed on the Android device. JS_JVC_KD_R960BTS_J_EN_3.indd 14 7/8/2014 3:04:54 PM... -
Page 17: Bluetooth — Mobile Phone
Receive a call To return to the previous setting item, press When there is an incoming call: – For KD-R960BTS: All the buttons and display flash. Default: XX – For KD-AR865BTS / KD-R860BT: All the buttons flash. – The unit answers the call automatically if [AUTO ANSWER] is set to a selected time. ( 16) MIC LEVEL –10 — +10 (–4): The sensitivity of... -
Page 18: Make A Call
BLUETOOTH® Make the settings for receiving a call Press to enter Bluetooth mode. Turn the volume knob to make a selection (see the following table), then press the knob. Repeat step until the desired item is selected or activated. To return to the previous setting item, press Make a call You can make a call from the call history, phonebook, or dialing the number. -
Page 19: Delete A Contact
BLUETOOTH® Settings in memory DIAL NUMBER 1 Turn the volume knob to select a number (0 to 9) or character ( , #, Store a contact in memory 2 Press to move the entry position. You can store up to 6 contacts into the number buttons (1 to 6). Repeat steps until you finish entering the phone number. -
Page 20: Bluetooth Compatibility Check Mode
“ ” disappears when disconnected. been deleted, and the unit exits check mode. JVC Smart Music Control is designed to view JVC car receiver status and perform simple • To cancel, press and hold to turn off the power, then turn control operations on Android smart phones. - Page 21 BLUETOOTH® BLUETOOTH — Audio Internet radio via Bluetooth Listen to Pandora Preparation: Select [ON] for [PANDORA] in [SRC SELECT]. ( 4) You can listen to Pandora on your smart phone (Android OS) through Bluetooth on this unit. Open the Pandora application on your device. Audio player via Bluetooth Connect your Bluetooth audio player via Bluetooth connection.
-
Page 22: Audio Settings
On the faceplate EASY EQ 1 USER1/ USER2: Select a preset name. 2 Adjust your own sound settings. Press repeatedly. Select a preset (For KD-R960BTS / KD-R860BT) equalizer Press , then turn the volume knob within SUB.W SP * 00 to +06 (Default: 03 2 seconds. - Page 23 AUDIO SETTINGS SUB.W PHASE * PRO EQ (For KD-AR865BTS) REVERSE (180°)/ NORMAL (0°): Selects the phase of the subwoofer 1 USER1/ USER2: Select a preset name. output to be in line with the speaker output for optimum performance. 2 BASS / MID BASS / MID / MID HIGH / HIGH: Select a sound tone. (Selectable only if a setting other than [THROUGH] is selected for 3 Adjust the sound elements of the selected sound tone.
-
Page 24: Display Settings
AUTO: Changes between the day and night adjustments when you turn off or on the car headlights. * REAR/SUB.W Rear speakers output Rear speakers output For KD-R960BTS, the display and button colors change according to the SUB.W/SUB.W Subwoofer output (Mute) settings made on [COLOR]. - Page 25 ONCE: Scrolls the display information once. ; AUTO: Repeats scrolling at • If [00] is selected for all primary colors for [DISP ZONE], nothing 5-second intervals. ; OFF: Cancels. appears on the display. COLOR (for KD-R960BTS) COLOR GUIDE ON: Changes the button, display, USB input terminal and auxiliary input PRESET You can select a color for [ALL ZONE], [ZONE 1], [DISP ZONE], or [ZONE 2]...
-
Page 26: More Information
- Windows long file name: 32 characters • If the Android device supports both mass storage class device and AOA 2.0, this unit always playback via AOA 2.0 as priority. • For more information and the latest compatible list, see: <http://www.jvc.net/cs/car/>. JS_JVC_KD_R960BTS_J_EN_01.indd 24 7/7/2014 2:17:10 PM... - Page 27 Track title Playing time Day/ • When you play audio file with song data added using the JVC Playlist Creator or JVC Music Clock (back to the beginning) Control, you can search for audio file by Genres, Artists, Albums, Playlists, and Songs.
-
Page 28: Troubleshooting
( 24) listening to the radio. Cannot playback at [AUTO • Make sure JVC MUSIC PLAY APP is installed on the Disc cannot be ejected. Press and hold to forcibly eject the disc. Be careful not MODE]. - Page 29 Make sure you have installed the latest version of the detected. • Reset the unit. ( 3) iHeart Link for JVC application on your device. Pairing cannot be • Make sure you have entered the same PIN code to both the “PLS LOGIN”...
-
Page 30: Specifications
Compliant with MPEG-1/2 Audio Layer-3 1 Check TROUBLESHOOTING WMA Decode Compliant with Windows Media Audio 2 Reset the unit ( 3) AAC Decode AAC-LC “.m4a” files 3 Contact (USA only) Call: 1-800-252-5722 ( or ) visit: http://www.jvc.com JS_JVC_KD_R960BTS_J_EN_2.indd 28 23/7/2014 10:38:19 AM... - Page 31 (at less than 1 % THD) Maximum Supply Current DC 5 V 1 A Speaker Impedance 4 Ω — 8 Ω MP3 Decode Compliant with MPEG-1/2 Audio Layer-3 Preout Level/Load (CD/USB) KD-R960BTS / KD-R860BT: WMA Decode Compliant with Windows Media Audio 2 500 mV/10 kΩ KD-AR865BTS: AAC Decode AAC-LC “.m4a” files 4 800 mV/10 kΩ WAV Decode...
- Page 32 Warning Installing the unit (in-dash mounting) • The unit can only be used with a 12 V DC power supply, negative ground. • Disconnect the battery’s negative terminal before wiring and mounting. • Do not connect Battery wire (yellow) and Ignition wire (red) to the car chassis or Ground wire (black) to prevent a short circuit.
-
Page 33: Wiring Connection
Wiring connection Firmly connect the ground wire of the amplifier (for KD-R960BTS / KD-AR865BTS) to the car’s chassis to avoid damaging the unit. KD-R960BTS KD-AR865BTS Rear output JVC Amplifier * Front output Front output Signal cord (not supplied) Rear/subwoofer output Subwoofer output Fuse (10 A) - Page 34 Wiring connection (for KD-R860BT) Firmly connect the ground wire of the amplifier to the car’s chassis to avoid JVC Amplifier * Front output damaging the unit. Signal cord (not supplied) Rear/subwoofer output Part list for Fuse (10 A) Remote wire installation...
- Page 35 • Android is trademark of Google Inc. • The Bluetooth® word mark and logos are registered trademarks owned by Bluetooth SIG, Inc. and any use of such marks by JVC KENWOOD Corporation is under license. Other trademarks and trade names are those of their respective owners.